Decorating a Niche in a Storage Hallway
October 11, 2025 · 15 min read · by Walensky
Every morning, you walk through this utilitarian storage hallway without even noticing. This empty niche has been taunting you for months, turning a functional space into a decorative dead zone.
You feel that dull frustration: a space that could be beautiful but remains stubbornly functional. The unpleasant feeling of wasted potential in your own home.
You've probably already tried a few attempts: a plant that withered, a small object that seemed lost, or perhaps nothing at all for fear of doing it wrong. These timid attempts have only accentuated your sense of decorative helplessness.
It's perfectly normal! The problem isn’t your lack of taste, but the absence of an adapted method for transitional spaces. Storage hallways follow specific decorating rules, which are rarely explained.
In 8 minutes, you’ll know exactly how to transform this niche into an elegant focal point that structures your entire hallway and impresses your guests upon arrival.
Why this niche can revolutionize the atmosphere of your home?
A well-decorated niche in a storage hallway acts like a visual magnet that instantly transforms the perception of the entire space. Like an architectural beacon guiding the eye and structuring the passage, it creates a decorative experience where there was only utilitarianism. Neglecting this opportunity now means accepting that your home remains functional but soulless.
📖 Customer testimonial: Sophie confides in us: "I've had this niche in my hallway for 3 years. One day, I installed a gilded relief painting with subtle lighting. Now, my guests invariably stop to admire it and ask me who my decorator is!"
Conversation with a decorating expert
The golden rule of decorative niches: The more functional the space, the stronger and bolder a decorative element must be to create a striking contrast. Result: a storage hallway that becomes a private gallery in just a few hours.

What's really behind your hesitations
You probably feel this paralyzing indecision: fear of making too bold a choice, anxiety about a failed hanging, or concern that the artwork will seem out of place. These symptoms reveal a very common decorative syndrome: a lack of confidence in transitional spaces.
The real problem isn't your ability to decorate, but the absence of specific guidelines for hallway niches. These hybrid spaces - neither living rooms nor simple passageways - require a particular approach.
It’s like trying to cook a gourmet dish with a basic recipe: the ingredients are good, but the method is unsuitable.
The first hidden cause: the illusion of the "neutral" space
Contrary to what one might think, a storage hallway is never neutral - it's either energizing or depressing. The absence of decoration in a niche creates a visual void that sucks the positive energy from your home.
Imagine a restaurant with bare walls: even the best cuisine in the world would seem bland in that atmosphere. Your hallway works the same way - it unconsciously influences your daily mood.
This discovery will transform your relationship with decoration: you'll go from "I don’t want to disturb anything" to “I want to create emotion.”
🔍 Revealing test: Close your eyes for 30 seconds, then look at your niche. If your gaze glides without stopping, that's proof it’s sucking energy instead of creating it.
The second hidden cause: the myth of "discreet" decoration
You were probably told that a hallway required understated decor.
It's the most expensive mistake! In a transitional space, only an assertive decoration succeeds in capturing attention.
It’s like wearing a delicate piece of jewelry with a winter coat: no one sees it. In a hallway, you have to dare the decorative statement to create visual impact.
Result: your "discreet" attempts go unnoticed and reinforce the impression of emptiness. The solution? Embrace the bold contrast between functional and aesthetic.
The third hidden cause: the forgotten viewing angle
No one has explained to you that in a hallway, people see your decoration in motion.
This specificity changes everything: colors, shapes, and textures must be thought out for dynamic vision.
You can identify this error if your current decor seems perfect from the front but disappears when you walk. It's a sign of a choice adapted to static rooms, not circulation spaces.
This revelation explains why your decorative choices always seem to be “missing something” in your hallway.
3 signs that your niche is suffering from the "dead zone" syndrome:
- The ghost effect: Your decor seems present head-on but fades in peripheral vision (lack of relief or contrast)
- The feeling of incompleteness: You constantly feel the urge to add "something" without knowing what (faulty lighting)
- The gaze that wanders: Your guests pass by without noticing your decorative effort (problem with visual hierarchy)
The trigger element: the power of a "visual anchor point"
The secret to successful niches lies in creating a "visual anchor point" - an element that catches the eye even when moving. Like a magnet attracts iron, it must possess magnetic characteristics: chromatic contrast, tactile relief, or captivating brilliance. You will recognize it by this ability: even in a hurry, your eye stops automatically on it.
The rule of triple impact: A successful niche must work at 3 distances - seen from afar, appreciated as you pass by, and admired up close. Test by placing yourself 5 meters, 2 meters, then 50 centimeters away.
| ❌ Common mistake | ✅ Effective approach | 💡 Why it works | 🎯 Visible benefit |
|---|---|---|---|
| Discreet decorative object placed in the background | Artwork with relief and dedicated lighting | Creates shadows that bring life to the space | Niche that attracts the eye even from afar |
| Neutral colors to "not shock" | Bold contrast with the wall | The brain automatically notices contrasts | Focal point immediately identifiable |
| Decoration changed according to the seasons | Permanent and timeless centerpiece | Builds the decorative identity of the space | Lasting recognition and pride |
| Installation "by feel" without measurement | Calculated positioning according to eye level | Optimizes visual impact in motion | Visual comfort for all ages |

Our favourite
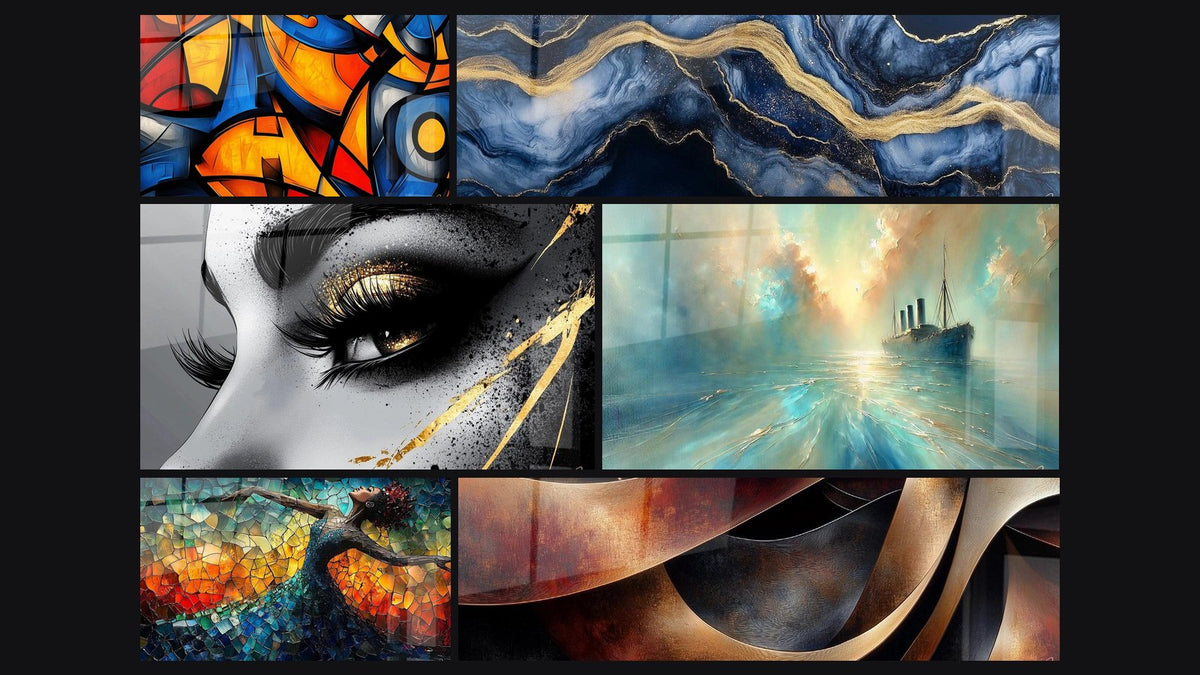
Colored geometric shapes painting - Abstract symphony - Abstract geometric edition
233,90€
Discover this artworkThe 3-layer method for an irresistible niche
Rassurez-vous : transforming your niche requires neither a colossal budget nor technical skills. The method follows a construction logic in 3 steps, like building a house: foundations, structure, finishes. Each layer brings its specific impact, and the final result creates that magical impression of natural harmony.
🎯 Overview of the method: Layer 1 (the anchor) creates the visual presence, layer 2 (the relief) adds the dimension, layer 3 (the light) brings the life. Logical progression: from distant impact to proximity emotion.
Step 1: Create the visual anchor point (the foundation)
This first step establishes the decorative presence of your niche. Like planting a tree that structures a garden, it creates the reference point around which everything is organized. Once this base is laid, you will immediately feel this satisfaction: "finally, my niche really exists!"
The essential elements for anchoring
- The main artwork: Choose a painting or sculpture with pronounced relief, not just a print. It should measure between 40% and 60% of the width of your niche to create perfect balance. Avoid flat reproductions that lack physical presence in the space.
- Professional hanging support: Invest in an invisible fixing system that allows for easy adjustment of position. The principle: your artwork should seem to "float" against the wall to create shadow play. Amateur hanging is immediately noticeable and trivializes the whole thing.
- Strategic background color: If your niche has white walls, consider an accent paint in a tone that highlights your artwork. This color becomes the "natural frame" that enhances your masterpiece.
Now let's move on to concrete implementation
Setting up your visual anchor
Position the artwork at the optimal height: Place the center of your artwork at 5.25 feet from the floor - this is the average eye level in motion. This professional rule guarantees visual comfort for all your visitors. The common mistake? Hanging too high for fear of obstructing passage.
⏱️ Time: 15 minutes | ✅ Success when: The artwork naturally attracts your gaze without effort | ⚠️ Attention: Check the effect from both ends of the hallway
Create depth with distance: Offset your artwork by 1.2 to 2 inches from the back of the niche. This distance creates cast shadows that give the whole a sculptural dimension. Without this distance, your decoration will appear "stuck" to the wall.
⏱️ Time: 10 minutes | ✅ Success when: You see subtle shadows around the artwork | ⚠️ Attention: No more than 2 inches otherwise the artwork overflows from the niche
Test the visual impact in motion: Walk normally down your hallway and observe at what point your eye catches on the niche. The effect should be immediate and natural. If you have to search with your eyes, it means the anchor lacks strength.
⏱️ Time: 5 minutes | ✅ Success when: Your attention is automatically captured | ⚠️ Attention: Test at different walking speeds
✨ Validation of step 1: Your niche should now have a "presence" - even empty, it attracts the eye. Your loved ones will notice the change immediately. If this is not the case, increase the contrast or size of the artwork.
— Our selection


OUR RECOMMENDED PRODUCTS
Step 2: Adding tactile dimension (the structure)
Now that your anchor works, we're going to create a richer sensory experience. This step transforms your niche from simply "nice to look at" into "irresistible to contemplate." The snowball effect begins: your guests no longer walk past, they stop to admire.
Elements of tactile dimension
- Accent lighting: An adjustable LED spotlight or a discreet light bar that sculpts your artwork with light. Look for a warm white (3000K) rendering that creates a welcoming atmosphere. Cold lighting kills decorative emotion.
- Complementary texture element: A textured background (relief wallpaper, plaster, or wood panel) that dialogues with your main artwork. The principle: create a tactile contrast even if you don't touch it.
Dimension installation
Install directional lighting: Orient your spotlight to create a 30 degree angle with the artwork - this is the optimal angle to reveal reliefs without creating annoying shadows. Test different intensities until you get a subtle halo around your room.
⏱️ Time: 30 minutes | ✅ Success when: The artwork seems "inhabited" by light | ⚠️ Attention: Avoid direct glare
Harmonize textures: If your artwork is smooth, choose a background with relief. If it's already textured, prioritize a matte solid background. This opposition creates the visual richness that captivates the eye for longer.
⏱️ Time: 45 minutes | ✅ Success when: Each element enhances the other | ⚠️ Attention: No more than 2 different textures
🎨 Validation of step 2: Your niche should now create an "ambiance" - even unlit during the day, you can feel the richness of the arrangement. In the evening, lighting transforms it into a true decorative showcase.
Step 3: Perfecting the final harmony (the master's finish)
This last step takes you from "informed amateur" to "confirmed connoisseur." We adjust the details that create this magical impression: "everything seems to have been thought out together forever". The final result? A niche that you will be proud of for years, which enhances your home and your personal taste.
Expert-level finishes
- Decorative linking element: A small object or material that echoes your main artwork (same color, same style, same era). It unifies the whole without overloading it.
- Cable and fixing management: All technical elements must become invisible. Cable covers, discreet sockets, camouflaged fixings - magic is born from this hidden technical perfection.
The finishes that make the difference
Add a touch of harmony: Place a small decorative element (vase, miniature sculpture, or collector's item) that picks up on a color or style from your main artwork. It should represent no more than 15% of the visual surface of the niche.
⏱️ Time: 20 minutes | ✅ Success when: The whole looks "naturally matched" | ⚠️ Attention: One complementary element is enough
Perfect the technical aspect: Hide all cables, adjust the lighting to eliminate distracting reflections, and make sure nothing betrays the "DIY" appearance. This technical perfection enhances the decorative effect.
⏱️ Time: 25 minutes | ✅ Success when: Everything seems "originally integrated" | ⚠️ Attention: Allow access for maintenance
🏆 Final validation: Your niche should now give the impression that "a professional decorator has been through here.". It attracts, holds attention, and creates a positive emotional experience. Bravo, you have mastered the art of decorative niches!
The rule of progression for masters: Wait 48 hours between each step so that your eye gets used to the new level. You will know when to move on to the next step when the current result seems "normal" to you - this is a sign that you are ready for more demanding work.
Congratulations! You have just acquired the decorating codes of professionals for transition spaces. This mastery gives you a considerable advantage: you now know how to transform any functional space into a decorative highlight. Here's an expert tip that few people know:
🎭 Decorator's secret: The "gallery corridor" effect is created by treating your niche as a "painting within a painting.". The niche becomes the frame, your artwork becomes the painting, and the lighting becomes the varnish. This technique triples the visual impact because it plays on several levels of simultaneous perception.
Frequent question from our readers
"But if I make a mistake in choosing the artwork, I'm going to be stuck with it for years?"
This concern is very understandable! In reality, the beauty of this method lies in its flexibility. You create a "setting" (the lighting and arrangement of the niche) that enhances any quality artwork. If you change your mind in 6 months, you keep 80% of your work and only change the central piece. It's like changing jewelry while keeping the same precious setting.
💡 Reassuring tip: Start with a piece that makes you spontaneously smile - it's the most reliable criterion. If it pleases you in your daily life, it will seduce your guests.
— You may also like


The 5 pitfalls that sabotage 90% of decorated niches
Now that you have mastered the method, let's protect your investment! These mistakes are so common that they seem "normal", but they ruin the desired effect. I prefer to tell you about them now rather than you discovering them out of frustration in 3 months.
- 🎯 The "too small artwork" syndrome: Out of fear of excess, we choose a piece that disappears into the niche. Result: the space seems even emptier than before! Solution: Your artwork should occupy at least 40% of the width of the niche to create the necessary visual impact.
- 💡 The "cheap" lighting that ruins everything: A low-end spotlight with cold white light turns your beautiful artwork into "office decoration". The €30 savings on lighting can ruin a €300 investment in decor.
- 📏 The "guessed" placement that unbalances: Placing the artwork based on personal feeling without measuring creates unbalanced proportions that everyone feels subconsciously. Even if no one knows why, “it doesn't feel right.”
- 🔧 The "DIY" hanging that shows: Visible fixings, trailing cables, a tilting support... These technical details immediately cheapen the whole ensemble, even with a magnificent artwork.
- 🎨 Decorative overload by enthusiasm: Adding “just one more little object” because it looks empty… until you recreate a decorative clutter. In a niche, the rule is strict: one main artwork + maximum one complementary element.
🛡️ Checkpoints before finalization: Your niche is successful if: 1) It attracts attention from 3 meters away, 2) The lighting creates soft shadows (no glare), 3) No technical elements are visible, 4) The whole thing makes you want to stop and look more closely.
— In the same vein


Your expert questions about niche arrangement
Allow half a day for impeccable results, spread over 2-3 sessions (you avoid fatigue and hasty mistakes). Electrical installation may require a professional (+2h), but the final effect is well worth the time investment.
Between €200 and €500 depending on your choices: artwork (€100-€300), quality lighting (€50-€100), finishes (€50-€100). It's the equivalent of a good dinner at a restaurant... but the effect lasts for years! Avoid cutting back on lighting: it’s what reveals your investment.
95% of the work is accessible to the average DIYer! Only electrical installation may require an electrician if starting from scratch. For the rest, the method is designed to avoid heavy work. With good tools and patience, you will achieve a professional result.
Prioritize noble materials (wood, metal, stone) and styles that transcend eras. Avoid trends that are too marked by time. A good test: imagine this artwork in your grandparents' house and in your children's house. If it works in both, you’ve got it!
Absolutely! The principle adapts: modern house (clean lines, LED lighting), traditional (classic artworks, warm lighting), industrial (raw metal and wood)... The important thing is to respect the harmony with existing elements while creating that functional/aesthetic contrast that makes the effect.
Your new daily routine in 3 weeks
Imagine: every morning, as you walk down your hallway, your gaze spontaneously stops on this beautifully highlighted niche. This little visual pause positively colors your whole day with a subtle but constant satisfaction. Your guests immediately notice that certain “je ne sais quoi” that makes your home so welcoming and compliment you on your refined attention to detail.
But beyond the decorative effect, you have gained a new confidence in your design choices. This success in a “difficult” space gives you the keys to transform all your transition spaces into decorative assets. Your relationship with interior decoration is no longer the same: you now think like a professional.
The understanding was indeed the most complex part - now you know why and how to do it. Your first move? Take measurements of your niche and note your artwork ideas. In one week, you won’t be able to stand seeing that empty niche!
🌟 Your transformation starts now: You have all the keys in hand to create that niche you've been dreaming of. No more hesitation, no more excuses - just the excitement of finally seeing this space reveal its magical potential !
Also read: 🏠 Discover our room-by-room decor guides
</div
More selected pieces
Heart of the Breeze Canvas - Abstract Boat Edition
233,90€
Discover this artwork →