

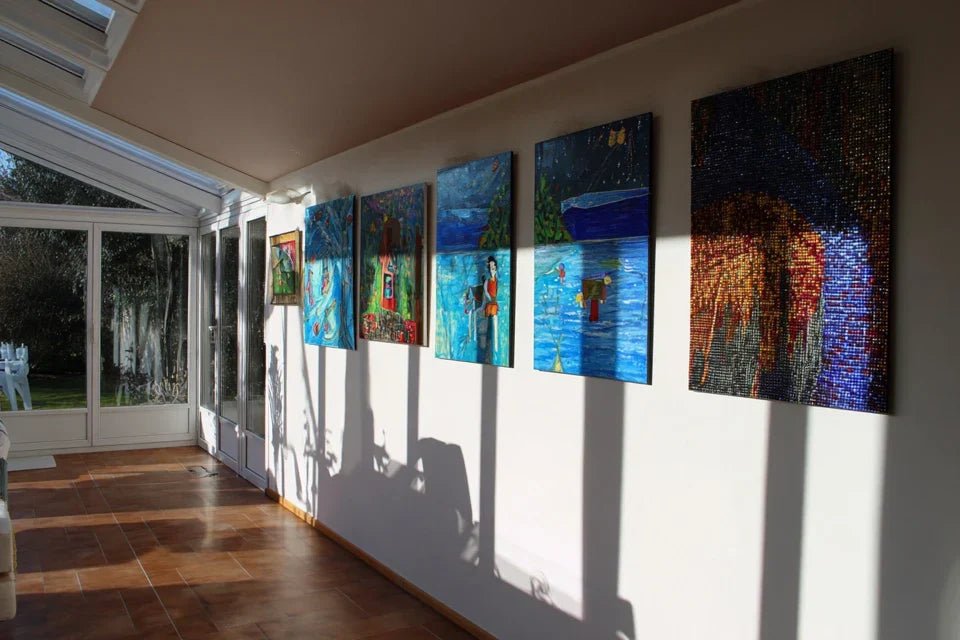
You’ve just hung your favorite artwork in your beautiful, light-filled conservatory... and disappointment sets in. Instead of enhancing the space, your piece disappears into a blinding reflection that turns your investment into an unusable mirror.
Every ray of sunlight becomes your enemy. In the morning, it’s total glare. In the afternoon, reflections dance across the surface and make the artwork unreadable. Even your guests avert their gaze, embarrassed by this aggressive light that kills all the magic of your decor.
You may have tried moving the artwork, changing the lighting, or even thought about installing curtains... But nothing works. The problem persists and you start to believe it’s impossible to have beautiful paintings in a very bright room.
Rest assured, this is absolutely not your fault! The problem doesn't come from your artistic taste or your artwork. It's simply that 95% of traditional supports are not designed for spaces with strong natural light.
By the end of this article, you will master the secrets of anti-reflective mounts and discover how to transform your conservatory into an elegant art gallery where each work reveals its beauty, even under the most intense sun.
Why Your Paintings "Disappear" in Intense Light?
Abundant natural light is not the enemy of art, on the contrary! The problem arises NOW because most supports sold commercially use standard glossy glass that acts like a mirror. It's like trying to read a book through a window: the more light there is, the less you see the content. If you wait any longer, you risk missing out on the opportunity to create that exceptional decor space your conservatory deserves.
🌟 Customer testimonial: "I had installed three beautiful canvases in my conservatory. The result? My guests only saw their reflection while having drinks! I discovered anti-reflective mounts and now, my works are enhanced by this golden light that literally makes them vibrate."
💬 Conversation with a decor expert
The golden rule of bright decor: The more your space is bathed in natural light, the more crucial the choice of support becomes. With the right support, you will get a professional gallery effect in less than 24h.
Understanding what's really happening in your sunroom
Do these situations sound familiar? You can no longer admire your paintings at the end of the morning due to glaring reflections. Your guests avoid sitting facing the artworks because they are uncomfortable with the reflections. Yourself, you have stopped looking at your favorite artistic pieces because they have become "awkward mirrors".
What's really happening is a simple physical phenomenon: specular reflection. Your standard glass reflects 8% of the light directly into your eyes, creating this visual discomfort. The problem isn’t your decor or artistic choices; it’s simply that you are using supports designed for classic indoor lighting.
It's like wearing sunglasses inside out: instead of filtering the light, they concentrate it! Your frustration is perfectly normal and above all... entirely avoidable.
The first hidden cause: "invisible" glass that isn’t
Here's what the industry doesn't tell you: standard "transparent" glass actually reflects 8% of the light that hits it. In a classic living room, this is imperceptible. In a sunroom, it’s a spotlight aimed at your eyes!
It's exactly like the difference between looking at the water in a swimming pool on a cloudy day (you see the bottom) and on a sunny day (you only see reflections). Transparency exists only under certain lighting conditions.
This discovery will transform your approach: instead of suffering from the light, you will learn to tame it so that it reveals your works rather than masking them. Your sunroom will become your major decor asset.
🔍 Quick test: Place your hand between a light source and your painting. Do you see the difference? This shading instantly reveals the true colors of your work, masked by reflections.
Everyone believes that all it takes is to avoid direct light on the painting. In reality, it's the angle between the light source, the painting and your eyes that creates the problem. A painting can be in the shade and still create annoying reflections!
Imagine a mirror in your bathroom: even if it’s not facing the window, it can send light into your eyes depending on your position. This is exactly what happens with paintings under classic glass.
That's why your attempts to "reposition" haven't worked. You are fighting against an optical phenomenon, not a placement problem. The solution isn’t to move the painting, but to change its ability to reflect light.
The third cause: the light intensity that varies throughout the day
What almost no one notices: in a sunroom, light intensity can vary from 1 to 100 between early morning and noon! Your perfect painting at 8 am becomes invisible at 12 pm.
Observe carefully: are there moments when your paintings look magnificent and others when they completely disappear? This is exactly the phenomenon of variable intensity at play.
This constant variation explains your growing frustration. You can never fully enjoy your works, always at the mercy of the sun's course. It’s exhausting and spoils your decorative pleasure.
The 3 warning signs to watch out for:
- The "phantom mirror" : You see your reflection or that of the furniture in the painting, this is a sign of excessive specular reflection
- The "disappearance" effect: The artwork becomes unreadable at certain times, revealing an inadequate support for the brightness
- Visual discomfort: You avoid looking at the painting by reflex, a symptom of uncontrolled glare
The trigger element: the light-material contact surface
What really makes the difference is the contact surface between light and your painting's support. It’s like a domino effect: an unsuitable surface creates a chain reaction of reflections that ruin the visual experience. In your situation, identify whether your paintings create "glare zones" at certain hours, if you have to change places to look at them, or if your guests avoid certain armchairs. These clues reveal the urgency of acting on the support.
The universal rule of visual comfort: A well-supported painting should be readable and pleasant to look at at all times of the day, regardless of light intensity. Test it: if you squint, it's time to change the support.
| ❌ Misconceptions | ✅ Technical reality | 💡 Explanation | 🎯 Practical benefit |
|---|---|---|---|
| You have to avoid light on paintings | You need to control the reflection of light | Light reveals colors, it's its reflection that is disturbing | Fully enjoy natural brightness |
| An expensive painting is enough on its own | The support conditions 80% of the experience | Even a masterpiece becomes invisible with a bad support | Maximize your artistic investment |
| All glasses are equal | Surface treatment changes everything | Between 1% and 8% reflection depending on the treatment | Optimal visual comfort in all circumstances |
| It's too technical for me | 3 simple criteria are enough to choose | Anti-reflective + UV protection + optical transparency | Informed decision in 5 minutes |
The simple method to choose the perfect support
Now that you understand the mechanisms, let’s move on to the solution. Rest assured, it’s much simpler than you think! Just like building a house, we proceed in logical steps: first the foundations (the type of support), then the walls (the technical characteristics), and finally the finishing touches (optimal installation). At the end, you'll have that magical feeling of entering your veranda and seeing your artworks revealed by the light instead of being masked by it.
🎯 Your action plan in 3 steps: Step 1 - Choose the right anti-reflective support (immediate satisfaction), Step 2 - Optimize technical characteristics (durability), Step 3 - Master installation and positioning (professional result).
Step 1: Identify the appropriate anti-reflective support
Let’s start with the foundations because that's where everything is at stake. It’s like choosing good foundations for your house: invisible but crucial for the overall solidity. Once this step is mastered, you will feel that deep satisfaction of knowing that you have made the right technical choice.
The 3 types of anti-reflective supports explained
- Matte anti-reflective glass: Recognizable by its slightly textured surface, it diffuses light instead of reflecting it. Available from professional framers, make sure it reduces reflections by 90%. Avoid cheap "satin" glass which dulls colors.
- Optical anti-reflective glass: Perfectly smooth surface with an invisible multi-layer treatment. The principle? Microscopic layers that cancel out reflections through destructive interference. Identify quality by the “light transmission >99%” certificate. More expensive but perfect transparency.
- Anti-reflective Plexiglas: A lightweight and shatterproof alternative, ideal for large formats. The anti-reflective treatment is integrated into the mass. Advantage: total safety in case of impact. The good indicator: it should be impossible to see your reflection in it.
Transition to practice: now, how do you make your choice?
The decisive test in 3 minutes
Light source test: Place the support sample facing your brightest window, hold a white sheet of paper behind it and observe. You should see the text distinctly through the support without any reflection from the window. If you see your silhouette or that of the room, this support is not suitable for your veranda.
⏱️ Time: 3 minutes | ✅ Successful when: No reflections visible even in direct sunlight | ⚠️ Attention: Do not confuse "less reflection" with "anti-reflection" - the difference is huge!
Transparency check: Look at a fine text through the support. The letters should remain sharp, without any blurring or distortion. A good anti-reflective support preserves 100% of the image sharpness. This is what distinguishes a professional support from a gadget.
⏱️ Time: 1 minute | ✅ Successful when: Text perfectly legible | ⚠️ Warning: Be careful of supports that "eat" fine details
UV resistance test: Request the UV protection certificate (essential in a conservatory). A good support should filter 99% of UV-A and UV-B. Without this protection, your works will lose their colors in a few months under this intense light.
⏱️ Time: Immediate verification | ✅ Successful when: UV99% certificate provided | ⚠️ Warning: UV rays are invisible but destructive - never neglect this aspect
✅ Validation of step 1: Your chosen support creates no reflections even in full sun, perfectly preserves image sharpness and protects from UV rays. If you're still hesitating, take the time to compare - this decision conditions your daily enjoyment. Bravo, you now master the fundamentals!
OUR RECOMMENDED PRODUCTS
Step 2: Optimize technical characteristics
Now that you have the right support, let's move to the next level: technical optimization. This is where you will make the difference between an amateur result and a rendering worthy of a gallery. This step is more rewarding because you begin to see the professional effect take shape, and this is where the snowball effect begins: each mastered technical detail amplifies the beauty of the whole.
The technical specifications that change everything
- Support thickness: Minimum 4mm to avoid optical distortions. Insufficient thickness creates invisible undulations that subtly distort the image. With a framer, check by looking at a straight object through it: it should remain perfectly straight.
- Edge treatment: Polished edges are essential to avoid light diffraction effects. Raw edges create "light leaks" that parasitize the image. The quality index: run your finger over the edge, it must be perfectly smooth.
- Mounting system: Floating supports are recommended to avoid pressure points that create optical constraints. Visible benefit: your painting seems "suspended" in space, a very modern and professional effect.
Precise technical implementation
Measure the optimal gap: Leave 2-3mm of clearance between the artwork and the support to avoid condensation effects. In a conservatory, temperature variations create mist that can damage your painting. This gap allows for air circulation while maintaining protection.
⏱️ Time: 5 minutes of measurement | ✅ Successful when: Uniform gap verified with a ruler | ⚠️ Warning: Too much clearance = dust, not enough = condensation
Check the perimeter seal: The seal must be continuous around the entire edge. In a conservatory, humidity can seep in and create mold between the artwork and the support. Test by sliding a thin sheet into the corners: it should not pass.
⏱️ Time: 3 minutes of inspection | ✅ Successful when: Perfect sealing on 100% of the perimeter | ⚠️ Attention: A single weak point compromises all protection
🎯 Technical validation: Your mounting respects all professional standards: correct thickness, polished edges, safety margin and perfect sealing. You now have a system that will protect and reveal your artwork for years.
Congratulations, you are now reaching the expert level! This final step transforms your technical knowledge into a spectacular result. The difference between an amateur and a connoisseur is made here: knowing where and how to position each artwork so that it dialogues perfectly with natural light. Visualize the final result: your guests who stop, admiring, in front of this perfect harmony between light and art that you will be so proud of.
The golden rules for positioning in a conservatory
- Optimal hanging angle: Tilt your artworks slightly (2-3°) downwards to direct residual reflections towards the floor rather than into the eyes. Use a spirit level for accuracy. This pro technique eliminates the last parasitic reflections. Eye-level height: In a conservatory, you often look from a relaxed seated position. Hang at 145cm from the floor (compared to 160cm in classic interior). This difference of 15cm completely changes the visual experience. Light safety distance: Maintain a minimum of 60cm between the artwork and any reflective surface (coffee table, mirror). Crossed reflections create unpleasant light interference.
Final professional installation
Test viewing angles: Walk around your conservatory and check the readability of the artwork from each armchair and at different times of the day. Note the positions where the work is perfect and adjust if necessary. The goal: 100% visual comfort for you and your guests.
⏱️ Time: 15 minutes of observation | ✅ Successful when: Perfect readability from all angles | ⚠️ Attention: Do not forget to test in both standing AND seated position
Adjust accent lighting: In the evening, add focused LED lighting with a color temperature of 3000K to prolong the pleasure. Position it at 30° relative to the artwork to avoid shadows. Your artworks remain sublime even after sunset.
⏱️ Time: 10 minutes of adjustment | ✅ Successful when: Uniform lighting without shadow | ⚠️ Attention: Avoid overly white LEDs that distort colors
Expert progression rule: You know you can move on to the next artwork when it provides you with the same visual pleasure at 8 am and at 2 pm in full sun. Be patient for fine adjustments, but keep your ambition for excellence.
You now master all technical and aesthetic aspects. Here are the expert subtleties that will give you that decisive advantage that few people know, even among professional decorators.
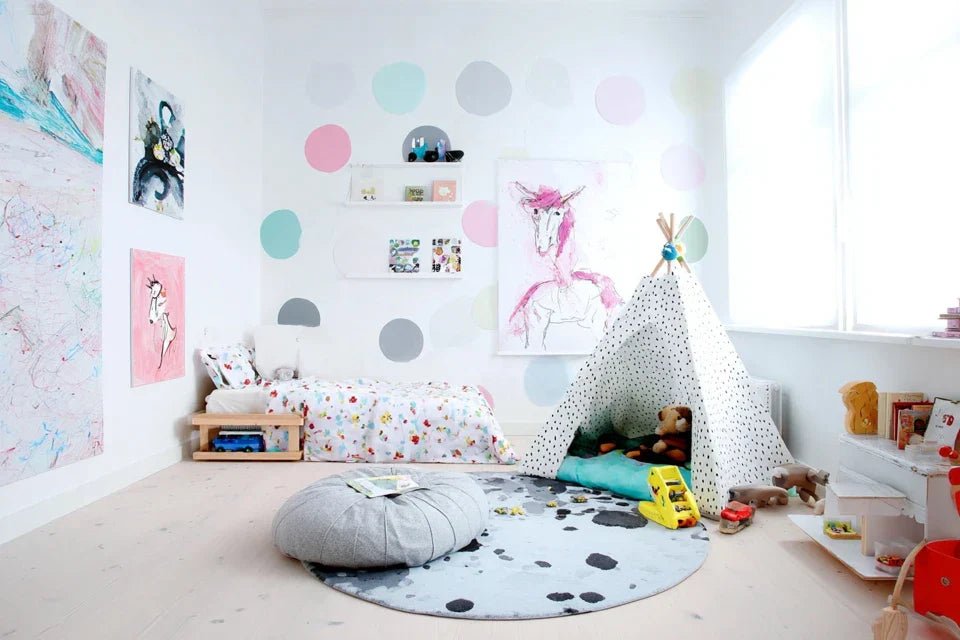
💎 Professional secret: Create "light transition zones" by positioning your artworks according to a gradient of intensity: works with warm tones on the south side, cool tones on the north side. This technique exploits color psychology and amplifies the effect of each artwork depending on the orientation of your veranda.
🤔 Frequent question from our customers
"Can I use my current artworks or do I have to buy everything new?"
I perfectly understand this financial concern! Rest assured, your existing works are perfectly preservable. Only the protective backing needs to be changed, not the artwork itself. It's exactly like changing sunglasses while keeping the same eyes: you improve protection and comfort without touching the essential. Most of our customers are pleasantly surprised to rediscover their artworks in a new light, literally! You will even discover details that you have never noticed.
🎯 Immediate action: Photograph your current artworks with and without reflection (by creating shadow with your hand). This comparison will motivate you to take the step and allow you to measure progress once the change is made.
Costly mistakes to absolutely avoid
I must alert you about some classic pitfalls that can spoil all your efforts. These errors are very tempting and seem logical, but they can make you lose months and compromise the final result. Fortunately, they are perfectly avoidable when you know them.
- ⚠️ Choosing a low-cost "anti-reflective" backing: The temptation of saving is strong, but a low-end support often creates a blurry effect that completely tarnishes the artwork. Result: your colors become dull and the image loses its sharpness. Prefer to invest in a good support rather than buying several times.
- 🚫 Positioning based on aesthetics only: Placing the artwork "where it's pretty" without considering the light angles guarantees failure. Even if you have the best support, if the angle is wrong, reflections will persist. Always test the viewing angle before drilling the wall.
- ❌ Neglecting UV protection: "My artwork isn't valuable, no need for UV" - fatal error! In a veranda, even a reproduction can lose its colors in 6 months. UV destroys modern pigments much faster than old ones. 🔥 Install without ventilation gap: Sticking the artwork directly against the support seems logical but creates destructive condensation. Trapped moisture causes mold and peeling. Always allow this vital 2-3mm gap.
- ⏰ Test only in good weather: Checking the rendering only in bright sunshine may surprise you. Other types of reflections can appear when cloudy. Test under all weather conditions before final validation.
🛡️ Quality control system: Check these 4 points before permanent installation: no visible reflection even in full sun, perfect image sharpness preserved, complete mounting seal, comfortable readability from all armchairs. Warning signs: intermittent reflections, image that "moves" depending on the angle, condensation forming inside.
🎁 Special offer for readers
Because you took the time to inform yourself, enjoy 10% discount on your first order:
⏰ Valid 72h after reading • Applicable to all our products
❓ Your most frequent technical questions
Allow between 80€ and 200€ per artwork depending on the format and type of support chosen. To optimize: start with your 2-3 favorite works and spread out the investment. Concrete example: for 3 60x80cm paintings with optical anti-reflection support, total budget 450€. The result is well worth this investment as you finally rediscover the pleasure of your artworks!
The effect is immediate from installation! You will notice the difference at first glance. To fully appreciate it, observe over a full day: morning, noon and evening. Most of our customers tell us they "rediscovered their paintings" and regret having waited so long.
The dismantling of the old support is within your reach with the right tools. For reassembly with the new anti-reflection support, I recommend a professional framer: the required precision (sealing, ventilation gap) justifies his 30-50€ labor cost. You preserve your artworks and obtain a durable result.
Professional-grade supports are designed to withstand temperatures from -20°C to +60°C. Check the certification when purchasing. Crucial point: avoid low-end plastic supports that warp at 35°C. Invest in treated glass or high-performance acrylic, designed for demanding environments.
🌟 Your sunroom transformed into an artistic showcase
In a few weeks, imagine the scene: you're having your morning coffee in your sunroom bathed in golden light. Your eyes naturally focus on your paintings which vibrate with pure colors, without any parasitic reflections. Your guests admire this perfect harmony between natural light and art. You feel that deep pride of creating a unique space where each artwork tells its story without being masked by reflections. Your sunroom has become the private gallery you dreamed of.
This transformation goes far beyond simple technique. You have acquired a refined understanding of the light-matter interaction that will serve you for all your future decorative choices. This expertise now naturally guides you towards the right decisions, whether it's for a new acquisition or arranging other spaces. Your confidence in interior decoration has taken a spectacular leap.
You now know that understanding the mechanisms was indeed the most difficult part. The rest is simply methodical application of these principles. Your first concrete step? Test today the "hand-shadow" effect on your current paintings to measure the potential for transformation. This revelation will be your trigger to take action and finally create that bright artistic space you dream of!
🚀 Your new reality starts now: You have all the keys to transform your sunroom into an exceptional gallery. Light is no longer your enemy but your ally to reveal the beauty of your artworks. Your bright space awaits you - all it takes is your decision!


