

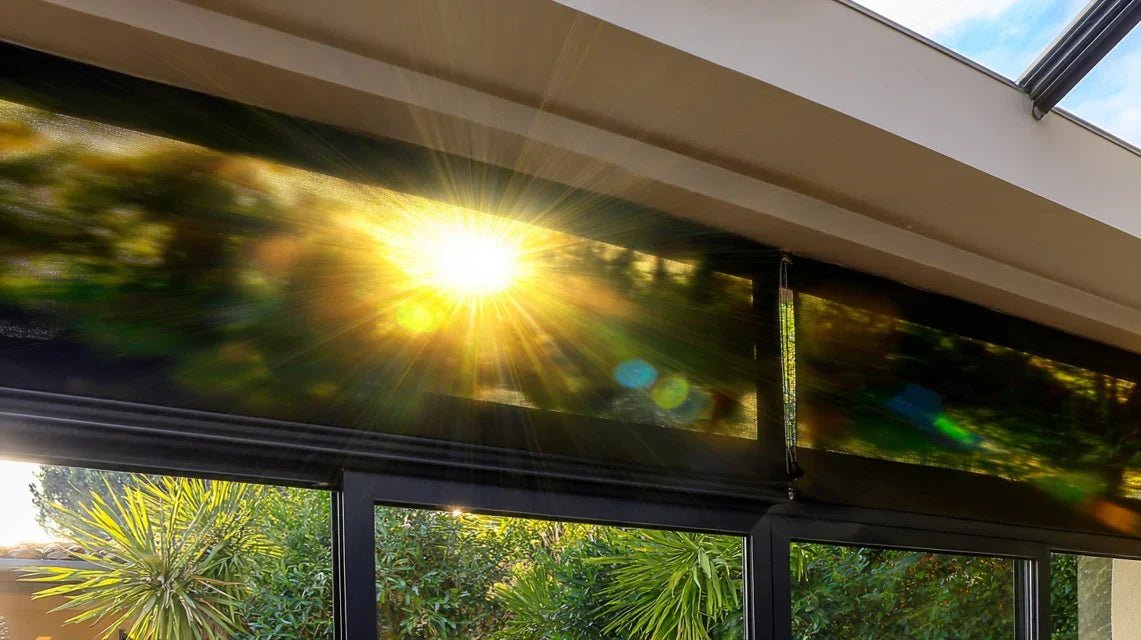
You’ve just finished decorating your beautiful sunroom and dream of displaying your favorite artworks, but a worry gnaws at you: will the intense light damage your art? You can already imagine the colors fading, the paper yellowing, and this anxiety prevents you from fully enjoying this bright space.
Each morning, while sipping your coffee in this sun-drenched room, you look at the empty walls with frustration. You invested in this extension to create a haven of well-being, but without wall decor, the space remains cold and impersonal, far from the warm atmosphere you dreamed of.
You may have already tried some solutions: temporarily hanging a painting, then taking it down for fear of damage, or choosing inexpensive reproductions that don’t really satisfy you. These disappointing compromises leave you with the feeling that you can never reconcile protecting your artworks and enjoying decorative pleasure.
Rest assured, this hesitation is perfectly legitimate. The problem doesn't come from a lack of knowledge on your part, but from the fact that most common advice ignores the specificities of a modern sunroom and the current technical solutions that allow you to effectively protect your paintings.
By the end of this article, you will know exactly what types of artworks to choose for your sunroom, how to protect them durably from light, and you’ll finally be able to transform this space into a personal art gallery where your works flourish without risk.
Why your sunroom deserves special attention for your paintings?
Contrary to popular belief, a sunroom is not an hostile environment for artworks, but it requires a specific approach. Ignoring this reality today risks seeing your artistic investments degrade silently, while simple solutions exist to make it a perfect showcase. The natural light that floods your sunroom is like a theater spotlight: beautiful for highlighting, but potentially destructive if not controlled. This unique opportunity to create an exceptional living room-gallery may not present itself again if you postpone your decor decisions.
🏡 Customer testimonial : "Marie had transformed her sunroom into a bright office, but the white walls depressed her. She first tried to install an oil painting inherited from her grandmother. After six months, she noticed that the reds were turning pink... An expensive lesson that led her to discover paintings on aluminum, now perfectly preserved after three years of exposure.”
💬 Conversation with a decor expert
The golden rule of decorated conservatories : It's the support that determines resistance, not the beauty of the work. With the right materials, your conservatory can become the most beautiful exhibition space in your home in less than 30 days.
Understanding What Really Threatens Your Paintings in a Conservatory
If you feel this frustration of not being able to decorate your conservatory, if you constantly hesitate between protection and aesthetics, if you settle for temporary solutions that don't really satisfy you, you are not alone in this situation.
What’s actually happening is that your conservatory combines three factors that traditional rooms do not experience: prolonged exposure to UV rays, greater temperature variations, and intense brightness that mercilessly reveals flaws. The problem isn't your conservatory, but the inadequacy between classic advice and this specific environment.
Imagine trying to grow tropical plants with advice for a temperate garden: failure would be predictable, not due to lack of skills, but because of methodological mismatch.
UV radiation: the invisible but measurable enemy
Contrary to what many think, it's not the heat that damages your paintings, but the ultraviolet rays. In a conservatory, UV intensity can be 3 to 5 times higher than in a traditional living room, even on cloudy days.
It’s exactly like the difference between being in the sun or in the shade at the beach: even on a cloudy day, you tan (or burn) much faster in direct exposure. The pigments in your paintings react the same way to this cumulative exposure.
This reality changes everything in your decorative approach: instead of avoiding light, you will learn to intelligently filter it and choose supports that take advantage of it rather than suffer from it.
🔍 Revealing test: Place a piece of colored paper on the windowsill of your conservatory and another in your living room. After a week, compare: the difference in discoloration will visually show you the UV impact that your paintings are experiencing.
Thermal variations: the invisible stress on your works
Many focus solely on UV rays, forgetting that temperature variations play an equally important role. In a conservatory, the temperature can vary by 15°C between morning and afternoon, creating repeated expansions and contractions.
It's as if you were alternately dipping your paintings in hot and cold water: the materials work, deform, and eventually crack or peel off. Traditional supports such as stretched canvas are particularly vulnerable to these movements.
This discovery will revolutionize your choice of wall art: prioritizing dimensionally stable supports that don't move with temperature will guarantee maximum durability.
Fluctuating humidity: the forgotten factor
Few conservatory owners realize that relative humidity there varies much more than in the rest of the house. This hygrometric instability can cause paper to swell, paint to crack, or promote mold growth.
Observe your conservatory on a morning after a cool night: do droplets form on the windows? If so, this is a sign that humidity regularly rises and falls. Your paintings are subjected to these cycles of expansion-contraction which, in the long run, weaken them.
This awareness will guide you towards choices of hydrophobic materials that remain beautiful and stable regardless of ambient humidity.
🎯 The 3 alarm signals to watch out for:
- Progressive fading of reds and blues: Sign of excessive UV exposure, comparable to tanning that gradually sets in without you noticing
- Corner warping: Reveals significant humidity variations, like a leaf curving near a kettle
- Appearance of micro-cracks: Indicates repeated thermal constraints, similar to the cracking of a windshield under stress
Light reflection: the unknown amplifier
The trigger element that few people identify is that in a conservatory, light does not only come from the front: it reflects off the clear floor, furniture, and even opposite windows, creating a 360° luminous environment. It is this multiplier effect that makes certain hours particularly intense, like a natural photo studio. Identifying these peaks of brightness allows you to strategically position your wall art or provide suitable protection.
The rule of the 3 combined criteria: A conservatory-resistant painting must withstand UV + thermal variations + fluctuating humidity. If one of these criteria is lacking, check it by exposing a sample for 48 hours in your conservatory.
| ❌ Common misconception | ✅ Technical reality | 💡 Simple explanation | 🎯 Practical benefit |
|---|---|---|---|
| Heat damages paintings | It's the UV rays that degrade them | Like tanning, invisible but cumulative | Choose the appropriate protection | Direct light should be avoided | Some supports love light | Aluminum is enhanced by UV rays | Exploit the asset of the conservatory |
| Only reproductions are resistant | The support determines the resistance | Like choosing the right sunscreen | Expose real works of art |
| A conservatory is not an artistic place | It's the best exhibition space | Natural light = museum lighting | Exceptional private gallery |
The progressive method to succeed with your conservatory gallery
Now that you understand the real issues, rest assured: transforming your conservatory into an art space is simpler than it seems. The progression resembles that of a gardener who learns: first prepare the ground (analysis of your space), then plant intelligently (choosing the right artworks), and finally maintain sustainably (protecting and optimizing). Each step brings you immediate satisfaction and prepares you for the next, until you get that exceptional space you dream of.
🗺️ Overview of your transformation: Step 1 - Analyze and secure (1 weekend), Step 2 - Select and install (2 weeks), Step 3 - Optimize and perpetuate (1 month). Result: a personal gallery that evolves with your tastes and resists the years.
Step 1: Analyze and prepare your space (solid foundations)
Starting with this step avoids costly mistakes and saves you time in the long term. It's like doing an inventory before moving in: it’s better to identify specificities now than to discover them after investing. This phase will give you the confidence needed to make the right decisions and avoid regrets.
🔧 Analysis tools required
- Lux meter (or free smartphone app): Resembles a small digital device that measures light intensity in lux. Used to identify areas of high exposure to adapt your artwork choices. Available in hardware stores for 15-30€. Quality criterion: +/- 5% accuracy. Avoid toy models costing less than €10 which give fanciful measurements.
- Hygrometer-thermometer: Small LCD screen device that displays temperature and humidity simultaneously. Principle: monitor variations that stress materials. Quality index: 24h mini/max memory. Visible impact: prevent warping and cracking before they appear.
- UV-test self-adhesive film: Stickers that change color according to the intensity of UV received. Magic principle: stick on different walls and compare after a week. Immediate benefit: visualize concretely the areas at risk in your conservatory.
Once equipped, let's move on to mapping your space:
🎯 3-step diagnostic method
Measure brightness by zones: Take measurements at different times (9am, 12pm, 3pm, 6pm) on each potential wall. Logic: identify peak light hours and zones to adjust placement. Technical tip: also note the orientation of windows as a north-facing wall will never receive direct sunlight. Objective: avoid surprises.
⏱️ Time: 2 hours over one day | ✅ Successful when: You have a "heat map" of your veranda with lux values noted | ⚠️ Attention: Don't measure on a very cloudy day, you would underestimate the actual exposure
Test climatic variations: Let the devices record for a full week, including during a period with a beautiful sunny day and a gloomy day. Why: understand the amplitude of changes that your future artworks will undergo. Crucial point: note the differences between day/night and sun/cloud. Frequent revelation: variations are often more significant than expected.
⏱️ Time: 15 min installation, 5 min/day recording | ✅ Successful when: Max temperature difference < 20°C and humidity < 30% | ⚠️ Attention: If differences are higher, provide ventilation or dehumidification
Identify parasitic reflections: Observe at different times where the sun's reflections are projected (floor, light furniture, windows). Purpose: anticipate unexpected "spotlight" effects that could surprise some artworks. Technique: use your smartphone to film a full rotation at the brightest time of day. Benefit: strategically position your future artworks.
⏱️ Time: 30 minutes observation | ✅ Successful when: You visualize all light paths | ⚠️ Attention: Reflections change with the seasons (sun height)
✅ Validation of step: Your veranda has no secrets: you know its gentle and intense zones, its climatic rhythms. If in doubt about a measurement, repeat it on a different day. This precise knowledge now gives you the power to choose exactly the right artworks for each location.
OUR RECOMMENDED PRODUCTS
Step 2: Select and install your first artworks (practical application)
Now that your space is analyzed, you access the next level: choose artworks that enhance your veranda instead of being overwhelmed by it. This step is more rewarding because you finally see your project take shape. The snowball effect begins: each artwork installed inspires you for the next and reinforces your confidence in your decorative choices.
🎨 Recommended types of artworks for veranda
- Tableaux sur aluminium dibond : Metal plates covered with a high-definition print and anti-UV varnish. Principle: totally stable material that does not move with heat or humidity. Quality recognition: minimum thickness of 3mm, satin finish. Decor impact: colors that "pop" in natural light, rendering close to stained glass. Impressions sur plexiglas : Transparent supports with sublimation printing behind the acrylic glass. Operation: light passes through and illuminates the image from within. Unique advantage: exceptional depth and brightness effect. Selection criterion: 4-6mm thickness to avoid deformation. Toiles enduites anti-UV : Textiles specially treated with integrated ultraviolet protection. Benefit: traditional look with modern security. Identification: "UV-resistant" or "archival quality" mention is mandatory. Visual result: warm rendering and authentic texture preserved.
- ⚠️ Choosing only based on style without checking the support: It's tempting to go for a beautiful classic canvas, but if it’s not UV treated, it will lose its colors in 6 months. Frustrating consequence: investing in a quality reproduction that becomes dull and devalues your decor. Smart alternative: look for the same image on a resistant substrate or request a custom print. Rest assured: even experts fall into this trap at first.
- ☀️ Ignoring seasonal exposure changes: Your conservatory receives 3 times more sun in summer than in winter due to the height of the sun. Concrete risk: artwork perfect in autumn that suffers from the first warm days. Preventive solution: test during a period of strong sunshine or provide adjustable protections. Understandable mistake: we often decorate in autumn/winter when we spend more time indoors.
- 🌡️ Neglecting conservatory ventilation: Many people think it’s enough to open the windows, but air must really circulate to avoid stagnant humidity pockets. Perverse effect: mold appears in the corners of frames after a few months. Effective method: create a cross-breeze with openings on opposite sides. Universal lesson: stagnant air is the enemy of all materials.
- 🔧 Underestimating the weight of protected artworks: Resistant supports (alu, glass) are heavier than traditional canvases, and standard wall fixings are not always sufficient. Feared consequence: artwork falls, damaging both the painting and the floor. Simple prevention: calculate the total weight (artwork + frame + protection) before choosing the fixing. Good reflex: provide 50% safety margin on the supported weight.
- 💰 Wanting to change everything at once: The desire to quickly transform your conservatory leads to buying several artworks simultaneously, but each location has its own specificities that are discovered over time. Financial trap: invest massively in choices you will regret. Wise approach: start with 2-3 pieces, observe their behavior for a season, then complete with knowledge of the facts. Winning philosophy: better an evolving beautiful gallery than a disappointing compulsive purchase.
🏆 Installation stratégique par zones
Positionner selon l'exposition mesurée : Place your most resistant works (aluminum, plexiglass) in areas with high UV exposure (>500 lux), and reserve more fragile supports for gentle areas (<300 lux). Logic: optimize durability while maximizing visual impact. Pro technique: create a "resistance gradient" from the most exposed to the most protected.
⏱️ Temps : 1 hour of planning + 2h installation | ✅ Réussi quand : No fragile work in direct exposure | ⚠️ Attention : Check the solidity of the fixings with the actual weight
Créer des points focaux lumineux : Use natural light as exhibition lighting by placing your favorite works where they will be naturally "spotted" during peak traffic hours. Museum tip: visitors instinctively look at what is best lit. Pro secret: vary sizes to create a dynamic visual rhythm.
⏱️ Temps : 3 hours of staggered installation | ✅ Réussi quand : Immediate "gallery" effect upon entering | ⚠️ Attention : Avoid the "photo wall" effect by respecting spacing
Étape 3 : Optimiser et pérenniser votre galerie (niveau expert)
You are now reaching the level of mastery that makes the difference between a passionate amateur and an informed connoisseur. At this stage, you no longer suffer from the constraints of your veranda: you transform them into assets. Your space becomes that exceptional gallery that your guests admire and which you are proud of, with the satisfaction of knowing that your works are protected there for years.🔮 Techniques de protection avancées
Installer des filtres UV sélectifs : Apply anti-UV transparent films to the most exposed windows (mainly south facade). Principle: block harmful rays while preserving brightness. Technique: choose films that filter 99% of UVA and UVB without altering vision. Result: invisible protection that preserves the aesthetics of your veranda.
⏱️ Time: 1 weekend for complete installation | ✅ Successful when: UV test confirms reduction >95% | ⚠️ Attention: Bubble-free application requires precise technique
Create a seasonal rotation system: Establish a schedule to rotate your artworks according to the seasons and variable solar exposure. Logic: even UV exposure distributed + constant visual renewal. Pro method: discreetly label on the back with color code summer/winter. Unexpected benefit: you regularly rediscover your works.
⏱️ Time: 2h organization + 30min per rotation | ✅ Successful when: Smooth and automatic system | ⚠️ Attention: Note the optimal location of each artwork
The collector's progression rule: Start with 3-4 well-chosen artworks, observe their behavior for a full season, then expand based on what you have learned. Patience rewarded: perfectly adapted gallery in one year.
Congratulations! You now master the subtleties that only true art lovers know. This expertise gives you a considerable advantage: creating exhibition spaces that even professionals admire, while protecting your artistic investments.
🎖️ Curator's tip: Create a photographic "logbook" of your artworks with a photo taken every 6 months in the same location and at the same time. This discreet monitoring allows you to detect any changes and intervene before a problem becomes visible. Method used in museums for preventative monitoring.
🤔 Frequent question from our readers
"I'm afraid my paintings will 'look too busy' in my sunroom... How can I be sure of the result?"
This hesitation is very understandable: you always fear turning a clean space into a cluttered mess. The good news is that natural light naturally unifies artworks, unlike artificial lighting which can create unsightly contrasts. Start with a single large artwork in the main line of sight: if the effect pleases you after a week, it means your sunroom accepts wall decoration. The space will naturally guide you towards balance.
💡 Risk-free test: Temporarily hang a large framed poster for a few days to visualize the impact. If you quickly get used to it and find the space warmer, that's the green light to invest in real artworks.
The pitfalls to avoid at all costs (protection guide)
Now that you know how to succeed, let's protect your investment by avoiding common mistakes. These mistakes are so common that they seem logical at first glance, but they can ruin months of effort in a few weeks.
🛡️ Safety checklist before purchasing: 1) Support mentioned as "UV resistant" or "outdoor" ✓ 2) Fixing adapted to the actual weight ✓ 3) Ventilation test performed (no persistent condensation) ✓ 4) Budget spread over several months ✓. Warning signs: salesperson who minimizes the importance of the support, fixings provided are too light, or “decorate everything” promotion.
🎁 Special readers offer
Because you took the time to inform yourself, enjoy 10% discount on your first order:
⏰ Valid 72h after reading • Applicable to all our products
❓ Your most frequently asked questions about artwork in a conservatory
With the right supports (aluminum, treated acrylic), expect a minimum of 15-20 years without visible degradation, versus 2-3 years for an unprotected canvas. To optimize: avoid direct exposure during the hottest hours (12pm-4pm) in summer with adjustable blinds. A concrete example: our customers who have followed this advice retain vibrant colors after 5 years of continuous exposure.
For 3-4 gallery quality artworks (approximately 50x70cm), allow €300-€800 depending on the chosen finish, plus €50-€100 of UV protection if necessary. Economical tip: starting with 2 large pieces rather than 5 small ones has more impact for the same budget. The investment is profitable from the second year compared to replacing unsuitable artworks.
Application possible by a motivated DIYer in a weekend, but delicate technique for a professional result. Main difficulty: avoiding bubbles and creases that alter the view. Hybrid solution: have it installed by a professional (€100-€200/m²) or choose exterior shutters with adjustable slats that naturally filter light. Equivalent result with simpler installation.
Possible with reinforced precautions: UV anti-reflective glazing framing, constant hygrometric monitoring, and mandatory seasonal rotation. Conservative recommendation: limit exposure to 6 months/year maximum for irreplaceable pieces. Wise alternative: display high-fidelity reproductions and reserve the originals for special events.
Excellent marriage! Plants naturally regulate humidity and create gentle microclimates. Composition tip: alternate artworks on hard supports and plants for a perfect visual balance. Attention: avoid plants that project water (misting) near the artworks, and choose waterproof planters to prevent drips on the walls.
🏆 Your conservatory transformed into an exceptional gallery
In a few weeks, imagine yourself enjoying your morning coffee in this transformed conservatory. Your favorite artworks capture the golden light, create subtle shadow games on the walls, and transform every moment spent in this space into true aesthetic pleasure. Your guests will not fail to notice this personal gallery where each painting tells a story, and you will feel that discreet pride of one who has managed to create an environment that is both beautiful and intelligent.
This decorative achievement goes far beyond simple decoration: you have learned to <strong>analyze a space</strong>, anticipate its constraints, and turn difficulties into creative assets. These skills will serve you in all your future design projects, and this newfound confidence in your decor choices will positively influence the entire interior of your home.
The hardest part was understanding the specific challenges of your conservatory. Now that you know, <strong>the first step</strong> is to concretely measure your light exposure this weekend. This simple action will solidify your intentions and launch the transformation of your space. Your future conservatory gallery awaits this first step to become a reality.
<strong>🌟 Your project deserves to come to fruition:</strong> You now have all the keys to create the art space you dreamed of. The technique is within your reach, just need to take action to see your conservatory reveal its full decorative potential!


