At What Height Should You Hang a Painting? Simple Rules for an Optimal Effect
By Alexandre MARY
⏱️ Reading time : 8 minutes
You've just acquired this magnificent artwork that excites you, you brought it home with so much enthusiasm... and now here you are standing in front of your wall, hammer in hand, completely paralyzed by this seemingly simple question: at what height should I hang it?
You measure, you remeasure, you hold the artwork at arm's length trying different positions, but nothing seems perfect.
Too high? It will dominate the room in an overwhelming way. Too low? It will go unnoticed, drowned in the furniture.
You may have already tried the famous "1m50 from the floor" rule found on the internet, or followed your mother-in-law's advice on alignment with furniture.
Result: Your artwork seems to float strangely in space, disconnected from your decor.
Rest assured, this frustration is perfectly normal! The problem isn't your artistic sense, but simply that every space is unique and requires a personalized approach.
Generic rules completely ignore your ceiling height, your furniture, and especially your way of experiencing the space.
By the end of this article, you will master professional hanging techniques to position your artworks at the perfect height, creating a harmonious visual balance that enhances your decor and reveals all the beauty of your works.
Why does the hanging height completely transform your decoration?
Hanging an artwork is not a trivial gesture that can be postponed. Each day spent with a mispositioned work of art is a little bit of its magic that evaporates.
Imagine a virtuoso musician playing on an out-of-tune piano: the talent is there, but the effect is ruined. Your artwork deserves better than to suffer from the effects of an approximate hanging.
🎨 Testimonial from a collector: "I had hung my favorite abstract canvas too high in the living room. For months, it remained invisible to my guests sitting down. The day I discovered the rule of eye level, everything changed. The same artwork became the focal point of my evenings, finally sparking the passionate discussions it deserved."
💬 Conversation with a decor expert
"I always thought you had to hang a painting in the center of the wall to be balanced..."
Not at all! An artwork lives in harmony with your furniture. Think about creating a visual dialogue: above a sofa, the artwork should "rest" on the back, not float in the void. It's like a hat: it must adapt to the shape of the face, not be placed in the middle!
"I was always told that 1m50 from the floor is the universal rule for all paintings..."
This rule dates back to the museums of the 19th century with their 4-meter ceilings! In a modern living room with a ceiling height of 2m50, this height gives the impression of a painting that "sticks" to the ceiling. The important thing is harmony with your living space and your way of looking at it every day.
The fundamental principle of successful hanging: A well-positioned painting creates a natural line of sight that guides the eye effortlessly, like a visual path that unites the work with its environment.
You should feel this balance from the first few minutes after hanging it.
Decoding: why your previous attempts didn't work?
If you find yourself in these situations, you are not alone: painting that seems to "float" above the sofa, a work that goes unnoticed despite its beauty, or even a feeling of visual overwhelm in your living room.
These symptoms reveal that the hanging does not respect the natural proportions of your space.
The real problem is not your artistic eye, but the lack of references adapted to your interior.
Each room has its own "emotional geometry" that determines where the eye naturally rests. Ignoring these anchor points condemns even the most beautiful painting to invisibility.
Imagine trying to hang a chandelier without considering the table it illuminates: even magnificent, it would seem out of place.
Your painting obeys the same laws of spatial coherence.
First hidden cause: the illusion of the universal rule
Contrary to what magazines proclaim, there is no magic height that works everywhere.
The famous "1m50 from the floor" rule completely ignores your height, that of your family, and above all the unique geometry of your room.
It's like being told that all size M clothes fit everyone: technically false, emotionally disappointing.
Your painting needs to be "tailor-made" for your space.
This revelation changes everything: instead of subjecting yourself to an arbitrary rule, you will create your own hanging system that reveals the personality of your interior and enhances your works.
✨ Revealing test: Hold a mirror in place where you want to hang your painting. If you have to raise or lower your chin to see yourself naturally, the height is not optimal. Your gaze should fall on it effortlessly.
Second cause: forgetting the surrounding furniture
Many think that a painting hangs "on a wall", when it must dialogue with the elements around it.
The real secret lies in creating an harmonious ensemble where each element enhances each other.
Think of an orchestra: each instrument has its precise place so that the melody is right.
Your painting is the soloist who must harmonize with the symphony of your decoration.
When you ignore this rule, you create a visual dissonance: the artwork seems disconnected, foreign to your living room, like a guest who wouldn't find their place at the table.
Third cause: ignorance of the "visual golden triangle"
There is in each room a "visual golden triangle" that almost no one notices: the area where your gaze naturally rests when you enter.
This magical zone is located between 1m40 and 1m70 from the floor, depending on your configuration.
You can easily spot it: it's where your eyes are directed spontaneously when you are standing in conversation, or sitting on your sofa.
This zone changes according to the main use of the room.
When your painting is outside this triangle, it becomes invisible in your daily life: too high, it fatigues you; too low, it psychologically clutters you.
🎯 The 3 signals that reveal a failed hanging:
The "torticolis" syndrome: You have to tilt your head to admire your painting, sign that it dominates instead of integrating
The "accessory furniture" effect: Your artwork seems placed on the furniture rather than highlighted by it
The feeling of clutter: Despite its beauty, the painting visually reduces space instead of enlarging it
The trigger factor: mastering proportions
What really makes the difference is understanding the proportions between your painting, your furniture and your architecture.
This mastery acts as a positive domino effect: as soon as you place a work correctly, the whole room gains coherence.
You will recognize this success by the immediate feeling of balance that you feel when entering the room.
The golden rule of professional hanging: The center of your painting should be at eye level of the person who looks at it most often.
You can check this by standing at a natural viewing distance (about 1m50-2m) and noting that your gaze falls on the center of the work effortlessly.
❌ Common belief
✅ Reality
💡 Explanation
🎯 Practical benefit
1m50 from the floor for all
Personalized eye level
Each home has its average height
Optimal visual comfort
Center of the wall = perfection
Harmony with furniture
The painting dialogues with the space
Decorative coherence
The higher it is, the more noble it is
Balance takes precedence over altitude
The eye favors harmony
Maximum highlighting
One nail in the center is enough
Adapted hanging system
Safety and aesthetics
Durability and beauty
The 3-level method for a perfect hanging
Now that you understand the mechanisms, let's move on to practice with a progressive approach.
Like learning to cook, we will master the fundamentals before venturing into expert techniques.
By the end of this process, you will know how to create the perfect balance between your artworks and your living space.
🎨 Method overview: We will progress through 3 levels of mastery: first establishing the base height (your foundations), then adjusting according to furniture (harmony), and finally refining according to lighting and ambiance (perfection).
Each level will give you visible results immediately.
Level 1: Establishing your personal reference height
Let's start by creating your personal standard for hanging, like a tailor who takes your measurements before making a suit.
This base will be your solid foundations on which to adapt each artwork.
Once this reference is established, you will already feel a sense of coherence in your decorative approach.
🛠️ What you need to get started
A measuring tape: Choose a rigid model 3 meters long that stands upright against the wall. Avoid flexible tapes that undulate and distort measurements. You can find it in any hardware store. An accurate measuring tape guarantees successful hanging from the first try.
A spirit level: Choose a model of at least 40cm with a clearly visible bubble. It will serve not only for horizontality, but also to draw straight lines on the wall. The precision of the level avoids the "tilted painting" syndrome that spoils the decorative effect.
A pencil: An HB or 2H pencil that draws fine and erases easily. Avoid pens that mark the wall permanently. The pencil allows you to correct without damaging the paint.
Now, let's move on to practice with your first fundamental measurement:
📏 Determining your reference height
Measure your natural eye level: Stand relaxed, facing the wall where you want to hang your painting. Ask someone to mark the height of your eyes on the wall with a pencil. This measurement will serve as a reference for all your future hangings.
⏱️ Time: 2 minutes | ✅ Successful when: You look straight ahead without tilting your head up or down | ⚠️ Attention: Do not wear heels for this measurement - remain in flat shoes or barefoot
Calculate your optimal hanging zone: Starting from your eye level, draw a horizontal line with a pencil. This line represents where to place the center of your future paintings. Also mark reference points +/- 10cm from this line to define your visual comfort zone.
⏱️ Time: 3 minutes | ✅ Successful when: You have a perfectly horizontal straight line | ⚠️ Attention: Check the levelness with a spirit level - a tilted line will skew all your hangings
Test with a temporary artwork: Take an artwork you already own and hold it against the wall so that its center coincides with your reference line. Step back 2 meters and observe. If it looks good without effort, your reference is good.
⏱️ Time: 5 minutes | ✅ Successful when: You look at the artwork naturally without moving your head | ⚠️ Attention: If you have to tilt your head up, your reference is too high - adjust down by 5cm
✅ Check of step 1: Your reference line should be between 1m45 and 1m65 from the floor depending on your height. If it falls outside this range, reconsider your posture during measurement.
If in doubt, always prefer 5cm lower than too high - it's more comfortable on a daily basis.
OUR RECOMMENDED PRODUCTS
Level 2: Adapt according to your furniture and lifestyle
Now that you have your personal reference, let's learn how to modulate it intelligently depending on the context.
This is where your hanging goes from "correct" to "professional" - you will create a visual harmony that naturally links your works to your decor.
🎯 Specialized tools for this step
Cardboard template: Cut a piece of cardboard to the exact dimensions of your artwork. This tool allows you to test different positions without making holes. Use fairly rigid packaging cardboard so that it holds against the wall. It's the professionals’ trick to avoid costly mistakes.
Repositionable adhesive: Masking tape or painter's adhesive to temporarily fix your template. Avoid standard scotch tape which can peel off paint. Repositionable adhesive allows you to adjust without damaging.Camera or smartphone: To photograph your tests and compare positions. The lens often reveals details that the eye misses in real time. Take photos from your usual viewing position.
🏠 Adaptation according to areas of your interior
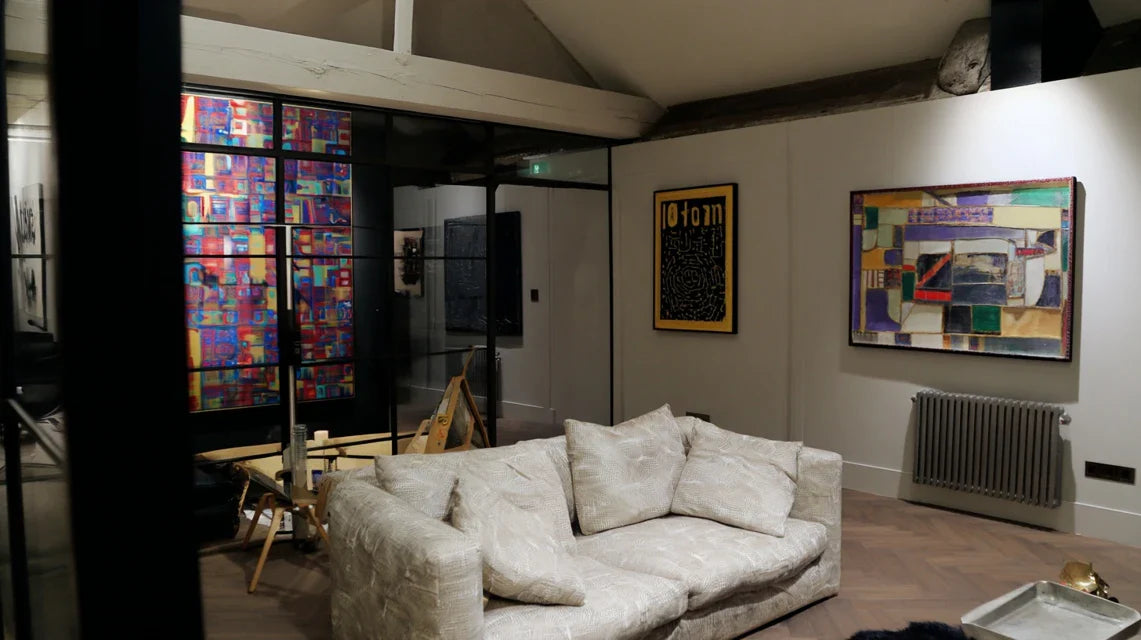
Above a sofa: Position your template so as to leave 15 to 20cm between the top of the backrest and the bottom of the artwork. This distance creates a visual dialogue without crushing. The artwork should seem to "rest" on the sofa while maintaining its independence.
⏱️ Time: 5 minutes | ✅ Successful when: The artwork forms a cohesive set with the sofa without dominating it | ⚠️ Caution: Too close to the backrest, the artwork appears "placed" on it; too far away, it floats
In an entryway or hallway: Here, you are walking upright, so respect your initial reference height. But be careful of the width of the hallway: in a narrow passage, lower it slightly to avoid a feeling of being crushed. In a wide hallway, you can raise it by 5cm.
⏱️ Time: 3 minutes | ✅ Successful when: You appreciate the artwork as you naturally pass by | ⚠️ Caution: In a dark hallway, favor a slightly lower height to compensate
In a dining room: Since you are mainly looking while seated, lower your reference by 10 to 15cm. The artwork should be visible and pleasant from your place at the table. Test from several chairs to ensure it is well visible for everyone.
⏱️ Time: 8 minutes | ✅ Successful when: All guests can admire it comfortably | ⚠️ Caution: Remember that guests of different heights sit at your table
📐 Verification step 2: Photograph each test and compare the images. The correct position is one where the artwork seems "naturally in its place", without visual effort.
If a position makes you hesitate, let it rest overnight and look at it again the next day with fresh eyes.
Level 3: Fine-tuning according to lighting and atmosphere
You now master the basics and contextual adaptation. This final step reveals the secrets of professional decorators: how lighting and ambiance can transform a good hanging into an exceptional one.
It's the difference between "well done" and "wow effect".
💡 Professional finishing tools
Flashlight or mobile lighting: To test different lighting angles and identify annoying reflections. A simple smartphone flashlight is sufficient. Lighting reveals details invisible in uniform light and can reveal necessary adjustments.
Pocket mirror: Place it in different places in the room to check the overall effect. This small mirror reveals perspectives you had not considered and ensures global decorative consistency.
Timer or stopwatch: To impose observation breaks on yourself and avoid the habituation effect. Look at your hanging in 2-minute increments with pauses, your eye will be more objective.
🎨 Optimization according to desired atmosphere
Test according to the time of day: Observe your artwork at different lighting times: morning, noon, evening and artificial lighting. Note if there are any distracting reflections or if some colors disappear. A good hanging remains beautiful in all conditions.
⏱️ Time: 15 minutes over the day | ✅ Successful when: The artwork remains attractive at all times | ⚠️ Attention: Reflections can create blind spots - adjust the angle if necessary
Harmonize with other decorative elements: Look at your artwork in relation to the other decorative objects in the room. It must be part of a coherent ensemble without competing. Sometimes, an adjustment of 2-3cm is enough to create perfect harmony.
⏱️ Time: 10 minutes | ✅ Successful when: All elements enhance each other | ⚠️ Attention: Avoid overly rigid alignments that create a "showroom" effect
Final adjustment according to the use of the room: In a reception room, prioritize a conversational height; in a bedroom, adapt it to the view from the bed. Each room has its own rhythm of life that influences the perception of your works.
⏱️ Time: 5 minutes | ✅ Successful when: The artwork naturally enriches your activities | ⚠️ Attention: In a bedroom, avoid it being the first thing you see in the morning if it is disturbing
The connoisseur's progression rule: You can move on to the next level when your eye immediately recognizes whether a painting is well or poorly hung at your home or elsewhere. This sensitivity is acquired with practice and becomes a permanent decorative asset.
Congratulations! You now have the keys to a professional hanging. But like any art, there are expert subtleties that transform good technique into a true decorative signature.
These nuances give you the advantage of professionals over well-intentioned amateurs.
🎯 Professional decorator tip: Create a "visual red thread" by subtly aligning all your paintings on an imaginary horizontal line that runs through the room. This invisible coherence unifies the space and creates a feeling of order and harmony that your guests will feel without being able to explain it.
🤔 Frequent question from a passionate amateur
"I'm afraid of making a hole in the wrong place and permanently damaging my wall..."
This apprehension is perfectly understandable and even healthy! It reveals your respect for your interior and your attention to detail.
The good news is that modern techniques allow for safe and adjustable hangings. First, use your cardboard template and repositionable adhesive to test without risk.
When you are satisfied, mark the fixing points with a pencil before drilling. A small screw hole can be easily filled with a little filler if necessary.
💡 Safety tip: Start by hanging a less valuable picture in a less visible place to gain confidence in your measurements. Once you have successfully hung one, you will approach the others with serenity.
The 5 mistakes that sabotage a hanging (and how to avoid them)
Even with the best method, some pitfalls persist. I'm going to reveal the most costly mistakes that I regularly see, so you can avoid months of decorative frustration.
🚫 The "quick glance" mistake: Hanging a picture based on your first impression without taking the time to measure. It's tempting when you're in a hurry, but 2cm of error can spoil months of visual pleasure. Always take your measurements, even for "just seeing the effect". Accuracy takes 5 minutes, regrets last months.
⚖️ The "paralyzing perfectionism" mistake: Spending hours hesitating between 2 very close positions for fear of making a mistake. When you hesitate between two very similar options, it means that both are good! Choose the one that inspires you most confidence and move forward. Absolute perfection does not exist, harmony does.
🔍 The "detail overshadowing the whole" mistake: Insisting on a perfect alignment with a specific element while forgetting the overall balance of the room. A picture can be perfectly aligned with a piece of furniture but create a general imbalance. Step back regularly to check the overall harmony.
💡 The "forgotten lighting" mistake: Hanging a picture without testing how natural and artificial light affects it at different times. A beautiful picture in the morning can become invisible in the evening or create annoying reflections. Test at different times of the day before permanently fixing.
👥 The "exclusive personal taste" mistake: Choosing a height that suits you perfectly while forgetting that other people live or visit this space. In a family living room, find a compromise that works for everyone. Shared beauty multiplies pleasure.
🛡️ Pre-final hanging verification system: Check that your picture remains visible and pleasant from 3 different positions in the room, test the effect with morning and evening lighting, ask a trusted person for their opinion, and make sure you don't have a stiff neck after 2 minutes of observation.
Because you took the time to learn more, enjoy 10% off your first order :
ART10
⏰ Valid 72h after reading • Applicable on all our products
❓ Frequently asked questions about optimal hanging
🕐 How long does it take to properly hang a picture?
For a successful installation, allow 20 to 30 minutes following the three-level method. This may seem long, but it's an investment: a well-hung picture will give you pleasure for years. To optimize: prepare your tools in advance, always use the cardboard template, and don't hesitate to take breaks to keep an objective eye.
💰 Should I invest in professional equipment?
Not necessarily! Basic tools are quite sufficient: tape measure, level, pencil and cardboard template. Your most worthwhile investment is the time spent measuring and testing properly. Reserve professional equipment for very large works or difficult walls. Technique beats equipment.
🏠 How do I adapt the technique according to the size of my room?
In a small room, lower your pictures slightly (5cm below your reference) to avoid an oppressive effect. In a large space, you can raise them a little to create more presence. The important thing is to maintain consistency: all the pictures in the same room must follow the same height logic.
🔧 What should I do if I've already hung my pictures at the wrong height?
Good news: it can be corrected! If the difference is small (less than 5cm), you can often use the same holes by adjusting the hanging system. For a larger difference, fill the old holes with a little plaster, let it dry, and start again with your new technique. The result is worth it.
🎨 How to manage multiple pictures on the same wall?
First create a guideline at your reference height. All centers of the pictures must align with this line, even if the frames are different sizes. Maintain a spacing of 5 to 10cm minimum between each work. For a gallery effect, prioritize equal spacing over edge alignment.
🌟 Your decorative transformation starts now
Imagine yourself in a few weeks, welcoming guests into your living room. Their eyes naturally fall on your artworks, perfectly integrated into your decor.
No more "something's wrong" or feeling of incompleteness. Your works finally reveal all their beauty in a harmonious balance that transforms your interior into a true personal gallery.
This mastery of hanging gives you much more than a technical skill: it’s a new confidence in your decorative choices.
You develop a trained eye that immediately spots imbalances and knows how to create harmony. This expertise translates into all your future decor projects and makes you the reference for your entourage.
The hardest part was understanding the hidden mechanisms behind a successful hanging. Now that you master them, start today by measuring your reference height.
This simple gesture already places you above 90% of amateurs who hang "instinctively".
✨ Your first success awaits you: Choose the artwork that means the most to you and apply the 3-level method. You have all the tools to succeed, and the result will surprise you with its accuracy and elegance.
📚 Deepen your decorative expertise
Now that you master the art of hanging, discover how to choose the right artworks, create balanced wall compositions, and harmonize your paintings with your furniture and colors.