Invisible Mounts: Elegance and Discretion for Designer Wall Art
By Alexandre MARY
⏱️ Reading time : 8 minutes
You’ve just acquired the perfect artwork for your living room, the one that expresses your personality and enhances your interior. But here's the problem: installation becomes a nightmare. Traditional fixings spoil the visual effect, shiny screws draw the eye, and these awful metal supports turn your work of art into simple wall decoration.
Every time you look at your wall, your eye automatically focuses on these unsightly details rather than the beauty of the artwork. The reflections of the metal capture the light, the contours of the fixings create shadows, and this feeling of “visible DIY” completely ruins the desired premium effect.
You may have tried discreet hooks, thin nails, or even adhesive systems. Result? Either it's still too visible, or it’s not strong enough for your valuable pieces. Commercial solutions all seem to overlook the essential: total invisibility.
It’s not your fault. Manufacturers of classic fixings prioritize ease of installation and cost over pure aesthetics. They assume that “it's barely noticeable,” without understanding that for an art lover, even “barely visible” is too much.
By the end of this article, you will master the invisible fixing systems that transform your wall into a professional gallery, where only the artwork counts, as if it floated naturally in space.
The era of accepting that “it’s a bit visible but it's normal” is over. Today, discerning collectors and decorators are discovering that wall art can reach an unprecedented level of sophistication. It's like the difference between office lighting and museum lighting: the details make all the difference. The more you wait, the more you get used to an amateur rendering when the professional is within your reach.
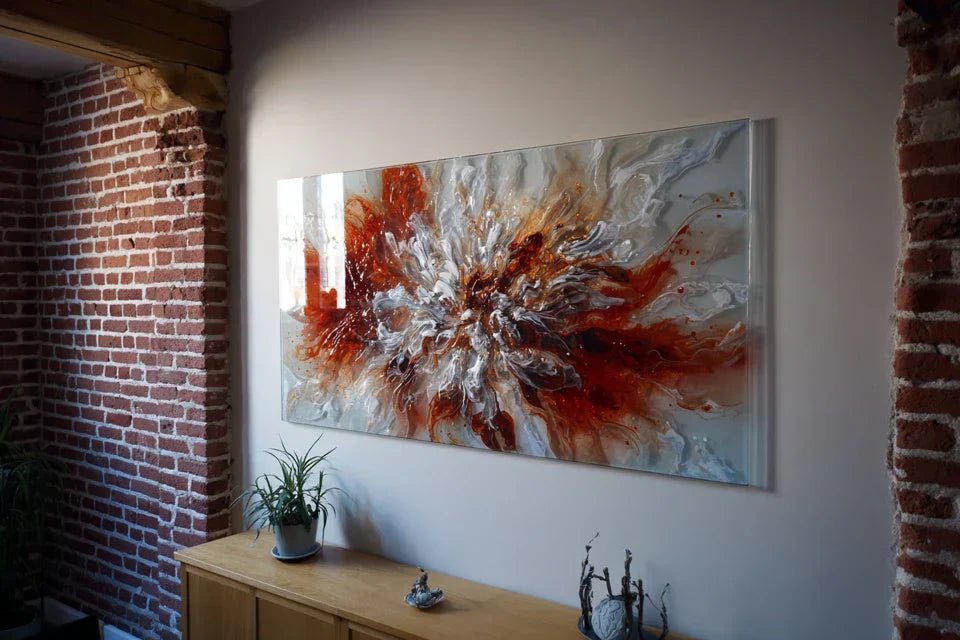
🎨 Customer testimonial: "I installed my 80x60cm abstract canvas with an invisible system six months ago. My guests still ask me how it 'holds up all by itself'. The effect is striking: it looks like it's an integral part of the wall, like a window to another world."
💬 Conversation with a decor expert
"I'm afraid my new artwork won’t be strong enough with an invisible fixing..."
Relax! It’s exactly the opposite. Professional invisible systems support up to 30kg per anchor point. That's stronger than most visible fixings!
"But I was told that you always have to see the fixings to check safety..."
Who told you that? Museums around the world use invisible wall mounts for their multi-million euro artworks. Security is about the quality of the system, not its visibility!
Total invisibility transforms the perception of the artwork: Your gaze focuses exclusively on the art, creating an emotional immersion that visible mounts systematically break. In 2 weeks, you won't be able to stand seeing exposed fixings at your friends’ places.
Finally understand why your current fixings disappoint you
You feel this underlying frustration every time you look at your wall. The artwork is magnificent, the frame perfect, but something feels off. Your eye catches on the technical details, the artistic illusion breaks, and you have the impression of a "homemade" work despite all your efforts.
What's really happening is that your brain processes visual information hierarchically. Fixing elements disrupt this hierarchy by creating "parasitic attention points". It’s like trying to admire a sunset with electrical wires in the field of vision.
Rassurez-vous : the problem isn't your demanding nature, but the conventional approach to hanging. Imagine watching a film at the cinema with the screen surrounded by small flashing lights. Even if they are discreet, they spoil the experience.
🔍 The first hidden cause: the "involuntary contrast" effect
Contrary to what one might think, it's not the fixings themselves that bother, but the micro-contrasts they create with the wall. Even a white nail on a white wall generates shadows and reliefs that your eye unconsciously picks up.
It’s like wearing clothing with a tag sticking out: it's not huge, but it spoils the elegance of the outfit. Your brain is programmed to detect these visual anomalies, even minimal ones.
These micro-contrasts create visual fatigue that prevents you from completely surrendering to contemplation. You miss out on the emotional experience the artist wanted to offer you.
🧠 Instant test: Fix your artwork for 30 seconds. Count how many times your gaze leaves the work to focus on the fixing elements. More than 2 times? Your fixings are parasitizing your artistic pleasure.
⚡ The second cause: the "apparent installation syndrome"
Many think that a well-installed painting should show its fixings to "prove" its solidity. In reality, it's a reflex of technical mistrust that has nothing to do with artistic experience.
It’s like leaving the scaffolding around a finished building: it gives an impression of permanent construction. Art requires total visual completion to reveal its emotional power.
This "technical first" mindset robs you of the magic of wall art: that feeling that the artwork naturally becomes part of your space, as if it had always been there.
🎭 The third cause: ignorance of museum standards
Most people are unaware that art professionals have exclusively used invisible systems for decades. They reproduce DIY methods by habit, without knowing the alternatives.
Carefully observe during your next visit to a museum: no visible fixings anywhere. Curators know that invisibility reveals art, visibility diminishes it.
This lack of awareness keeps you in an amateur standard when professional tools are now accessible to the general public, often for the same price as traditional fixings.
🔎 5 signs that your fixings are harming your artworks:
You first notice the hanging system: Your eye focuses on the fixings before the artwork, a sign that the installation visually dominates
Your guests ask technical questions: Instead of talking about artistic emotion, they ask "how is it fixed?"
The artwork seems "stuck" to the wall: Lack of harmonious integration, like a sticker on a surface
Photos are disappointing: The fixings appear in your photos and ruin the Instagram look
You hesitate to invest in art: Unconsciously, you know that the final result will not be up to par
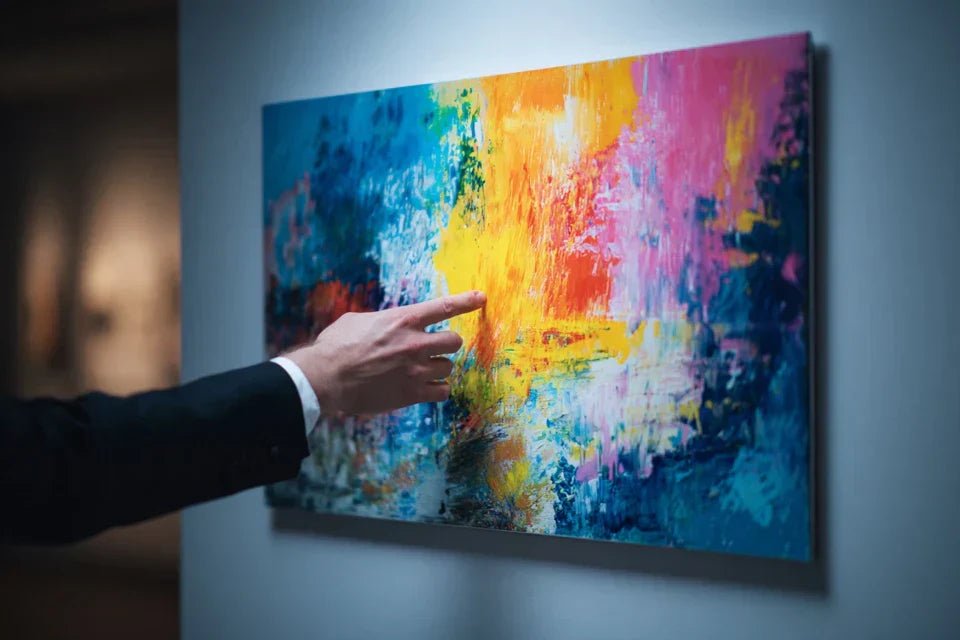
⭐ The trigger element: the revelation of "the floating effect"
The magical moment arrives when you discover the artistic levitation effect: the artwork seems suspended in space by its own aesthetic force. It is a powerful psychological phenomenon, like a domino effect that transforms your entire perception of wall art. Once experienced, it's impossible to go back.
Golden rule of invisible hanging: If you see how it’s fixed, it’s failed. True art must seem to exist naturally in the space, without visible technical explanation.
❌ Traditional fixing
✅ Invisible fixing
💡 Key difference
🎯 Perceived benefit
You can see how it holds
Total mystery of suspension
Magic vs apparent technique
Wonder and prestige
The eye flits between art and fixing
Pure concentration on the artwork
Distracted attention vs focused
Total emotional immersion
DIY effect
Professional gallery finish
Amateur vs expert
Pride and sophistication
Questions about installation
Conversations about artistic emotion
Technique vs feeling
Recognition of your taste
The 3-step method for perfect invisible hanging
Breathe: you don't need to be a DIY expert to succeed. The invisible fixing follows a simple logic, like building a house starting with the foundations. Each step prepares the next, and the final result will give you that deep satisfaction of having created something truly elegant.
🎯 Transformation overview: Support preparation (solid foundations) → Installation of discreet system (invisible structure) → Aesthetic finishing (magic revealed). Result: your wall becomes a window to pure art.
🔧 Step 1: Wall support preparation
It all starts by creating perfect conditions for invisibility. It's like preparing a canvas before painting: without this impeccable base, even the best system will fail. This step will already give you immense satisfaction as you feel the difference in quality from the very first gestures.
🛠️ Materials needed for a professional result
Electronic stud detector: Small device that precisely locates load-bearing structures in your wall. Essential for maximum solidity, unlike "hit and miss" methods which weaken the installation. Choose a model with sound signal, available in hardware stores.
60cm professional spirit level: Millimetric precision that makes the difference between "roughly straight" and "perfectly aligned". Short levels give approximate results. A good level transforms your amateur installation into gallery-quality finishing.
Specialized drill bits according to your wall: Concrete, plasterboard, brick... each material requires its specific tool. An appropriate bit avoids cracks, guarantees hold and preserves the appearance of the wall. Savings on this item always backfire.
Now, let's move on to practice with the method that transforms your wall into a professional support.
🎯 Execution of perfect preparation
Locating load-bearing points: Scan the installation area with the detector, tracing imaginary lines. The signal indicates areas of maximum solidity, typically spaced 40-60cm apart. These points determine the absolute safety of your installation.
⏱️ Time: 5-10 minutes | ✅ Successful when: Clear and repeatable signal in the same location | ⚠️ Attention: False signals near electrical outlets - always check with multiple passes
Tracing the reference axis: Position the level horizontally at the desired height and gently trace it with gray pencil. This line becomes your absolute reference for perfect alignment, even with multiple artworks.
⏱️ Time: 3-5 minutes | ✅ Successful when: Line is perfectly straight along its entire length | ⚠️ Attention: Too much pressure on the pencil which permanently marks the wall
Precise fixing point marking: Refer the exact dimensions of your invisible system respecting the millimeter spacing. Each point must coincide with a previously detected load zone.
⏱️ Time: 2-3 minutes | ✅ Successful when: Points aligned and in load zones | ⚠️ Attention: Confusion between system pitch and artwork width
✅ Validation of step 1: Your wall has precise markings, aligned, and located on reliable load zones. You already feel that satisfaction of well-prepared work. If you have any doubts about a point, redo this part - it is the guarantee of success in the following steps.
OUR RECOMMENDED PRODUCTS
🔩 Step 2: Installation of the invisible fixing system
You are now entering the heart of the transformation. This step reveals the magic of discreet engineering: creating a foolproof solidity without any visible trace. It is more rewarding than preparation because you see the system that will change your perception of wall art being born. The feeling of satisfaction multiplies with each component installed.
🎨 Components of the professional invisible system
Hidden suspension rails: Thin metal bars that integrate into the thickness of the frame, totally invisible from the front. Their genius: support significant loads while visually disappearing. Available in several lengths depending on your artworks.
Recessed wall supports: Elements that sink into the thickness of the wall, protruding only a few millimeters. Once painted the color of the wall, they become literally invisible even up close.
Secure locking system: Mechanism that guarantees your artwork cannot accidentally fall, even in case of vibration or handling. Complete peace of mind for your valuable pieces.
🎯 Systematic installation of the system
Precision drilling: Drill the holes exactly at the marked points, respecting the recommended depth for your type of wall. The quality of this step determines the long-term hold and absence of future cracks.
⏱️ Time: 10-15 minutes | ✅ Successful when: Clean holes, without chips, at the right depth | ⚠️ Attention: Drilling speed too fast which heats up and damages the drill bit
Fixing wall supports: Insert and screw in the receiving elements ensuring they are perfectly flush with the surface of the wall. These supports will visually disappear once the finish is applied.
⏱️ Time: 8-12 minutes | ✅ Successful when: Supports are solid and perfectly level | ⚠️ Caution: Excessive tightening that pushes the support too far into the wall
🎨 Step 3: Invisible Finishing and Load Test
You have now reached the level of aesthetic mastery that separates the amateur from the connoisseur. This step transforms your technical installation into a work of art in its own right. The final result will give you immense pride in having created something truly exceptional, which your guests will admire without understanding the secret of this perfection.
✨ Finishing for total invisibility
Color correction of supports: Gently apply the exact color of your wall to the fixing elements with a fine brush. This step literally makes the last traces of the system disappear.
⏱️ Time: 15-20 minutes (drying time included) | ✅ Successful when: Supports are invisible from 50cm away | ⚠️ Caution: Paint dripping and marking the clean wall
Installation and testing of the artwork: Position your painting on the system and check the perfect stability. Test with light pressures to confirm safety. The work should seem like an integral part of the wall.
⏱️ Time: 5-8 minutes | ✅ Successful when: Painting is stable, straight, and no fixings are visible | ⚠️ Caution: Abrupt handling that could mark the fresh wall
Rule of expert progression: The installation is successful when your guests ask "how does it hold?" rather than noticing the fixings. If someone spots the system, a retouch is needed.
Congratulations, you now master the subtleties of an expert that transform a simple installation into a true artistic staging. These advanced finishes give you the advantage over 95% of individuals who ignore these professional techniques.
🎯 Professional gallery tip: For high-value artworks, install indirect lighting directed at the painting from a hidden source. The absence of visible fixings combined with this lighting creates a striking "museum" effect that multiplies the emotional impact of the work.
🤔 Frequent question from our readers
"Is it really more solid than a simple hook, even for my heavy canvases?"
I perfectly understand this concern - we all grew up with the idea that we have to "see" solidity to trust it. In reality, professional invisible systems distribute weight better over several anchor points, unlike a single hook which concentrates all the load. Museums protect millions of dollars worth of artworks using these techniques, that's how reliable they are!
🧪 Trust test: Start by installing a medium-sized artwork (maximum 40x60cm) to see for yourself the impressive sturdiness. The success of this first attempt will give you the confidence for your more important pieces.
⚠️ Avoid these mistakes that ruin the invisible effect
Attention, some mistakes can undo hours of meticulous work and make you lose confidence in the method. These traps are easy to avoid when you know them, but devastating by ignorance. I prefer to warn you now rather than you discover these pitfalls by accident.
🎨 Neglecting color correction: It's tempting to think "it won't be too noticeable," but it's exactly that detail that betrays all the work. Even a slightly darker or lighter support attracts the eye like a magnet. Take the time to perfect this step, it makes all the difference.
📏 Underestimating the importance of level: "It looks straight to the eye" is the enemy of perfection. A deviation of 2-3 degrees, imperceptible during installation, becomes glaring once the artwork is in place. Your brain detects these flaws and ruins the visual harmony.
🔧 Choosing undersized fasteners: The classic mistake of "that should be enough." Dynamic loads (vibrations, drafts) stress fasteners more than static weight. Always oversize, your peace of mind is priceless.
🏃 Rushing the drying stage: Impatience to see the final result leads to handling too soon. A paint touch-up that isn't dry enough is damaged by the first contact and forces you to start all over again. Patience = perfection.
🎯 Forgetting the preliminary load test: Installing the final artwork directly without verification is a risky bet. A test with an object of equivalent weight reveals weaknesses without risking damage to your valuable artwork.
🛡️ Checkpoints before finalizing: Fasteners perfectly level ✓ Supports invisible from 1 meter away ✓ No play in the system ✓ Successful load test ✓ Warning signs: noise during handling, artwork that doesn't fall perfectly plumb, visible traces of supports.
Because you took the time to inform yourself, enjoy 10% discount on your first order:
ART10
⏰ Valid for 72h after reading • Applicable to all our products
❓ Technical and practical questions
🕐 How much time should you allow to install a complete invisible system?
Allow 2-3 hours for your first installation, then 1h30 once the technique is mastered. This time includes preparation, installation, and complete finishing. To optimize, group several installations on the same day - you amortize the preparation time of tools and develop your dexterity.
💰 Is the cost really justified compared to classic fixings?
An invisible system costs 15-25€ versus 3-5€ for visible fixings, but completely transforms the artistic experience. It's like comparing the lighting of a bare bulb to that of a designer lamp: the investment is immediately felt and lasts for years. Your works deserve this enhancement.
🔧 Can you install it yourself without DIY experience?
Absolutely! The principle is simpler than a flatpack piece of furniture. If you know how to use a drill and a level, you have all the necessary skills. Precision counts more than strength or experience. Start with a small work to gain confidence.
🏠 Will it work on all types of walls?
Yes, with the right adapted anchors: concrete, plasterboard, brick, even lightweight partitions. The only difference is the type of anchor and the weight distribution. On fragile partitions, use load distributing systems. Invisibility remains perfect regardless of the support.
🎨 Can you easily move the artworks afterwards?
This is the little-known advantage of invisible systems: change artwork in 30 seconds without tools! The supports remain in place, you simply slide in a new canvas. Ideal for renewing your decoration according to your moods or rotating your collection.
🌟 Your artistic transformation begins now
In a few weeks, you will look at your walls with new pride. Your works will seem to float naturally in the space, creating that professional gallery atmosphere you dreamed of. Your guests will stop dead in front of your installations, intrigued by this inexplicable elegance, and ask you for your secret with admiration.
This mastery of invisible fixings transforms more than just your decoration: it reveals your refined artistic eye and your demand for excellence. You join the circle of art lovers who refuse compromises and prioritize pure emotion. This skill will serve you throughout your life and impress those around you.
Understanding was the most difficult step, you have overcome it. Now, choose your first artwork and get the right system. In 3 hours, you will discover this magical feeling of art that seems to exist by its own aesthetic force. Your living room will never be the same.
✨ Your first step towards excellence: True art deserves a presentation that matches its value. You now have all the keys to create this gallery magic in your home. Your artistic vision is waiting for your action!
📚 Deepen your hanging techniques
Discover other professional technical solutions: fixings for difficult walls, modular systems, artwork protection... Complete your expertise to become a true master of wall art.


