Hanging Multiple Pictures in a Straight Line Without a Laser Level: A Visual Method
By Alexandre MARY
⏱️ Reading time : 8 minutes
You've just acquired this magnificent set of three paintings that will transform your living room, but here's the problem: it’s impossible to align them correctly on the wall.
A little too high on the left, slightly tilted to the right, and the last one seems to float in empty space.
You step back a few paces, squint, adjust again... but that perfectly straight line still eludes you.
The result: your wall art looks more like a poorly assembled puzzle than the elegant gallery you had imagined.
You may have tried the traditional spirit level, measured to the centimeter, or even attempted that smartphone app that promised miracles.
But between walls that aren't perfectly straight, electrical outlets that disrupt things, and this feeling that something is wrong despite all your efforts...
It’s perfectly normal! The problem isn't your eye or your technique, but simply that no one has explained the visual method of professionals to you.
This intuitive approach mastered by interior designers and which requires no sophisticated tools.
By the end of this article, you will master the secret technique for perfectly aligning your paintings with the naked eye, creating that visual harmony that instantly transforms the atmosphere of your room.
Why getting the alignment of your paintings right will revolutionize your decor?
A perfect alignment is not just pretty: it instantly creates a feeling of order and balance that psychologically transforms your space.
It’s like the difference between a disharmonious orchestra and a harmonious symphony.
Missing this step now means accepting that your artistic investment will go unnoticed, drowned in an ensemble lacking coherence.
🏠 Customer testimonial: Marie, a Parisian interior architect, recently told us: "I've seen clients spend €2000 on magnificent works of art, then ruin it all with approximate hanging. The result: their guests noticed the misalignment before admiring the canvases!"
💬 Conversation with a decor expert
"I'm afraid that without a laser level, my paintings will be crooked..."
Don’t be fooled! The human eye is naturally calibrated to perceive balance. The most beautiful art galleries have used this visual method for centuries!
"But precision tools are still safer..."
Paradoxically, no! A laser level measures physical horizontality, but your wall may have invisible defects. Visual alignment automatically corrects these imperfections.
The golden rule of professional hanging: A visually perfect alignment always trumps technical precision, because your brain perceives the overall harmony before mathematical details. In 15 minutes, you'll achieve a more natural and elegant result than with 2 hours of precision tools.
Why Your Previous Attempts Failed (and It’s Not Your Fault)
You surely recognize yourself in these situations: meticulously measuring the distances between each artwork, using a spirit level on every frame, or trusting that smartphone app which constantly fluctuated.
Pourtant, once finished, something was always off.
The problem? You were following a technical logic in a universe governed by the laws of visual perception.
It’s like trying to cook relying solely on molecular chemistry: technically correct, but ignoring the final taste.
Imagine a pastry chef who never tasted their creations, simply weighing everything to the gram.
They would get "perfect" cakes on paper, but potentially unpalatable!
🎯 First Hidden Cause: The Illusion of Millimetric Precision
Contrary to what we imagine, measuring within centimeters doesn’t guarantee a harmonious rendering.
The truth? Our walls are never perfectly straight, our ceilings rarely horizontal, and our floors often slightly sloped.
It's like trying to walk in a straight line on a boat that pitches: technically correct according to your compass, but visually shaky for an outside observer.
This obsession with technical precision often creates cold and artificial alignments that lack the natural fluidity your eye instinctively seeks.
The result? You get artworks "straight" but which seem frozen, lifeless.
💡 Immediate test: Look at any renowned art gallery or museum: you’ll notice that curators always prioritize visual harmony. Approach an exhibition wall with your spirit level... guaranteed surprise!
⚖️ Second Hidden Cause: Ignoring Overall Perception
The popular belief is that we hang artwork by artwork, focusing on each element individually.
The actual mechanism? Your brain first perceives the global composition before analyzing the details.
It’s exactly like tuning an instrument: you don't adjust each string independently, but in harmony with the whole to create just chords.
This fragmented approach explains why your artworks seem correct individually but create a visual cacophony once assembled.
You’ll soon discover how to create this magical coherence with a single glance.
👁️ Third Hidden Cause: Underestimating Your Visual Intuition
Almost no one realizes that our eye possesses an exceptional natural precision for detecting imbalances.
For example: you instantly spot a poorly framed photo on a wall, even from several meters away.
You can identify this ability in yourself by observing your instinctive reaction to any poorly arranged space: that immediate feeling that "something is wrong" without being able to explain it rationally.
This distrust of your instinct deprives you of your best decorating tool: your natural perception of balance and harmony.
🔍 The 3 signals that your eye automatically captures:
Natural sight lines: Your brain subconsciously traces guiding lines between your paintings, like an architect draws perspectives
Balance of visual masses: You instinctively perceive whether one side of your composition "weighs" more than the other, just like a balance scale
Harmony of empty spaces: Your eyes automatically measure whether the intervals between paintings create a pleasant rhythm, like musical pauses in a melody
🎨 The trigger factor: The consistency of the guiding line
What really makes the difference is to create an invisible guiding line that your eye will naturally follow.
It's the visual domino effect: once this line is established, all your paintings naturally organize around it, like magnets attracting each other.
You identify this magic line by observing the point where your gaze spontaneously rests when you enter the room, then mentally extending that trajectory.
The universal rule of intuitive alignment: Your first visual impression upon entering the room immediately reveals whether the alignment works. If you have to think or analyze, it means harmony has not yet been found. Immediate test: turn around, come back and observe your spontaneous reaction.
Emotion takes precedence over technique in decoration
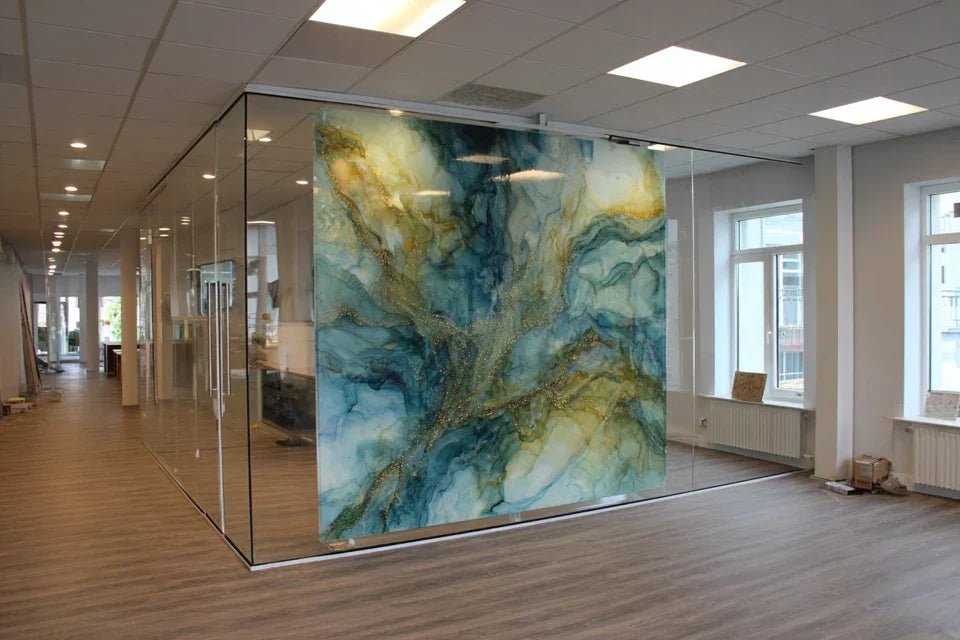
A wall of art that breathes sophistication
The 3-Look Method: Align Like a Pro Without Any Tools
Rassurez-vous, vous n'allez pas apprendre une technique complexe mais plutôt révéler une capacité que vous possédez déjà.
Cette progression suit la logique naturelle de votre œil : d'abord saisir l'ensemble, puis affiner les détails, et enfin harmoniser l'ensemble comme un chef d'orchestre qui équilibre sa symphonie.
Le résultat final ? Cette sensation magique d'avoir créé une vraie galerie d'art personnelle qui impressionne dès le premier regard.
🎯 Overview of your transformation : Step 1 - Create your guideline (the invisible foundation), Step 2 - Place your visual anchors (balance points), Step 3 - Harmonize the whole (the final touch of maestro). Each step brings you closer to that perfect harmony you feel immediately when entering the room.
🎨 Step 1: Create Your Invisible Guideline
Commencer par établir cette colonne vertébrale visuelle est essentiel car elle va guider naturellement tous vos choix suivants.
C'est comme tracer la ligne de départ d'un marathon : sans elle, impossible de savoir si vous courez dans la bonne direction.
Une fois cette référence établie, vous ressentez immédiatement une sensation d'ancrage qui vous guide intuitivement pour la suite.
🧰 What You Need (Nothing to Buy!)
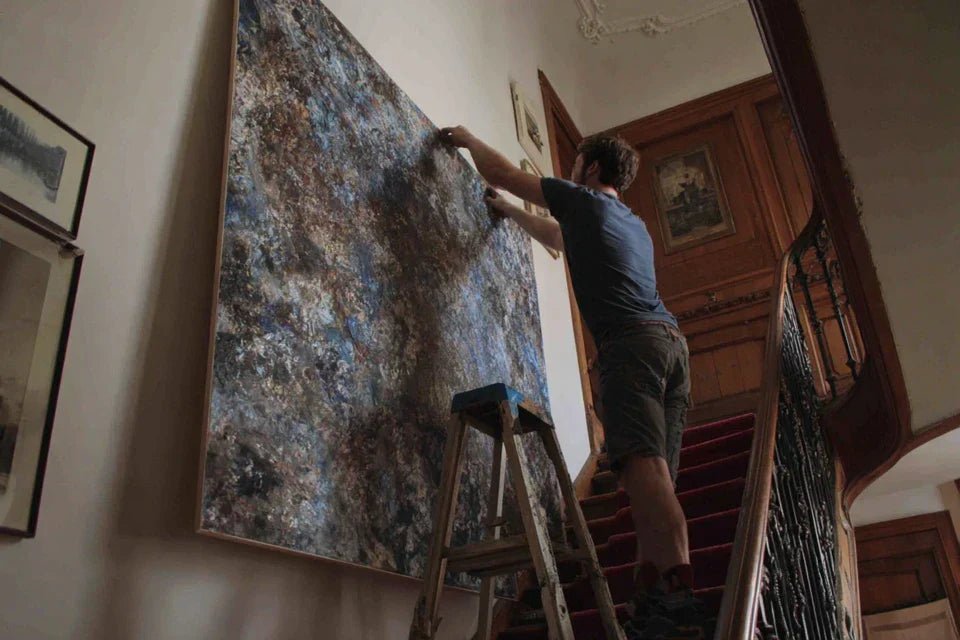
Your paintings laid on the floor: Imagine them as actors before their entrance on stage. Arrange them in the planned order against the wall to visualize the final composition. This step avoids unpleasant surprises once the first hole is drilled. Don't just imagine them: your brain needs this physical reality to calibrate proportions.
A natural reference point: Identify a fixed element of your room (switch, socket, corner of furniture) that will serve as your visual beacon. It’s your magnetic north to avoid drifting during installation. Choose it at eye level because that's where your gaze naturally rests.
Your sense of stepping back: This innate ability to step back 2-3 meters to judge the whole. It's your decorator’s superpower because this distance corresponds exactly to the optimal viewing angle for perceiving proportions.
Now, let's move on to practice with confidence:
🎯 Step-by-Step Implementation
Position your central painting: Place the painting that will attract the most attention in the center of your composition. It becomes your "sun" around which other elements revolve. The technical trick: its lower edge should be 140-160 cm from the floor, exactly at the height where your eye naturally rests when standing.
⏱️ Time: 3 minutes | ✅ Success when: When stepping back 3 meters, this painting immediately "jumps out" at you | ⚠️ Attention: Resist the temptation to place it too high - a common mistake that breaks the harmony
Establish your mental guideline: Imagine a horizontal invisible line that crosses the center of your main artwork and extends across the entire width of your wall. This line becomes your absolute reference, like the horizon for a navigator. It guides you for all subsequent placements.
⏱️ Time: 1 minute | ✅ Successful when: You "see" this invisible line clearly even with your eyes closed | ⚠️ Attention: Do not seek mathematical perfection, trust your perception
Validate your reference: Step back and observe whether this guideline seems natural in relation to the fixed elements of the room (windows, doors, furniture). If something bothers you intuitively, adjust now because correcting it later will be tedious.
⏱️ Time: 2 minutes | ✅ Successful when: You feel a spontaneous harmony with the architecture of the room | ⚠️ Attention: Ignore rational doubts if your eye approves
✨ Validation of this foundation: Your guideline is perfect when it seems "obvious" and natural to you. If you are still hesitating, that's normal: redo the process relying more on your first impression. This solid base greatly facilitates the following steps.
OUR RECOMMENDED PRODUCTS
⚖️ Step 2: Place your visual anchors
You are now moving to the next level of composition: creating balance points that give rhythm to your gallery.
This is where the magic happens because you discover how your eye naturally orchestrates harmony.
This step is more rewarding than the previous one because you see your wall come alive before your eyes.
🎼 Create the rhythm of your composition
Position side artworks: Place your artworks on each side of the central one, guided by your invisible guideline. The pro trick: their centers should align with this line, even if their sizes differ. It's like placing notes of music on a staff: different heights but same baseline.
⏱️ Time: 5 minutes | ✅ Successful when: The whole creates a feeling of stability and fluidity | ⚠️ Attention: Do not be distracted by the borders of the frames, focus on the visual centers
Adjust spacing to the eye: Perfect spacing? The one that seems natural when you step back. Generally, the width of a medium artwork (40-60 cm) between each piece creates an enjoyable rhythm. But trust your perception: too tight gives a feeling of suffocation, too spaced creates a sensation of abandonment.
⏱️ Time: 4 minutes | ✅ Successful when: Your gaze flows smoothly from one painting to the next | ⚠️ Attention: Avoid measuring! Your eye is more precise than a meter
🎨 Harmony check: Your composition works when you no longer notice individual discrepancies but perceive a coherent whole. If a painting "stands out" visually, it's not perfectly integrated with your guiding line. Minor adjustments accepted, major overhaul = review step 1.
✨ Step 3: The maestro's finishing touch
You are now reaching the level of mastery of professionals: this ability to perceive and correct micro-imbalances that make the difference between "correct" and "exceptional".
It's the difference between a cook who follows the recipe and a chef who reveals the flavors: you transform a technical alignment into a true artistic composition that you will be proud of for years.
🎯 Fine-tune with the expert's eye
The global critical gaze: Perform a "final inspection" by entering the room as if you were discovering it for the first time. Your brain, now accustomed to this composition, can detect subtle imperfections. Focus on your first impression: it instantly reveals points to adjust.
⏱️ Time: 3 minutes | ✅ Successful when: You feel an immediate and spontaneous satisfaction | ⚠️ Attention: Do not over-analyze: your first impression is the most reliable
Intuitive micro-adjustments: If something still bothers you slightly, trust that feeling and make small adjustments (maximum 2-3 cm). At this stage, you develop this sensitivity of a museum curator who perceives details invisible to the uninitiated.
⏱️ Time: 5 minutes | ✅ Successful when: No visual discomfort remains | ⚠️ Attention: Stop before perfectionism that spoils natural harmony
The expert progression rule: You know it's finished when you can observe your wall for 30 seconds without feeling the urge to change anything. If you continue to want to "improve", take a break of 2 hours then come back: often, your eye was already perfectly calibrated.
Congratulations! You have just mastered the secret technique of professional decorators.
This intuitive approach now gives you a considerable advantage over 90% of amateurs who struggle with measuring tools.
Let's discover the expert subtleties that will transform your wall into a true art gallery.
🏆 Museum curator's tip: To test the solidity of your alignment, photograph your wall and observe the photo: invisible defects often stand out in a picture. If your composition remains harmonious in image, it is perfectly successful! This technique allows you to detect micro-imbalances before they become bothersome.
🤔 "But what if my paintings have very different sizes?"
"How do I do when I have a large central painting and two small ones on the sides? Isn't it likely to be unbalanced?”
Excellent question that shows you are thinking like a composer! This situation is actually a formidable asset for creating a dynamic and sophisticated composition.
The trick is to align optical centers rather than borders: your brain naturally perceives the "visual weight" of each work and creates balance automatically.
Think of the windows of the finest stores: they always mix different sizes to create rhythm and visual interest.
The golden rule? If it seems harmonious at first glance, then it is!
💡 Anti-doubt test: Place your paintings of different sizes, step back 4 meters and close your eyes for 5 seconds. Open them: your spontaneous reaction will immediately tell you if the balance works. Trust this first impression!
The 5 pitfalls to avoid to protect your success
Now that you have mastered the technique, I want to spare you the classic mistakes that can waste hours of work.
These traps are insidious because they seem logical but contradict the laws of visual perception.
🔧 Wanting to "correct" with precision tools: Once your visual alignment is successful, resist the temptation to "check" it with a level! You risk destroying a perfect balance to replace it with an artificial straightness. This is the most frustrating mistake because you go from a natural result to something frozen. Remember: your eye is right!
📏 Obsession of mathematical spacing: Measuring distances to the centimeter seems reassuring but ignores visual reality. Different works create different "visual weights" which require variable spacings. Trust your natural perception of proportions: it automatically integrates these subtleties that no rule can predict.
🎯 Fixing definitively too quickly: The desire to drill immediately is understandable, but allow yourself 24 hours of reflection with your paintings “posed” against the wall. You may discover obvious improvements once the initial enthusiasm has subsided. This patience avoids 90% of later regrets.
👥 Listening too much to external opinions: Each visitor will have their opinion on your arrangement, often contradictory! Remember that this is YOUR space and that you live there daily. If the harmony satisfies you, owner of the premises, that's essential. Unsolicited advice often disrupts more than it helps.
🔄 Constantly questioning: Once you are satisfied with your alignment, avoid re-questioning it every day! This tendency towards excessive perfectionism destroys confidence in your initial success. Set yourself a rule: no modification for at least one month, so that your eye can definitely get used to this new harmony.
🛡️ 30-second self-check system: Your alignment is successful if: (1) Your first impression upon entering the room is positive, (2) Your gaze naturally circulates from one work to another, (3) No painting "shocks" you or seems out of place, (4) The whole gives you a feeling of balance and harmony. Warning sign: if you have to "convince yourself" that it's good, then an adjustment is still necessary.
Because you took the time to inform yourself, enjoy 10% discount on your first order:
ART10
⏰ Valid 72h after reading • Applicable to all our products
🙋♀️ Your most frequently asked questions about alignment without tools
⏰ "How long does it take to master this technique?"
Excellent news: 15 to 30 minutes are enough for your first success! The beauty of this method lies in its natural simplicity. Allow 2-3 compositions to fully develop your confidence, or about 2 hours of cumulative experience. A negligible investment compared to the years of visual pleasure that your perfectly harmonious walls will offer you.
💰 "Does this method also work with expensive paintings?"
Absolutely, and it's even more important! The more valuable your works are (artistically or sentimentally), the more they deserve a hanging that reveals their beauty. This visual technique is the one used in high-end galleries worldwide. Museum curators only work by eye to create these extraordinary compositions that you admire.
🏠 "Does it work on all types of walls (old, modern, textured)?"
This is precisely the immense advantage of the visual method! Unlike precision tools that "fight" against wall imperfections, your eye automatically adapts to the reality of your surface. Slightly tilted wall? Your brain compensates. Irregular texture? Your perception integrates these variations to create a harmonious balance despite everything.
🎨 "How do I manage more than 3 paintings with this technique?"
The more paintings you have, the more indispensable this method becomes! The trick is to create several coherent "visual groups" rather than a single endless line. Think musical composition: main theme (central group) and harmonic variations (lateral groups). Your eye naturally orchestrates these sub-ensembles to create an overall visual symphony.
💡 "What if I'm wrong? How do I correct without damaging the wall?"
Rest assured, this method drastically minimizes errors because you visually validate before drilling! If a real adjustment is necessary, your new holes will be so close to the old ones that a dab of filler will suffice. Pro tip: always keep some of your wall paint for these invisible touch-ups.
🏆 Your transformation into an intuitive decorator is complete
In a few days, when you enter your living room and your gaze is immediately drawn to this perfect harmony of your aligned paintings, you will feel that deep satisfaction of well-done artistic work.
Your guests will instantly notice this new elegance in your space, this sophistication that transforms a simple decoration into a true personal gallery.
You will have gained this valuable confidence that will allow you to dare other bold compositions.
But beyond the visual beauty, you have developed a transferable skill which will enrich all your future decor projects: this ability to trust your eye, to perceive natural balance, to compose with space.
A talent that now distinguishes you from those who remain dependent on measuring tools and brings you closer to true atmosphere creators.
The understanding was indeed the most difficult part: now that you master the principles, each new hanging will be smoother and more intuitive.
Your first step? Position your paintings today against the wall according to this method and observe this revelation of natural harmony.
The art of visual composition awaits only your boldness to express itself!
🎨 Your new decorative signature: You now possess this rare sensitivity that transforms any wall into an artistic composition. This mastery is definitive and will accompany you in all your future spaces. Dare now to create the gallery you dreamed of!
📚 To go further in the art of hanging
Now that you’ve mastered visual alignment, discover our technical guides to adapt your method to all types of walls : concrete, plasterboard, stone, hollow walls... Each surface has its own specific features for a secure and lasting attachment.


