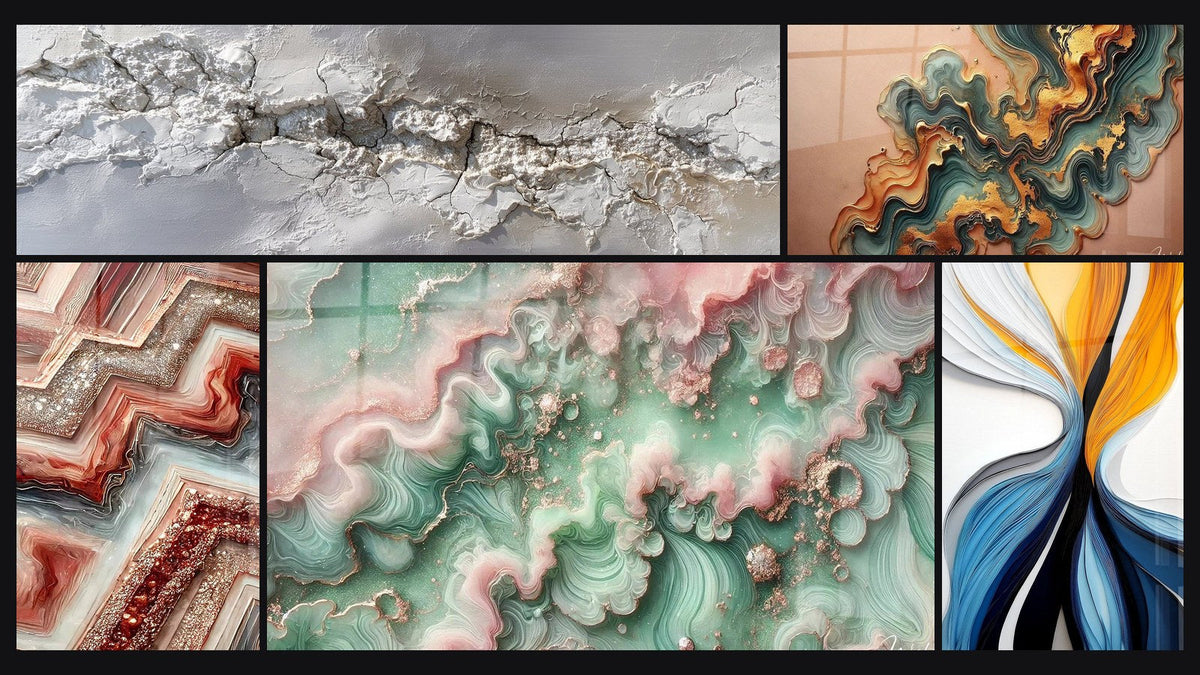
Retro-futuristic wall art: between nostalgia and innovation
October 11, 2025 · 16 min read · by Walensky
You are standing there, in your living room, contemplating that white wall that seems to mock you for months. You've already tried a few "classic" paintings, but nothing really reflects your unique personality - that part of you that loves innovation while still having a fondness for the golden age of the 80s.
You imagine this space transformed by a work that would capture this fascinating duality: the nostalgia for a dreamed future mixed with modern aesthetics. Something that will make your guests say "Wow, where did you get this amazing piece?" while creating that particular atmosphere you are looking for.
The problem? You've already browsed dozens of stores and websites, but everything you find seems either too "vintage" tacky or too "futuristic" cold. The pieces you really like are either overpriced or of questionable quality.
This is perfectly normal, and it’s not your taste that's at fault. The real problem is that authentic retro-futuristic wall art requires a fine understanding of this particular aesthetic universe, where every detail counts to create this nostalgic magic.
By the end of this article, you will know exactly how to choose and integrate retro-futuristic wall art that will transform your interior into a space where past and future meet harmoniously, creating that unique atmosphere you dream of.
Why is retro-futuristic art the decorative choice for 2025?
Retro-futuristic wall art is not just a passing trend. It's an emotional response to our time: we live in a technologically advanced present that our grandparents imagined, while still having nostalgia for their optimistic visions of the future. Imagine waiting a few more months to decide... Meanwhile, this aesthetic becomes increasingly popular, and authentic pieces become rarer. It’s like hesitating to buy a vinyl record from the 80s when no one wanted them!
🎨 Customer testimonial: "I installed a retro-futuristic artwork in my living room in October. In three months, I've received more compliments on my decor than in ten years! My friends are now asking me for advice for their own interiors. This piece has literally transformed the energy of my home."
Conversation with a decor expert
Retro-futuristic art creates a "temporal bridge" in your interior: it awakens the reassuring nostalgia of the past while projecting an optimistic vision of the future. The result? A space that breathes personality and originality, where every glance reveals new fascinating details.
Understanding what makes your decor bland (and why it's not your fault)
Do you recognize yourself in these situations? You walk into your living room and... nothing inspires you. Your guests sit politely but never ask questions about your decor. Yourself, you avoid certain angles of view because "something is missing" without being able to say what.
What's really happening is that your decor suffers from the "catalog syndrome": it's technically correct but emotionally neutral. The problem isn't your taste, it's that you haven't found that piece yet that will reveal your unique personality.
It’s like having a wardrobe full of beautiful but impersonal clothes. You are well dressed, but no one remembers you. You lack that visual signature that defines you.
The trap of "safe" decorations
Contrary to what one might think, choosing neutral works out of fear of making a mistake is exactly what makes an interior forgettable. Decorating magazines have created the illusion that there's a "universal good taste," but in reality, memorable interiors are those that embrace a personality.
Imagine two restaurants: one with beige and harmless decor, the other with a marked atmosphere that tells a story. Even if the first is "technically" correct, it’s the second that you will remember and return to.
In your living room, it's the same thing: playing it safe guarantees a bland result. Embracing a strong aesthetic like retro-futurism gives you that personality that transforms a space into "your" space.
🔍 Quick test: Look at your current living room and ask yourself: “If a friend described this space without mentioning the furniture, what personality would they guess?” If you don't have a clear answer, that’s exactly the problem retro-futuristic art can solve.
The error of decorative accumulation
Many think that it is necessary to multiply decorative elements to create an atmosphere. In reality, it's often the opposite: a strong and well-chosen piece can transform an entire space more effectively than ten "cute" objects.
It’s like in cooking: it’s better to highlight one exceptional ingredient than ten average ingredients mixed together. A quality retro-futuristic painting becomes the "conductor" that harmonizes all the other elements of the room.
What’s the result? Instead of having a “decorated” living room, you have a living room “with soul” - and that's exactly what makes the difference between a house and an interior from a magazine that is quickly forgotten.
The myth of the “unique style”
You’ve probably already heard that you need to “choose a style and stick with it.” But this rigid rule ignores a simple truth: we are all multifaceted. You can love modern comfort AND retro-futuristic boldness.
Look at your music playlist: you surely listen to jazz, rock, electro depending on your mood. Your decor can work the same way: a contemporary base with retro-futurist accents that reveal your visionary and creative side.
This “hybrid” approach creates richer and more authentic interiors than monolithic decors. It reveals your personal complexity instead of boxing you in.
3 signs that your decor lacks personality:
- The “pretty but…” syndrome: You find your interior correct, but you can’t explain why you don't love it. It’s a sign of a decor technically successful but emotionally empty.
- Decorative invisibility: Your guests never make spontaneous comments about your decor. An interior with personality always generates reactions, even subtle ones.
- Visual fatigue: You subconsciously avoid certain viewpoints or you no longer “see” your living room. That’s because nothing captures your gaze or stimulates your imagination.
The trigger element: the signature piece
What really makes the difference is this unique piece that becomes the “emotional anchor point” of your space. In retro-futuristic art, this piece works as a revealer: it reveals your visionary side, your open mind, your ability to reconcile past and future. It’s the domino effect: once this piece is installed, all other elements of your decor naturally find their place and meaning. You can verify it yourself: interiors that mark you always have a strong piece that sets the tone.
Golden rule of personalized decoration: It’s better to have one statement piece that reflects you than ten pretty pieces that could be in anyone's home. Test it: look at your favorite interiors in magazines, there is always an element that “makes the difference”.
| ❌ “Catalog” decor | ✅ Personalized decor | 💡 Why it works | 🎯 Visible result |
|---|---|---|---|
| Accumulation of “cute” objects | One statement piece that sets the tone | The eye needs a focal point to structure the space | Gazed attracted, spontaneous conversations |
| Neutral colors out of fear | Assumed palette with nuances | Colors create emotion and memorization | Distinctive atmosphere, guests who remember |
| Unique style “by principle” | Reflected mix of styles | Reflects the real complexity of your personality | Living interior that evolves with you |

How to integrate retro-futuristic art into your interior (progressive method)
🎯 Overview of the method: We will proceed in 3 steps like an architect: first lay the visual foundations (choose and position the artwork), then build the atmosphere (adapt lighting and colors), finally refine the details (accessories and finishes) to create this perfectly integrated retro-futuristic atmosphere.
Essential criteria for your retro-futuristic artwork
Strategic installation of your artwork
Identify the focal wall: Choose the wall you see first when entering the room, usually facing the entrance or visible from the main passageway. It is this wall that will create maximum impact and set the tone for the entire space.
⏱️ Time: 10 minutes | ✅ Successful when: You can view the artwork from 3 different points in the room | ⚠️ Attention: Avoid walls with too much traffic - the artwork needs to be able to "breathe" visually
Calculate the ideal height: Place the center of the artwork at 5.25 ft (1.60m) from the floor (standard gallery height). This height creates a natural connection with the eye and avoids the "floating" effect that is too high or "crushing" too low.
⏱️ Time: 5 minutes | ✅ Successful when: You can admire the artwork comfortably sitting or standing | ⚠️ Attention: Adjust according to your height - the artwork should be at your natural eye level
Create breathing space: Leave at least 12 inches (30cm) of free space around the artwork. This "negative space" highlights the artwork and avoids the "collage" effect that diminishes its visual impact.
⏱️ Time: 15 minutes | ✅ Successful when: The artwork seems to "float" on the wall without visual competition | ⚠️ Attention: Temporarily move other decorative elements to judge the effect
🎨 Impact check: Step back 10 ft (3 meters) from the artwork. It should immediately capture your attention and create that feeling of "Wow, this is exactly what was missing!". If you feel hesitation, it's often the height or location that needs to be adjusted. Take the time to refine - this step determines 80% of the final success.
RECOMMENDED PRODUCTS
Step 2: Harmonize lighting and complementary colors
Now that your artwork is in place, you enter the "revelation" phase: it's the lighting and surrounding colors that will bring the retro-futuristic tones to life and create this particular atmosphere. This step is more subtle but it’s what transforms a simple decoration into a true visual experience. The snowball effect begins here: each adjustment amplifies the beauty of the main artwork.
Atmospheric elements to consider
- Accent LED lighting: Opt for adjustable spotlights with variable color temperature (3000-4000K). These lights reveal the nuances of the artwork without creating annoying reflections. Invest in quality - poor lighting can tarnish even the most beautiful artwork.
- Complementary colors: Introduce touches of colors present in the artwork via cushions, a throw or decorative object. These color reminders create visual consistency that unifies the space without overloading it.
- Complementary textures: Slightly shiny materials (silk, satin, brushed metal) echo the retro-futuristic aesthetic by subtly capturing and reflecting light.
Creating a retro-futuristic atmosphere
Install accent lighting: Place an indirect light source that illuminates the artwork at an angle (30-45°). This gallery technique reveals reliefs and texture while avoiding direct reflections that "break" the visual effect.
⏱️ Time: 20 minutes | ✅ Success when: The artwork seems "illuminated from within" | ⚠️ Attention: Test the lighting in the evening - the effect should be magical even in artificial light
Adjust overall temperature: Slightly reduce the general lighting of the room to create a subtle contrast. This technique highlights the main artwork while creating a more intimate and sophisticated atmosphere.
⏱️ Time: 10 minutes | ✅ Success when: The artwork naturally becomes the luminous focal point | ⚠️ Attention: Keep enough light for daily activities
Step 3: Fine-tune details and accessories
This final step takes you from "informed amateur" to "connoisseur." This is where you develop your eye for the details that make a difference and create that sophisticated coherence that impresses your guests. The final result? A living room that tells a story, where each element dialogues with the others to create a perfectly balanced and personalized retro-futuristic atmosphere.
Expert finishing touches
Select accompanying objects: Choose a maximum of 2-3 items that recall the retro-futuristic aesthetic: a lamp with geometric lines, a brushed metal vase, a cushion with graphic patterns. These objects create a "visual echo" without competing with the main artwork.
⏱️ Time: 30 minutes | ✅ Success when: The whole seems naturally coordinated | ⚠️ Attention: Less is more - avoid decorative clutter
Create visual transitions: Arrange the elements according to the rule of triangles: imagine invisible lines that connect your decorative objects. This composition technique naturally guides the eye and creates a professional harmony.
⏱️ Time: 15 minutes | ✅ Success when: The gaze flows smoothly through the space | ⚠️ Attention: Vary the heights to avoid the "alignment" effect
Expert progression rule: Each step should amplify the effect of the previous one, not compete with it. If an addition diminishes the impact of your main artwork, then either reposition it or remove it. Retro-futuristic art shines through its ability to create a strong impact with well-chosen elements.
Congratulations! You now master the fundamentals of retro-futuristic integration. But to really make a difference, here are some expert subtleties that will transform your living room into a true personal gallery and give you the confidence of someone who perfectly masters their subject.
🎖️ Collector's tip: Create a "temporal dialogue" by subtly placing an authentic vintage object (80s-90s) near your modern retro-futuristic artwork. This juxtaposition creates a fascinating sense of historical depth - your guests subconsciously capture this temporal richness without being able to explain it. Example: An old Casio calculator casually placed on a nearby shelf.
Reader question
"I love the idea but I'm afraid my spouse will find it 'too much' or that it won't appeal to everyone..."
I completely understand this apprehension! It’s exactly the kind of doubt all our clients feel before taking the plunge. The beauty of retro-futuristic art is that it acts as a personality revealer: people like you will be seduced, others… well, does their opinion really matter for your daily happiness? Experience shows that even the most reluctant eventually appreciate originality and quality. And then, your interior should first please YOU - you are the one who lives there every day!
💡 Approval strategy: Start by showing examples of successful integrations (magazine photos, Instagram) to familiarize those around you with the aesthetic. Once they visualize the sophisticated final result, resistance naturally fades.
— Our selection


The 5 mistakes that ruin the retro-futuristic effect (and how to avoid them)
After supporting hundreds of clients, I notice that certain mistakes come back systematically. The good news? They are all easily avoidable when you know them! These errors don't reflect a lack of taste on your part, but simply classic pitfalls of this particular aesthetic.
- ⚠️ Overloading with too many neon elements: The desire to create a "cyberpunk atmosphere" often leads to multiplying bright colors. Result: a "nightclub" effect that quickly fatigues. The solution? Limit yourself to 2-3 bright colors maximum and balance with sophisticated neutrals. It’s a mistake even beginner decorators make! 🎨 Neglecting natural lighting: Installing a retro-futuristic artwork without considering daylight can create disappointing effects. The magnificent artwork at night may appear dull during the day. Always test the location at different times to ensure that the impact remains constant. 📏 Incorrect sizing: Choosing an artwork that is too small for fear that it will "take up too much space" is mistake number 1. An undersized artwork loses all its power of attraction and looks "shy" instead of "sophisticated". Dare to choose the size that corresponds to your wall! 🎭 Mixing all futuristic styles: Confusing retro-futurism with hardcore science fiction or cyberpunk creates a confusing mix. Retro-futurism has its own aesthetic, more gentle and nostalgic than these other currents. Stay within the specific universe you have chosen. 🔧 Neglecting the hanging quality: Using low-quality fixings for an exceptional artwork is like wearing trainers with a suit. Invest in a professional hanging system that enhances your decorative investment.
🛡️ 4-point verification system: Before validating your installation, check that the artwork looks good under different lighting conditions, that it doesn't create annoying reflections, that it harmonizes with your existing furniture, and that it generates that "Wow!" feeling even after several days. If any of these points fail, an adjustment is necessary.

Frequently asked questions about retro-futuristic art
For a significant impact, allow 150-300€ for a quality artwork (60x90cm), plus 50-100€ for accent lighting and small accessories. It's an investment that transforms your space for years! To optimize, start with the main artwork - it alone can already revolutionize your living room.
The visual impact is immediate upon installation of the main artwork! But the "perfectly integrated" effect develops over 2-3 weeks, as you naturally adjust the lighting and details. That's normal - even professional decorators refine their creations over time.
Absolutely! Retro-futuristic art adapts particularly well to contemporary, industrial, and even Scandinavian interiors. The secret? Choose artworks with the right proportion of bright/neutral colors according to your decorative base. In a very neutral interior, dare more colors; in an already colorful space, prioritize more subtle pieces.
Excellent question! Choose a work that evokes a positive emotion (nostalgia, optimism, creativity) rather than just "it's pretty". Authentic retro-futuristic artworks have this ability to reveal new details over time - that's what avoids boredom. And besides, this aesthetic transcends decades: it was modern in the 80s, and it still is today!
For enthusiasts, yes! Programmable LED systems can evolve the colorful ambiance according to the time of day or your moods. But be careful: start by mastering static lighting before exploring these possibilities. The "nightclub" effect awaits eager individuals! Retro-futuristic elegance lies in subtlety.
Your retro-futuristic transformation begins now
Imagine yourself in a few weeks, entering your transformed living room. This retro-futuristic artwork perfectly integrated immediately captures your gaze and provides you with that discreet pride of owning something unique. Your guests naturally slow down to admire it, and you see in their eyes that admiring curiosity that says a lot about your sure taste and originality.
But beyond the purely decorative aspect, you have developed a true understanding of contemporary art and space arrangement. This acquired confidence is felt in your other decorating choices - you no longer buy by chance, you compose with intention. Your interior finally tells your personal story.
Now that you master the essential principles, the only thing separating you from this transformation is taking action. Start by identifying the focal wall of your living room - that's where everything will play out. Then trust your instinct: the artwork that gives you that feeling of "Finally, that's exactly it!" awaits you.
<strong>🚀 Your mission if you choose to accept it: You now have all the keys to create this retro-futuristic interior that resembles you. The art of living in a space that inspires you every day is no longer a dream, it's a project within your reach. Your living room of tomorrow starts with your decision today.
Explore our collections