

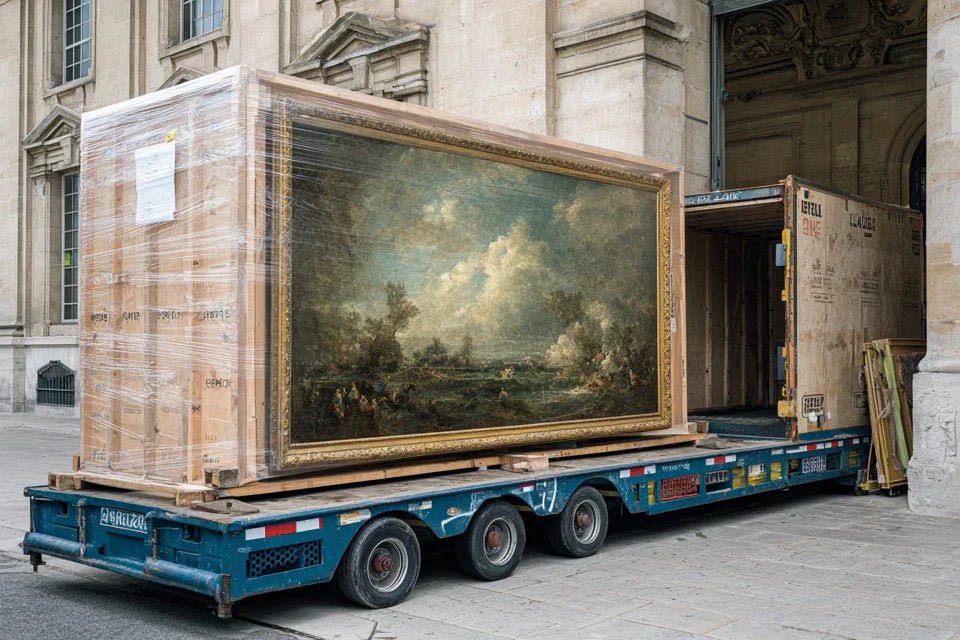
You can already imagine the shards of glass scattered in the box, your investment reduced to nothing. This anxiety prevents you from sleeping, you who have saved for months to afford this unique piece.
Perhaps you’ve tried wrapping your previous paintings with newspaper and tape, only to discover scratches or cracks. Or worse, you trusted the movers who stacked your artworks like ordinary boxes.
Rest assured, it's not your fault! Professional artisanal packaging techniques are not improvised. Most people ignore that 95% of damages occur due to improper conditioning, not the transport itself.
In 8 minutes, you will master the museum conservator’s method for wrapping your glass artworks. You'll know exactly which materials to use, in what order to proceed, and how to guarantee total protection. No more anxiety in your stomach: you will be serene and proud of mastering this expert technique.
Why does your glass artwork deserve star treatment right now?
Contrary to popular belief, a glass artwork is not just “fragile, handle with care.” It's a complex assembly of materials that react differently to shocks, vibrations and temperature variations. Waiting until the last minute to take care of it is like trying to protect a soufflé once it’s out of the oven.
💔 Real testimonial: Marie, a passionate collector, says: “My vintage Murano artwork worth €2800 broke during my move in Paris. The mover had leaned it against a wall for 3 hours. Just the vibrations from a neighboring truck were enough to create an invisible crack that spread during transport.”
💬 Conversation with a decor expert
The conservator's golden rule: A properly packaged acrylic painting can survive a 50 cm drop without damage. Protection is built in 3 complementary layers: contact, absorption and shielding. Allow 30 minutes for professional packaging that will guarantee you 10 years of peace of mind.
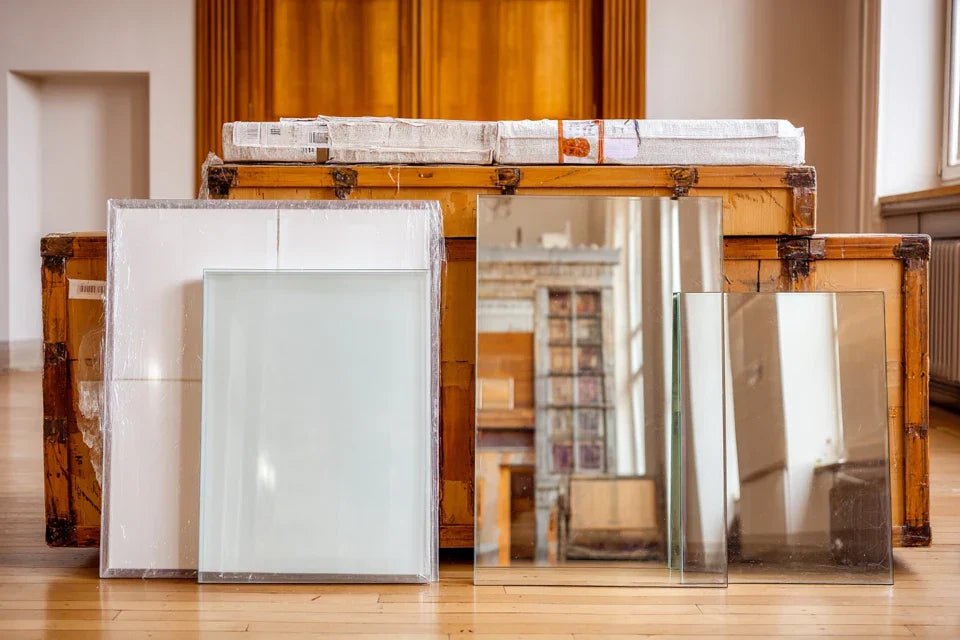
Understanding what's really happening in your moving box
Perhaps you recognize yourself in these situations: you hear suspicious noises coming from the boxes, you discover traces of friction on the frame, or you find mysterious shards at the bottom of the box. You think you've packed it badly, but it's not your fault.
The real problem is that no one has explained to you that in a moving truck, your belongings undergo constant micro-shocks. Even when stationary, the painting continues to vibrate, materials rub against each other, and pressure points shift.
It's as if your work of art spends 6 hours in a washing machine drum running at slow speed. Now you understand why newspaper isn't enough!
The truth about vibrations no one tells you
Everyone believes that big shocks are the most dangerous. In reality, it is the constant micro-vibrations that crack the glass from the inside, like drops of water that pierce stone.
Imagine a violinist playing the same note for 6 hours: even at low volume, the string will eventually relax or break. This is exactly what happens to your poorly protected painting.
This discovery will change the way you see packaging: instead of trying to create a hard shell, you will learn to build an amortizing cocoon that breathes with the movements.
🧪 Revealing test: Place your hand flat on a table and gently tap it with your other hand for 2 minutes. Do you feel your palm becoming sensitive? That's exactly what a poorly protected painting experiences throughout the journey!
The fatal error of "maximum tightening"
You were surely told to "tighten well so that it doesn't move". This is the biggest possible mistake! Overly tight packaging directly transfers all shocks to the glass, as if you were receiving blows without boxing gloves.
Think of an egg in a carton: it never touches the walls directly, it floats in its recess. It is this suspension that protects it, not compression.
As a result: you discover pressure points on your frame, scratches on the corners, and sometimes star cracks where the packaging pressed too hard.
The mystery of "protections that don't protect well"
You invested in thick bubble wrap, foam, polystyrene... and yet, it doesn't always work. The secret that professionals know: these materials only protect if they are used in the right order.
It's like wearing a wool sweater directly on your skin in summer: the material is good, but poorly placed in the sequence. Each layer has its precise function and its moment of intervention.
When you see marks on your artwork despite "all this protection", it's because the materials have been fighting each other instead of collaborating.
🔍 3 warning signs to watch out for :
- Scratching noises when you shake the box : Your protective layers are not solidary, they slide against each other like tectonic plates
- Packaging that deforms under pressure : The structure is not rigid enough, your artwork will surf in its box instead of being stabilized
- Protective material that compresses easily : It will collapse along the way and lose its cushioning power, like a deflated cushion
The trigger factor that 90% of people ignore
What really makes the difference is the temperature of the glass at the time of packaging. Glass packaged in a cold environment into a warm one will expand and crack its packaging from the inside, like an ice cube bursting in lukewarm water. You can easily identify it: if your artwork comes out of a cool room (cellar, garage) and you package it in a heated room, wait 2 hours for it to acclimatize.
The rule of thermal balance : Artwork, packaging materials, and environment must be at the same temperature for a minimum of 1 hour before packaging. Check by touching: no element should be colder or warmer than your hand.
| ❌ Common belief | ✅ Reality | 💡 Explanation | 🎯 Practical benefit |
|---|---|---|---|
| The tighter it is, the better protected it is | Suspension absorbs better than compressionShocks are transmitted less in a flexible materialZero pressure points on your artwork|||
| Bubble wrap is enough for everything | Each material has its specific functionLayered protection like an onionMaximum efficiency with controlled budget|||
| Big shocks are the most dangerous | Continuous vibrations do more damageMaterial fatigue due to repeated stressProtection adapted to the real danger|||
| A sturdy carton protects better | Internal cushioning is more importantExternal rigidity without internal flexibility transmits everythingYour artwork floats like in a cocoon
The museum conservators' method in 3 simple steps
Now that you know the real stakes, let's get practical! The beauty of this method is that it follows a natural logic: we dress the artwork like we dress for winter, layer after layer. You will progress from the most delicate (direct contact) to the most robust (outer packaging), like an architect building foundations to roof. At the end, you will have created a protective case that you will be proud of.
🎯 Overview of the method: Step 1 - Creating the protective skin (gentle contact), Step 2 - Building the shock absorber (impact absorption), Step 3 - Outer shielding (transport resistance). Each step takes 10 minutes and gives you a growing sense of security.
Step 1: Create the protective skin (the caress that saves)
This first step is crucial because it will perfectly hug the shapes of your artwork. Like the foundations of a house, if this base isn't perfect, everything else will be fragile. You will feel an immediate satisfaction seeing your work wrapped with as much delicacy as a newborn.
🧰 Materials for the first layer
- Silk paper or microfiber cloth: Resembles ultra-thin gift wrap, serves to create an anti-scratch barrier. Buy it from a packaging or art store, check that it doesn't pill when touched. Avoid newspaper which contains destructive acids for artistic glass.
- Professional food grade plastic film: Thicker than kitchen wrap, it holds the silk paper in place without creating creases. Recognize good quality by its resistance to stretching: it shouldn't tear easily. It provides a perfect seal against humidity.
- Delicate masking tape: Specially designed not to leave any traces, it resembles painter's tape but softer. Its slightly translucent color guarantees that it won't mark. It allows you to fix without damaging delicate surfaces.
Now let's get moving with the precision of a watchmaker
🎨 The art of delicate wrapping
Clean and prepare the surface: Wipe the glass with a slightly damp microfiber cloth, then dry immediately with a dry cloth. This step removes fingerprints that can create adhesion points with the packaging. It's easier than you think, like cleaning a mirror.
⏱️ Time: 3 minutes | ✅ Successful when: The glass shines without traces or condensation | ⚠️ Attention: Do not use chemical products that could react with the artistic glass
Place the first layer of tissue paper: Unroll the tissue paper and gently place it on the front of the artwork, starting from the center towards the edges. Smooth with the palm of your hand to remove air bubbles. This technique avoids creating points of tension that could turn into streaks.
⏱️ Time: 4 minutes | ✅ Successful when: No visible creases, paper well adhered | ⚠️ Attention: Beginners pull too hard on the paper, you have to go as gently as a caress
Secure with plastic film: Wrap the plastic film around the artwork starting from the back, overlapping each turn by 50%. Maintain constant but gentle tension, as if you were swaddling a baby. The film must mold the shapes without creating a ridge.
⏱️ Time: 3 minutes | ✅ Successful when: Smooth surface, transparent film with no bubbles | ⚠️ Attention: Too much tension can warp thin frames
✅ Step 1 Check: Your artwork should look like a candy wrapped in cellophane: perfectly smooth surface, invisible but present protection, no noise when you tap it lightly. If you feel any roughness, start this step over. Otherwise, congratulations! You have just mastered 50% of the protection.
OUR RECOMMENDED PRODUCTS
Step 2: Build the cushioning (smart protection)
Congratulations, you are moving to the next level! Now that your artwork has its protective skin, you are going to create a personalized cushioning system. This step is more rewarding because you see your protection gain thickness and solidity. The snowball effect begins: each layer multiplies the effectiveness of the previous one.
🛡️ Second Layer Materials
- Closed-cell polyethylene foam: Comes in sheets 5-10mm thick, pearly white, slightly elastic to the touch. Unlike ordinary foam, it does not sag over time and is moisture resistant. Find it at packaging specialists or order online. It absorbs 90% of vibrations. Large bubble bubble wrap (minimum 10mm): Small bubbles burst too easily and lose their effectiveness. Large bubbles maintain their shock absorption capacity even under pressure. Test by pressing: they should resist finger pressure. Visible impact: protection against direct impacts. Corner protection cardboard: Protective L-pieces that protect the corners, the most vulnerable points of any artwork. Choose them long enough to extend beyond the corners by 2 cm on each side. They transform weak points into strong points.
🏗️ Building the cushioning fortress
Cutting and adjusting polyethylene foam: Measure your artwork and cut out two rectangles of foam extending 5 cm on each side. Place one rectangle in front, one behind, and temporarily secure with delicate adhesive. This double protection creates a custom mattress that perfectly hugs your work.
⏱️ Time: 5 minutes | ✅ Successful when: Foam is well adhered, equal overhangs | ⚠️ Attention: Sharp cutter to avoid uneven cuts
Installing corner protection: Slide a corner protector onto each corner of the artwork, ensuring it extends slightly. Secure them with adhesive. These corners will redistribute impacts over the entire length instead of concentrating them on the point of impact. It's the principle of a bicycle helmet.
⏱️ Time: 4 minutes | ✅ Successful when: Corner protectors are securely attached, corners are completely covered | ⚠️ Attention: Poorly fitted corner protectors can create pressure points
Wrapping bubble wrap strategically: Start with the most exposed sides (usually the longest), then wrap crisscrossing the bubbles. Each area should be covered by a minimum of 3 layers. Think of a chainmail shirt: protection comes from intelligent layering.
⏱️ Time: 6 minutes | ✅ Successful when: Uniform protection, no thin areas | ⚠️ Attention: Avoid bubble packs that create bumps
🎯 Step 2 Check: Your artwork now looks like a professional package. Ultimate test: press firmly on different places, you should feel no hard resistance. If you hear bubbles popping, add a layer. Your protection is now 80% effective!
Step 3: Create the outer shielding (the final fortress)
You reach the level of mastery of professionals! This last step will transform your packaging into a real portable safe. You will feel legitimate pride contemplating this protection worthy of the greatest museums. Your artwork could now travel to the four corners of the world without risk.
🏰 The ultimate protection
Choosing and preparing the transport carton: Select a double corrugation carton extending at least 10 cm on each side of your packaged artwork. Reinforce the corners with packaging tape. A quality carton does not bend when you press on it and resonates like wood when you tap.
⏱️ Time: 4 minutes | ✅ Successful when: Rigid cardboard, reinforced corners | ⚠️ Attention: Carton too small = fatal compression of your protection
Create the protective bed: Cover the bottom of the carton with 5 cm of cushioning particles (styrofoam, wood chips, or crumpled paper). Gently place your artwork in the center, then fill all the side spaces. Your work must float in the center without touching the walls, like an astronaut in their capsule.
⏱️ Time: 8 minutes | ✅ Successful when: Artwork centered, no contact with the walls | ⚠️ Attention: Particles too heavy can compress and lose their effectiveness
Finalize and test the protection: Cover the top with an additional 5 cm of particles, close the carton and shake gently. You should hear no movement noise. Stick the packaging adhesive in a cross pattern on all sides for maximum rigidity.
⏱️ Time: 5 minutes | ✅ Successful when: Complete silence during the shaking test | ⚠️ Attention: Underestimation of cushioning = artwork moving inside its carton
The pros' progression rule: You can move on to the next step when the previous one seems to you natural and obvious. Take your time on each step, haste is the enemy of perfection. Better 45 minutes of careful work than 20 minutes of stress and catch-up.
Congratulations! You have just mastered a technique that 95% of individuals do not know. Here are now the expert subtleties that make the difference between a good package and a museum curator's package. These tips give you a considerable advantage and allow you to handle all special cases.
🎭 Curator's tip: Place a silica gel sachet (recovered from shoe boxes) in your packaging before closing. It will regulate humidity throughout transport and avoid condensation which can cause mixed glass-wood supports to warp. This technique is used in all museums worldwide!
🤔 "What if my painting has a very particular shape?"
"My round/triangular/textured glass painting... Does it still work?"
Excellent question! I understand your concern because non-standard shapes seem more complicated. Rest assured, the method adapts perfectly: for rounded shapes, you create an "imaginary box" with foam that follows the shape. For reliefs, you fill the hollows with custom-cut foam. The principle remains the same: create a uniform shape that fits into a standard rectangular carton.
💡 Actionable tip: Trace the outline of your artwork on cardboard, cut it out and use this template to trim your protective foam. You'll get a perfectly fitted packaging in 10 minutes extra.
⚠️ Pitfalls that can ruin your protection
Now that you master the technique, I’m going to reveal the fatal mistakes even some professionals make. These errors are sneaky because they aren't immediately visible, but they compromise all your protection. I prefer to tell you about them now to avoid unpleasant surprises.
- ⚡ Wrapping a still-cold artwork: It’s tempting to save time by wrapping it directly after taking it out of the garage or cellar. Result: the glass expansion will crack the packaging from the inside. Solution: let your artwork acclimatize for 2 hours at room temperature. This is the most common mistake, even pros get fooled!
- 🎯 Using ordinary tape: Office tape yellows, becomes sticky and can leave permanent marks on your frame. You'll discover the damage months later. Solution: invest in specialized masking adhesive, it costs 3€ more for absolute peace of mind.
- 🔄 Reusing packaging materials: Compressed foam and burst bubble wrap have lost their cushioning capacity. You think you're protecting but you create weak points. Solution: new materials each move, it’s an investment that protects thousands of euros worth of art.
- 📦 Underestimating the void space: "It fits, that's good!" No! If your artwork touches the walls of the carton, it will directly suffer all shocks. Solution: minimum 10 cm of space on each side, even if it requires a larger carton.
- ⏰ Wrapping at the last minute: Under stress, we rush the steps, we tighten too much, we forget details. Your protection becomes your worst enemy. Solution: wrap your artworks 48h before moving day, calmly and with concentration.
🔍 Anti-error verification system: Before transport, perform these 4 checks: (1) Shake gently - no noise = OK, (2) Press on all corners - uniform resistance = OK, (3) Check the temperature - artwork warm to the touch = OK, (4) Inspect the adhesives - color unchanged = OK. If one point fails, start this part again.
🎁 Special readers offer
Because you took the time to inform yourself, enjoy 10% discount on your first order:
🙋♀️ Frequently Asked Questions from Our Expert Readers
Realistic budget: €15-25 of materials to protect a 50x70cm painting (foam €8, bubble wrap €4, adhesives €6, cardboard €7). Time: 45 minutes the first time, 25 minutes when you master it. Optimization: buy your materials in bulk if you have several artworks, you divide the cost by 3. Concrete example: Marie protected her 5 paintings for a total of €35 instead of paying €150 to a specialist.
This fear is perfectly normal and even reassuring: it shows that you are aware of the value of your artwork! The method I have given you is the one used by museums for 50 years, it has been proven on millions of artworks. Psychological advice: start by practicing on a frame without value (family photo in a glass frame). You will see that it is simpler than expected and you will gain confidence.
Beware of traps! Most movers use the quick method: newspaper + tape + hope. They are not specialized in art and their insurance rarely covers the sentimental value. Realistic budget: having a specialist pack it costs €80-120 per painting. My recommendation: pack yourself, entrust the transport to the movers with visible "FRAGILE - ART" labeling.
Excellent question from a pro! Thermal shocks are insidious but destructive. Absolute rule: do not unpack immediately after transport. Leave the box closed for 4-6 hours in the destination room to equalize temperatures. Otherwise, you risk instantaneous condensation which can detach mixed elements (glass glued to wood). Warning sign: condensation on the glass = wait longer!
Strategy of smart nomad! Yes, but only partially. Reusable: cardboard (if intact), corner protectors, plastic film. To be renewed: foam (compresses), bubble wrap (burst bubbles), filling particles (settle). Pro tip: photograph your perfect packaging to reproduce it identically at the next move. Investment: €8 replacement kit vs €25 complete each time.
🌟 Your transformation into an expert in artistic protection
In a few weeks, when your friends discover your works perfectly intact in your new home, you will feel that unique pride of a job well done. You will never again be that person who agonizes throughout the move imagining the worst. Now, you have the confidence of a connoisseur who masters their art.
This skill goes far beyond simply moving: you now know how to protect your artistic investments for storage, lending, shipping. You have acquired the eye of a curator who anticipates risks and puts in place the right protections. This expertise gives you new assurance in your art acquisition choices.
The hardest part was understanding the hidden issues and overcoming preconceived notions. Now that you master the principles, your first step will be to gather your materials and practice on a first piece. You'll be surprised at how natural and satisfying this method becomes from the second time!
🚀 Your new superpower: You now possess expertise that even some gallerists don't have! Your works of art deserve this museum protection, and you alone can offer it with so much passion and precision. The perfect time to start is now.


