⏱️ Reading time : 8 minutes
You've just hung your beautiful new artwork above the sofa, but something feels off. It seems to float in empty space, not really aligned with the furniture, nor truly centered on the wall.
You step back a few paces, tilt your head, squint... This persistent feeling that something is wrong deeply irritates you. Your guests cast discreet glances at this artwork that seems to be searching for its place.
You've probably tried repositioning it several times, relying on your instinct or the contradictory advice found online. But the result still doesn't satisfy you.
Rest assured, this isn't a lack of taste on your part, nor a defect in your artistic eye. The problem simply comes from the fact that no one has explained to you the true rules of decorative alignment.
By the end of this article, you will know exactly how to position your artworks to create perfect visual harmony, and your rooms will finally have that natural elegance you seek.
🎯 Why aligning your artworks instantly transforms your interior?
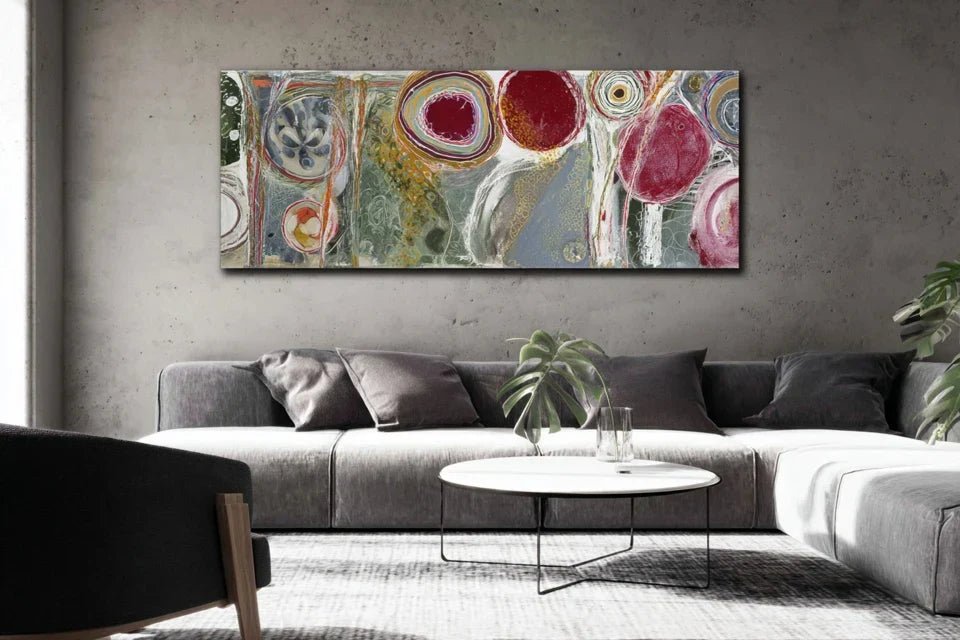
Aligning an artwork isn't just an aesthetic matter; it’s the detail that reveals your decorative personality. Imagine entering a living room where every element seems naturally in its place: that's exactly the effect of a mastered positioning.
In the next few minutes, you will discover why some interiors exude the serenity and sophistication you admire in others.
💡 Customer testimonial: "I repositioned my 15 cm artwork to the left following the furniture rule, and my friends immediately asked if I had changed my decor. The effect was striking as I only touched one thing!"
💬 Conversation with a decorating expert
"I'm afraid my artwork won’t be well centered if I align it with the furniture..."
Relax! It's exactly the opposite. An artwork aligned with its furniture creates a
visual unity that gives the impression of a perfectly organized ensemble, even in an asymmetrical space!
"But I was told you always had to center it on the wall..."
Who told you that? Modern rules prioritize
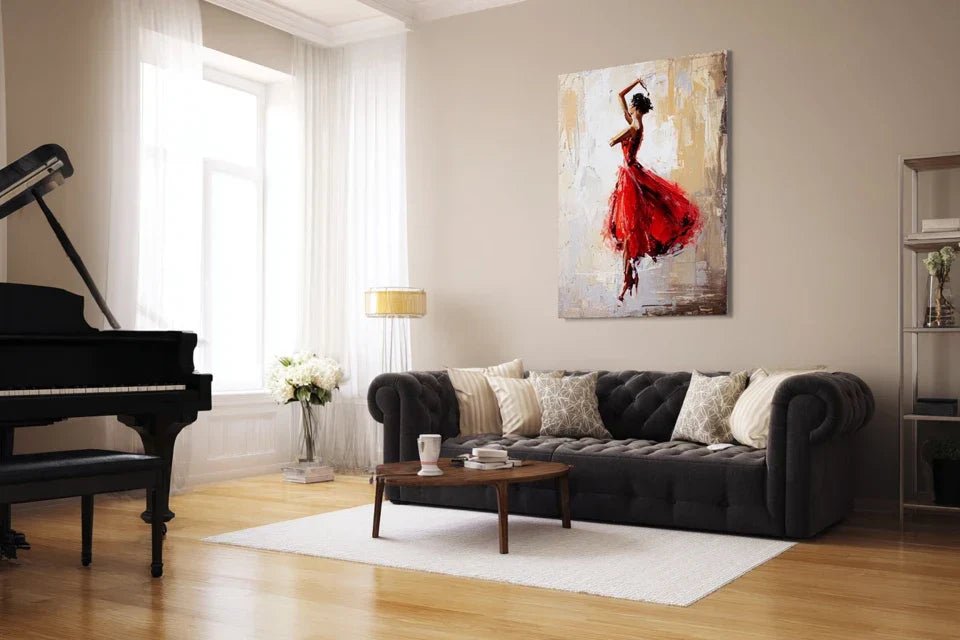
functional harmony. An artwork centered on a bare wall can seem lost, while an artwork linked to its furniture anchors your decor!
The golden rule of alignment: A well-positioned artwork creates a visual conversation with its immediate environment, instantly transforming the atmosphere of your room and giving it that coherence you feel without being able to explain it.
🔍 Let's understand what’s really happening in your living room
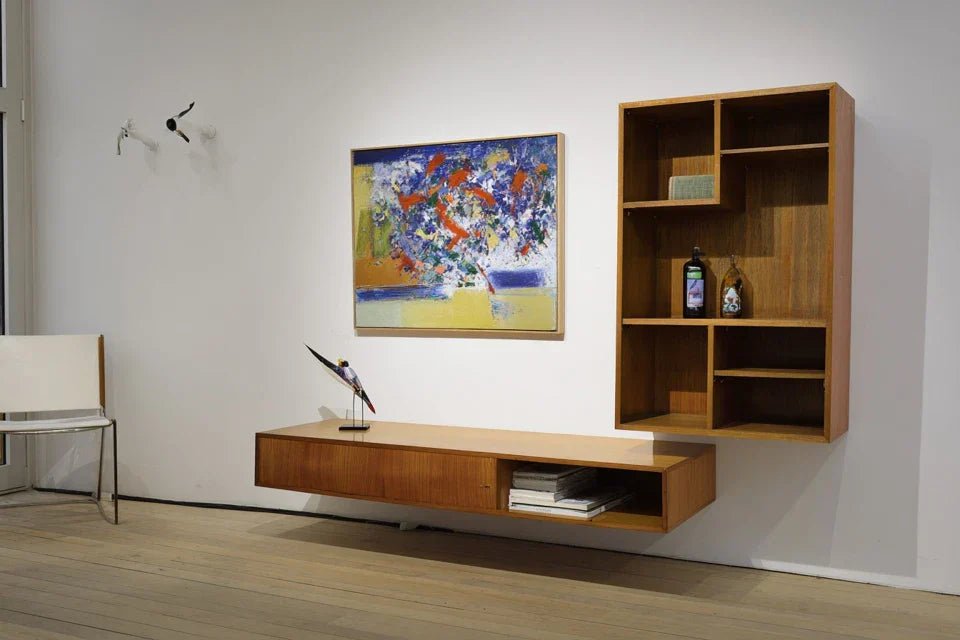
You may be feeling this frustration: your artwork seems to "float" above the furniture, or conversely, it appears crushed against the wall.
Sometimes, you feel like it's tilting even though it's perfectly straight, or that it takes up too much space in a corner of the room.
These unpleasant sensations don’t come from a flaw in your perception, but from an unresolved visual conflict between the different elements of your space.
Your eye naturally seeks anchor points and guidelines to rest.
It's like trying to read a book with misaligned paragraphs: technically readable, but exhausting for the eye and mind.
🎯 The first hidden cause: the illusion of perfect centering
Contrary to what many think, mathematically centering an artwork on a wall doesn't guarantee a harmonious result.
The reality? Your eye first perceives the relationships between nearby objects before considering the overall space.
Imagine a person standing in the middle of a football field: technically centered, but visually lost. That’s exactly what happens to your artwork when it ignores its immediate surroundings.
This discovery will revolutionize your approach to decoration: you'll never again seek the perfect geometric center, but natural visual balance.
Your spaces will instantly gain sophistication and coherence.
🧪 Immediate test: Look at your current artwork while hiding the furniture with your hands, then look at it with the visible furniture. You'll notice that your perception changes completely depending on the context!
🏠 The second hidden cause: forgetting the rule of proportions
Many think that a large artwork must automatically be centered on a large wall, and that a small artwork can go anywhere.
In reality, the size of the supporting furniture dictates the optimal zone of influence for your work.
It's like tuning a violin: each string influences the others. Your artwork, your furniture, and your wall form a harmonic trio that must be tuned together.
When you ignore this rule, you feel that sense of instability in your room, as if something is about to fall.
The solution? Consider your furniture-artwork ensemble as a decorative unit.
🌊 The third hidden cause: the effect of visual circulation
Few people notice that our gaze follows predictable paths in a room, creating invisible "visual highways".
A poorly positioned artwork can create a "traffic accident" that disrupts this natural flow.
Observe how your eye moves through your living room: it clings to aligned elements and stumbles on isolated elements.
A well-positioned artwork becomes a point of rest in this visual journey.
This disruption translates into subtle visual fatigue when you're in the room, and a general feeling of disorder even when everything is perfectly tidy.
🔍 The 3 signs of misalignment:
- Feeling that something is off: Your eye doesn't find a stable anchor point, like looking at a tilted horizon
- Tendency to want to "straighten" visually: You instinctively tilt your head to compensate for an imbalance
- Constant desire to move objects around: Your brain actively seeks a better configuration
⚖️ The trigger element: the rule of zones of influence
What really makes the difference is understanding that each piece of furniture creates an invisible "zone of influence" in which decorative elements must be included.
This zone acts as a magnetic field: the more your artwork conforms to it, the more natural and balanced the overall look will appear.
You can identify it by mentally tracing the lines of force of your main piece of furniture.
The universal alignment rule: Always align your artwork with the most structuring element of the zone - generally the furniture - then adjust according to the available wall space. Check by stepping back 3 meters: the whole should form a coherent silhouette.
| ❌ Common belief |
✅ Decor reality |
💡 Why it works |
🎯 Visible benefit |
| "You always have to center on the wall" |
Alignment follows the logic of the furniture |
The eye first seeks nearby coherence |
Feeling of natural order |
| "A large artwork on a large wall" |
Proportion depends on the supporting furniture |
Scale is measured by the nearest object |
Perfect visual balance |
| "Height doesn't matter" |
1.50m from the floor = universal rule |
Corresponds to natural line of sight |
Optimal visual comfort |
| "One artwork per wall" |
Composition possible if coherent |
Alignment unifies multiple elements |
Mastered decorative richness |
🛠️ The 3-step method for perfect alignment
Now that you understand the mechanisms, let's move on to practice with a progressive and foolproof method.
Like building a house, we will proceed by solid foundations, then structure, and finally finishes.
At each step, you’ll see your space transform and gain harmony.
🎯 Overview of the transformation: Step 1 - Identify your guiding element (the furniture), Step 2 - Create perfect alignment, Step 3 - Optimize the overall visual. Each step brings you immediate and visible satisfaction.
📐 Step 1: Identify your guideline
This first step is crucial as it determines everything else. It's like choosing the right foundation for your house: a mistake here will have repercussions on everything.
But once mastered, you’ll feel that satisfaction of the “click” when everything suddenly becomes obvious.
🔧 What you need :
-
Measuring tape: To accurately measure the dimensions of your furniture and wall. Choose a model of at least 3 meters, more practical than short rulers that require multiple measurements. Avoid fabric tapes that deform and distort calculations.
-
Spirit level: Essential for checking that your reference lines are perfectly horizontal. A small 30cm level is sufficient and easily fits into your toolbox. It's the tool that makes the difference between “roughly straight” and “perfectly aligned”.
-
Paper and pencil: To note down your measurements and make a small sketch of your layout. This step, often neglected, avoids errors and saves you valuable time when hanging.
Now let's move on to identifying your leading element
🎯 How to proceed concretely :
Measure your main furniture: Place your meter from end to end of your sofa, chest of drawers or console. Note this width as it becomes your “zone of influence”. Your painting should fit within this zone to create visual coherence. Only measure the furniture, not its accessories.
⏱️ Time: 2 minutes | ✅ Successful when: You have the exact measurement in centimeters | ⚠️ Attention: Do not include cushions or objects placed on it - they may move
Trace visual limits: Stand facing your furniture and imagine two invisible lines that extend from the ends to the ceiling. This is your “alignment corridor”. Your main painting should fit within this area to create a strong visual unity. The more it overflows, the greater the effect of dispersion.
⏱️ Time: 1 minute | ✅ Successful when: You clearly visualize this area | ⚠️ Attention: Do not confuse with the limits of the entire wall
Define your center of reference: The center of your furniture becomes your main anchor point. Discreetly mark it with pencil on the wall, about 1.50m from the floor. This is where you will center your painting, not from the center of the wall. This fundamental difference instantly transforms the harmony of your space.
⏱️ Time: 1 minute | ✅ Successful when: You have a clear reference point | ⚠️ Attention: Use an erasable pencil or mark very lightly
✅ Step 1 Verification: You must have a clear alignment zone, a marked center point, and be certain that your artwork will fit within the visual influence of your furniture. If anything seems unclear, calmly re-measure. The next step will be much easier!
🎨 Step 2: Creating the Perfect Alignment
Now that you have your reference points, you are going to position your artwork with precision.
This step is more rewarding because you immediately see the result of your efforts.
The effect of instant harmony that you obtain will surprise and motivate you for the rest.
🔧 Additional Material for this Step:
-
Kraft paper or newspaper: To create a template of your artwork and test the position before drilling. This professional technique avoids unnecessary holes and allows you to easily experiment with different positions.
-
Repositionable adhesive: To temporarily fix your template without damaging the wall. Choose a special delicate adhesive that removes cleanly, even from fragile paint.
🎯 Precise Positioning:
Create your template: Cut out a rectangle of paper with the exact dimensions of your artwork. This professional technique allows you to visualize the final result without commitment. You can move, adjust, and test different heights freely. It's the step that avoids 90% of positioning errors.
⏱️ Time: 5 minutes | ✅ Successful when: The template exactly matches the dimensions | ⚠️ Attention: Double-check the measurements, especially for framed artworks
Test the central alignment: Place the center of your template on the reference point you marked. Step back 3 meters and observe: the furniture-artwork ensemble should form a coherent silhouette. If it seems "unbalanced", adjust slightly to the left or right until the balance is perfect.
⏱️ Time: 3 minutes | ✅ Successful when: The whole looks naturally balanced | ⚠️ Attention: Trust your first impression from a distance
Adjust according to the wall space: If your ideal alignment zone extends beyond the available wall, prioritize coherence with the furniture, even if it means slightly offsetting it from the wall. An artwork perfectly linked to its furniture but slightly offset from the wall will always be more harmonious than an artwork centered on the wall but disconnected from its environment.
⏱️ Time: 2 minutes | ✅ Successful when: The compromise visually satisfies you | ⚠️ Attention: Never sacrifice the furniture-artwork relationship for perfect centering


