

You've just hung your new artwork on the wall and... something feels off. Despite your efforts, your piece looks like a simple poster glued there randomly, without soul or character.
Dim lighting makes the colors appear faded, the cheap frame ruins all the charm, and the whole thing gives that unpleasant dorm room decoration vibe rather than a true artistic choice.
You may have tried to change the location, add other elements around it, or even invest in a more expensive frame. But nothing works: your artwork desperately lacks presence and refinement.
Rest assured, this isn't about taste or budget. The problem comes from specific technical details that 99% of people ignore and which make all the difference between a work that impresses and a simple decorative element.
By the end of this article, you will master the 5 secrets of professional decorators to transform any work into a true prestige focal point that will attract all admiring glances.
Why does your artwork lose all its impact?
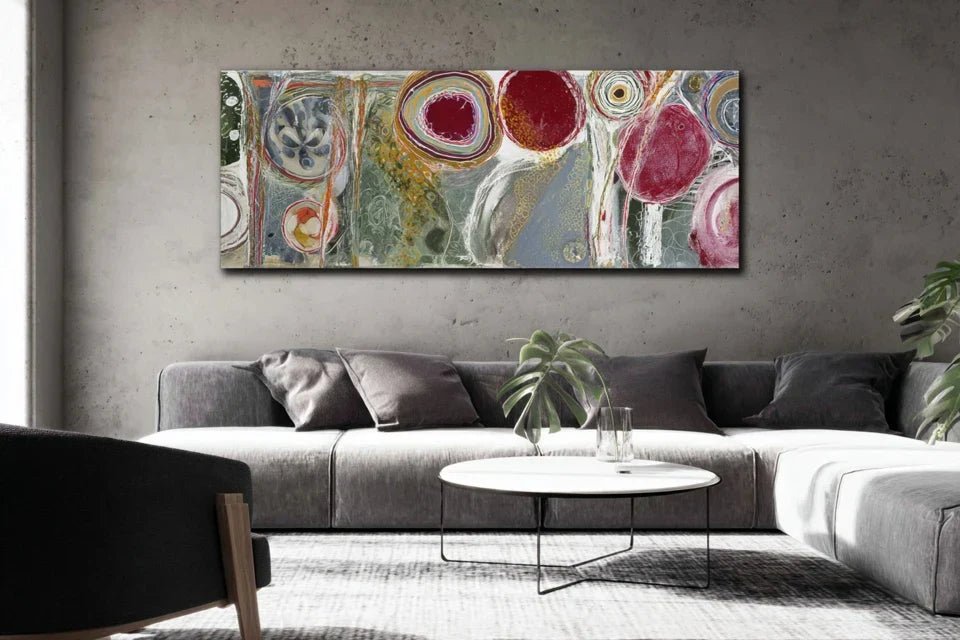
The poster effect is not inevitable, but the result of specific technical choices that subconsciously sabotage the potential of your work. Imagine a magnificent diamond presented in a cardboard case: even the most beautiful stone would lose some of its brilliance. The same thing happens with your wall art.
🎨 Expert testimony: Sarah, a decorator for 15 years, says: "I've seen works worth €2000 look less impressive than €50 reproductions, simply because the first was poorly presented and the second sublimated by the right technical choices."
💬 Conversation with a decor expert
The golden rule of artistic presentation: 70% of the visual impact of a work depends on its staging, not its intrinsic value. Master these elements and you will transform your space into a private gallery in less than 2 hours.
The 3 hidden causes that kill the prestige of your wall art
Do you recognize these situations? Your artwork seems to "float" on the wall without interacting with the space, visitors pass by without really noticing it, and you yourself don’t feel that initial pride when looking at it anymore.
The real issue is that three specific technical factors are sabotaging the perceived quality of your artwork. The problem isn't your artistic sense, but a lack of understanding of these presentation mechanisms.
Think of a talented actor: on stage with the right lighting and costumes, they shine. Under white light in ordinary clothes, even they would appear unremarkable.
Cause #1: Lighting that diminishes your investment
Contrary to popular belief, it's not the amount of light that matters, but its direction and color temperature. A painting lit by a central ceiling light will always appear flat and lacking depth.
Imagine photographing a face with your phone’s flash: the shadows disappear, the skin looks dull. The same effect happens to wall art with general lighting.
This lighting mistake turns even the most expressive artworks into simple, shallow color patches. But the good news? Proper lighting can reveal details you’ve never noticed in your own painting.
💡 Quick test: Turn off your ceiling light and shine your phone's flashlight on your artwork from a 30° angle. Do you see the difference? That’s the magic of directional lighting revealing texture and nuances.
Cause #2: The "budget frame" syndrome
Many think that an expensive frame guarantees a high-end result. In reality, it's the proportion and thickness of the frame in relation to the artwork that create the perception of prestige.
A thin frame on a large canvas is like wearing a delicate watch with a bespoke suit: the proportions don’t match, and the overall look loses elegance.
This disproportion makes your gaze focus on the inconsistency rather than the art itself. The result: your artwork gives an impression of amateurism that undermines your entire decor.
Cause #3: Hanging height that sabotages everything
Here’s a secret even some decorators ignore: hanging height directly influences the perceived value of your artwork. Too high, it becomes decorative. Too low, it looks neglected.
Imagine a conversation where you have to look up to see your interlocutor: automatically, you feel in an inferior position. The same goes for a painting hung too high.
This incorrect height creates a psychological distance that prevents the establishment of an emotional connection between the viewer and the artwork.
🎯 The 3 signals that betray amateur hanging:
- You have to tilt your head to look at the artwork: it becomes a distant decorative element rather than an artistic presence
- The artwork appears "stuck" to the wall: the lack of visual relief makes it lose its sculptural dimension
- The proportions seem unbalanced: the work does not harmonize with its environment
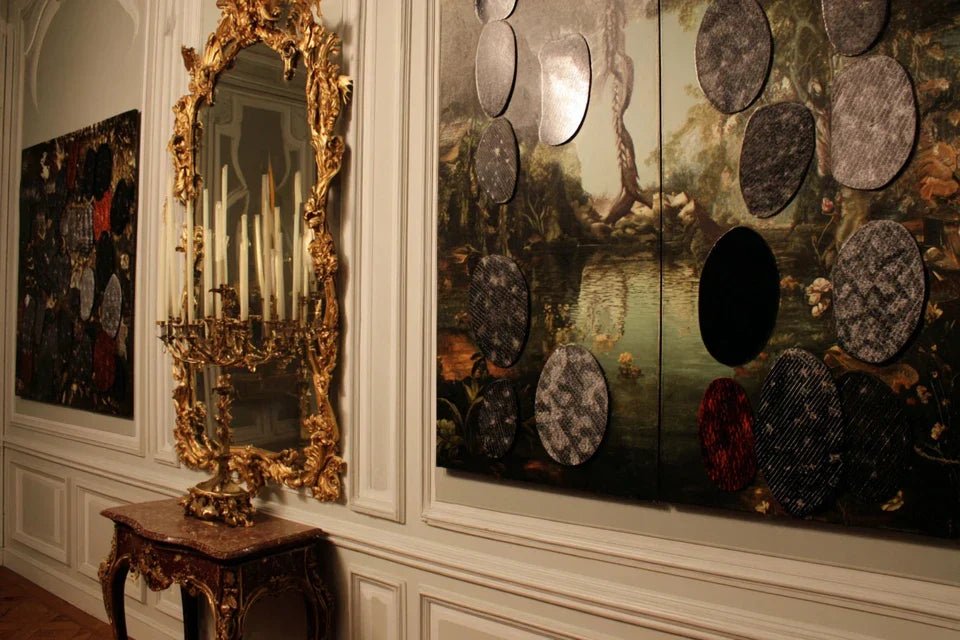
The trigger element: the rule of the "natural focal point"
The real secret of successful presentations lies in what professionals call the "natural focal point": this specific area where your gaze settles naturally when entering a room. Place your artwork there, with the right technical settings, and it instantly becomes the heart of your decor. Ignore this rule, and even the most beautiful painting will go unnoticed.
The 60-second rule: A well-presented artwork captures attention in less than 3 seconds and holds the gaze for more than 60 seconds. Test it with your guests: it's an infallible indicator of success.
| ❌ Amateur presentation | ✅ Professional staging | 💡 Technical difference | 🎯 Impact on atmosphere |
|---|---|---|---|
| Artwork hung "at random" | Positioning calculated according to eye level | Center of the artwork at 5.25 ft from the floor | Natural dialogue with the viewer |
| General room lighting | Dedicated directional lighting | Light source at a 30° angle | Revelation of textures and reliefs |
| Frame chosen by chance | Proportions studied according to the artwork | Thickness = 1/20th of the diagonal | Window effect on an artistic world |
| Artwork isolated on the wall | Integration into a coherent ensemble | Dialogue with furniture and colors | Creation of a refined universe |
The 3-step method to transform your wall into a gallery
Now that you understand the mechanisms, let's move on to concrete transformation. This method follows the logic of an architect: first the foundations (positioning), then the structure (lighting), and finally the finishing touches (harmonization). In a maximum of 3 hours, your artwork will radiate a prestige worthy of the most beautiful galleries.
🗺️ Overview of the transformation: Step 1 = Optimal positioning (immediate impact on presence), Step 2 = Revealing lighting (sublimation of colors and textures), Step 3 = Overall harmonization (creation of a coherent universe).
Step 1: Positioning that adds character
Starting with positioning is like choosing the location of a house: everything else follows from it. Good positioning can make an artwork appear 30% more impressive, while bad positioning can spoil even the most beautiful piece. This step will give you immediate satisfaction as the visual impact is instantaneous.
🔧 What you need for this step
- Measuring tape: not a flexible sewing tape measure, but a real rigid DIY measuring tape. It will help you accurately measure distances and heights. Avoid smartphone apps which lack the precision needed for this type of fine measurement.
- Spirit level: even a small one (30cm), it is essential. The human eye detects a deviation of 2° and that's enough to ruin the prestige effect. Phone leveling apps are acceptable as a temporary solution.
- Masking tape: to temporarily mark the position before permanent drilling. Choose masking tape that doesn't leave marks on your type of wall paint.
Now, let's move on to practice with the golden rule of positioning
🎯 Executing optimal positioning
Calculate the hanging height: Measure 160cm from the floor and mark discreetly with a pencil. This is the height where the geometric center of your artwork should be located, not the top or bottom. This measurement corresponds to the average human eye height and guarantees a natural dialogue.
⏱️ Time: 5 minutes | ✅ Success when: The center of the artwork is exactly at 160cm, verified with a measuring tape | ⚠️ Attention: Do not confuse the center of the artwork and the center of the frame if the latter is very thick
Identify the natural focal point: Stand at the entrance to the room and look where your eyes are drawn spontaneously after 3 seconds. It's usually the wall facing the entrance or perpendicular, in the naturally best lit area.
⏱️ Time: 10 minutes | ✅ Success when: You have tested 3 different entrances with the same result | ⚠️ Attention: Avoid areas of high traffic or too close to other strong visual elements
Calculate spacing from neighboring elements: Leave a minimum distance equal to half the width of your artwork between it and any other decorative element (another painting, furniture, window). This rule avoids visual confusion.
⏱️ Time: 15 minutes | ✅ Success when: The artwork “breathes” visually without competition | ⚠️ Attention: Be wary of electrical outlets and switches that visually pollute
✨ Verification of step 1: Your artwork should now “hold” the wall with an obvious presence. Test by stepping back 3 meters: it should naturally attract your gaze. If this is not the case, adjust the height in increments of 5cm.
OUR RECOMMENDED PRODUCTS
Step 2: Lighting that reveals the magic
You are now moving up a level: reveal all the richness of your work thanks to thoughtful lighting. This is the stage where the transformation really becomes spectacular. Good lighting can reveal details that you have never noticed in your own painting and create a professional gallery atmosphere.
💡 Professional Lighting Equipment
- Adjustable LED spotlight on rail or wall sconce: choose 3000K (warm white) for works with warm tones, 4000K (neutral white) for contemporary works. Absolutely avoid halogens which heat up and alter colors over time. Dimmer switch: allows you to adjust the lighting according to the time of day and desired atmosphere. Lighting that is too intense fatigues the eye and makes the work appear aggressive. The dimmer gives you total control. Diffuser or anti-glare filter: for works under glass or varnished. A reflection on your painting instantly ruins the prestige effect by reminding you that it is an object and not a window onto an artistic universe.
🔆 Installation of Revealing Lighting
Position the light source: Place your spotlight at a 30° angle to the perpendicular of the painting, either left or right depending on the configuration of your room. This angle reveals the reliefs without creating annoying shadows and gives a striking depth to the colors.
⏱️ Time: 20 minutes | ✅ Successful when: No shadow from the frame is projected onto the work | ⚠️ Attention: Test the lighting in the evening to check for any annoying reflections
Adjust optimal intensity: The artwork should be 2 to 3 times more illuminated than the surrounding wall, without dazzling. Use your dimmer to create this difference in intensity that naturally draws the eye to your painting.
⏱️ Time: 10 minutes | ✅ Successful when: The contrast is visible but comfortable | ⚠️ Attention: Excessive lighting creates an unflattering "spotlight" effect
Step 3: Harmonization that Creates Excellence
You now master the art of wall presentation: your work has found its optimal place and reveals all its beauty. This final step will create a harmonious dialogue between your painting and its environment, transforming your wall into a true decorative composition that your guests will remember for a long time.
🎨 Creating Overall Harmony
Create colorful echoes: Identify 2-3 dominant colors in your work and integrate these same shades into a maximum of 3 elements around (cushion, vase, book...). This repetition creates a visual coherence that unifies the space.
⏱️ Time: 30 minutes | ✅ Successful when: The eye naturally connects the artwork to its environment | ⚠️ Warning: Do not overuse repetitions, 3 elements are enough to create harmony
Balance visual masses: If your painting is on the right, place a visually equivalent element on the left (plant, sculpture, stack of beautiful books). This balancing avoids the feeling of imbalance that unconsciously fatigues the eye.
⏱️ Time: 15 minutes | ✅ Successful when: The composition appears stable and restful | ⚠️ Warning: The balancing element should not compete with your main work
Final validation rule: Photograph your composition with your phone. If it looks balanced and harmonious in the photo, you've succeeded! The objective doesn’t lie and reveals imbalances that the eye sometimes forgives directly.
Congratulations! You now master professional techniques. Here are some expert subtleties that will make you a true connoisseur in artistic presentation, these details that distinguish the informed amateur from the simple weekend decorator.
🎓 Museum curator's secret: Slightly change your lighting angle according to the seasons. In winter, tilt it 5° more downwards to compensate for less natural light. This subtle adaptation maintains optimal visual impact all year round, as do major galleries.
🤔 Frequent question from our readers
"I'm afraid my room is too small to apply all these rules..."
I perfectly understand this concern! In reality, restricted spaces benefit even more from these techniques because every detail counts double. In a 25m² studio, a well-presented painting can create the illusion of space by creating visual depth. Start with the height rule (160cm) which works everywhere, then adapt the lighting even with a simple adjustable wall lamp. The effect will be proportionally more spectacular than in a large living room!
💡 Test in a small space: Just apply the height rule and add an accent light. You'll immediately notice that your artwork gains presence and visually structures the entire space.
⚠️ The 5 pitfalls that ruin a beautiful presentation
Warning! Some mistakes can negate all your efforts in seconds. These traps are insidious because they seem logical at first glance, but subtly sabotage the desired effect. Knowing them will save you months of frustration.
- 🚫 Hanging multiple artworks "at the same height" : It's tempting to align frames from the top, but the eye perceives a glaring imbalance. Align the centers of the works at 160cm instead, even if the frames have different heights. That's the rule of professional galleries.
- 🚫 Choosing "powerful" lighting to "see better" : More isn’t always better! Too intense lighting creates an "interrogation room" effect that assaults the eye and makes it flee. Opt for softness and progressive contrast.
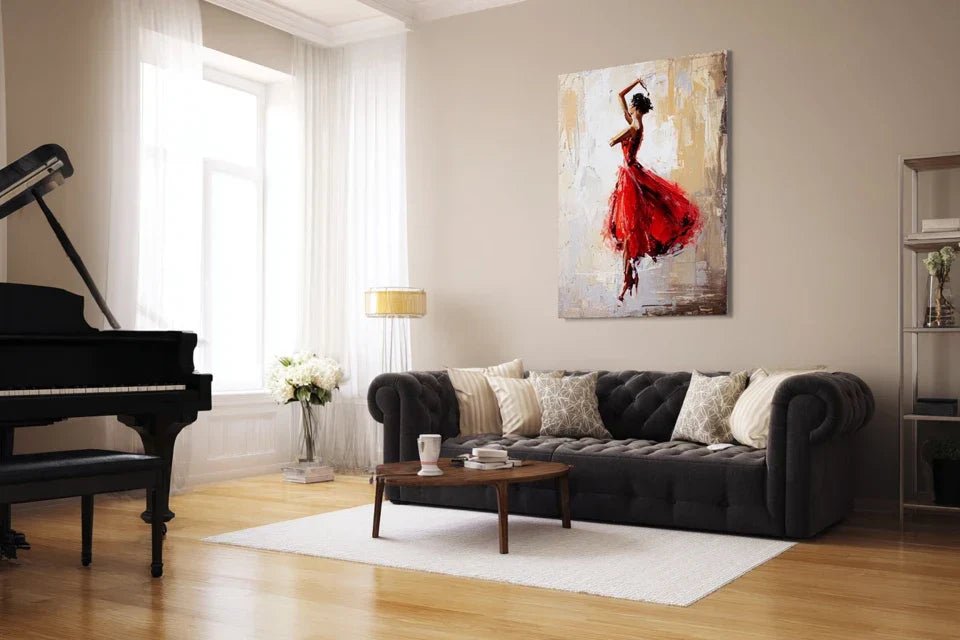
- 🚫 Placing the artwork above a sofa "because it's logical" : This obviousness hides a trap: you never look at a painting when you are sitting underneath. Prefer a wall that you see from your usual relaxation position.
- 🚫 Perfectly matching the colors of the artwork to the furniture : Total harmony kills personality! An artwork should bring a distinctive touch, not disappear into the whole. Aim for complementarity, not fusion.
- 🚫 Waiting to have "the full budget" to start : Perfectionism paralyzes! Start with the position and height (free of charge), the impact will already be spectacular. You’ll add lighting later.
🛡️ Anti-error verification system : Photograph your composition from the main entrance, then from 2 other angles. If the artwork attracts the eye in all 3 photos, it’s a success. If it goes unnoticed in one of them, readjust the lighting angle or height.
🎁 Special reader offer
Because you took the time to inform yourself, enjoy 10% discount on your first order:
⏰ Valid for 72h after reading • Applicable to all our products
❓ Practical questions about artistic enhancement
For a professional result, count 50-150€ (LED spotlight + dimmer + small hardware) and 3 hours of work spread over a weekend. Start by repositioning for free: you’ll already get 60% of the improvement. The lighting investment pays off because it enhances all your current and future artworks.
Absolutely! 90% of the improvements do not require any drilling. Use floor spotlights, adhesive rails for lighting, and focus on optimal positioning. The effect will be identical and you’ll take everything with you when you move out.
🌟 Your artistic transformation begins now
In a few weeks, when your guests spontaneously stop in front of your wall whispering "Where did you find this masterpiece?", you will smile knowing that the secret lay in these technical details that 99% of people ignore. Your artwork will radiate this discreet prestige that distinguishes true art lovers.
This mastery goes beyond simple decoration: you develop an expert eye that transforms your perception of all the spaces you frequent. In restaurants, hotels, at your friends' homes, you will immediately notice what works and what could be improved.The hardest part was understanding the mechanisms. Now that you master them, start by measuring this famous height of 160cm on your wall. This simple gesture will already transform your view on your artwork and give you the momentum to perfect this exceptional staging.🚀 Your first transformation awaits you: In less than an hour, you can already reposition your artwork at the optimal height and notice the spectacular difference. Each mastered detail brings you closer to the gallery atmosphere you dreamed of!


