

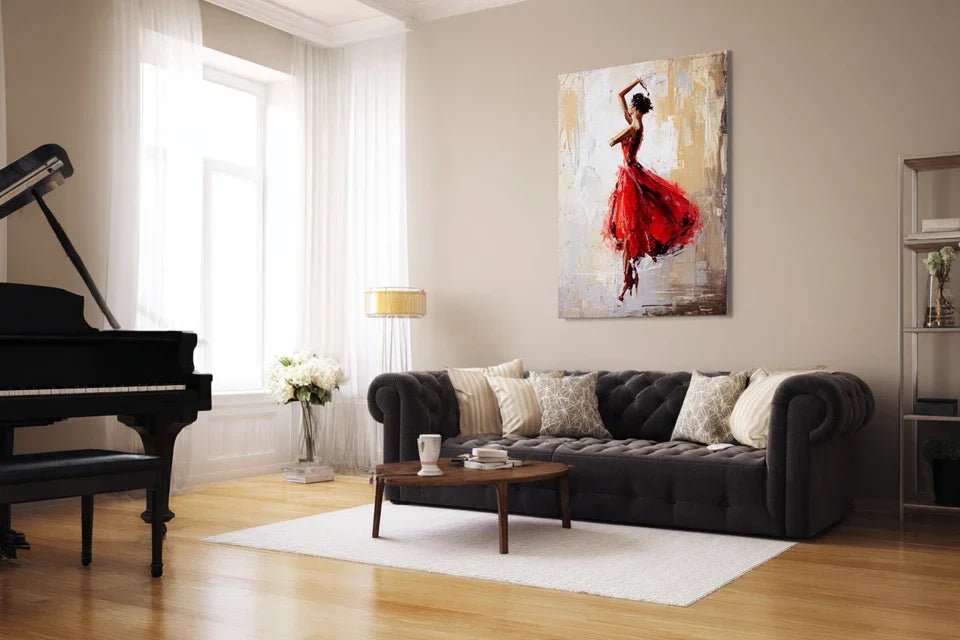
You've just acquired the perfect artwork for your living room, the one that makes you vibrate with every glance. But here's the thing: once hung on the wall, something feels off. The artwork seems lost, too high or too low, and your living room no longer has that harmony you had imagined.
You stand there, hammer in hand, hesitating between making new holes or accepting this disappointment. This piece, which was supposed to transform your space, now seems out of place, like an awkward guest in your own living room.
You may have followed classic advice: "put it at eye level" or "center it on the sofa." Pertinent, the result never matches your visual expectations. Why don't these universal rules work in your specific living room?
It's normal, and it’s not your fault! These generic tips ignore the unique proportions of your room, the height of your ceilings, and especially the actual use of your living room. Every space has its own particular visual logic.
By the end of this article, you will master the rule of visual proportions that will transform the hanging of your artworks into a true decorative signature. You will know how to create that perfect harmony that makes your guests say: "How well thought out!"
Why the height of your artwork can transform the soul of your living room?
The hanging of an artwork is not just a matter of decoration: it's the secret to a room that breathes harmony. Imagine a living room where every glance naturally finds its anchor point, where the eye rests with pleasure rather than seeking balance. The opportunity you risk missing? Transforming your living room into a true personal gallery that tells your story.
📐 Interior designer revelation: Sophie, a Parisian decorator, receives a desperate call. A client has just invested €2000 in a sublime artwork, but their living room seems "unbalanced" since the hanging. In 20 minutes on site, she repositions the piece 15 centimeters lower. The client exclaims: "It's magical, the whole space breathes again!" The difference? She applied the rule of visual proportions rather than generic standards.
💬 Conversation with a decor expert
The perfect height creates a visual dialogue between the artwork and the space: Like an orchestra conductor who places each musician at the right distance, ideal positioning allows your painting to "converse" harmoniously with your furniture and the architecture of the room. The result is observable: a living room where everything seems naturally in its place, in just a few minutes of adjustment.
What's really behind your hanging hesitations
You may recognize yourself in these situations: you spend ten minutes holding the painting at different heights, you ask three different people for their opinion, or you remain frustrated with a result that "doesn't look like magazines". These hesitations reveal a simple reality.
You are looking for perfect harmony, but the rules you have been given do not take into account the reality of your living room: its brightness, its proportions, your way of experiencing the space. This is not a lack of taste on your part; it's an issue of method.
It’s like trying to cook a delicate dish with a generic recipe that ignores the specificities of your oven and ingredients. The result can only be approximate.
The first cause: you follow the "rule of eye level" without knowing its limit
“Hang at eye level” is the most common advice, but it ignores a fundamental reality: in what context do you really look at your painting? Standing when you come home, sitting on your sofa, or moving around the room?
It’s like adjusting a car rearview mirror for a single seat position: it only works in one case. Your living room has multiple "points of view" that matter.
This unique approach creates this subtle frustration where the painting seems perfect from one place, but unbalanced from your sofa or entrance. Your eye naturally seeks a global coherence that this simplistic rule cannot offer.
🔍 Quick test: Look at your current painting from 3 different positions: standing at the entrance of the living room, sitting on your sofa, and from the other end of the room. If the harmony changes drastically depending on the angle, you have applied a rule that is too rigid for your space.
The second hidden cause: you ignore the "visual weight" of your furniture
Most people believe that the painting should be centered above the sofa, end of story. But an imposing sofa “pulls” the painting visually downwards, while a low piece of furniture makes it appear “floating”.
It’s exactly like balance on a swing: the heavier one side is, the more you need to adjust the position to regain harmony. Your eye perceives these visual weights instinctively.
Result: you feel discomfort without being able to explain it, as if something "is not right" in the room. This visual tension prevents you from fully enjoying your artistic investment.
The third reason: you underestimate the impact of ceiling height
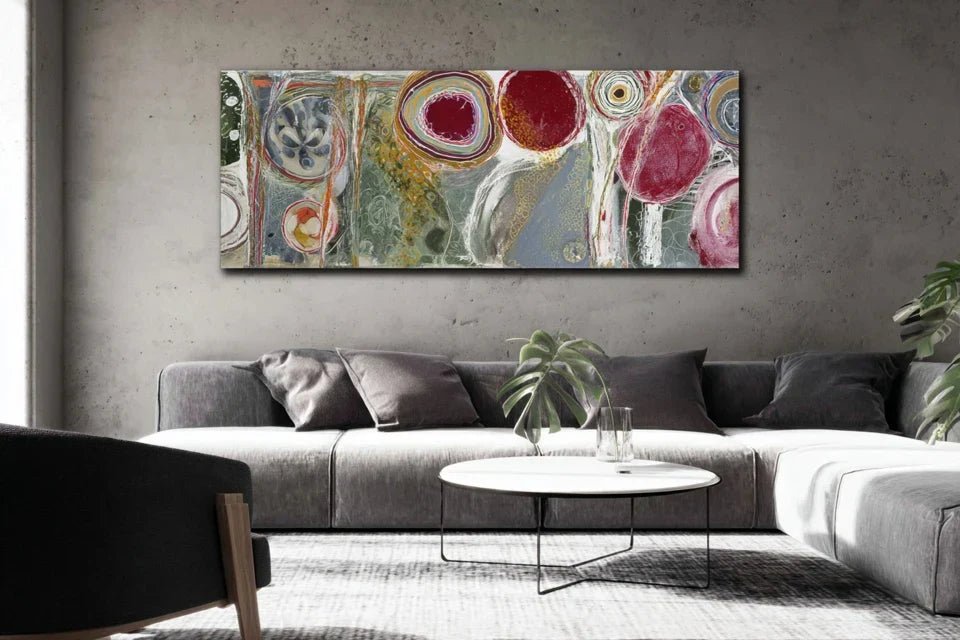
Few people realize that a low ceiling "crushes" visually a painting placed too high, while a cathedral ceiling can make the same work appear "lost". The perfect example: this magnificent painting that seems perfect in the shop but too small at your place.
You can easily spot this phenomenon: if your gaze "catches" on the empty space above the painting, or conversely it seems "compressed" against the ceiling, then the vertical proportions are not respected.
This mismatch creates a feeling of discomfort that prevents you from fully appreciating your artistic choice and spoils the atmosphere of your living room.
3 alarm signals to watch out for:
- Gaze "caught" on the ceiling: If your eye automatically rises towards the empty space above the painting, then the vertical balance is broken
- Feeling of "floating": When the painting seems disconnected from the furniture below, as if suspended in a void without visual logic
- Need to step back to "see": If you have to move away to appreciate the whole thing, the height does not correspond to the natural use of your living room
The trigger: mastering the "lines of force" of your living room
What really makes the difference is understanding that your living room has invisible "lines of force": the horizontals created by your furniture, the verticals of openings, the diagonals of the gaze. A well-placed painting fits into these lines like a just note in a musical chord. You can identify these lines by observing where your gaze naturally rests when you enter the room and how it then circulates.
Golden rule of harmonious hanging: The ideal height respects the balance between the "visual weight" of your furniture and the proportions of your room. Immediate check: your gaze should be able to naturally scan the whole thing without "stumbling" on a break in harmony.
| ❌ Common belief | ✅ Reality on the ground | 💡 Why it works | 🎯 Immediate benefit |
|---|---|---|---|
| "Always at 1m60 from the floor" | Height adapted to YOUR proportions | Each living room has its own guidelines | Natural harmony with your space |
| "Centered above the sofa" | Balanced with the visual weight of the furniture | The eye seeks balance, not symmetry | Soothing and coherent feeling |
| "The higher it is, the more elegant it is" | Position dialoguing with uses | You look from different points | Visual pleasure from all angles |
| "One rule for all paintings" | Personalized method per work | Each format has its specific needs | Each painting reveals its potential |
The method of visual proportions: your new decor reflex
Rassurez-vous, this approach is more intuitive than it seems! We will build your decorative eye step by step, like a photographer develops their sense of framing. Imagine yourself in a few weeks, able to position any artwork with confidence, feeling naturally the right height. This transformation will give you a decorative confidence that your loved ones will immediately notice.
🎯 Your progress in 3 steps: We will start by identifying the "anchor points" of your living room (fundamental step), then calculate the ideal proportions according to your actual use (precise technique), and finally validate the overall harmony with the rule of the "visual triangle" (complete mastery). Each step will bring you a finer understanding of your space.
Step 1: Identify your "visual anchor points"
Starting with this step is crucial as it reveals the natural logic of your living room. Like an architect who studies the terrain before building, you must understand how your eye naturally circulates in the space. This discovery will give you that "click" satisfaction: finally understanding why certain arrangements instinctively please you!
What you need for this analysis
- Measuring tape: Choose a model of at least 3 meters, more accurate than short rulers. You can find it in any hardware store. Make sure it locks firmly in place: you will measure alone without the ribbon retracting. Avoid sewing fabric tapes, which are too flexible for precise vertical measurements. Masking tape: This repositionable tape allows you to temporarily mark heights without damaging the paint. Its principle: stick and peel easily to test several positions. Buy it from a stationery store or hardware store. Good quality is recognized by its ease of removal even after 24 hours: avoid transparent scotch which leaves residue. Spirit level: This tool ensures that your markings remain perfectly horizontal, avoiding the "tilted picture" effect that spoils all harmony. It reveals invisible defects to the naked eye but subconsciously perceptible, a source of visual discomfort.
Now, let's move on to practice to reveal the personality of your living room
Discovery of your natural guidelines
Measure "dominant horizontal lines": Record the height of your sofa (including backrest), shelves, consoles, and other significant furniture. This step reveals the visual rhythms of your room, because your eye instinctively seeks to create correspondences between these heights. Note these measurements precisely: they become your "decorative grammar".
⏱️ Time: 10 minutes | ✅ Successful when: You have 3-5 key heights noted with precision | ⚠️ Attention: Measure from the floor to the highest point of each piece of furniture, not to the tabletop. The eye perceives the overall silhouette, not the technical details.
Identify your "circulation triangle": Observe where you naturally stand in the room: entrance, facing the TV, near the window. These three points form your actual usage triangle. Your artwork should be visible and harmonious from these privileged positions, not from places where you never go.
⏱️ Time: 5 minutes | ✅ Successful when: You can name your 3 main positions | ⚠️ Attention: Do not confuse "theoretical" positions (geometric center of the room) with your actual usage. Rely on your daily habits.
Mark the "seated line of sight": Sit on your sofa in your usual position and ask someone to hold an object at eye level, or use a mirror to identify this line. Mark this height on the wall with masking tape. This is your personal reference, more relevant than generic standards.
⏱️ Time: 3 minutes | ✅ Successful when: You have a clear horizontal mark | ⚠️ Attention: Adopt your natural relaxed posture, not an artificial "straight" position. Your daily comfort takes precedence over the theoretical ideal.
✨ Success check: Your living room now reveals its "visual signature": you clearly see the heights that matter, you know your privileged viewpoints, and you have your personal line of sight. If some measurements surprise you, that's normal: each space has its unique logic! You are ready to calculate the perfect position.
OUR RECOMMENDED PRODUCTS
Step 2: Calculate your ideal personalized height
You are now moving to the next level: transforming your observations into a precise decision. This step is more rewarding because you see concretely how your measurements translate into optimal positioning. The snowball effect begins here: once this height is found, you will gain confidence for all your future hangings.
Tools for precise calculation
- Calculator (or smartphone): To apply proportion formulas without error. Calculations remain simple (additions and divisions), but accuracy counts: 5 cm of difference can transform the harmony of your living room.
- Paper and pencil: Note down your intermediate calculations so you can check them. This written record also allows you to reproduce the method for other artworks or rooms.
- The artwork you want to hang: Measure its exact dimensions (height and width) as they directly influence the final calculation. A panoramic format does not follow the same rules as a square format.
Applying the formula for harmonious proportions
Calculate the "reference height": Take your seated eye line (measured in step 1) and add 10 to 20 cm depending on the height of your ceiling. For a standard ceiling (2.50m), add 10 cm. For a high ceiling (3m+), add 20 cm. This formula naturally compensates for the proportions of your space.
⏱️ Time: 2 minutes | ✅ Successful when: You get a height between 130 and 180 cm from the floor | ⚠️ Attention: If the result seems very far from standards, re-measure your eye line. Errors often come from this first step.
Integrate the "visual weights" of your furniture: If your sofa or console is more than 80 cm high (including the backrest), reduce your reference height by 5 cm. This correction avoids the “crushing” effect where the painting seems overwhelmed by imposing furniture. Conversely, if your furniture is low (less than 60 cm), add 5 cm to avoid a floating effect.
⏱️ Time: 3 minutes | ✅ Successful when: Your adjusted height remains consistent with your proportions | ⚠️ Attention: Do not visually oversize your furniture. Only the perceived height from your seated position counts, not the total technical height.
Determine the exact hanging point: Your calculated height corresponds to the vertical center of your painting, not the hanging point. Divide the height of your painting by 2 and subtract this result from your reference height. Then add the distance between the top of the painting and its hanging point (variable depending on the fixing system).
⏱️ Time: 5 minutes | ✅ Successful when: You know precisely where to hammer your nail | ⚠️ Attention: Measure exactly the distance between the top of the frame and the hanging point on the back of the painting. This measurement, often neglected, can create 10 cm of error.
🎯 Intermediate validation: Your calculation should give you a hanging point between 120 and 170 cm from the floor for most situations. If you are far outside this range, check your initial measurements. A consistent result gives you confidence: you now master the mathematical logic of visual harmony!
Step 3: Validate harmony with the "visual triangle" rule
You are now reaching the level of decorative mastery! This final step makes the difference between someone who follows a method and someone who truly understands visual balances. The final result: a living room where each element naturally dialogues, creating that signature decoration that your guests will notice without being able to explain it.
Check overall balance
Create the "perfect visual triangle" : Temporarily place your artwork at the height calculated with masking tape. Observe the triangle formed between the artwork, your main furniture, and a vertical element (door, window, shelf). This triangle should appear stable, without any angle seeming to "collapse" visually.
⏱️ Time : 10 minutes | ✅ Successful when : The whole seems naturally balanced | ⚠️ Attention : Make this check from your 3 main positions identified in step 1. A perfect triangle from one point of view can be unstable from the others.
Test the "visual breathing space" : The space above and below the artwork should appear proportionate. Practical rule: the space above should not exceed twice the space below. This proportion creates a psychological stability that your brain perceives subconsciously as soothing.
⏱️ Time : 5 minutes | ✅ Successful when : No space appears "empty" or "crushed" | ⚠️ Attention : If the upper space bothers you, it's often because the ceiling height was not taken into account enough in the initial calculation.
Validate the final hanging : Precisely mark the hanging point with a pencil, check horizontality with the level, and proceed to fix it. After hanging, step back and observe from each of your usage positions. The harmony should be obvious and immediately perceptible.
⏱️ Time : 15 minutes | ✅ Successful when : You feel that "just right" placement satisfaction | ⚠️ Attention : Don't rush the fixing. Take the time to visually validate: moving a mispositioned artwork takes more work than placing it correctly from the start.
Rule of progression to become autonomous : You can move on to hanging other artworks when this method becomes fluid and you "feel" naturally the right proportions. Objective criteria: you calculate without making mistakes and the harmony seems obvious at first glance. Balance patience (to integrate well) and ambition (to progress).
Congratulations! You now master a skill that few people possess. Here are the expert subtleties that will give you this decorative ease that is noticed by interior design professionals.
🎨 Professional decorator's secret : The "rule of visual thirds" allows you to further refine your positioning. Mentally divide your wall into three equal vertical zones: place the center of your artwork at the level of the line separating the lower third from the middle third. This technique, from photography, creates a natural balance that the eye finds immediately satisfying, even without understanding why.
💭 Frequent question from our readers
"What if I have multiple artworks to arrange together? Do I need to apply the same height for all of them?"
Excellent question that shows you're already anticipating your next decorating projects! For a composition of several artworks, the principle changes: you create a "common guideline". Align the centers of all your artworks on your calculated reference height, regardless of their individual sizes. This creates an overall harmony where each work dialogues with the others. Horizontal spacing? Allow 5 to 10 cm between each frame depending on their size.
💡 Quick practical tip: Cut out rectangles of paper to the dimensions of your future artworks and test different arrangements on the wall with masking tape. You will visualize the whole thing before any purchase or drilling, saving time and costly mistakes.
The 5 mistakes that can ruin even a beautiful artwork
Even with the best method in the world, some traps remain tempting. Knowing these errors protects you from avoidable disappointments and saves you valuable time. These errors are universal: even experienced decorators have made them!
- ⚠️ Neglecting ambient lighting: It's tempting to position an artwork in full daylight, but the harmony changes completely with artificial evening lighting. Consequence: a perfect hanging on the weekend that seems unbalanced when you return from work. Solution: validate your positioning with the lighting you use 80% of the time. This is the most common mistake among enthusiastic amateurs!
- 📐 Forgetting to measure available distance: You calculate perfectly... but realize afterwards that you can never step back far enough to appreciate the whole thing. Impact: daily frustration and impression of an "overbearing" artwork. Alternative: in a confined space, reduce the height by 10 cm to compensate for the lack of distance. Your forced proximity will be compensated by a more accessible position.
- 🔧 Underestimating weight and fixing: A beautiful height calculation is useless if the artwork falls! Classic mistake: choosing the fixing after drilling, instead of anticipating it. Potential consequence: artwork on the floor and wall damaged. Always provide an oversized fixing compared to the actual weight. Better to be too cautious than disappointed.
- 🏠 Copying a magazine photo without adapting: This magazine kitchen or living room inspires you, but your ceiling is 30 cm shorter... Blind inspiration leads to inadequacy. Reality: every space has its own unique constraints. Use magazines for general inspiration, never for exact measurements. Your living room deserves its own harmony.
- ⏰ Rushing the final hanging: Enthusiasm pushes you to fix quickly, especially when the calculation seems right. But 5 minutes of visual validation avoids weeks of regret. Frequent problem: forgetting to check horizontality or neglecting the opinion of a friend. Take the time for collective validation before the irreversible gesture.
🎯 Hanging verification system: Verify that your calculation results in a height between 47-67 inches from the floor, that the harmony is obvious from your 3 main positions, that the fixing supports 150% of the weight of the artwork, and that you have the approval of a trusted person on the final positioning. Warning signs: need to justify yourself ("it will be fine"), prolonged hesitation, or the impression that "something is wrong" without being able to identify it.
🎁 Special offer for readers
Because you took the time to inform yourself, enjoy 10% discount on your first order:
⏰ Valid 72h after reading • Applicable to all our products
❓ Your practical questions about the perfect hanging
The complete method is mastered in 2-3 practical hangings, or about 1 month at a rate of one artwork per weekend. In terms of budget: maximum €15 for tools (meter + level + masking tape), largely amortized after the first successful hanging. To optimize learning, start with your most neutral artwork before tackling your character pieces. Concrete example: Sarah, an accountant, transformed her living room in 3 weekends and now masters the hanging of all her collection.
This apprehension is normal and healthy! The secret: always temporarily validate with masking tape before drilling permanently. Live with your artwork positioned for 48h before the final hanging. This test period reveals whether the harmony withstands daily life or if an adjustment is needed. Reassuring rule: if you and your loved ones find the position obvious after 2 days, you have hit the mark. Confidence comes from this progressive validation, not from perfect calculation.
Visual harmony transforms any artwork! A €30 artwork well positioned will have more impact than a collector's piece hung poorly. The technique reveals the potential of each artwork, regardless of its price. However, a quality frame amplifies the effect: invest in a good frame for a simple work rather than an expensive one framed badly. Harmony is paramount to market value.
The principle remains the same, only the reference points change! In a bedroom: prioritize the view from the bed (lying down position). In the kitchen: adapt to the standing position near the worktop. For a hallway: optimize for circulation (moving gaze). The universal rule: first identify how you truly live in each space, then apply the proportion method. Each room reveals its specific usage logic.
Excellent transition question! First, evaluate your existing setup with your new reading grid: apply the calculation method to your current hangings. If the difference is less than 10 cm, a simple adjustment will suffice. Beyond that, reposition entirely to reveal the potential of your artworks. Advantage: you already have the fixing holes as a basis for comparison to see the improvement. Many are surprised to rediscover their paintings after repositioning!
🌟 Your living room transformed, your confidence multiplied
In a few weeks, when you receive your loved ones, you will observe their gazes naturally linger on your paintings. They will ask you: "Who advised you on the arrangement?" You will smile realizing that it is your own expertise that created this harmony. Your living room now tells your story with an obviousness that inspires admiration.
This mastery of perfect hanging has given you more than just a technique: a decorative confidence that can be felt in all your layout choices. You now look at spaces with the eye of an expert, capable of instinctively sensing what works. Your future decor projects benefit from this deep understanding of visual balances.
Now that you understand the logic of proportions, the hardest part is behind you! Your first move? Observe your current living room with your new gaze: you will immediately identify the adjustments that will multiply the impact of your artworks. Start with your main painting – the one closest to your heart deserves this particular attention.
🎯 Your next decor victory awaits you: You now have all the keys to transform any space into a harmonious personal gallery. This skill is yours for life and improves with each new creation. Your living room is waiting for your expert eye to reveal its full potential!


