

You've just acquired this exceptional artwork that excites you, but here's the problem: facing a bare wall, anxiety sets in. Should you accompany it with a mirror? Won’t it lose its splendor? Will your guests find the ensemble harmonious or... completely botched?
This hesitation has been gnawing at you for weeks. You circle around your empty wall, visualizing a thousand possible combinations, fearing the moment someone notices that “something is wrong” in your decor.
You may have already tried a hasty association: a mirror chosen on the spur of the moment, positioned as best you could, creating that
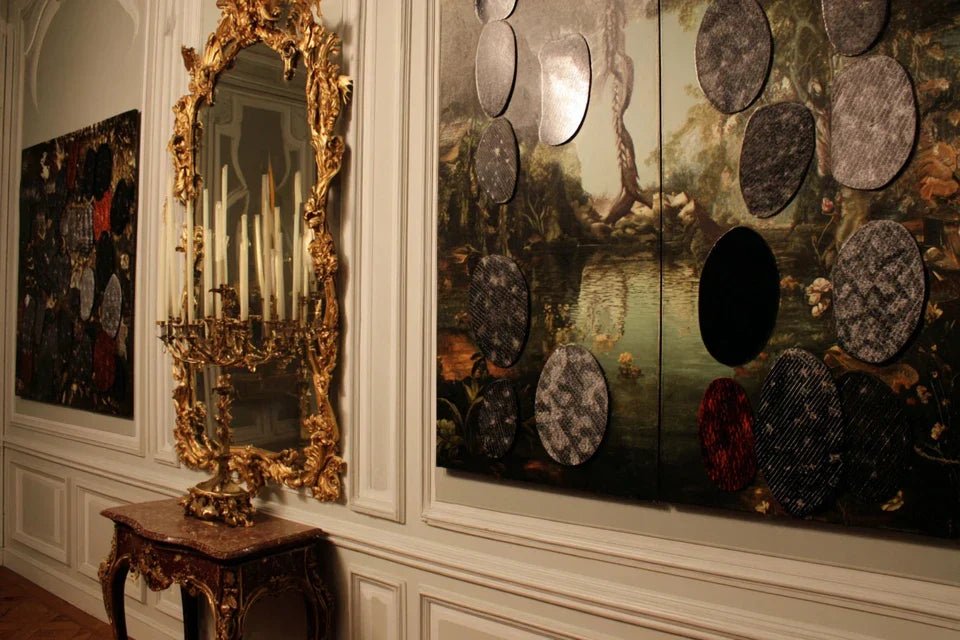
The golden rule of successful pairing: A well-chosen mirror never competes with a painting; it reveals it by capturing and redistributing natural light. In 15 days, you will notice that your room seems more spacious, brighter, and your artwork more vibrant.
What really happens when your wall decor disappoints you
Do you recognize these three situations? You scan your wall and feel that sense of "emptiness" despite the presence of your painting. You turn on all the lights but the atmosphere remains dull, without that sophisticated warmth you are looking for. Or even, your guests politely admire your work without ever truly being amazed.
What is actually happening has nothing to do with the quality of your painting or your artistic sense. The problem lies in the isolation of the artwork: without complementary elements to create a visual dialogue, even the most beautiful paintings lose their impact. It's exactly like a talented actor playing alone on stage.
Imagine your painting as a virtuoso musician: he can play solo, but it is in duet that he reveals all his harmonic richness. The mirror then becomes his ideal decorative partner.
The first hidden cause: the "cold gallery" effect
Contrary to what 90% of decoration enthusiasts think, hanging a painting alone on a large wall does not create a "chic gallery" effect but rather a "cold gallery" effect. True elegance is born from the conversation between elements, not their solitude.
It's like serving an excellent wine in an ordinary glass: the content is exceptional, but the staging does not do it justice. Your eye needs multiple anchor points to fully appreciate the beauty.
This discovery will transform your approach: instead of looking for the perfect placement for your painting, you will compose a visual symphony where each element enhances the other.
🔍 Quick test: Temporarily place a pocket mirror near your painting and observe how the light behaves differently. You will instantly notice that the colors seem more intense and the whole is more vibrant.
The second cause: the trap of single lighting
The popular belief is that good lighting is enough to highlight a painting. In reality, direct lighting only illuminates the surface without creating that mysterious depth that fascinates the eye.
A mirror strategically placed acts as a natural reflector that multiplies light sources and creates those games of shadows and reflections so sought after in high-end interiors.
That's why your painting seems "flat" despite expensive lighting: it lacks that tactile dimension that only reflection can bring.
The third cause: the absence of material dialogue
Here's what goes unnoticed at first glance: your artwork, whether on canvas, metal or wood, naturally dialogues with certain materials and ignores others. A bare wall only offers it a decorative monologue.
Spot this detail in your own interior: look carefully at the texture of your work. Is it smooth, rough, shiny? A mirror with a frame made of complementary material will create that tactile conversation which makes the whole irresistible to the touch.
This harmony of materials transforms the experience of your room: it becomes a space that you want to explore with your eyes and hands, not just pass through.
🎯 The 3 signals of a successful wall composition:
- The gaze circulates naturally: Your eyes move from the artwork to the mirror effortlessly, like a fluid visual dance
- Lighting seems richer: The room appears bathed in soft, changing light depending on the time of day
- The space seems larger: The mirror creates an illusion of depth that visually enlarges the room
The trigger element: decorative resonance effect
What really makes the difference is what decorators call "decorative resonance": that magical moment when two elements respond to each other to create a harmony superior to their simple addition. It's the positive domino effect you’re looking for: the mirror reveals the artwork, which illuminates the mirror, which enlarges the space, which enhances the colors... In your living room, look for that moment when you feel that "everything fits" naturally.
The rule of the golden triangle: Position your gaze in the center of the room and check that artwork, mirror and natural light source form a harmonious triangle. If this is the case, magic happens automatically.
| ❌ Common belief | ✅ Expert reality | 💡 Explanation | 🎯 Concrete benefit |
|---|---|---|---|
| A painting is enough to decorate a wall | Association creates more impact | The eye needs visual dialogue | 3x more sophisticated atmosphere |
| The mirror will "steal" the attention | It reveals and amplifies the artwork | Light resonance effect | Artwork highlighted |
| More elements = overloaded effect | 2 well-chosen elements = elegance | Principle of balanced composition | Decoration worthy of a magazine |
| You have to match perfectly | Subtle contrasts enrich | Harmony by complementarity | Originality and personality |
The 3-step method to successfully combine artwork and mirror
Now that you understand the mechanisms at play, let’s move on to practice with a progressive and secure approach. Like a chef who first masters basic techniques before creating their own recipes, you will build your decorative composition step by step. At the end, you will have created this sophisticated atmosphere that makes all the difference between an interior "decorated" and an interior "lived with art".
🗺️ Your creative roadmap: First step, we establish the harmony of proportions (like the foundations of a house). Then, we create the dialogue of materials and colors (the structure). Finally, we refine the lighting and details (the final decoration). Each step brings you closer to that natural sophistication you are looking for.
Step 1: Mastering the art of balanced proportions
Starting with proportions is no coincidence: it’s the invisible foundation of any successful composition. Like an architect who first calculates resistance before thinking about aesthetics, you must first create this visual balance that will allow your eye to rest naturally. Once this base is laid, you will immediately feel that sensation of "rightness" that transforms any wall into an elegant focal point.
🛠️ What you need to get started
- A flexible tape measure: Choose a tailor's model rather than a rigid DIY meter. It better hugs curves and allows for precise measurement of diagonals. You can find it in any haberdashery for 3-5€. Quality is recognized by its clear graduation and flexibility without elasticity, unlike cheap plastic versions that deform.
- Repositionable masking tape: This high-end painter's tape sticks and peels off without leaving traces on your walls. It perfectly simulates the final location of your elements. The principle? It adheres enough to hold for several days but removes gently. Avoid classic scotch tape which could damage your paint or wallpaper.
- Newspaper or kraft paper: To create full-size templates of your future locations. This support allows you to visualize the real impact before any drilling. The visible benefit? You avoid regrets and unnecessary holes in your walls.
Let's move on to concrete practice now
🎯 Precise actions for a professional result
Define your composition area: Measure the available space starting from existing furniture (sofa, console, etc.) to corners or openings. Trace this area with masking tape to materialize your "decorative canvas". This step avoids the classic mistake of a painting lost on a wall that is too large or suffocated in a space that is too small.
⏱️ Time: 10 minutes | ✅ Successful when: Your area forms a harmonious rectangle in relation to the furniture | ⚠️ Attention: Many forget to take into account natural lighting, which influences the perception of proportions.
Apply the decorative rule of thirds: Mentally divide your area into 9 equal parts (3x3). Place your artwork on one of the lines of force (intersections of the thirds) and not in the geometric center. This photographic composition technique works perfectly in decoration and naturally creates the dynamic balance that captures the eye.
⏱️ Time: 5 minutes | ✅ Success when: The eye is naturally drawn to the artwork | ⚠️ Attention: Perfect centering often gives a "frozen" and institutional effect.
Determine the ideal mirror size: Your mirror should measure between 40% and 60% of the main dimension of your artwork. Too small, it disappears; too large, it dominates. Use your paper templates to visually test this proportion before making any purchase.
⏱️ Time: 15 minutes | ✅ Success when: Both elements seem to "dialogue" equally | ⚠️ Attention: The shape of the mirror (round, square, oval) influences the perception of its apparent size.
✅ Validation of step 1: Step back 3 meters and observe the whole. Your eyes should circulate naturally between the elements without effort. If you feel a sense of balance and harmony, even with your simple templates, you've got it! If in doubt, don't hesitate to adjust: it’s better to refine now than regret later.
OUR RECOMMENDED PRODUCTS
Step 2: Create the harmony of materials and colors
You are now moving to the next level: the one where your composition becomes truly personal and refined. If step 1 created balance, step 2 brings soul and character. This is where your artistic sensibility fully expresses itself, and the snowball effect begins: each good choice makes the next easier.
🎨 Your advanced composition tools
- Color and material samples: Collect small samples (fabrics, metals, woods) corresponding to your artwork and the materials in your room. These "material identity cards" allow you to test combinations before making a final purchase. Request free samples at a decorating store.
- Mobile lighting (flashlight or smartphone): To test the effect of reflections under different lighting angles. The principle? A mirror reveals its true personality under different lights. Test morning light, afternoon light, and artificial evening lighting.
- Color applications on smartphone: Tools like Adobe Color or Coolors help you identify the exact shades of your artwork and find the perfect complementary colors for the mirror frame.
🎨 Chromatic composition techniques
Identify the dominant color of your artwork: Observe your work from 2 meters away and note the color that first catches your eye. This master tone will guide all your other choices. If your painting mixes several colors, choose the one that occupies about 60% of the visible surface.
⏱️ Time: 5 minutes | ✅ Success when: You can name this color precisely | ⚠️ Attention: The dominant color is not necessarily the brightest, but the most present on the surface.
Choose your chromatic strategy: Either harmony (mirroring in similar tones to the artwork) or contrast (complementary color). Harmony creates serenity, contrast brings dynamism. Test both approaches with your samples to feel the desired atmosphere.
⏱️ Time: 20 minutes | ✅ Success when: The association provides you with the emotion you are looking for | ⚠️ Attention: A contrast that is too violent can create an unpleasant visual competition.
Match materials by resonance: If your painting has a smooth texture (stretched canvas), prioritize a mirror frame with a more tactile finish (raw wood, hammered metal). The opposite also works. This complementarity creates richness and sophistication without clutter.
⏱️ Time: 15 minutes of testing | ✅ Success when: You feel like touching the whole ensemble | ⚠️ Attention: Avoid more than 3 different materials in the same composition.
🎨 Chromatic quality control: Photograph your test composition with your smartphone, then look at the photo. It reveals imbalances that the eye forgives live. The harmony must be obvious even in the image. If something bothers you in the photo, adjust before finalizing.
Step 3: Fine-tune the lighting and finalize the composition
Congratulations, you are reaching the level of mastery that separates informed amateurs from true connoisseurs! This final step transforms your beautiful composition into a decorative masterpiece that evolves with light and seasons. You will create these subtle effects that your guests will notice without being able to explain them, this signature of an interior thought out with refinement.
💡 Your final lighting kit
- Adjustable LED spotlights: Choose models that allow you to adjust the intensity and color temperature (warm/cold white). These directed light sources reveal the details of your painting while creating dynamic reflections in the mirror. Invest in quality: good lighting lasts 10 years.
- Precision bubble level: A model of at least 40cm to guarantee perfect alignment. In a double composition, even the slightest misalignment is immediately visible and breaks the harmony. Magnetic spirit levels facilitate work on metal surfaces.
- Premium fixings: Depending on the weight of your items, choose expansion anchors, noble wood screws, or hanging systems for paintings. Safety is paramount: a falling painting damages both the artwork AND the floor. Calculate high level resistance.
✨ Implementing the final composition
Optimize hanging according to natural light: Observe your wall at different times of the day. Place the mirror on the side that best captures morning or evening light depending on your lifestyle. A well-oriented mirror can double the natural lighting of your painting.
⏱️ Time: One day of observation | ✅ Success when: The mirror reflects light onto the painting naturally | ⚠️ Attention: Avoid direct sunlight reflections that dazzle and discolor artworks.
Install strategic accent lighting: Position your light sources to create a triangle of light: main light on the painting, reflection in the mirror, ambient lighting for the whole. This "layering lighting" technique creates depth and theatricality.
⏱️ Time: 30 minutes | ✅ Success when: No hard shadows appear | ⚠️ Attention: Lighting that is too powerful creates aggressive reflections in the mirror.
Proceed with definitive installation: Mark all your fixing points with a pencil, check the levels, drill precisely. First install the heaviest element (usually the painting), then adjust the position of the mirror according to the actual result. Theory guides, but only the final eye decides.
⏱️ Time: 45 minutes | ✅ Success when: The whole thing holds securely and the alignment is perfect | ⚠️ Attention: Protect the floor and test each fixing before releasing the element.
🏆 Final expert validation: Invite a trusted person to discover your composition without any prior explanation. Observe their spontaneous reaction and the time they spend contemplating the whole thing. A successful composition naturally generates admiration and questions about your "decor secret".
Expert progression rule: You can consider your mastery acquired when you instinctively perceive the balance of a composition in less than 30 seconds. This developed intuition will allow you to adapt the method to all your future decorative projects.
You now master the fundamentals, let's explore the subtleties that distinguish a beautiful achievement from an exceptional composition. These advanced techniques give you that edge that makes your guests say: "How do you do it to have so much taste?"
🎭 Pro tip - The "private gallery" effect: Create a slight, deliberate asymmetry by placing the mirror 5cm higher than the perfect alignment with the artwork. This mastered imperfection breaks rigidity and mimics the natural hanging style of contemporary art galleries. Why is it so effective? Our eye prefers dynamic balances to perfect symmetries, which are too often associated with institutional spaces.
🤔 "What if my mirror takes up too much visual space?"
"I love the idea but I'm afraid the mirror will distract from my artwork, which I spent a lot of money on..."
This concern is very legitimate and reveals your sincere attachment to your work of art. Rest assured: a well-chosen mirror never "steals" the show; it acts as a luxurious supporting role. Like a theater lighting designer who highlights the main actor, the mirror directs the gaze towards your artwork through reflections. To convince yourself, try this simple technique: temporarily place a small pocket mirror near your work and observe how it seems brighter, more present. The real mirror will reproduce this effect on a grand scale.
💡 Immediate reassuring tip: Start with a mirror 30% smaller than recommended. You can always exchange it for a larger size, but you'll quickly see that even this reduced format enhances your artwork without competing with it.
The 5 mistakes that sabotage a painting-mirror pairing
Now that you know how to proceed, let's protect your investment of time and money. These errors seem insignificant but turn a good idea into a decorative disappointment. Fortunately, they are all avoidable with the right reflexes!
- ⚠️ Neglecting standard height rule: Hanging the painting "at eye level" without considering the surrounding furniture. It's tempting because it's the rule everyone hears, but it ignores your actual use of the room. Consequence: your composition floats in emptiness. Solution: align the bottom of the painting 15-20cm above the back of the sofa. This error concerns 70% of self-taught decorators.
- 🔄 Choosing a mirror too small out of fear: The apprehension of overloading often leads to tiny formats that visually disappear. Result: the expected effect does not occur and the investment seems useless. Trust the proportions calculated in step 1, they are your assurance of results.
- 💰 Prioritizing price over reflection quality: A cheap mirror with distorted or dull reflections ruins the entire composition. It's better to wait and invest in an optically impeccable quality mirror. Your painting deserves it, and the difference is immediately noticeable.
- ⚡ Underestimating the importance of lighting: Installing the perfect composition and then leaving it in dimness. Lighting is not a detail but the revealer of your work. Without it, even the most beautiful pairing remains invisible. Budget for appropriate lighting from the start.
- ⏰ Rushing into a mirror purchase: Buying impulsively without testing with the templates. Enthusiasm is great, but take some time to reflect. A poor mirror choice is harder to correct than a bad placement. Live with your paper stencils for a few days before committing.
🛡️ Your anti-disappointment checklist: Before any definitive purchase, check that your test composition brings you pleasure and pride after 48 hours of observation. That the current lighting in the room is sufficient to reveal the details. That the wall's solidity can support the total weight. And finally, that those around you react positively to your project. These 4 validations guarantee a result that meets your expectations.
🎁 Special offer for readers
Because you took the time to inform yourself, enjoy 10% discount on your first order:
⏰ Valid 72h after reading • Applicable to all our products
Your frequently asked questions about the painting-mirror association
Allow between €150 and €800 depending on the quality and size of your mirror, assuming you already have your painting. A mid-range 50cm mirror costs around €200-€300. In terms of timing: 2h for planning and testing, 1 day for shopping, 2h for installation. That's a well-spent weekend for a result that will last for years. To optimize: start by precisely defining your needs using the described method, you will avoid unnecessary purchases.
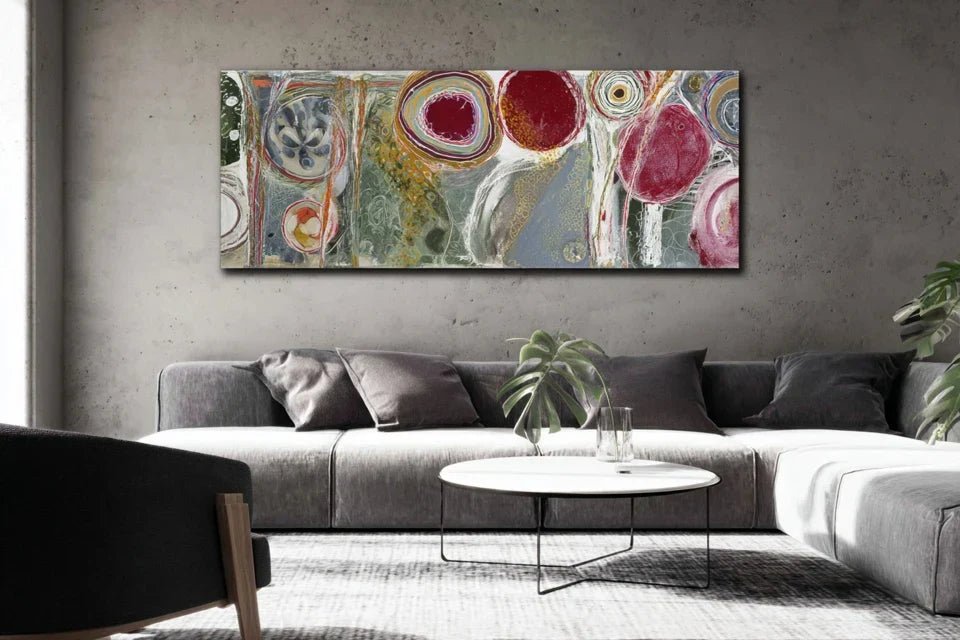
Excellent question! With a color-rich painting, your mirror becomes the soothing element of the composition. Choose a frame in a neutral shade (matte black, off-white, natural wood) that allows the whole to breathe. The golden rule: the more expressive your painting is, the more understated your mirror should be. This complementarity creates a sophisticated balance, not a competition.
Absolutely! Use drill-free fixing systems: load bars, high-resistance adhesives for lightweight paintings, or floor-to-ceiling telescopic rods for high rooms. Some systems support up to 15kg per anchor point. Creative alternative: place your elements on a console or wall shelf, creating a grounded composition just as elegant.
Yes, but sparingly! Maximum 2 associations in a room of less than 25m², otherwise the effect dilutes. The key: create a dialogue between compositions by taking up a common element (same frame style, same material, same accent color). Each association should have its own personality while participating in the overall harmony. Advanced technique reserved for confirmed enthusiasts!
Your decorative transformation is underway
In a few weeks, when you contemplate your perfectly balanced wall composition, you will smile as you remember your initial hesitations. Your living room will have gained that sophisticated dimension that makes all the difference: the art of entertaining in a thought-out and personal setting. Your guests will immediately notice this natural elegance without being able to put their finger on what has changed. This is the signature of a mastered interior.
Beyond aesthetic beauty, you will have developed an acute decorative eye that will serve you for all your future layout projects. This ability to see balances, anticipate harmonies, create dialogue between elements... These skills will accompany you in every decorative choice, from the simple acquisition of a cushion to the complete redesign of a room.
Understanding was indeed the most delicate step, the rest is just methodical implementation. Your first move? Take out that measuring tape and delineate your composition area. In an hour, you will have already crossed the first step towards this transformation that you have wanted for so long.
🚀 Your decor moment has arrived: You now possess the method, conceptual tools, and confidence necessary to create the association you dreamed of. Elegance is no longer a question of budget or "innate gift", but of technique applied with taste. Your future magazine interior awaits!


