

You've just hung your new favorite artwork on your pristine white wall, but the result leaves you perplexed. Instead of radiating as it did in the gallery where you discovered it, your artwork seems to get lost, almost invisible against this neutral surface.
Your living room's lighting cruelly reveals the reality: your artwork appears dull, lacking depth, as if it were missing presence. You feel that nagging frustration of seeing an artistic investment that doesn’t do justice to your interior, when you had already imagined the compliments from your guests.
You may have tried to change the lighting or move the artwork, but nothing works. This impression of "flatness" persists, and you begin to doubt your artistic choices or even your decorating talents.
Rest assured, it's neither your fault nor that of your artwork! The problem simply comes from the fact that white and neutral walls create a particular environment that requires specific techniques to reveal all the beauty of a work of art.
By the end of this article, you will master the secrets of lighting and highlighting that will transform your artwork into a true focal point of your interior, creating that sophisticated atmosphere you dreamed of.
Why does your painting disappear on a white wall?
The situation is more common than you think, and it's crucial to act now before this frustration leads you to move your artwork into a closet. A poorly highlighted painting loses 70% of its emotional impact, just like a diamond without a setting that appears dull under dim light.
🎨 Atelier revelation: Marie, a Parisian decorator, says her clients often panic after hanging their first painting on a white wall. "They call me thinking they've made a purchase mistake, when sometimes all it takes is adjusting the lighting to reveal a masterpiece!"
💬 Conversation with a decor expert
The golden rule of contrast: A painting never disappears due to lack of quality, but due to a lack of visual dialogue with its environment. In 48 hours of adapted highlighting, your artwork will regain all its splendor.
Decoding: what's really happening in your living room
Do you recognize these situations? Your artwork seems to "float" on the wall without visual anchoring, ceiling light creates annoying reflections on the surface, or the piece appears too small compared to the immensity of the white wall.
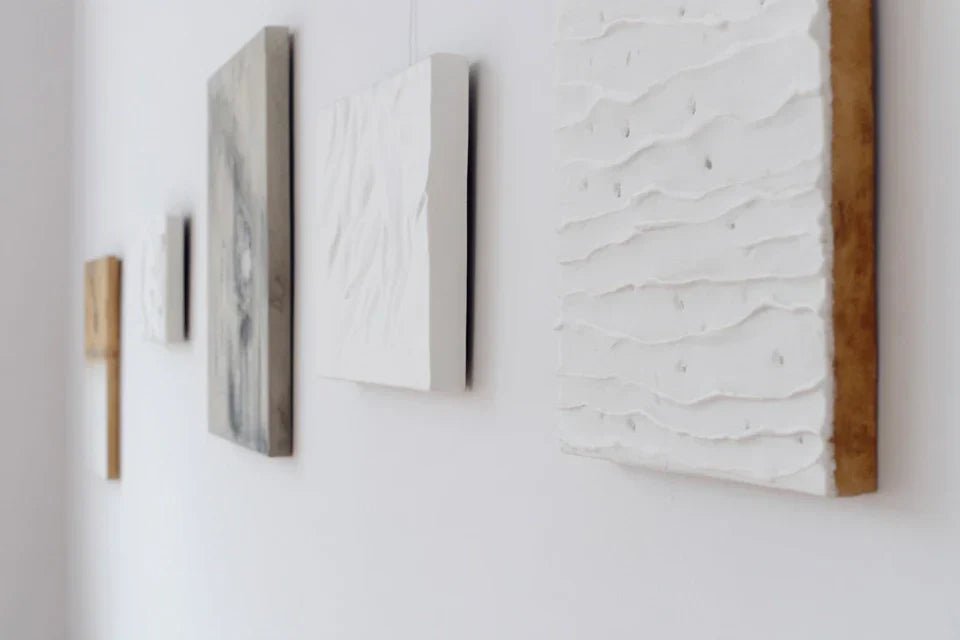
The real phenomenon happening is called chromatic fusion: your eye cannot create a clear separation between the artwork and its support. The white wall acts as a "visual absorber" that neutralizes the natural contrasts of your work.
Imagine a chameleon on a branch: if the environment offers no contrast, even the most colorful animal becomes invisible. Your artwork experiences exactly the same thing on this neutral wall.
🔍 Hidden cause #1: uniform lighting
Contrary to what many think, general uniform lighting is the enemy of an artwork. Most people believe that you need to "well light" the entire room, while magic happens from plays of shadow and light.
It's like photographing a face with direct flash: everything flattens out. The reliefs, textures, and color nuances of your artwork need directional lighting to reveal their depth.
This discovery will completely change your approach to home lighting. You will move from "general illumination" mode to scenic lighting mode that transforms every corner of your living room into a private gallery.
🧪 Quick test: Turn off the main lighting and light only a desk lamp directed at your artwork from an angle of 30°. Observe the striking difference in less than 30 seconds!
⚡ Hidden cause #2: lack of "visual breathing room"
Many believe that you need to "fill" a white wall for it to be beautiful. In reality, your artwork needs controlled negative space around it to create maximum impact.
Think of a jewel in a velvet case: it's not the absence of decoration that is problematic, but the lack of visual delimitation that allows the eye to focus on the essential.
This revelation explains why you feel this sense of "emptiness" around your artwork. Your brain instinctively seeks visual cues to fully appreciate the work.
🎯 Hidden cause #3: unsuitable eye level
Here's a secret that few notice: the hanging height radically influences the perception of an artwork on a white wall. Too high, it seems to "fly away"; too low, it appears to "sink" into the wall.
You can easily spot this problem: if you need to tilt your head up or down to admire your artwork in a natural position, then the hanging needs adjustment.
This positioning error creates an unconscious break in your daily pleasure of contemplating the work, gradually diminishing your artistic satisfaction.
🔍 3 revealing signs of a "lost" artwork:
- Your guests don’t notice it spontaneously: The artwork lacks magnetic presence, like a melody played too softly in an orchestra
- You sometimes "rediscover" it when entering the room: Sign of an insufficient visual anchoring, your eye “forgets” the painting due to a lack of memorable contrast
- The artwork appears different depending on the time of day: Reveals an excessive dependence on natural light, symptom of unsuitable artificial lighting
⭐ The trigger element: creating a "visual ecosystem"
The real difference between a painting that “lives” and one that “survives” lies in the creation of a harmonious visual ecosystem. This is the domino effect that transforms a simple wall decoration into a true daily artistic experience. You can identify this ecosystem by three clues: your gaze is naturally drawn to the painting when entering the room, the artwork seems to "dialogue" with other decorative elements, and you feel a sense of completeness when contemplating the whole.
Law of captivated gaze: A well-highlighted painting attracts the eye in less than 3 seconds and retains it for at least 10 seconds. Test this by observing your guests' behavior!
| ❌ Frustrating misconception | ✅ Liberating reality | 💡 Why it works | 🎯 Immediate benefit |
|---|---|---|---|
| "My white wall makes everything look bland" | White reveals colors by contrast | Natural relief effect | More vibrant colors |
| "I need more light everywhere" | Shadow creates depth | Sculptural chiaroscuro play | Texture and relief revealed |
| "A large wall requires multiple paintings" | Negative space magnifies the unique artwork | Focus of gaze | Emotional impact multiplied |
| "Modern art doesn't go with my classic style" | Stylistic contrast creates character | Dialogue between eras | Asserted personality |
The 3-step method to reveal your painting
It's unnecessary to revolutionize everything! With this progressive approach, you will transform your space step by step, like a gardener who reveals the beauty of a plant by successively adjusting exposure, watering and environment. Within 48 hours maximum, you will observe a spectacular metamorphosis that will definitively reconcile you with your white wall.
🗺️ Your roadmap: We will proceed like a theater lighting designer: first create the luminous atmosphere (step 1), then structure the visual space (step 2), and finally refine the details that make the difference (step 3). At each step, you will notice an immediate gain in presence and impact.
✨ Step 1: Create the revealing lighting
Starting with light is fundamental as it determines 80% of the visual impact of your artwork. It's like planting roots before growing a tree: without this solid foundation, all other efforts will be in vain. Once you’ve mastered this step, you’ll immediately feel that deep satisfaction of seeing your work "come to life" before your eyes.
🔧 What you need
- Adjustable LED spotlight (3000K): Choose a model with adjustable intensity with a maximum angle of 30°. Avoid halogen spotlights that heat up and alter colors. Find them in high-end hardware stores or lighting specialists. Quality criterion: the CRI (Color Rendering Index) must exceed 90 to reveal the true nuances of your work.
- Electrified track or adjustable wall mount: The system allows you to easily reposition the lighting according to your needs. The rail offers more flexibility but the wall mount is more discreet. Check the sturdiness of the support as it must be able to support at least 2kg without flexing. The orientation angle must be adjustable by a minimum of 180°.
- Dimmer switch or remote control: Essential for adapting the intensity according to the time and desired ambiance. It's the difference between "functional" lighting and "living" lighting that adapts to your moments of contemplation.
Now let’s move on to practice with precise gestures
🎯 Installation of your dedicated lighting
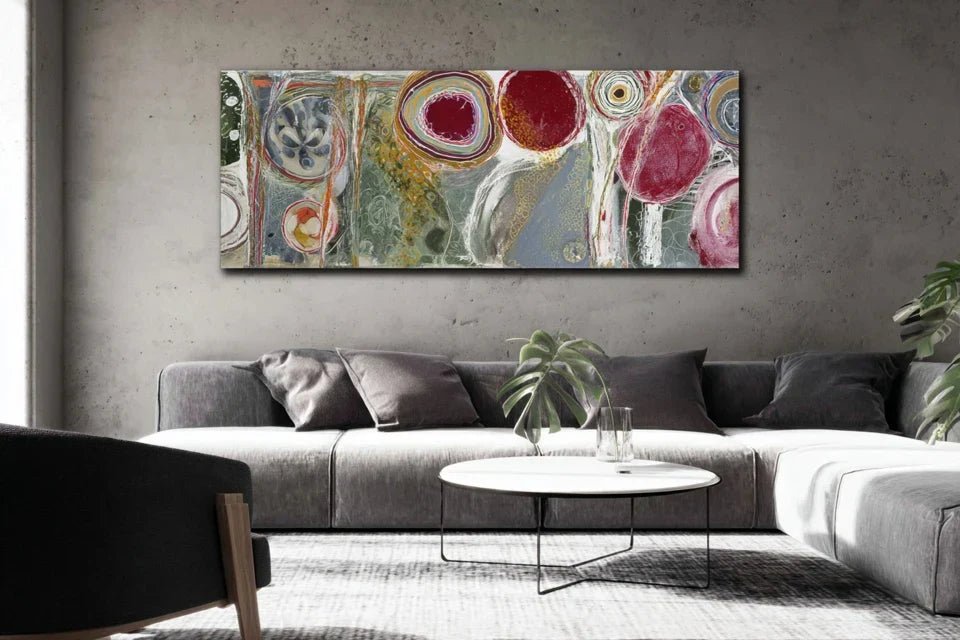
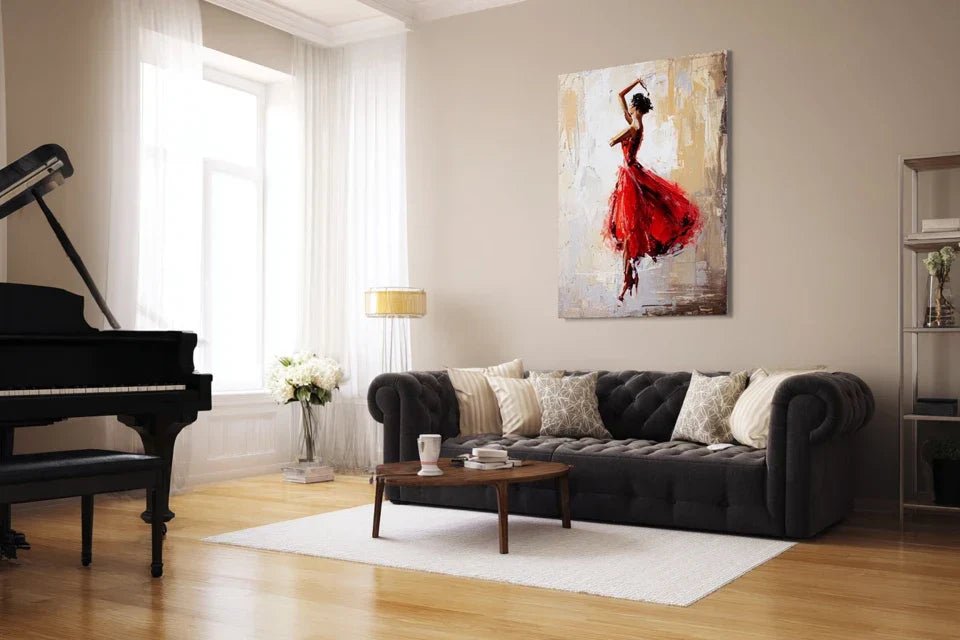
Spot positioning: Install the spotlight 1.5 meters from the wall and 30cm above the artwork, creating a 30° downward angle. This position avoids reflections on the painted surface while creating a subtle model that reveals textures. Don't be afraid: this configuration is used in all professional museums.
⏱️ Time: 45 minutes | ✅ Success when: No visible reflections on the artwork, uniform lighting across the entire surface | ⚠️ Attention: An angle that is too steep (more than 45°) creates harsh shadows that distort colors
Intensity adjustment: Start at 70% power then adjust according to the overall ambiance of the room. The goal is for the artwork to be twice as bright as the surrounding wall, without creating an aggressive contrast. This subtle difference naturally guides the eye without dazzling.
⏱️ Time: 10 minutes | ✅ Success when: The artwork "pops out" naturally without appearing overexposed | ⚠️ Attention: Lighting that is too powerful fatigues the eyes and distorts subtle colors
Night validation test: Turn off all other lighting and keep only the one dedicated to the artwork. The work must radiate in the dark like a luminous window. This verification confirms that your installation creates the desired "private gallery" effect.
⏱️ Time: 5 minutes | ✅ Successful when: The artwork becomes the magnetic focal point of the room | ⚠️ Caution: If the lighting seems artificial, reduce intensity by 20%
🎨 Artistic validation: Your artwork should now present more vibrant colors, sharper details and a definite presence. You should feel the desire to contemplate it for longer. If it's not perfect yet, adjust the angle rather than the intensity, and remember that magic often happens after 24 hours of visual adaptation!
OUR RECOMMENDED PRODUCTS
🖼️ Step 2: Structure the visual space
Now that your artwork shines brightly, it's time to create its visual frame. This step transforms a simple hanging into a true decorative composition. The effect is immediate: your guests will instinctively notice that "something has changed" without being able to identify exactly what.
🎨 Composition elements
- Decorative molding or slim frame: A discreet horizontal line placed 20cm below the artwork creates a visual "base" that anchors it to the wall. Choose a tone-on-tone finish with your existing decor. The ideal thickness: maximum 2-3cm to remain subtle while marking the boundary.
- Complementary decorative object: A green plant with clean lines or a designer vase placed on the floor or nearby furniture. It must "respond" visually to the artwork without competing with it. Golden rule: choose an element whose height represents 1/3 of the artwork's height.
- Rug or floor runner: Defines the contemplation space and creates a natural invitation to approach the work. Its color should subtly pick up a shade present in the artwork to create a harmonious chromatic dialogue.
📐 Creating your composition
Installation of the anchor line: Fix your decorative molding perfectly horizontally 20cm below the artwork. This invisible line to the conscious eye "positions" the work and prevents a floating effect. Use a spirit level because even 2° of inclination disrupts the visual balance.
⏱️ Time: 20 minutes | ✅ Successful when: The artwork seems "placed" on an invisible base | ⚠️ Caution: A molding that is too thick attracts attention to itself rather than to the work
Positioning of the complementary element: Place your decorative object in a visual triangle with the artwork: neither directly below (too static) nor too eccentric (break in harmony). The ideal is a displacement of 30-40cm to the left or right, creating a subtle movement that guides the eye.
⏱️ Time: 15 minutes | ✅ Successful when: The whole forms a balanced composition without perfect symmetry | ⚠️ Attention: Avoid overly colorful objects that distract from the artwork
💎 Step 3: Expert Finishing Touches
This final step separates the amateur from the true connoisseur. You will learn the subtleties that only professional decorators master. The result? A space that breathes expertise and inspires respect, that particular atmosphere of character interiors that you admire in magazines.
✨ Professional Refinement
Adjusting color temperature: In the evening, slightly warm the lighting of the artwork (to 2700K) to create a more intimate atmosphere. This chromatic variation reveals different facets of the work depending on the moments, just like in a professional gallery.
⏱️ Time: 5 minutes | ✅ Successful when: The atmosphere becomes cosier without losing definition | ⚠️ Attention: Lighting that is too warm distorts blues and greens
Creating the "halo" effect: Add a very soft indirect lighting that rises slightly up the wall behind the artwork. This "wash wall" technique used in museums creates exceptional visual depth and avoids the “artwork stuck to the wall” effect.
⏱️ Time: 30 minutes | ✅ Successful when: The artwork seems to “float” slightly in front of the wall | ⚠️ Attention: Backlighting should never exceed 30% of the main lighting
Expert progression rule: Each step must bring an immediate visual gain without compromising the balance achieved previously. If an addition disrupts harmony, return to the previous step and consolidate before continuing.
Congratulations! You now master the professional codes of artistic enhancement. These techniques give you a considerable advantage: you can transform any space into a sophisticated private gallery.
🏆 Gallery secret: For a spectacular effect during your receptions, install a connected dimmer that allows subtle variations in intensity throughout the evening. At the beginning of the evening, 60% lighting for a convivial atmosphere, then gradual increase to 90% when you want to draw attention to the artwork. Your guests will be amazed by this staging worthy of the most beautiful exhibitions!
💭 "What if my painting has very bright colors?"
"I have a painting with very saturated colors, will these techniques be too much?"
Excellent question that shows your artistic sensibility! It is precisely with colorful artworks that these techniques reveal all their subtlety. A controlled lighting will "civilize" the bright colors without dulling them, creating this elegance that we observe in the most prestigious contemporary galleries.
🎯 Validation test: Photograph your artwork before and after lighting with your smartphone in automatic mode. If the colors appear more balanced on the "after" photo, you've got it! Your eye will perceive the same improvement.
⚠️ Mistakes to absolutely avoid
After supporting hundreds of art enthusiasts, I have identified the recurring mistakes that sabotage the most beautiful projects. These pitfalls are perfectly normal but easily avoidable when you know them.
- 🔥 Lighting too powerful from the start: Enthusiasm often leads to "doing too much". Result: an overexposed artwork that loses its subtlety and quickly fatigues the eye. Always start with 50% intensity then increase gradually. This is the most common mistake among passionate beginners!
- 📐 Multiplication of decorative elements: Wanting to "enrich" the space around the artwork often leads to visual clutter. Your work needs to "breathe" to reveal its personality. Limit yourself to a maximum of 2 elements within a radius of 2 meters. Simplicity is always more elegant than accumulation.
- ⚡ Neglecting ambient lighting: Focusing only on the spotlight dedicated to the artwork without adapting the general lighting of the room. The contrast then becomes too harsh and uncomfortable. Reduce surrounding lighting by 30% to create a harmonious light hierarchy.
- 📏 Inappropriate hanging height: Blindly following the "1m60 from the floor" rule without taking into account your height and the layout of the room. The center of the artwork should be at eye level when you are in your usual contemplation position (standing or sitting depending on the room).
- 🎨 Inappropriate frame color choice: Opting for a flashy gold frame thinking "to look richer". On a white wall, prefer neutral tones (matte black, natural wood, off-white) that do not compete with the artwork. The frame should serve art, not impose itself.
🔍 Quick verification system: Each week, observe your installation for 30 seconds when entering the room. Checkpoints: does the artwork immediately attract your gaze? Do the colors seem faithful? Do you feel pleasure in contemplating it? If one answer is negative, adjust the corresponding element before dissatisfaction sets in.
🎁 Special offer for readers
Because you took the time to learn more, enjoy 10% discount on your first order :
⏰ Valid 72h after reading • Applicable on all our products
❓ Your most frequently asked questions
Great news: professional lighting starts at 80€ for a complete kit (LED spotlight + rail + dimmer). For 150€, you get a high-end system that will transform several artworks. Avoid spotlights costing less than 40€ which produce poor quality light. The investment pays off from the first evening when your guests notice the difference!
The impact is immediate upon installation, but your eye gradually gets used to it for 48h. After a week, you won't be able to imagine your painting without this lighting! To optimize: test different intensities at key moments of your day (morning, afternoon, evening) and memorize your favorite settings.
Rest assured! 90% of solutions do not require any drilling or complex wiring. Electrified rails are fixed with 4 screws and plug into a standard outlet. For wall lighting, call an electrician for a maximum of 2 hours work (60-80€). Many stores also offer an installation service for around 50€.
Absolutely! Contemporary art reveals even better its subtleties with controlled lighting. Textures, impastos, and material games take on an extraordinary dimension. Abstract works with large areas of color become particularly striking as directional lighting reveals the nuances invisible to the naked eye.


