Installing a Painting on a Brick or Stone Wall: Precautions to Take
By Alexandre MARY
⏱️ Reading time : 8 minutes
You just fell in love with this favorite artwork that will transform your living room, but here's the thing: you're staring at a rustic brick wall or a natural stone partition with a knot in your stomach. How to hang picture on brick wall without damaging anything?
You can already imagine the disaster: the drill slipping, the brick crumbling, the gaping hole disfiguring your wall... And that precious artwork ending up on the floor in a thousand pieces.
You may have already tried with a classic DIY dowel or a simple nail. Result? The support came loose after a few weeks, leaving your work of art hanging precariously.
Don't worry, it's not your fault! Walls made of hard materials require a specific technical approach that store salespeople don't always master.
By the end of this article, you will know exactly how to drill into decorative stone wall safely and install your artwork with the confidence of a professional. No more stress, just pride in a perfect hanging!
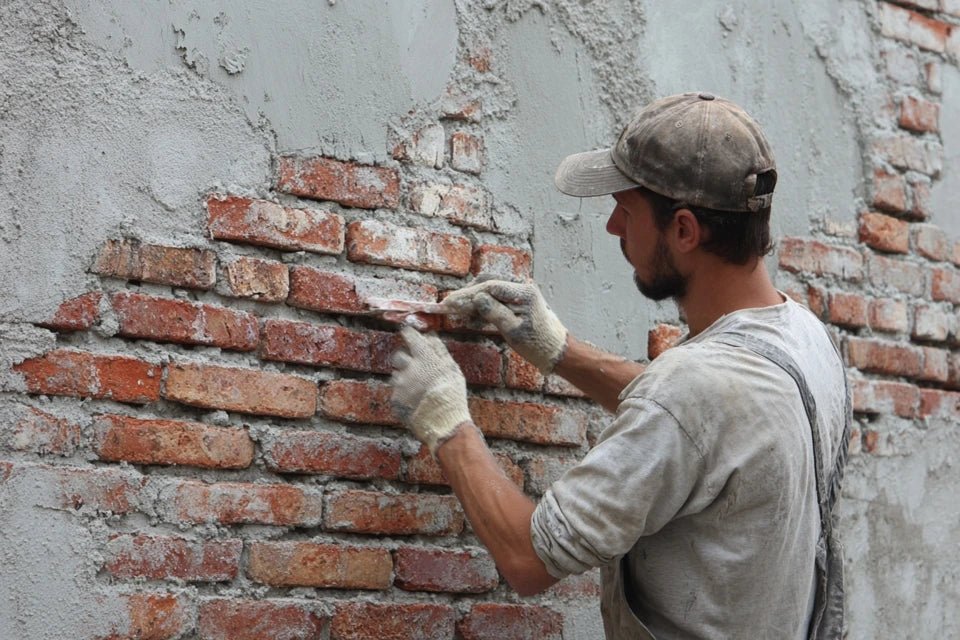
Why does your brick wall deserve special attention now?
Installing a picture on brick or stone is not just about decoration; it's an investment in the durability of your interior. Waiting risks permanently damaging this character wall that adds so much charm to your room. It’s like trying to plant a tree in rocky soil with a simple hoe: without the right tools, you damage everything.
🏠 Customer testimonial: "I wanted to hang my vintage picture on my exposed brick wall with a standard dowel. After 3 weeks, I heard a cracking sound at night... My €800 artwork was lying on the floor, the frame cracked and the wall holed. I should have invested €15 in the right equipment rather than paying €200 for repairs."
💬 Conversation with a decor expert
"I'm afraid that drilling my beautiful old brick will completely crack it..."
On the contrary! With the right technique, drilling a brick preserves its structure. It’s like getting an injection: the right move in the right place leaves no trace.
"But special dowels cost more than classic ones..."
€15 of professional equipment versus €200 for repairs if it fails. Not to mention the risk to your artwork! It’s like choosing good tires for your car.
The golden rule of hanging on hard materials: Investing in the right equipment from the start saves you time, money and preserves your character walls. Guaranteed result in less than an hour of careful work.
Why did your last attempt fail?
Do you recognize these situations? Your dowel spins in the void, the drill slips on the surface, or worse, your stone wall crumbles around the hole. These symptoms reveal that you are using the wrong approach for these specific materials.
This isn't a matter of skill, but of understanding of materials. Brick and stone have complex internal structures that react differently depending on the type of stress. It is normal for classic methods to not work.
Imagine trying to screw into Swiss cheese with a corkscrew: even with force, you will never get a solid anchor. You need to adapt the tool to the material.
Variable density: the invisible trap
Unlike plasterboard or uniform concrete, brick and stone have areas of different densities. What you take for a homogeneous material actually hides air pockets, mortar joints, and softer inclusions.
It's like trying to hammer a nail into a mille-feuille: depending on where you fall, the resistance varies greatly.
As a result, your dowel ends up in a hollow or friable area, and your wall art gradually loses its hold. You thought you had fixed it well, but the internal structure cannot support the weight.
🔍 Revealing test: Tap your wall lightly with a screwdriver. If the sound varies depending on the areas (deaf or resonant), you confirm this heterogeneity that explains your previous failures.
The choice of drill bit: the 90% error
You are probably using a classic concrete drill bit, thinking that "hard on hard" will work. In reality, brick and stone require a different progression: they resist by friction rather than compression.
This is the difference between drilling into wood (which allows itself to be traversed) and drilling into a castle wall (which requires patience and progressive technique).
With the wrong drill bit, you create vibrations that crack the structure around the hole, weakening the anchor before even placing your dowel.
Drilling speed: the critical factor
You are probably going too fast, out of impatience or lack of knowledge. Natural materials like old stone or brick heat up quickly under friction, which makes them brittle.
You can easily observe this: if your drill bit comes out hot and you smell burning, you have weakened the material around the hole.
This overheating creates invisible micro-cracks that compromise the solidity of your fixing in the long term.
The 3 warning signs to recognize:
Colored dust coming out of the hole: Indicates that you are crushing the material instead of drilling it cleanly
Drill bit that heats up quickly: Reveals a bad attack angle or excessive speed that weakens
Dowel that sinks in too easily: Sign that the hole has widened and will not be able to hold the weight
The diameter of dowel: the misunderstood equation
Most people choose the wall plug according to the weight it needs to bear, but on hard irregular materials, it's the load distribution that matters. A wall plug that is too thin concentrates the pressure, while one that is too large weakens the material too much. It’s an inverted lever effect: you need to find the optimal balance point for your type of wall.
The fundamental principle to remember: On brick and stone, solidity comes from the complementarity between the right drill bit, the right speed and the right wall plug. Always test your technique on a hidden area before final installation.
❌ Classic approach
✅ Adapted method
💡 Why it changes everything
🎯 Concrete benefit
Concrete drill bit + fast speed
Special masonry drill bit + slow progression
Respects the internal structure of the material
Clean hole without peripheral cracking
Universal wall plug according to weight
Wall plug adapted to the material + calculated diameter
Distributes the load over the healthy area
Durable fixing even with a heavy picture
Direct drilling without preparation
Density test + precise marking
Avoids friable areas and weak joints
First successful attempt without retouching
Immediate installation after drilling
Hole cleaning + verification
Eliminates residues that prevent expansion
Wall plug that expands perfectly
The professional method for a perfect hanging
Now that you understand why classic approaches fail, let's move on to the technique that actually works. This 3-step method guarantees a professional result, even if it’s your first time on this type of wall. Think about building a house: solid foundations, adapted structure, careful finish.
🎯 Overview of the method: Wall diagnosis (5 min), technical drilling (10 min), secure installation (5 min). Each step validates the next, like foundations that condition walls that condition the roof.
Step 1: Diagnosis and preparation (the foundations of your success)
This step determines 80% of your final success. This is where you will understand your wall to perfectly adapt your approach. Once this analysis is complete, you will feel that reassuring confidence of knowing exactly where and how to proceed.
Professional diagnostic equipment
Material detector: Electronic device that scans the internal density of your wall in real time. Essential for avoiding cavities and hidden reinforcement bars. Available in hardware stores for 25-40€. Choose a model with both audible AND visual indication. Avoid "budget" detectors that provide false information.
Diamond graduated drill bit: Reinforced tip specially designed for hard materials, with visible graduations to control depth. Works by progressive abrasion rather than percussion. Recognizable by its metallic color and micro-notches. Directly impacts the cleanliness and precision of your holes.
Professional laser or bubble level: A tracing tool that guarantees perfect alignment of your fixings even on uneven surfaces. Essential because brick and stone often have planarity defects that deceive the naked eye.
Now, let's move on to practice with the step-by-step method
Execution that makes the difference
Scan your fixing area: Pass the detector over an area of 30x30cm around the intended location. Look for dense and homogeneous areas, avoid mortar joints and cavities. This step reveals your wall's "internal map" that you cannot see.
⏱️ Time: 3-4 minutes | ✅ Successful when: Stable and dense signal over at least 5cm | ⚠️ Attention: An intermittent beep indicates a hollow area - move a few centimeters
Mark your fixing points precisely: Use the level to draw guidelines with a pencil, checking for horizontality over at least 50cm. The rule: always mark wider than necessary to have options if you discover an obstacle during drilling.
⏱️ Time: 2-3 minutes | ✅ Successful when: Clear lines and perfect level | ⚠️ Attention: On uneven brick, rely on the level rather than the visual alignment of the bricks
✓ Step 1 validation: You have identified dense areas, drawn perfectly aligned guidelines and chosen a location that avoids fragile joints. If you are still unsure about the solidity of an area, do a discreet test with a fine tip. You are now ready for technical drilling.
OUR RECOMMENDED PRODUCTS
Step 2: Technical drilling (the precision that changes everything)
You are now moving to the next level: mastered drilling which respects the structure of your wall. This step requires more concentration but brings immense satisfaction when you see the perfect hole form without any cracks.
Specialized drilling equipment
Drill with variable speed: Essential to adapt the rotation to the material resistance in real time. Look for a drill with adjustable torque and "soft percussion" function. Variable speed allows you to feel the material and adjust.
6mm and 8mm diamond drill bits: Universal sizes that match the most common wall plugs for paintings. Diamond abrades the material instead of fracturing it. Recognizable by their greyed tip and tight spiral.
Construction vacuum or blower: To immediately remove residues that hinder the progress of the drill bit. A clean hole guarantees a plug that unfolds perfectly.
Start drilling gently: Position the drill bit perpendicularly, start at minimum speed (position 1 on your drill) and let the tip "bite" gradually. Very slowly increase the speed according to the felt resistance.
⏱️ Time: 30-45 seconds per hole | ✅ Successful when: Regular progress with fine and clear dust | ⚠️ Attention: If the drill bit heats up or you feel vibrations, slow down immediately
Clean the hole thoroughly: Use the blower or vacuum to remove all residues. A poorly cleaned hole prevents the plug from deploying correctly. Check the depth with a fine rod.
⏱️ Time: 1 minute per hole | ✅ Successful when: Perfectly clean hole and at the correct depth | ⚠️ Attention: Residues at the bottom create false resistance that can break your plug
Step 3: Installation and final verification (complete mastery)
You are now reaching the level of professional finish. This last step transforms your technical work into a perfect aesthetic result. It is here that you feel the pride of a job well done and confidence in the durability of your installation.
Quality plugs and fixings
Expansion plugs for hard materials: Specific models with anti-sinking collar and controlled expansion. Recommended brands: Fischer, Rawl, Hilti. Absolutely avoid universal "all materials" plugs.
Stainless steel screws with suitable head: Length calculated according to the thickness of your painting support. Stainless steel prevents corrosion that can stain your wall over time. Countersunk head for a discreet finish.
Distribution washers: Small discs that distribute pressure over a larger surface, protecting your wall and reinforcing the fixing.
Install plugs with precision: Insert the plug by hand until the collar, then gradually screw in feeling the resistance increase. Expansion must be gradual to avoid cracking the surrounding material.
⏱️ Time: 2 minutes per plug | ✅ Successful when: Flush plug and firm resistance to screwing | ⚠️ Attention: If it screws too easily, the plug does not expand - check the cleaning of the hole
Load test before hanging: Temporarily suspend a weight equivalent to your artwork to check its stability. This verification gives you peace of mind before installing your precious piece.
⏱️ Time: 2-3 minutes | ✅ Successful when: No movement or creaking under load | ⚠️ Attention: Any play indicates a problem - do not take any risks with your artwork
Professional progression rule: Each step must be perfect before moving on to the next. An approximate diagnosis compromises the drilling, a botched drilling ruins the installation. Take the necessary time for each phase.
You now master the basic technique, but here are the expert tips that make the difference between an amateur job and a professional installation. These subtle details give you that extra assurance and that impeccable result that impresses.
🎓 Professional secret: On very old or friable brick, lightly moisten the drilling area with a damp brush. The moisture temporarily stabilizes the structure and limits chipping. Allow to dry completely before inserting the anchor.
❓ Frequent question from our readers
"I'm stressed about messing up and permanently damaging my beautiful stone wall..."
I perfectly understand this apprehension! Your stone wall has probably been around for decades or centuries, and the idea of "hurting" it is distressing. But rest assured: with the right technique, drilling into stone is less risky than drilling into plasterboard. Stone is a noble material that "forgives" small mistakes if you respect its nature. Start by doing a discreet test behind a piece of furniture to gain confidence; you'll see that it's much simpler than your fears suggest.
💡 Reassuring action: First, drill a 3mm pilot hole in a hidden area (behind a radiator for example). You will find that the stone drills cleanly and that your concern was disproportionate.
The mistakes that can ruin everything (and how to avoid them)
After years of helping customers, I have identified the recurring pitfalls that turn a simple installation into a nightmare. These errors are so common that I prefer to tell you about them now to spare you frustration and costly repairs.
⚠️ Neglecting the density test: You're in a hurry and attack drilling directly without scanning. Result: you hit a hollow area and your anchor spins in the void. Always take these 3 minutes of diagnosis, they save you 3 hours of repair.
🔥 Forcing on a drill bit that is heating up: You feel resistance and insist thinking "to get through" the obstacle. In reality, you are carbonizing the material around the hole, making it crumbly. As soon as it heats up, stop! Let it cool down and reduce the speed.
💨 Rushing too quickly out of impatience: You want to finish quickly and put the drill at full speed from the start. On stone and brick, speed creates vibrations that crack. Start slowly, it's counterintuitive but faster in the end.
🎯 Aiming for mortar joints: They seem softer so easier to drill. Trap! The mortar crumbles and doesn’t hold the weight. Always aim for the heart of the brick or stone, even if it's harder at first.
🔧 Using an undersized wall plug: You choose 6mm for a heavy picture out of fear of making a "big hole". A plug that is too small in a hard material concentrates stresses and eventually pulls out. It’s better to have an 8mm hole done properly than a 6mm one that fails.
🛡️ Safety checklist before installation: Wall scanned and dense areas identified, appropriate drill bit and minimum starting speed set, wall plugs corresponding to the weight AND material selected, vacuum cleaner or blower within reach to immediately clean up. Warning sign: abnormal noise, excessive heat, or too easy progress of the drill.
Because you took the time to inform yourself, enjoy 10% discount on your first order:
ART10
⏰ Valid 72h after reading • Applicable to all our products
Your practical questions about installation
💰 How much does a professional installation on a brick wall actually cost?
For a standard picture, count 15-25€ for materials (drill bit + wall plugs + quality screws) and 1 hour of careful work. A professional charges between 80-120€ for the service. By doing it yourself with the right method, you save 60-100€ while acquiring a lasting skill. Paid back after the second picture!
⏰ How long does it take to master the technique on a stone wall?
With this method, 2-3 attempts are enough to gain confidence. The first picture takes 45 minutes (with learning), the third only 15 minutes. The progression curve is fast because the technique follows a clear logic. Many of our customers become "family experts" after their first success!
🏠 Does this method work on all types of old walls?
Yes, it adapts to 95% of cases: solid brick, hollow brick, natural stone, reconstituted stone, even cellular concrete. The only exception is very old wattle and daub or adobe walls which require a special approach. The initial diagnosis immediately reveals compatibility.
🔧 Can I use this technique for objects heavier than a picture?
Absolutely! The principles remain the same, only the sizing changes. For a heavy shelf or mirror (+ of 10kg), switch to a 10mm drill and reinforced expansion anchors. The diagnostic and drilling method remains the same, you just adapt the caliber.
🎨 How do I know if my wall will support a large artwork?
Simple rule: 1 fixing point per 3kg increment, spaced at least 30cm apart. An 80x60cm artwork weighing 6kg requires 2 points with a 40cm spacing. On healthy brick or stone, you can support up to 50kg with 4 well-distributed points. The diagnostic reveals the actual capacity of your wall.
Your transformation: from apprehension to mastery
In 3 weeks, when your guests admire your perfectly hung artwork on that beautiful brick wall, you will feel that discreet pride of a job well done. You will never see a stone wall as an obstacle again, but as an opportunity to create a characterful hanging that lasts over time.
This skill goes beyond the simple artwork: you have acquired the technical confidence for all your future decor projects. Shelves, mirrors, luminaires... Your view of the layout has changed. You now know how to adapt your approach to the material, diagnosis before action.
The hardest part was understanding the logic, now you have it. Take out your detector, mark your reference points, and start with that first test hole. In an hour, you will be hanging your artwork with the serenity of an expert.
🚀 Your next step: Each brick or stone wall deserves a decoration worthy of it. You now have all the keys to transform these characterful surfaces into extraordinary personal galleries!
📚 To go further in the art of hanging
Now that you master hard walls, discover our complete guides on specialized fixings: plasterboard, concrete, hollow core doors. Each material has its secrets!


