DIY: Using Chopsticks, Rods or Ropes to Hang Multiple Works
By Alexandre MARY
⏱️ Reading time: 8 minutes
You've been staring at your bare walls for weeks, with that pile of beautiful artworks sadly waiting in a corner.
You’ve tried arranging them with classic nails, but the result looks more like a chaotic patchwork than a professional gallery.
Each attempt to hang something ends up with more holes in the wall, tilted artworks, and that frustrating feeling that your interior is desperately lacking artistic coherence.
You can already imagine the gallery effect you dream of.
You may have tried industrial hanging rails or complex systems from stores, but they cost a fortune and turn your living room into a cold museum exhibition.
Classic solutions never give that natural and bohemian look you're searching for.
That’s perfectly normal: most traditional methods completely ignore the art of creative suspension.
They focus on technical solidity but forget visual harmony and decorative originality.
By the end of this article, you will master 3 creative techniques to transform your walls into true personalized galleries, with simple materials that create a spectacular effect from the first glance.
Why doesn’t your traditional hanging ever really work?
Hanging several artworks harmoniously has become a major decorative challenge in a time when our interiors reflect our personality.
Waiting longer means telling an incomplete story and missing the opportunity to create that gallery atmosphere that impresses your guests as soon as they enter.
Imagine the domino effect: a well-composed wall inspires confidence, creates conversations, and completely transforms the energy of your space.
🎨 Testimonial from a decorator: "Marie had bought 6 artworks she loved but didn't dare to hang them. Result: 8 months living with dull walls. In one afternoon with the wooden batten technique, she created a gallery wall that all her loved ones admire."
💬 Conversation with a decor expert
"I'm afraid that hanging several artworks on the same fixing will make it look too busy or amateur..."
On the contrary! The most prestigious galleries actually use this technique to create visual coherence. It’s like a bouquet of flowers: the whole creates more impact than each element isolated. The eye perceives an intentional composition rather than a haphazard assembly.
"I've always been told that you need one fixing point per artwork for it to be solid..."
This rule dates back to the era when heavy oil paintings on canvas were hung! Today, with modern prints and weight distribution systems, a well-fixed rail easily supports 5-6 lightweight artworks while offering a flexibility of composition impossible with individual nails.
The golden rule of creative hanging: A unified fixing creates more visual harmony than multiple attachment points. It's like conducting an orchestra - all the musicians follow the same baton to create a coherent symphony.
What really happens when your artworks seem to "float" on your walls
You probably feel this frustration: your artworks seem lost on your walls, without dialogue between them, like isolated decorative islands.
Perhaps you are constantly adjusting their position, or you avoid certain walls altogether for fear of the final result.
What's really happening is that your eye naturally seeks a guiding line, a visual thread.
Without a unified suspension system, each artwork creates its own logic, and the whole becomes chaotic despite the individual beauty of each piece.
It’s exactly like trying to read a book where the lines are not aligned - even the most beautiful text becomes difficult to appreciate.
The first hidden cause: The illusion of perfect geometry
Contrary to what we imagine, perfect hanging doesn't come from perfect geometry but from creating a visual rhythm.
The difference? Geometry imposes, rhythm inspires and naturally guides the eye.
Think of a jazz melody: it’s not the perfectly measured notes that create emotion, but the way they dance together in a common tempo.
This revelation will completely change your approach: instead of measuring equal distances, you will create visual relationships between your artworks.
🔍 Instant test: Look at your current artworks with slightly squinted eyes. If you can distinguish an "invisible line" that connects them, it's successful. Otherwise, they float independently.
The second hidden cause: The myth of the “single focal point”
We are told that a room must have a single focal point, but the most successful interiors actually create "visual conversations" between several elements.
The real secret is visual hierarchy rather than unique domination.
It's like a successful dinner: there’s not just one person talking, but a fluid conversation where everyone finds their place naturally.
As a result, you deprive yourself of decorative richness by trying to create too simple compositions that lack personality and originality.
The third hidden cause: The forgetting of the temporal dimension
Almost no one thinks about the evolution of their decor over time, yet your tastes and collection of artworks will naturally evolve and enrich
Marie discovers this reality when she wants to add a new canvas 6 months after its installation.
You can spot this trap if you already hesitate to modify your current layout or if the idea of adding a work stresses you out.
This rigidity deprives you of the joy of evolving your decor as you make artistic discoveries and seasonal desires.
3 signs that your hanging system is limiting you:
You avoid buying new artworks: Your wall seems "complete" while lacking dynamism - like a garden too orderly which has lost its spontaneity
You take few photos of this area: Instinctively, you know that the harmony is not there - your eye naturally avoids unbalanced compositions
Your guests comment on the individual artworks: They do not perceive the whole as an intentional composition - a sign that visual coherence is lacking
The trigger element: the magic of the guiding line
What really makes the difference is the creation of a "visual backbone" that unifies the whole.
This guiding line acts like an invisible conductor: it coordinates all elements without imposing itself visually.
You will recognize it when your guests spontaneously say "I love your wall" rather than "I like this painting".
The rule of the invisible line: A successful suspension always creates a visual connection that the eye perceives instinctively, even without technically understanding why it is harmonious.
❌ Traditional hanging
✅ Creative suspension
💡 Why it works
🎯 Visible benefit
Each artwork has its nail
A guiding line unifies
The eye naturally follows a visual guidance
Instant professional gallery effect
Definitive, fixed layout
Modularity and easy evolution
Flexibility without wall retouching
Decor that grows with your tastes
Perfect measurements mandatory
Natural visual rhythm
Intuitive harmony vs rigid geometry
Living and inspiring composition
Stressful and definitive installation
Playful experimentation encouraged
Possibility of adjustment without damage
Creative pleasure and regained confidence
The method of 3 guiding lines to transform your walls
Don't worry: you don't need to be an expert DIYer to master these techniques.
The beauty of this approach is its natural progressiveness - like learning an instrument, you start with simple melodies before creating your own compositions.
You will feel the satisfaction of creating something unique from the first technique, then the desire to explore more sophisticated variations will come naturally.
🎯 Overview of 3 techniques: Horizontal baguette to start (classic gallery effect), vertical suspension for originality (bohemian atmosphere), and modular system for perfectionists (maximum flexibility). Each level adds a creative dimension while maintaining ease of installation.
Technique 1: The horizontal baguette - your first gallery line
Starting with this technique is laying the foundation for your understanding of creative hanging.
Like building a house, this solid base will give you the confidence to explore more daring compositions later.
You'll immediately feel that satisfaction of seeing your works "dialogue" with each other for the first time.
What you need (investment: €15-25)
A light wood baguette (oak or beech): Length 80-120cm depending on your wall, section minimum 2x3cm. Avoid pine which warps with humidity. You will find it in hardware stores or joineries. Quality is recognized by the absence of knots and regular grain - it will be your visual "conductor" for the next 10 years.
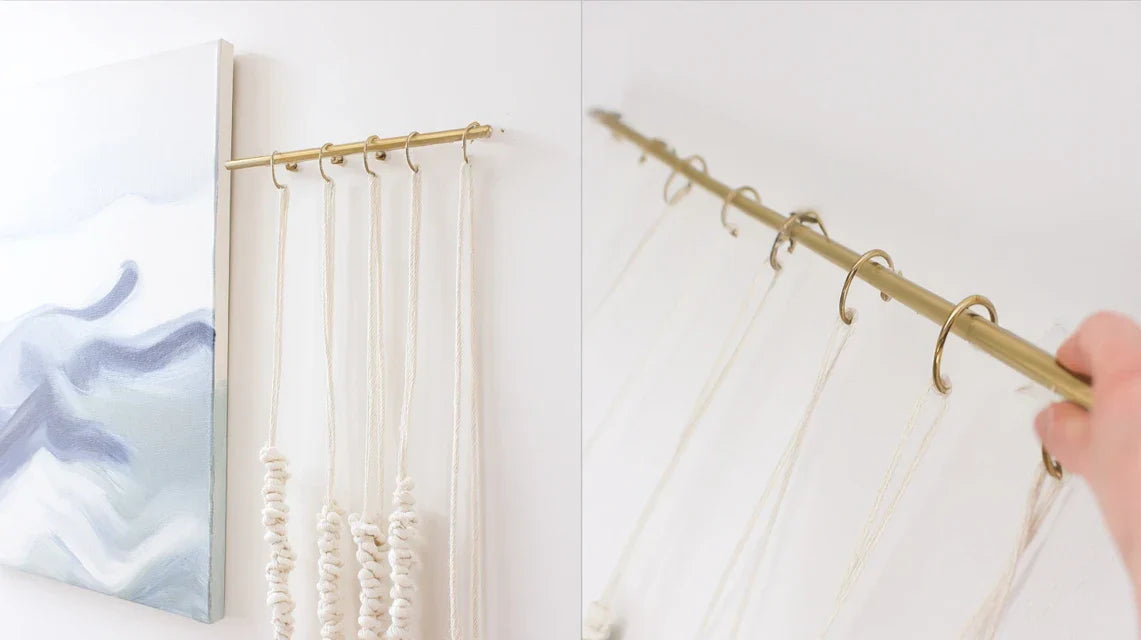
Mini metal hooks to screw: Type "S" brass or stainless steel hooks, diameter 8-12mm. The principle: they are screwed under the baguette and slide freely to adjust the position. A quality hook pivots easily without sticking - this allows you to reposition your works in 30 seconds.
Transparent fishing line or fine chain: Invisible thread creates a "floating" effect, chain assumes an industrial-chic look. The impact: the thread disappears visually, the chain becomes a decorative element in its own right that adds character.
Now let's move on to concrete implementation
Installation in 3 simple steps
Baguette positioning: Fix it horizontally 30cm from the ceiling (or 2m20 from the floor if high ceiling). This height creates the impression of a professional gallery rail while remaining discreet. Use 2 robust fixings spaced two-thirds of the length to avoid central sagging.
⏱️ Time: 15 minutes | ✅ Successful when: The baguette doesn't move when you pull on it firmly | ⚠️ Attention: Check the level - a defect is immediately visible once the works are suspended
Hook installation: Screw a hook every 25-30cm under the baguette, in a staggered pattern to avoid a repetitive effect. The secret: orient them all in the same direction for a professional finish. Let them slide freely - that's your future flexibility.
⏱️ Time: 10 minutes | ✅ Success when: Each hook slides smoothly along the baguette without forcing | ⚠️ Attention: Don't overtighten - a blocked hook reduces your creativity
Artwork hanging: Start with the most imposing central piece, then balance each side. Vary heights by 10-20cm to create a natural visual rhythm. The pro tip: artworks of the same size are placed at different heights, different sizes can share the same height.
⏱️ Time: 20 minutes of experimentation | ✅ Success when: The whole thing pleases you instinctively without measuring | ⚠️ Attention: Resist the urge to align perfectly - controlled irregularity creates life
✨ Final check: Step back 3 meters - the eye should perceive a coherent composition before distinguishing individual artworks. If an element "catches" the eye in a disturbing way, adjust its position. If in doubt, take a photo - it instantly reveals imbalances invisible to the naked eye.
You are now moving to the next creative level by exploring decorative verticality.
This technique transforms a corner of a room or a narrow wall into a surprising focal point, where traditional hanging would be impossible.
The snowball effect: this installation often becomes the starting point for a global reflection on your wall decoration.
Specific materials (budget: 12-20€)
Natural fiber rope: Jute, hemp or braided cotton, diameter 8-12mm, length according to ceiling height + 50cm. The natural texture adds a warm tactile dimension. Avoid synthetic ropes that shine artificially under lighting - they break the sought-after bohemian effect.
Design clothes pegs or metal clips: Wooden raw, patinated metal or matte black models depending on your style. The principle: they slide along the rope and hold your artworks without damaging them. A quality peg opens easily but holds firmly - test the pressure before purchase.
Reinforced ceiling attachment system: Expansion hook or eye bolt capable of supporting 5-8kg distributed. The challenge: the rope works under tension, it pulls harder than an equivalent load in horizontal hanging.
Creating your artistic column
Cord Length Calculation and Installation: Measure the ceiling height to the floor, add 40cm for fixing and knots. Create a reinforced loop at the top (bowline knot) and let the rope hang freely. The trick: a slight natural tension is perfect, avoid stretching like a clothesline.
⏱️ Time: 10 minutes | ✅ Success when: The rope oscillates very slightly without swaying | ⚠️ Attention: A rope that is too tight breaks the natural effect and strains the fixing
Cascade Composition: Arrange your works in decreasing size from top to bottom, or alternate large/small formats for a more dynamic rhythm. The ideal spacing: 30-50cm between each level. The pros' secret: odd numbers of artworks (3, 5, 7) to avoid overly symmetrical effect.
⏱️ Time: 25 minutes of adjustment | ✅ Success when: The composition naturally guides the eye from top to bottom | ⚠️ Attention: Avoid perfectly equal spaces - vary slightly for more naturalness
🎨 Aesthetic Check: The whole should evoke a precious artistic garland. Each work breathes in its space without touching. Ultimate test: your guests should want to look at the entire installation before focusing on a particular artwork.
Technique 3: Modular System - Absolute Flexibility
You are now reaching expert level where creation and functionality meet perfectly.
This approach gives you total creative freedom while retaining the possibility of reorganizing everything according to your seasonal desires.
Imagine the pride of presenting your system to loved ones and being able to modify your gallery in real time according to your artistic acquisitions.
Professional Modular Kit (investment: 35-50€)
Several short rods (40-60cm): 3 to 5 sections that you combine according to your needs. Same quality as technique 1 but in modular format. The advantage: you create compositions in L, staircase or completely asymmetrical impossible with a single rod.
Adjustable angle connectors: Metal pieces that connect your rods at different angles (90°, 120°, 135°). Look for models with butterfly screw tightening - tool-free adjustment and guaranteed stability.
Varied hook kit: Different sizes and styles to adapt to your current and future artworks. The idea: build an "hanging library" that grows with your collection.
Building Your Evolving Gallery
Structure Planning: Draw your composition on paper before installation. Start with a simple shape (L or T) that you will gradually enrich. The principle: each addition must maintain the overall harmony while bringing a new creative possibility.
⏱️ Time: 20 minutes of reflection + 30 minutes of installation | ✅ Successful when: The structure is stable and the angles match your sketch | ⚠️ Attention: Always maintain symmetry in fixing - each baguette must be supported at both ends
Flexibility test: Once installed, experiment with different compositions of artworks to validate the versatility of your system. Change orientation, density, mix formats and styles. The goal: you should be able to create 3-4 different atmospheres with the same elements.
⏱️ Time: 45 minutes of creative experimentation | ✅ Successful when: You have found at least 3 compositions that you like | ⚠️ Attention: Photograph your successful compositions so you can reproduce them
Modular progression rule: Add one element only when you perfectly master the current configuration. Complexity should serve creativity, never complicate it.
You now master the three fundamental approaches, but some expert subtleties will make all the difference between an amateur result and a professional gallery rendering.
These details are what distinguish a successful installation from a composition that impresses durably.
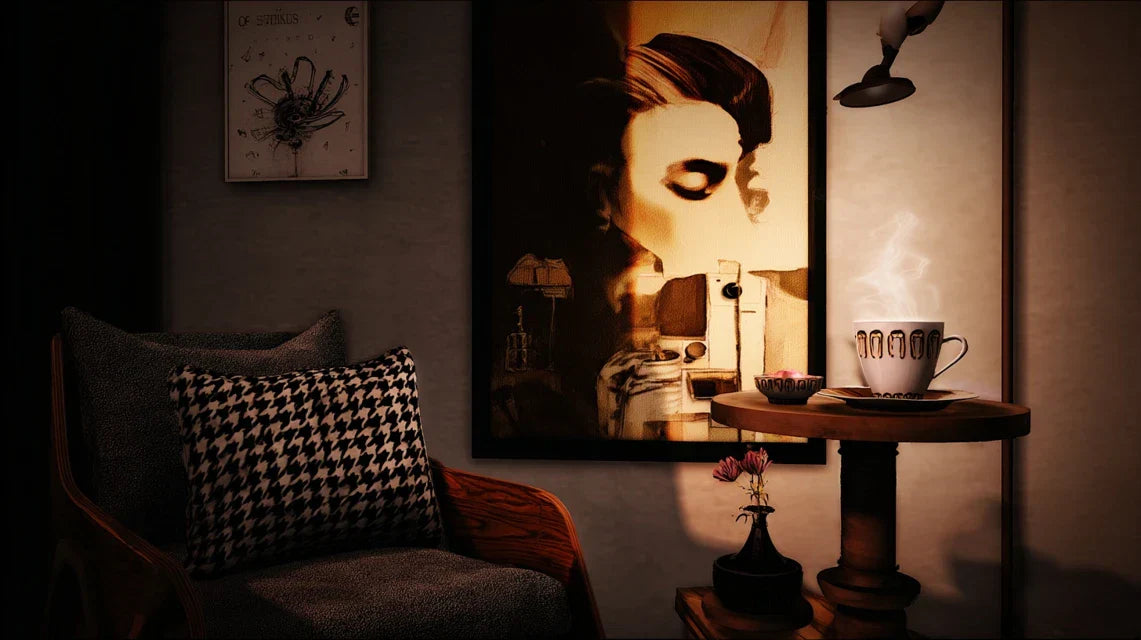
🔥 Galerist's secret: Lighting accounts for 50% of the success of your installation. An adjustable spotlight following your guiding line transforms your artworks into true "wall stars". The trick: illuminate the structure (baguette or rope) as much as the artworks - it then becomes an assumed decorative element.
💭 "What if my artworks are very different sizes?"
"I have small postcards and large canvases... can they work together?"
That's precisely where these techniques reveal all their creative magic! The most interesting galleries deliberately mix formats to create visual rhythm.
The trick: group the small artworks by 2-3 at the same height so that they "weigh" visually as much as a large isolated piece.
Think musical composition: the small artworks are your "fast notes", the large ones your "chords"; together, they create the melody.
🎯 Immediate test: Place 3 small artworks in a triangle 15cm apart, then add a large artwork 40cm away. You will instantly see visual balance emerge.
The 5 mistakes that can ruin your installation (and how to avoid them)
After supporting hundreds of people in their creative hanging projects, some errors systematically recur.
The good news? They are all easily avoidable when you know them, and often very simple to correct even after installation.
⚠️ Overdoing it from the start: The enthusiasm leads to hanging your entire collection at once, creating a "artistic bazaar" effect. As a result, no artwork stands out, and the eye gets lost. Start with 3-4 pieces maximum, add gradually. This mistake affects 8 people out of 10 - it's human to want to show everything!
🔧 Neglecting the strength of fixings: Trying to save money on hardware, but a fixing that comes loose damages your artworks AND your confidence. A falling picture marks you psychologically. Invest 5€ more in quality fixings - your peace of mind is worth it.
📏 Measuring instead of feeling: Taking out the measuring tape and calculating perfect distances kills natural harmony. The human eye prefers organic rhythms to mechanical spacing. Trust your visual instinct - it's more reliable than your measurements.
💡 Forgetting ambient lighting: Installing beautiful pictures in a poorly lit area is like wearing a tuxedo in the dark. Check the natural and artificial lighting at different times - your artworks must shine constantly.
🎨 Ignoring the style of the frame: Choosing a bohemian rope for ultra-modern works, or a design baguette for countryside watercolors creates dissonance. The frame must dialogue harmoniously with the style of your artworks - it enhances them instead of competing with them.
🛡️ Safety checklist before inauguration: Test each fixing by pulling firmly, check that nothing creaks or moves, observe the whole thing under different lighting, ask for the sincere opinion of a friend (the outside eye reveals what you no longer see).
Because you took the time to inform yourself, enjoy 10% discount on your first order:
ART10
⏰ Valid 72h after reading • Applicable to all our products
🔧 Practical questions about your creative hanging project
⏱️ How long does it take to install my first gallery line?
Allow 1h30 to 2h for a complete initial installation (rail + 4-5 artworks), hardware included. Once you master it, modifying your composition takes a maximum of 15 minutes. To optimize: prepare your artworks and materials in advance, work in natural light to better judge the colors.
💰 What budget should I plan to get started?
A basic functional system costs 15-25€ in hardware (rail, hooks, wire). For a high-end finish, allow 40-60€ with premium finishes. Spread over several months if necessary - start with a simple technique that you will gradually enrich according to your creative desires.
🏠 Does it work in a small space?
Absolutely! These techniques are even ideal for optimizing small spaces. A baguette of 60cm transforms a hallway into a gallery, a vertical suspension exploits a lost angle. The small space trick: prioritize medium formats (max 30x40cm) and light colors that visually enlarge.
🔄 Can I easily change my artworks?
That's precisely the huge advantage of these systems! Change artwork in 30 seconds thanks to the sliding hooks or mobile clips. Perfect for following the seasons, testing new acquisitions, or adapting the atmosphere according to your guests. Many discover that they change their composition 2-3 times a year - it has become a regular creative pleasure.
🛠️ Do I need to be an experienced handyman?
Not at all! These installations only require basic gestures: drill, screw, thread. If you know how to hang a classic picture, you already master 90% of the necessary skills. In case of doubt about wall fixings, ask for free advice in a hardware store - they love explaining these simple techniques.
🎯 Your decorative transformation starts now
In a few weeks, you will welcome your guests in front of an amazing gallery wall that tells your artistic story with elegance and originality.
Imagine their surprise and admiration when they discover that you created this unique installation with simple materials and your creativity.
You will feel the deep pride of mastering a rare decorative know-how, and a new confidence to dare other creative projects in your interior.
Beyond aesthetics, you have developed the eye of an expert on visual harmony and space composition.
These skills naturally transfer to all your decoration: furniture arrangement, choice of lighting, organization of decorative objects.
You will never again experience an interior that doesn't reflect you.
The first step was to understand - it was the most difficult, and you have overcome it.
Now, choose your favorite technique and give yourself a week to gather the materials.
Your first gallery wall is waiting for your decision to begin!
✨ Your creative challenge: Transform a wall in your interior into a personalized gallery this weekend - you now have all the keys to create something extraordinary and unique.
📚 Continue learning about decor
Discover other creative techniques to personalize your interior: ambient lighting, frame compositions, styling tips and much more.


