

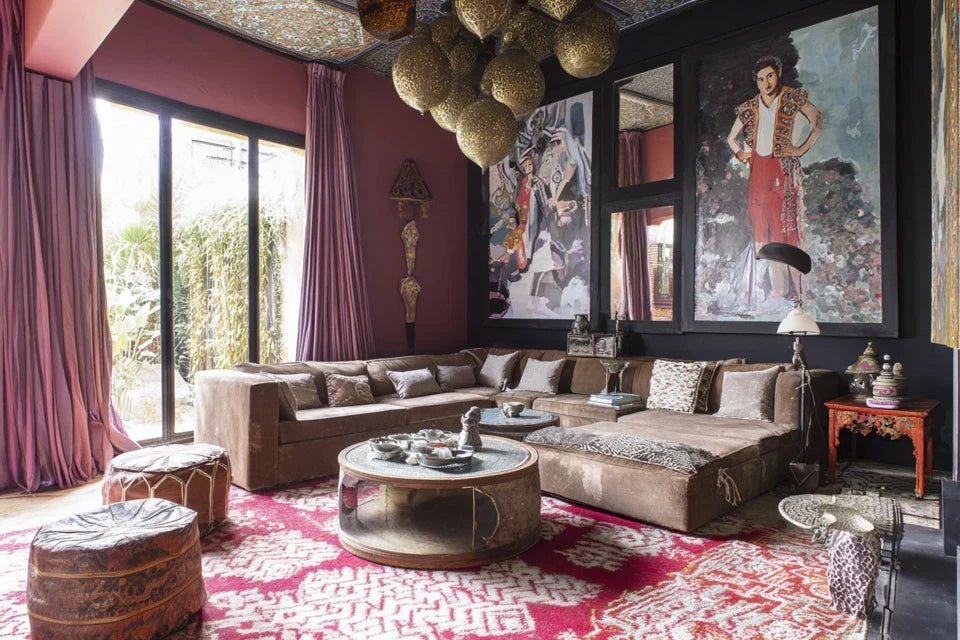
You've just spent three hours choosing the perfect artwork for your new living room. But deep down, that little voice whispers: "What if I move next year?" You look at this blank wall already imagining drill holes, scratches on the walls during the next move, and that artwork ending up in a box for months.
You feel that familiar frustration: the desire to create an authentic home clashes with the reality of your nomadic lifestyle. Each move becomes a decorative puzzle, each new rental brings you back to square one.
You may have already tried adhesive posters that peel off, plastic frames that break, or worse: you've given up on decorating, accepting living in impersonal spaces. But why have your previous attempts failed?
It’s not your fault. The problem is that no one has explained to you that there is a specific approach to reconciling quality wall art and nomadic flexibility. Classic solutions are designed for settling down, not for your reality.
By the end of this article, you will master the art of creating an authentic decorative cocoon that follows you everywhere, transforming each new place into a true home in less than an hour.
Why does your nomadic decor determine your daily well-being?
Living without personal decorative anchoring affects your mind more than you imagine. It's like trying to feel at home in a hotel room: technically, you have a roof over your head, but emotionally, you float. Each month that passes without personalizing your space is a lost opportunity to create visual memories that nourish your well-being.
🏠 Revelatory testimonial: Sarah, an international consultant, was explaining to me recently: "I lived in impersonal white apartments for 18 months. I thought I would adapt, but I woke up every morning without enthusiasm. The day I hung my first nomadic artwork, I felt like I could finally breathe at home."
💬 Conversation with a decor expert
The nomad decor golden rule: A quality artwork transforms any space into a personal sanctuary in less than 10 minutes. You'll feel the difference from the first morning glance, and the effect strengthens every day for weeks.
Why have your previous decor attempts failed?
Do you recognize yourself in these situations? You buy a frame that breaks during the third move. You invest in heavy artworks that cost you a fortune in shipping fees. You accumulate "temporary" solutions that end up creating a discouraging visual clutter.
The real problem isn't your nomadic lifestyle, it's that you apply sedentary decor codes to a mobile reality. It’s like trying to ride a bike with running techniques: the basic logic is different.
Imagine a musician who wanted to take their grand piano on tour. They would quickly learn to master instruments designed for mobility without sacrificing sound quality.
First hidden cause: You confuse "temporary" and "nomadic"
Everyone thinks that nomadic = low-end, but it's an expensive mistake. The real difference isn't in quality, but in technical design: ultra-resistant materials, revolutionary hanging systems, optimized formats.
It’s like comparing a dive watch to a desk watch. Both can be luxurious, but one is designed to withstand extreme conditions.
This confusion leads you towards disposable solutions that degrade your visual environment instead of enriching it. The result: you associate "nomadic decor" with "compromise", when you should see it as an opportunity for technical excellence.
🔍 Instant test: Look at your current decoration and count how many items you would proudly show to a VIP guest. If it's less than 70%, you’ve fallen into the “temporary” trap.
Second hidden cause: You choose with your fears, not your desires
Most nomads buy thinking "hopefully it won't break" instead of "I want to contemplate this every morning". This defensive mindset prevents you from experiencing artworks that would move you.
It’s like choosing your clothes only for their resistance to washing. Technically functional, emotionally disastrous.
You end up with objects that don't reflect you, in a space that doesn't inspire you. Your visual identity crumbles move after move.
Third hidden cause: You neglect the "instant cocoon" effect
Here’s what almost no one notices: happy nomads have developed a space reappropriation ritual. They know how to create their bubble in less than an hour with a few strategic decor items.
Observe your behavior: how long does it take you to feel "at home" in a new place? If it's more than a week, you don’t have your visual anchor objects.”
Without these decorative landmarks, each new place requires an exhausting adaptation effort. You lose mental energy instead of gaining it.
The 3 signs that you are decoratively adrift:
- Timing signal: You take more than 2 weeks to unpack your "decor." It's like indefinitely postponing a doctor's appointment: your subconscious avoids what doesn't nourish it.
- Emotional signal: You avoid inviting people over for the first few months. Your space doesn’t represent you enough for you to share it proudly.
- Practical signal: You take more photos outside than at home. Revealing: your "home" isn't photogenic enough for your own memories.
The trigger element: The quality of materials changes everything
Here’s what makes the difference between frustration and satisfaction: materials designed to last. A canvas on a noble wood frame vs a laminated poster, it's the reverse domino effect. One inspires confidence and pride in you, the other constantly reminds you that "it's temporary." You notice it immediately: touch the texture, observe the finish of the corners, test the stability of the hanging.
The rule of first glance: If a nomadic artwork doesn't make you want to admire it in the first 3 seconds, it will never create the necessary attachment to your well-being. Do the test: look at it and time your smile.
| ❌ "Temporary" mindset | ✅ Quality nomadic approach | 💡 Why it works | 🎯 Daily benefit |
|---|---|---|---|
| "It's just while I settle down" | "It’s my style that follows me everywhere” | Your visual identity travels with you | Immediate sense of belonging |
| “It has to be cheap” | “It has to be durable” | Unique investment vs repeated replacements | Savings and peace of mind |
| “Hopefully it’ll stay on the wall” | “I want to contemplate it every day” | Positive emotion nourishes attachment to place | Positive energy every morning |
| “I'll decorate later” | “I create my cocoon from day one” | Psychological adaptation is immediate | Maximum productivity and serenity |
The 3-pillar method for lasting nomadic art
Rest assured, you don't need to revolutionize your entire approach. Quality nomadic decor follows a simple logic, like building a house: solid foundations, adapted structure, finishes that resemble you. At the end of this method, you will have a decorative system that transforms any space into a personal sanctuary.
🎯 Overview of your transformation: Pillar 1 (noble materials and nomadic formats), Pillar 2 (damage-free hanging system), Pillar 3 (composition that reveals your personality). Each pillar gives you more confidence, until you master the art of "instant cocooning".
Pillar 1: Choosing noble materials adapted to nomadism
Starting with the quality of the materials is like choosing good shoes before a hike: it determines the comfort of the entire journey. This solid foundation immediately gives you confidence in your choice, and this satisfaction grows with each handling.
The materials that make the difference
- Canvas on noble wood frame: Recognizable by its slightly grainy texture and solidity to the touch. It naturally absorbs and diffuses light, creating a depth that classic prints never have. Find it with art dealers or specialized artisans. Check that the corners of the frame are perfectly adjusted. Avoid rigid plastic which yellows and deforms.
- Integrated hanging system: The back of the painting integrates a mechanism that distributes weight evenly. The principle: less stress on one point, less tearing. Identify quality by metal fixings (never in plastic) and the presence of a distribution plate. Direct impact: installation in 30 seconds, maximum security.
- Reinforced corner protection: These small details make all the difference during transport. Rounded corners or silicone protection that absorbs shocks. Visible benefit: your artwork keeps its new appearance move after move.
Now, let's move on to practical selection
How to spot quality in 3 steps
Solidity test: Take the painting by a corner and lift it gently. A quality frame does not move, does not creak. The reason: assemblies are glued AND screwed, not just fitted. The technical detail: you should feel no play in the structure. It's simpler than it seems.
⏱️ Time: 10 seconds | ✅ Successful when: No movement, no noise | ⚠️ Attention: If it creaks, repeated transports will degrade the assembly
Surface verification: Gently run your hand over the canvas. Quality = homogeneous texture without irregularities. This is a sign of correct tension and professional grain. Do not be fooled by ultra-smooth surfaces that give an "industrial" appearance.
⏱️ Time: 15 seconds | ✅ Successful when: Pleasant sensation, regular grain | ⚠️ Attention: Bubbles or ripples reveal approximate mounting
Hanging test: Turn the painting over and observe the fixing system. You should see robust metal, not plastic. The logic: your decorative investment deserves maximum security, especially if you often change location.
⏱️ Time: 5 seconds | ✅ Successful when: Metal visible, integrated fixing | ⚠️ Warning: Glued systems detach with heat/humidity
✨ Final validation: Your nomadic artwork makes you want to touch it, inspires confidence from the first handling, and you can already imagine hanging it proudly. If you're still hesitating, it’s not the right one. Be patient: the technical AND aesthetic crush exists.
OUR RECOMMENDED PRODUCTS
Pillar 2: Mastering damage-free hanging
You're leveling up: creating a fixing system that protects your rental walls while ensuring the safety of your artworks. This step is more rewarding because you immediately see the result, and it definitively frees you from the anxiety of rental damage.
The pro's tools without damage
- High-performance adhesive hooks: They look like classic hooks but with a reinforced adhesive base. Their secret: ultra-tenacious polymer that removes cleanly. Available in high-end hardware stores. Quality criterion: indicated load capacity + "no residue" guarantee. Why not nails: irreversible holes and risk of cracks.
- Miniature spirit level: This precision tool ensures perfectly straight hanging. Simple principle: the centered bubble = straight artwork. Recognizable quality: sharp graduations and case solidity. Major impact: the "pro" effect that transforms the atmosphere of the room.
- Wall protection kit: Anti-shock pads placed behind the artwork. They prevent friction and markings on the paint. Why it's crucial: preserve your deposit while protecting your work from everyday micro-shocks.
Secure installation in 5 minutes
Surface preparation: Clean the hanging area with a slightly damp cloth then dry. The reason: maximum adhesive performance requires a perfectly clean surface. The detail that changes everything: wait 2 minutes for the humidity to evaporate completely. Easier than expected.
⏱️ Time: 3 minutes | ✅ Successful when: Surface is dry and smooth | ⚠️ Warning: On a damp wall, the adhesive loses 70% of its performance
Leveling: Place your spirit level on the adhesive hook before fixing it permanently. The goal: avoid readjustments that weaken the adhesion. Pro technique: lightly mark the perfect position with a pencil. It's a gesture that reassures and professionalizes your approach.
⏱️ Time: 1 minute | ✅ Successful when: Bubble is perfectly centered | ⚠️ Warning: Repeated adjustments damage the adhesive
Mounting and load test: Press the hook firmly for 30 seconds, then gradually test with the weight of the artwork. The logic: the adhesive needs this pressure to create its definitive bond. Patience = long-term security.
⏱️ Time: 1 minute | ✅ Successful when: Hook remains still under pressure | ⚠️ Caution: An overly aggressive load test can detach the entire unit
System check: Your installation is successful when the artwork remains perfectly horizontal even when moved slightly. Backup alternative: always keep a spare hook in your nomadic belongings. Encouragement: this skill will serve you in all your future homes.
You reach expert level: creating a signature decor that represents you and instantly transforms the atmosphere of a place. This final step provides lasting pride because you master the art of revealing your personality through your space, wherever you are.
The elements of a signature decor
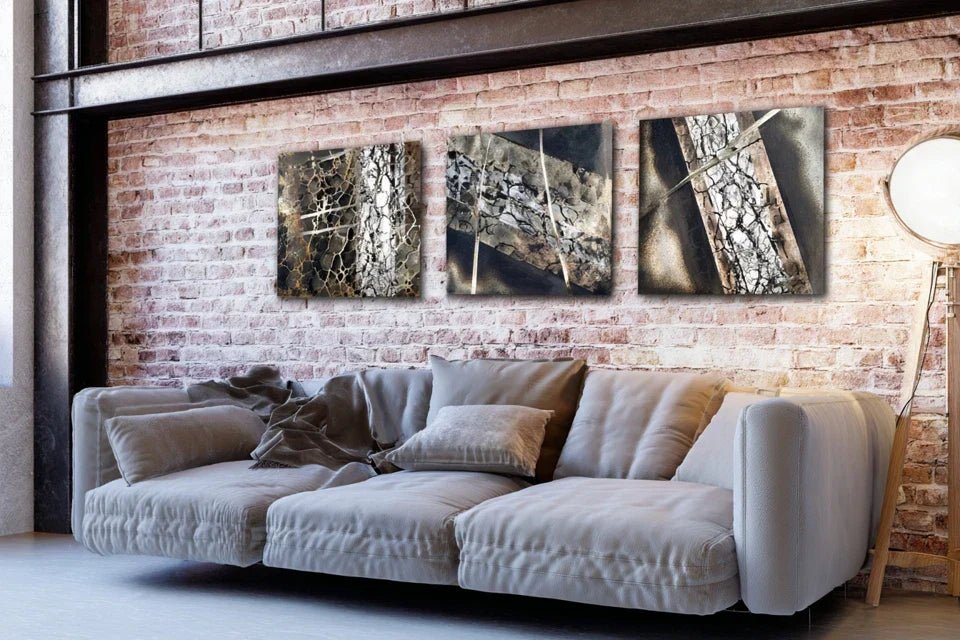
- Personal color palette: A maximum of 3 colors that resemble you and harmonize in different environments. They create your visual guiding thread, like a melody that follows you. Identify them in your favorite clothes or travel memories. Infallible criterion: these colors instantly soothe you. Avoid fleeting trends that don't really suit you. Consistent artistic style: Abstract, figurative, photographic... Your eye has its natural preferences. The principle: respect your instinct rather than follow trends. How to recognize it: the works that make you smile spontaneously belong to your aesthetic family. Personal impact: consistency that reassures and affirms your identity. Optimized nomadic format: Not too big (difficult to transport), not too small (insufficient visual impact). The sweet spot: between 40x60cm and 70x100cm depending on your typical spaces. Practical advantage: you create a maximum decorative impact with minimum encumbrance.
Create your signature in 3 steps
Definition of your palette: Gather 5 objects from your daily life that you love (clothing, accessory, photo...). Observe the dominant colors that recur. These repetitions reveal your natural chromatic DNA. Technique validated by professional interior designers.
⏱️ Time: 15 minutes | ✅ Successful when: 2-3 colors clearly stand out | ⚠️ Caution: Don't force it, let your instinct speak
Emotional impact test: Temporarily place your selection of nomadic artworks in your space. Live with them for a minimum of 48 hours. The goal: to validate that the positive emotion persists beyond the initial crush. Pro method: photograph the result and observe your reaction a few days later.
⏱️ Time: 2 days of observation | ✅ Successful when: Spontaneous smile with every glance | ⚠️ Attention: The eye gets used to it: if the emotion fades, it's not the right choice


