

You're standing in front of your child’s room, a beautiful artwork in hand, but one question haunts you: is it really safe? That nagging fear that the frame will come off during the night, that the materials release toxic substances, or that sharp corners injure your little one during their energetic play.
You can already imagine the worst-case scenario: waking up in the middle of the night to the sound of breaking glass, your child crying, and that terrible guilt of not having thought about all the safety details.
You’ve already tried repositionable stickers that peel off, posters that tear, or worse, you've given up on any decoration for fear of doing something wrong. The result? A bland room that doesn't stimulate your child's imagination.
It’s normal to have these concerns - the safety of our children comes first. The problem isn't your vigilance, but the lack of clear information on the real safety criteria for a children's artwork.
By the end of this article, you will know exactly how to choose a perfectly safe artwork that will transform your child’s room into a creative and stimulating cocoon, without compromising their safety.
Why the safety of a wall art can't wait?
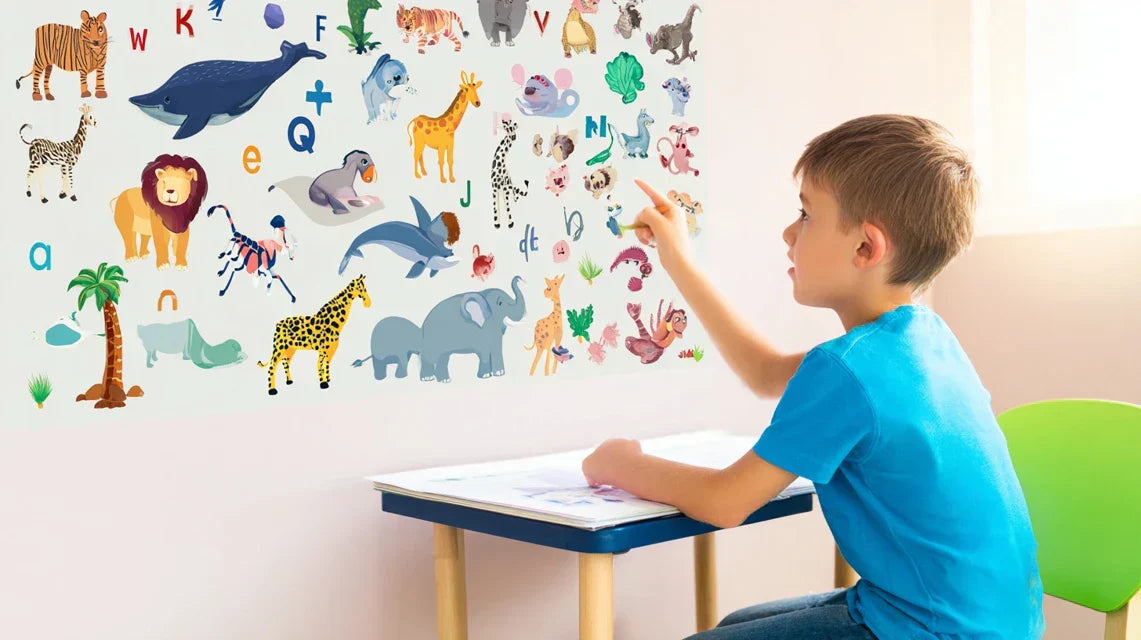
Every day, your child grows and explores their environment more. Waiting for “the right moment” to decorate their room, is risking missing those crucial years when colors and shapes nourish their cognitive development. It’s like waiting for your garden to grow on its own without ever planting seeds.
🏠 Real testimonial: Sophie, mother of 4-year-old Léa, had hung a painting with basic fixings. One morning, she found the frame on the floor, luckily without injuring her daughter who was sleeping. "I realized I only thought about beauty, not solidity. Now, I check everything before hanging anything."
💬 Conversation with a decor expert
The golden rule: a secure artwork enriches the environment without creating risk: With the right materials and fixings, you get a decorative element that resists impacts and stimulates development, visible from the first weeks of installation.
What's really behind your concerns
You hesitate between several options, you read contradictory reviews on the internet, you wonder if this artwork will be strong enough, if the colors won’t fade... Do these doubts speak to you?
What's actually happening is that manufacturers don’t clearly communicate about child safety criteria. The problem isn't your perfectionism, it’s the lack of transparency on real standards.
Imagine buying a car without knowing its safety equipment: you would have the same apprehension. For artworks, it's exactly the same.
The fixing: the weak link that nobody sees
Everyone focuses on the artwork’s visual aspect, but 80% of accidents come from unsuitable fixings. The difference between a simple pin and a professional fixing system? Peace of mind.
It's like comparing a supermarket umbrella to mountain equipment: similar apparent function, completely different resistance.
As a result, you spend your nights imagining the worst instead of serenely enjoying your child waking up in a stimulating and perfectly safe environment.
🔍 Quick test: Look at an artwork already hung in your home and try to move it slightly. If it moves more than 2mm, the fixing is not strong enough for a child’s room.
The materials: the invisible danger that rightly worries
The popular belief says "if it's sold, it's safe". Reality? Some varnishes or glues emit volatile organic compounds (VOC) for months.
It’s like the difference between a synthetic fragrance that gives you a headache and a natural essence that relaxes: similar olfactory effect, opposite health impact.
Consequence: your child may develop irritations, sleep disorders, without you making the connection with this "pretty artwork" hung above their bed.
The format and angles: seemingly insignificant detail, major impact
You might not think about the frame’s corners, but a child who falls can be seriously injured on a poorly protected corner. It's the detail that nobody mentions in product descriptions.
You can easily spot it: run your hand over all the corners of the frame. If they are sharp or pointed, look for an alternative.
The impact? The difference between a minor bruise and an injury that requires stitches.
5 alarm signals to spot immediately:
- Persistent chemical smell: Sign of toxic VOCs, like the smell of fresh paint that lingers
- Frame that flexes under pressure: Too fragile material, risk of breakage like a cheap plastic toy
- Fixations provided are too small: Inappropriate for the actual weight, like using tack nails to hang a mirror
The Trigger Factor: The Combination of Material + Fixing + Location
What really makes the difference is the harmony between these three elements. It's a positive domino effect: each well-chosen element strengthens overall safety, as the three legs of a tripod stabilize each other.
Universal Practical Rule: "See, Touch, Shake" : Examine every detail visually, touch all angles and surfaces, test the solidity with a firm movement. If something makes you uncomfortable, trust your instinct.
| ❌ Outdated Vision | ✅ Current Reality | 💡 Why it Works | 🎯 Concrete Benefit |
|---|---|---|---|
| Avoid any object in a child's room | Select safe and stimulating elements | Materials and fixings have evolved | Room that is both fulfilling AND secure |
| Wait until the child is "old enough" | Adapt from the first months | The brain develops from birth | Early stimulation of creativity |
| Prioritize price only | Balance quality and safety | An accident costs more than a good product | Durable and reassuring investment |
| Rely on product descriptions | Verify certifications and standards | Independent labels guarantee quality | Informed and confident choice |
The Progressive Method for a Serene and Secure Choice
Rest assured, choosing the right artwork is not a battle. It's enough to follow a logical progression in 3 steps, like building a house: first the foundations (safety), then the structure (fixing), and finally the decoration (aesthetics). The result? Artwork that will still be perfectly in place in 10 years.
🎯 Overall Vision of Your Project: 1) Select healthy materials, 2) Choose the appropriate fixing system, 3) Optimize location and installation. Each step brings you closer to a room that combines beauty and absolute protection.
Step 1: Decipher Materials Without Making Mistakes
Starting with materials ensures that the foundations are sound. Like the diet of your child, it's better to be demanding from the start than to regret it later. This step will give you immediate satisfaction: "I know I made the right choice."
Essential Components to Identify
- The support (canvas, wood, metal): Prioritize FSC certified solid wood or anodized aluminum for their natural stability. Avoid inexpensive agglomerates that can release formaldehyde. Check for any chemical smell upon unpacking. The difference? A healthy support ages well without deforming.
- Inks and paints: Look for the mention "vegetal inks with no VOCs" or "compliant with toy standard EN71". The principle? As with your child's crayons, only non-toxic inks guarantee healthy air. Recognize quality by the absence of a strong odor and colors that don’t bleed when touched.
- The protective system (varnish, lamination): Opt for a water-based varnish or solvent-free UV protection. The visible advantage? Colors remain vibrant without emitting harmful vapors, even in full sun.
Now let's move on to practical selection
How to proceed concretely
Examine certifications: Look for CE, FSC, or "Origine France Garantie" labels directly on the packaging or product sheet. These certifications guarantee strict independent checks. Also check the manufacturing date to avoid old stock. It's simpler than it seems.
⏱️ Time: 3 minutes | ✅ Successful when: You find at least one recognized certification | ⚠️ Attention: Be wary of "self-certifications" invented by the brand
Test the support's resistance: Press firmly (without damaging) on different points of the artwork. A good support should neither flex nor crack. It’s the same principle as testing the ripeness of a fruit: firmness reveals quality.
⏱️ Time: 1 minute | ✅ Successful when: No visible or audible deformation | ⚠️ Attention: A slight cracking sound signals structural weakness
Check for odor: Discreetly smell the artwork from 10cm. No chemical, plastic, or varnish odor should be perceptible. A healthy product smells "neutral" like a natural wood furniture.
⏱️ Time: 30 seconds | ✅ Successful when: Neutral or slightly woody scent | ⚠️ Attention: A sweet smell can mask solvents
🎯 Step validation: You should be able to explain in one sentence why this artwork is healthy for your child. If you still hesitate, it means a doubt remains - take the time to clarify this point before continuing. The next step will be all the more serene.
OUR RECOMMENDED PRODUCTS
Step 2: Mastering fixing like a professional
You are now moving to the next level: fixing that never lets go. This step is more rewarding because you immediately see the result of your work. The snowball effect: once this skill is acquired, you will be able to secure any decorative element.
Essential fixing elements
- Wall-adapted anchors: For drywall: Molly or expansion anchors. For concrete: hammer-in anchors. For brick: chemical anchors. Always check the indicated maximum load capacity. Allow 3 times the weight of the artwork for safety. The difference? No risk of detachment even in case of impact.
- Quality screws: Stainless steel minimum 4mm diameter, length = wall thickness + 40mm. The principle is that the screw must "bite" sufficiently into the support to resist vibrations. Avoid screws supplied with cheap anchors.
- Artwork hanging system: Prefer metal triangular brackets over simple rings. They distribute forces better and resist lateral movements like slamming door shocks.
Installation step by step
Identify the wall type: Tap with your knuckles. Its hollow sound = drywall. Its full sound = concrete/brick. This identification determines everything else about the installation. If in doubt, use a material detector (€5 in store).
⏱️ Time: 2 minutes | ✅ Successful when: Sound identified clearly | ⚠️ Attention: Mixed partitions (metal + drywall) require a specific approach
Mark the location accurately: Use a spirit level and measure from a fixed reference point (wall corner, electrical outlet). Mark the drilling points with pencil. Accuracy here avoids unsightly corrections.
⏱️ Time: 5 minutes | ✅ Successful when: Level perfectly horizontal | ⚠️ Attention: Check that no electrical cable runs behind (detector mandatory)
Drill and permanently fix: Use a drill bit suitable for the anchor diameter, drill perpendicular to the wall. Insert the anchor flush with the wall, screw in gradually until you feel final resistance. Do not force beyond that.
⏱️ Time: 10 minutes | ✅ Successful when: Anchor impossible to remove by hand | ⚠️ Attention: An anchor that spins in the void indicates an oversized hole
🔧 Resistance test: Hang the artwork and perform a slight downward pull (equivalent to 2 times its weight). There should be no movement, no noise. If it's solid, congratulations: you have just completed a professional-level fixing!
Step 3: Optimize location for safety and visual impact
You are now reaching the level of mastery that makes the difference between amateur and connoisseur. You will create a result you will be proud of for years: a perfectly integrated artwork that seems to have always been part of the room.
Location parameters to consider
- Safety height: Minimum 1m20 from the floor to avoid accidental bumps, but low enough for the child to enjoy the visual. Use this rule: bottom of the picture = child's eye level + 20cm. Distance from risky activities: Avoid the area within 80cm around the bed (falls), above the desk (chair bumps), near the door (sudden gestures). Favor "calm" walls facing the bed. Exposure to light: Indirect light is ideal to preserve colors. Avoid direct sunlight which fades and creates disturbing reflections. A north-east orientation offers soft and constant brightness.
- 🔩 Underestimating the actual weight of the artwork: Manufacturers often indicate the weight without packaging and fixings. Always add 30% to the stated weight to calculate your fixings. Consequence of a miscalculation? Progressive detachment that weakens the entire installation. Solution: weigh it yourself if possible.
- ⚡ Drilling without checking for networks: The temptation to "rush" leads to drilling without a detector. Touching an electrical cable = power outage and danger. A pierced pipe = water damage. Invest 10€ in a detector, it's cheaper than an emergency repair.
- 🎨 Choosing only from the photo: Screens distort colors and hide texture details. Always order a sample or check the return conditions. An artwork that seems perfect online can be disappointing in reality.
- 📏 Neglecting room proportions: A too-small artwork gets lost in the space, a too-large one overwhelms the room. Simple rule: the artwork should occupy 1/3 to 1/2 of the width of the wall for optimal impact. Test with cardboard before buying.
- 🛡️ Forgetting children's development: What suits a baby can become dangerous for a child who climbs everywhere. Anticipate: in 2 years, will your child be able to reach the artwork? Adjust the height accordingly during installation.
Optimal placement
Simulate the location: Use masking tape to outline the future picture's location. Observe for 24 hours how your child evolves in the room. Adjust if necessary before final fixing.
⏱️ Time: 5 minutes + observation | ✅ Successful when: No interference with daily activities | ⚠️ Attention: A child can change their habits, stay flexible
Check the lighting at different times: Test the rendering in the morning, midday and evening. The ideal: colors visible without disturbing reflections, even with a nightlight on. Adjust the tilt angle if needed.
⏱️ Time: 3 checks during the day | ✅ Successful when: Pleasant visual in all circumstances | ⚠️ Attention: Artificial lighting can reveal reflections invisible during the day
Master progression rule: You can move to the final phase when your child can play normally in their room without you thinking about the picture once. This is a sign that it is perfectly integrated and secure.
You are now able to select and install a picture with the expertise of a professional. These expert subtleties give you a considerable advantage over 95% of parents who buy "on feeling".
🎨 Professional decorator tip: Create an "evolving gallery wall" by installing a discreet fixing rail right now. You can change and add elements without new drillings. Result: a decoration that grows with your child.
💭 "What if my child grows up and no longer likes the picture?"
"I wouldn't want to invest in something they will find 'babyish' in 2 years..."
I perfectly understand this concern - we want every euro invested to be worthwhile. The good news? A quality picture lasts through the ages thanks to its aesthetic neutrality and durable manufacturing. Prioritize timeless patterns (nature, soft geometry, colorful abstracts) rather than cartoon characters. Your child will appreciate it differently at each stage: colors at 2 years old, shapes at 5 years old, art at 10 years old.
🔄 Longevity test: Ask yourself if you would hang this artwork in your living room. If the answer is yes, it will stand the test of time with style.
The pitfalls that can ruin your efforts
I don't want you to make the mistakes I’ve seen too often. These mistakes are normal and predictable, but so easy to avoid when you know them.
🛡️ Checkpoints before final validation: 1) The artwork doesn't budge when you pull on it, 2) No perceptible odor at 50cm, 3) All corners are rounded or protected, 4) The child cannot reach it by climbing. Warning signs: creaking, chemical odors, or a feeling of danger.
🎁 Special readers offer
Because you took the time to inform yourself, enjoy 10% discount on your first order:
⏰ Valid for 72h after reading • Applicable to all our products
🤔 Your most frequent questions
Allow 80-200€ for a professional quality artwork (60x40cm format) including suitable fixings. The installation takes 45 minutes to 1h15 depending on your experience. Optimization: group your decor purchases to amortize shipping costs, and plan the installation on the weekend to take your time without stress.
Absolutely! With quality Molly plugs (minimum load of 25kg), even 10mm plasterboard can support a 3kg artwork. The secret: distribute the load over several attachment points and do not exceed 50% of the plug's maximum load capacity. Real-life example: my customers have had 5kg artworks on plasterboard for 8 years, no problem.
From as early as 4-6 months, your baby can distinguish contrasts and follow shapes with their eyes. The visual impact therefore begins very early on. Prioritize contrasting patterns in the first few months, then soft colors around 12 months. The child will really interact with the artwork around 18 months by pointing at it and asking questions.
First, choose your base palette (no more than 3 colors) for the entire room, then select an artwork that picks up on 1 or 2 of these shades. Advanced tip: An artwork with 60% neutral colors (white, beige, soft gray) will adapt to all your future decor changes. Test the harmony using the ColorSync app on your phone.
With the detailed method in this article, 90% of parents manage it on the first try. The necessary tools: drill, level, pencil, measuring tape. If you are unsure, start with a lightweight artwork (less than 1kg) to gain confidence. A reassuring alternative: many stores offer an installation service at home for €30-€50.
Your child deserves an environment that inspires them safely
In a few weeks, you will enter your child's room with that proud smile: everything is perfectly in place, secure, and beautiful. Your little one will observe their artwork with wonder, and you will know that every detail has been thought out for their development AND protection. Your loved ones will ask for your advice, admiring this perfect harmony between aesthetics and safety.
This expertise gained goes far beyond simply choosing an artwork. You have developed a critical eye for quality and safety that you will naturally apply to all your future decor purchases. This new confidence will transform your approach to interior design: unregretted impulsive purchases are a thing of the past, making way for thoughtful and sustainable choices.
Now that you master all the technical and safety aspects, the hardest part is behind you. All that remains is to apply this method step by step. Start today by identifying 2-3 artworks that meet your new criteria - you will be surprised at how much your perspective has changed!
🌟 Your next step: Your child grows every day in an environment that YOU create. Every element counts, every detail shapes their childhood memories. Give them the gift of a room that stimulates their imagination while protecting them.


