Composez votre galerie d'art

Des tableaux qui racontent votre histoire
Code d'initiation
ART10
10% offerts sur votre première acquisition
Découvrir la collection

Integrated artworks: wall art conceived as part of the building

Tableaux intégrés aux structures : art mural pensé comme partie du bâtiment
⏱️ Reading time: 8 minutes
You’ve just moved into your new living room, and that immense white wall has been taunting you for weeks. You've already hung three different paintings, but something feels off: , disconnected from your interior, like uncomfortable guests who can't find their place.

The worst part is this persistent feeling that your decor lacks . Your friends compliment politely, but you know your artworks look more like than a true artistic expression integrated into your living space.

You’ve tried the classic advice: matching colors, respecting proportions, harmonizing styles. Yet, the result remains and you don't understand why some interiors exude that natural elegance that eludes you. sets in, and you start to think you don't have an “artistic eye”.

Rest assured, it’s absolutely not your fault! The problem doesn’t come from your taste or choices, but from a : treating wall art as a simple accessory instead of designing it as an .

By the end of this article, you will master the art of and know how to create a perfect symbiosis between your works and your walls, transforming your interior into a true .

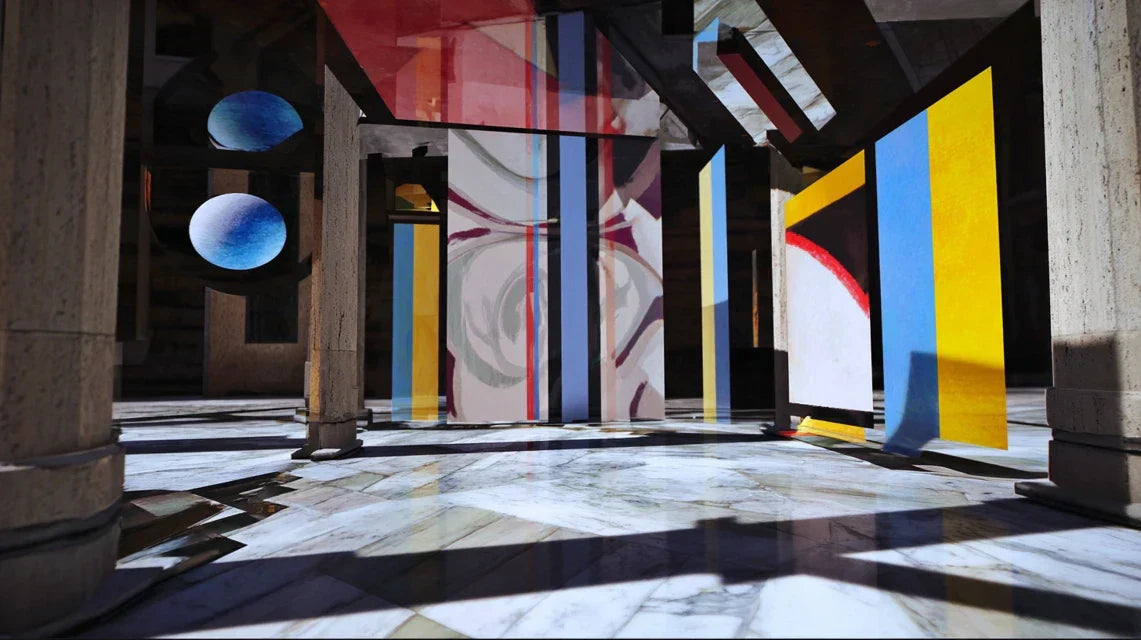
Why architectural integration revolutionizes your decor?

Imagine entering a living room where the : materials respond to each other, reliefs dialogue, colors naturally extend the architecture. This magic never happens by chance, and if you wait any longer, you risk missing the current movement towards . It's like building a house forgetting the foundations: everything you add after will seem shaky.

"I remember this client who had spent €3000 on masterpieces, but her living room looked like an art store. In one day, we created a that cost half the price and completely transformed the atmosphere. She told me: 'Now my house really looks like me.'"

💬 Conversation with a decor expert

"I'm afraid that my new painting won’t match if I change my wall color..."
Relax! It’s exactly the opposite. A true artistic crush adapts and even reveals itself with new colors. It's like a diamond that shines differently depending on the lighting!
"But I was told you always have to match colors..."
Who told you that? Modern decor is all about subtle contrasts. A painting with warm tones on a cool wall is like a fireplace in a blue room: magical!

Integrated art transforms space into an extension of your personality:

Au lieu de décorer vos murs, vous les sculptez visuellement pour créer une continuité naturelle entre matière et émotion. En 3 semaines, votre regard sur votre intérieur change complètement.

Let's discover together what’s really blocking your wall decor

You may feel this frustration when you look at your "decorated" wall: something is missing, but it’s impossible to put your finger on it. Or that feeling of incompleteness despite all your efforts. Even worse, that disappointment when your guests politely admire without being truly impressed.

What's really happening is that you’re applying traditional decorating rules to an approach that requires an architectural vision. It's exactly like trying to paint a masterpiece with children's coloring techniques: the tools don't match the ambition.

Imagine your wall is a blank page in a book: instead of sticking stickers on it (classic paintings), you need to write directly on it to create a coherent story that reads naturally.

The first hidden cause: the illusion of "added decoration"

Contrary to what 90% of people think, a successful interior is not decorated, it’s designed. What's the difference? Integrated art is part of the DNA of the space, just like exposed beams or period moldings.

It's like the difference between wearing a bespoke suit and renting one: technically, both dress you, but one enhances you while the other diminishes you.

This revelation changes your relationship with space: you stop being subjected to your walls to become the conductor of your visual environment. Your confidence in your decor choices transforms radically.

🧪 Instant test: Look at your favorite painting and imagine it recessed into the wall rather than hanging on it. Do you feel this difference in presence? That's exactly the power we’re going to unlock.

The second hidden cause: fear of the irreversible

Many hesitate to structurally integrate their works for fear of making a permanent mistake. Yet, it's exactly the opposite: integrated art offers more creative flexibility than traditional hanging.

It’s like choosing between a temporary tattoo and a real one: the first washes off in the shower, the second evolves with you and gains character over time.

This fear keeps you in decorative mediocrity, while controlled boldness would lead you to a level of sophistication your guests will never forget.

The third hidden cause: ignoring the "breathing" of materials">

Here’s what they don’t tell you: every material has its own “visual breath.” A canvas print interacts differently with a concrete wall than it does with drywall. Marie, a Parisian interior designer, recently explained to me how this discovery revolutionized her projects.

You can easily spot it: observe how light behaves differently depending on the textures, how some combinations create visual vibrations and others dead zones.

This ignorance prevents you from achieving spectacular visual effects with your current budget, simply by understanding these material dialogues.

🔍 3 signs that your wall “calls” for integration:

  • The visual “black hole” effect: Your gaze glides over this area without stopping, as if it absorbed attention instead of captivating it
  • Rhythm disruption: This feeling that something "breaks" the harmony of the room, like a false note in a melody
  • Persistent sense of incompleteness: Even after several attempts at decoration, you feel that the space doesn’t express its potential

The trigger element: the “architectural signature”

What turns an interior from “pretty” to “unforgettable” is its unique architectural signature: that particular way in which art and structure marry to tell YOUR story. It’s the domino effect that transforms everything: once you master this signature, every element of your decor naturally finds its place. You’ll recognize it by that feeling of "that's exactly it!" when everything fits perfectly.

Golden rule for successful integration: If you have to force harmony, it means the approach is wrong. Authentic integrated art creates a visual evidence that’s verified at first glance.

❌ Traditional decoration ✅ Integrated art 💡 Why it changes everything 🎯 Immediate benefit
You choose the painting then look for where to hang it You think about the space and then create the adapted artwork Art becomes a natural extension of the wall Obvious harmony without effort
You follow color/proportion rules You create your own visual logic Originality replaces conformity Unique and memorable interior
You decorate over the architecture You visually sculpt the architecture Coherence between form and background Natural sophistication
You accumulate decorative objects You reveal the character of the space Fewer elements, more impact Purified and modern elegance

The progressive method to master architectural art

Don't be discouraged by imagining monumental projects! Integrated art develops step by step, like a gardener preparing their soil before planting. Each level brings you immediate satisfaction while preparing the next. At the end, you will have created a decorative ecosystem that evolves naturally with your tastes.

🗺️ Your roadmap to excellence: We will proceed in 3 logical steps: first analyze your existing architecture (the foundations), then create the first material dialogues (growth), finally orchestrate the whole thing (mastery). At each step, you will see your eye become more refined and your confidence grow.

Step 1: Decipher the soul of your walls

Before creating, you must listen to what your space has to say. It's like learning a new language: first understand, then dialogue. This step will reveal unsuspected aspects of your interior and give you that thrilling sensation of discovering a hidden treasure in your home.

🔧 Your analysis tools (nothing to buy!)

  • Your smartphone in photo mode: Essential for capturing light variations according to the hours. Take pictures every 2 hours from 8am to 8pm, you will discover that your wall completely changes personality! Avoid flash which masks these subtle nuances.
  • A flashlight or phone lamp: To reveal micro-reliefs and textures invisible in normal lighting. Move the light at an angle over your surfaces, it's magical! The effect obtained foreshadows what your future integrated art will give.
  • Tracing paper or greaseproof paper: To report architectural shapes (angles, moldings, sockets...) and visualize your integration ideas. This architect's technique saves you hours of reflection.

Let's move on to concrete practice now

🎯 Your exploration mission (easier than it seems)

Map the "dialogue zones": Identify places where your wall changes texture, color or direction. These natural transitions are your future artistic integration areas! Photograph them from different angles to capture their potential. Don't look for perfection, look for the unique character.

⏱️ Time: 15 minutes per wall | ✅ Success when: You have identified 3-5 zones that "catch" your eye naturally | ⚠️ Attention: Don't ignore "flaws" like slight cracks or irregularities - they can become your most beautiful artistic assets!

Test the "luminescent breathing" : At different times of day, observe how shadow and light dance on your surfaces. Note the areas that are illuminated, those that remain in shadow, the reflection effects. This information will determine the orientation and materials of your future integrated art.

⏱️ Time : 5 minutes every 2h for a day | ✅ Successful when : You clearly visualize the "active" and "passive" luminous zones | ⚠️ Attention : Don't forget evening artificial lighting - it often reveals hidden potential!

Identify your "natural architectural style" : Look at existing elements (baseboards, sockets, switches, radiators) no longer as constraints but as clues to your personal decorative grammar. Are they rather geometric? Organic? Minimalist? This hidden consistency will guide your artistic choices.

⏱️ Time : 10 minutes | ✅ Successful when : You can describe the dominant "character" of your space in 3 adjectives | ⚠️ Attention : Don't judge your current style, analyze it objectively to sublimate it!

✨ Validation of your architectural diagnosis : You should now see your wall differently : no longer as a flat surface, but as a three-dimensional landscape full of possibilities. If you feel an irrepressible desire to "dialogue" with these areas that you have just discovered, that's perfect! In case of doubt, start the observation again at another time - the eye is gradually educated.

OUR RECOMMENDED PRODUCTS

Step 2 : Create your first material-art dialogues

Now that you know your space intimately, we move on to the creative level! This step is particularly rewarding because you will see your first concrete transformations. The snowball effect begins: each success gives you the audacity to go further.

🎨 Your creation materials (controlled budget)

  • Texture paste or decorative plaster : Choose a product repositionable in the first few hours to experiment without stress. First test on cardboard to get used to its texture. Avoid "quick-drying" products that do not forgive beginner hesitations!
  • Cut stencils or templates : Make them from rigid cardboard to create shapes that dialogue with your architecture. Pro tip: cut several sizes of the same shape to create scale games. Cardboard is easy to handle and costs almost nothing.
  • Relief brushes and spatulas: These tools create three-dimensional textures that catch and reflect light differently depending on the viewing angle. The visual impact is spectacular compared to the negligible cost of the investment.

🚀 Your first integrated creations

Create a "textured signature": In one of your identified dialogue areas, apply texture paste following the natural lines of your architecture (along a skirting board, around a light switch...). This gentle integration technique instantly reveals the potential of the space! Work in small areas to maintain control.

⏱️ Time: 30 minutes per area | ✅ Successful when: The texture seems "to have always been there" and naturally guides the eye | ⚠️ Attention: Start discreetly - you can always intensify after drying!

Play with cast shadows: Use your stencils to create reliefs that project changing shadows depending on the light. Position them taking into account your lighting analysis from step 1. These living shadows transform your wall into a natural kinetic work of art!

⏱️ Time: 45 minutes | ✅ Successful when: Shadows create a different "show" depending on the time of day | ⚠️ Attention: Test first with temporary shapes before finalizing!

Step 3: Orchestrate your decorative symphony

You are now at the mastery level! The difference between amateur and connoisseur is now in your ability to coordinate multiple elements to create a coherent whole. The final result? An interior that tells a unique story and which your guests remember months after their visit.

🎼 Your overall composition

Create "visual echoes": Repeat certain patterns or textures in several areas of the room to create a decorative rhythm. But be careful: vary the scales and intensities to avoid monotony! This designer technique creates a sophisticated unity with seemingly effortless ease.

⏱️ Time: 1h to 2h depending on the size of the room | ✅ Successful when: The eye naturally moves from one element to another | ⚠️ Attention: A maximum of three echoes per room to maintain readability!

Integrate dedicated lighting: Add light sources that reveal your creations: adjustable spotlights, discreet LEDs, wall sconces... Lighting transforms your integrated art into a true nocturnal spectacle! It's the detail that takes your creation from "amateur" to "professional" status.

⏱️ Time: 2h to 3h | ✅ Successful when: Your reliefs and textures come alive as soon as dusk falls | ⚠️ Attention: Test several positions before final fixing!

Master progression rule: You are ready for the next step when the previous one seems evident and natural. Respect your learning pace: mastery is better than haste!

Congratulations! You now master the fundamentals of integrated architectural art. But true connoisseurs go even further with expert subtleties that make all the difference between "pretty" and "breathtaking". These little secrets give you a decisive advantage over 99% of people who decorate "normally".

🎭 Master decorator's tip: Create "mystery zones": corners where your integrated art is revealed gradually according to the viewing angle. This technique of "progressive discovery" maintains interest and creates a sense of more spaciousness! For example, a texture that extends behind a piece of furniture and reappears further away...

💭 Question from a passionate reader

"I'm a tenant, can I still create integrated art without risking my deposit?"

Excellent question that shows you are already thinking in terms of concrete feasibility! Rest assured, temporary integrated art exists and can be spectacular. Think about removable textured panels, magnetic fixing systems on metal partitions, or repositionable "false-relief" techniques. One of my tenant clients created an accent wall with decorative gypsum boards fixed with reinforced suction cups: stunning result and removal in 2h! The trick is to work OVER the existing rather than within it.

🔧 Immediate feasibility test: Temporarily stick a piece of textured cardboard to your wall with quality double-sided tape. If you like the effect, you will know that a "definitive removable" version is worth it!

The pitfalls that ruin everything (and how to avoid them)

Even with the best method, some classic mistakes can turn your project into disappointment. I prefer to reveal them to you now to spare you these frustrations! These errors are human and common, but easily avoidable with the right reflexes.

  • ⚡ Wanting to do everything at once: The enthusiasm of the beginning leads to attacking several walls simultaneously. Result: exhaustion, loss of quality, abandonment of the project. Like a chef preparing 10 dishes at the same time! Master one area before attacking the next - your satisfaction will be multiplied.
  • 🎨 Ignoring the "visual digestion period": After creation, it takes a minimum of 48h for your eye to get used to and objectively judge. Many touch up too quickly and break their first momentum! Live with your creation for a few days before adjusting - often, it reveals its qualities over time. 💡 Ignoring artificial lighting: Creating a magnificent relief in daylight and discovering that it "dies" under evening lighting, is frustrating! Always test your creations under all your types of lighting - LED, halogen, warm/cold light...
  • 📐 Underestimating the impact of proportions: A perfect pattern in small can become overwhelming when enlarged, or conversely lose all its charm reduced. Always test your idea in a "mockup" before you start - cardboard, paper, projection...
  • 🏠 Forgetting the "dialogue" with what already exists: Getting carried away with a technique seen on Pinterest without considering whether it respects the DNA of your space. It's like wearing a tuxedo to the beach! Your creation should sublimate your architecture, not fight it.

🛡️ Your anti-error check-list: Before each creative session, make sure you have physical distance to judge (at least 2m), that your lighting is representative of daily use, that you are not rushed by time, and that you keep "recovery" materials on hand. Warning signs : if you force, if it doesn't "speak" to your loved ones, or if you can’t explain your choice simply.

🎨 Discover all our wall art collections

🎁 Special reader offer

Because you took the time to inform yourself, enjoy 10% discount on your first order:

ART10

⏰ Valid 72h after reading • Applicable to all our products

Your expert questions about architectural art

🕒 How long does it take to completely transform a room with this method?

For a 20m² room, allow 3 to 4 weekends spread over a month if you follow the step-by-step progression. The secret to optimizing: prepare all your materials in advance and work in "campaigns" (one day = one technique). My client Sophie transformed her living room in 3 weekends and the result rivals a professional decorator project!

💰 What budget to plan to start without breaking the bank?

Excellent news: you can start with 50 to 80€ of materials to test the method on 2-3m²! Decorative plaster costs €15-25 per pot, basic tools €20-30, and the rest in additional lighting. The budget trick: recycle templates from your cardboard packaging and make your own stencils - guaranteed effect!

🔧 I am not at all handy, is it really accessible to beginners?

Rest assured! 80% of success comes from observation and planning, not manual dexterity. The techniques I share are deliberately simple and "catch-upable". Plus, unlike plumbing or electricity, here mistakes are easily corrected! Start with the least visible area to get your bearings - guaranteed confidence.

🎯 How do I know if my personal style is suitable for this approach?
All styles benefit from integrated art! Whether you love Scandinavian minimalism, baroque opulence or industrial spirit, the method adapts by changing materials and patterns. Integrated art reveals and amplifies your existing style rather than imposing it. If you like your interior but find it "fade", that's perfect!

⚡ What should I do if the result doesn’t please me once finished?
Precisely to avoid this, we proceed in progressively validated steps! But even so, if you are not satisfied, most techniques remain modifiable for 24-48h. After complete drying, light sanding + a new coat allow you to start over. I've even seen "failures" become masterpieces after simple creative retouching!

Your transformation into a creator of exceptional spaces

In a few weeks, when you look at your transformed wall, you will feel that deep pride of the creator: not only will you have a unique interior that everyone admires, but you will have developed an artistic eye that will forever change your relationship to decoration. Your friends will ask for your advice, your home will become the preferred meeting place, and above all, you will experience this daily satisfaction of living in a space that truly resembles you.

Beyond visual beauty, you will have acquired a transferable creative skill: this ability to see hidden potentials, to think in volumes and harmonies. This new perception will serve you in all your future decor projects, but also in your general approach to aesthetics and organization. Your confidence in your visual choices will be transformed forever.

The best thing about it all? You now know that the decorative magic is not a mysterious gift but an accessible method. Your first concrete step: choose tonight your "test zone" and observe it with your new eye of architectural analyst. Tomorrow, you will never see your walls the same way again!

🚀 Your creative spark awaits you: Every great decorator started with a first bold gesture on an anonymous wall. Yours is waiting for your signature to reveal its extraordinary potential!

Read more

Art mural fonctionnel (isolation, acoustique) : doublez l’impact esthétique par l’utilité
Créer un axe visuel fort avec un tableau grand format dans un projet de rénovation