Create a Strong Visual Axis with a Large-Format Artwork in a Renovation Project
By Alexandre MARY
⏱️ Reading time : 8 minutes
You've just finished renovating your living room, you’re proud of the result, but something feels off... The space is desperately lacking in character, as if all that energy invested wasn’t enough to create that soul you were so looking for.
You look at this main wall, this central partition that should naturally attract the eye, but remains desperately bland. Even with your new sofa and carefully chosen lighting fixtures, the overall effect lacks that visual strength that makes people turn around when they enter a room.
You may have tried a few scattered small paintings, a decorative shelf, or even changed the color of the wall. But nothing works: your gaze doesn't find that central anchor point that should magnetize attention and structure the entire space.
Rest assured, this feeling of emptiness is not your fault. The problem is that most people underestimate the impact of a powerful visual axis. They think about decoration by adding elements, when you need to think about visual architecture by creating a clear hierarchy.
By the end of this article, you will know exactly how to transform your space with a large format painting that creates a true magnetic visual axis, that force of attraction that was missing from your interior to make it go from “pretty” to “remarkable”.
Why does your space NOW crave a powerful visual axis?
Imagine entering a restaurant without knowing where to look: that's exactly what happens in an interior without a defined visual axis. Your brain instinctively seeks a central landmark, and without it, the entire space loses impact and memorability. It’s like trying to tell a story without a main character: everything dilutes.
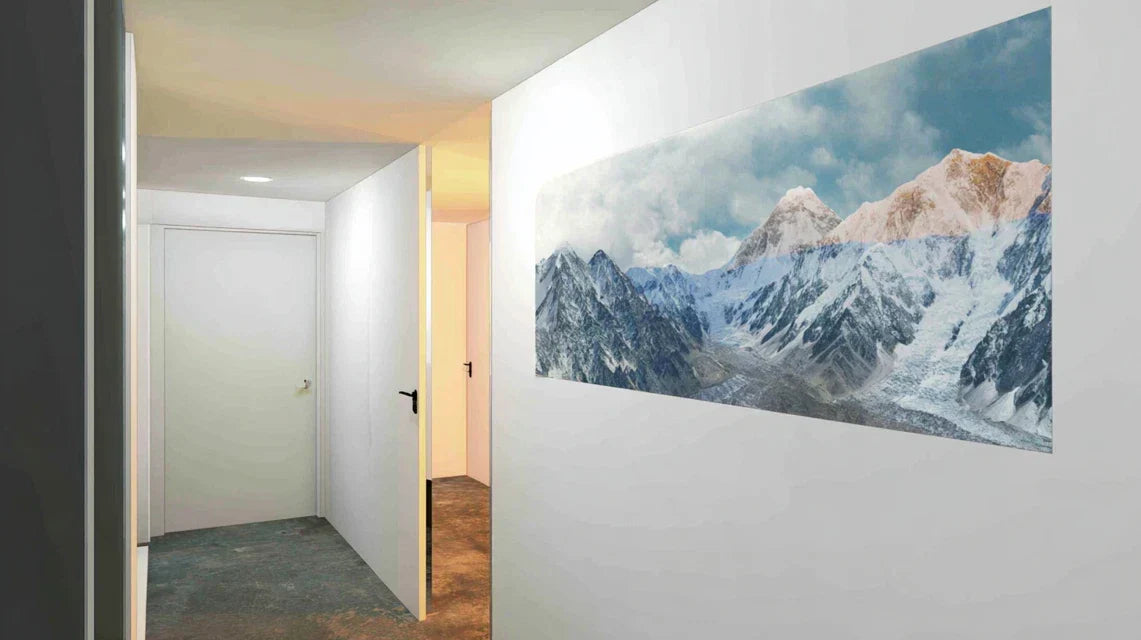
🏠 Customer testimonial: "After 6 months in our new living room, our guests were standing near the entrance, as if lost. The day we installed our panoramic painting of 120cm facing the door, everything changed. Now people naturally head towards the sofa, attracted by that visual strength which structures the entire space."
💬 Conversation with a decor expert
"I'm afraid my new painting won’t match if I change my wall color..."
Relax! It’s exactly the opposite. A true artistic crush adapts and even reveals itself with new colors. It’s like a diamond that shines differently depending on the lighting!
"But I was told you always had to match colors..."
Who told you that? Modern decor plays on subtle contrasts. A painting with warm tones on a cool wall is like a fireplace in a blue room: magical!
The golden rule of the visual axis: A large format artwork well placed acts like a visual magnet that instantly organizes all the space around it. In 24h, your perception of the room will be totally transformed, going from blurry to clear, from scattered to centered.
What's really happening in your space (and why you feel it)
Do you recognize these situations? Your guests hesitate before sitting down, they look everywhere without knowing where to put their eyes, or worse, they take out their phone due to visual discomfort. Your space lacks this natural breathing that guides the gaze and soothes the mind.
What's really happening is that your brain and those of your guests are desperately looking for a focal point to orient themselves in the space. Without it, the eye flits around, gets tired, and the person feels a subconscious tension. It’s exactly the same mechanism as trying to read text without paragraphs.
Think of the difference between looking at a landscape with a majestic tree in the center and a uniform plain: the tree instantly creates a visual hierarchy that makes the landscape memorable and soothing.
First hidden cause: The illusion of "additive decoration"
Contrary to what 90% of people think, accumulating decorative elements does not create a beautiful interior. It's even the opposite: the more small objects you add without a clear hierarchy, the more you dilute the visual impact of your space.
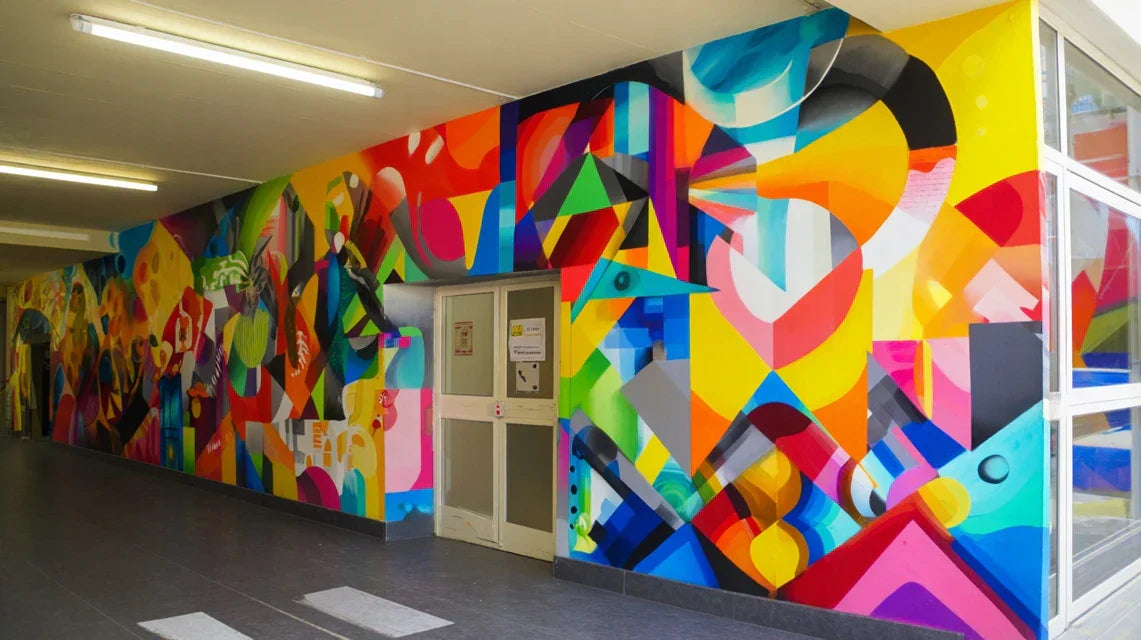
It’s like trying to make a bouquet by mixing 20 different flowers of the same size: the result lacks structure. In decoration, you need a "soloist" - your large format artwork - that sets the tone, and "accompanists" that sublimate it.
This misunderstanding explains why you feel this underlying frustration in your "finished" space but which does not satisfy you. Your instinct tells you that something important is missing, and it's right: the visual orchestra conductor is missing.
🔍 Instant test: Look at your main room and count how many elements attract your attention at the same time. More than 3? Your space needs a clear visual hierarchy with a dominant element.
Second cause: The myth of the "right size"
The majority of people choose their artworks too small for fear of “doing too much”. They think that a large format will “overwhelm” the space, when it’s exactly the opposite that happens: a format that is too small drowns in the space and loses all its impact.
It's like wearing a women's watch with a men's suit: the effect is unbalanced. In decoration, proportions are crucial. A large format artwork creates an enlargement effect by giving the room a noble scale.
This proportion error explains why your main wall remains "flat" despite your efforts. Your eye needs a format that dialogues with the architecture of the room, not one that hides in it.
Third Reason: Neglecting the "Breathing" Effect
Few people realize that a well-defined visual axis creates a "breathing" effect in space: the gaze finds its anchor and can then explore the rest of the decor serenely. Without this anchor, the eye remains in constant tension.
Observe your behavior: in a space without a clear visual axis, you move more, touch more objects, and feel a subtle agitation. This is your brain searching for that point of visual rest.
This imperceptible tension impacts your daily well-being in the space. You feel less relaxed at home without understanding why, and your guests leave with a less memorable impression of your interior.
🎯 3 Signals That Don't Lie:
The Darting Gaze: Your guests scan the room without stopping - sign of a lack of strong focal point
Hesitation to Settle In: People stand longer than necessary - the space lacks reassuring hierarchy
Persistent Feeling of "Emptiness": Despite your efforts, something is wrong - it lacks the central structuring element
The Triggering Element: The Power of a Focal Axis
What really makes the difference is understanding that a large-format artwork doesn't just decorate: it architectures the space. Like a pillar that structures a building, it creates a domino effect that visually reorganizes everything around it. Identify in your room the wall that naturally attracts the eye from the entrance: this is where your visual axis should take place.
The Rule of Magical Proportions: Your artwork should occupy between 60% and 75% of the width of the wall to create an optimal impact. Test with kraft paper glued to the wall - you'll immediately feel the difference.
❌ Classic, Scattered Approach
✅ Strong Visual Axis Approach
💡 Why It Changes Everything
🎯 Benefit Felt
Multiplying small decorative elements
A dominant large-format artwork
Creates a clear visual hierarchy
Sense of order and harmony
Seeking perfect matching
Playing subtle contrasts
Contrast creates depth
Dynamism and personality
Fear of being "too noticeable"
Embracing a strong artistic choice
Measured boldness impresses
Pride and distinction
Random placement
Strategic position facing the entrance
Naturally guides the gaze
Fluidity and welcome
Your 3-Step Method to Create a Magnetic Visual Axis
Don't worry, creating a powerful visual axis isn't complicated once you understand the logic. We will proceed like an interior architect: first analyze the space, then choose the right format, finally strategically position. At each step, you will see your space transform before your eyes.
🗺️ Overview of your transformation: Step 1 - Analysis and choice of strategic wall (immediate satisfaction of seeing clearly). Step 2 - Selection of the perfect format and style (excitement of a choice that reflects you). Step 3 - Installation and final balancing (pride in the professional result).
Step 1: Identify your master wall and its specifics
Starting with this step is crucial because it determines everything else. Like an architect studying the terrain before building, you must understand the natural geometry of your space. Once this analysis is complete, you will feel that "seeing clearly" satisfaction that gives confidence for what follows.
🔧 What you need for this analysis
A measuring tape of at least 3m: Essential for accurately measuring widths and heights. Prefer a rigid metal model that doesn't bend - fabric versions give approximate measurements that will skew all your proportion calculations.
Your smartphone with camera: To capture different views and analyze perspectives at your leisure. The naked eye can be deceived by proportions, while the photo immediately reveals imbalances and hidden potential of each wall.
A notebook and pencil: To note measurements and observations without risking forgetting them. The brain remembers better when writing by hand, and these notes will become your reference for all subsequent decisions.
Now, let's move on to the practical analysis of your space.
🎯 How to proceed methodically
Identify the main vision wall: Stand at the entrance of your room and observe which wall naturally attracts your gaze first. It is usually the wall facing the front door or the one that offers the largest visible surface. This wall will become your main visual axis because it already benefits from geographical advantage.
⏱️ Time: 5 minutes | ✅ Successful when: You can close your eyes, open them and immediately point to the imposing wall | ⚠️ Attention: Do not confuse the largest wall with the best-placed wall - location is more important than surface
Measure exact proportions: Record the total width of the chosen wall, its height, and note the position of existing elements (sockets, switches, radiators). These technical constraints will determine the optimal dimensions of your future painting and its exact positioning.
⏱️ Time: 10 minutes | ✅ Successful when: You have a sketch with all dimensions | ⚠️ Attention: Many forget to measure the height of the baseboards - it is included in the final calculation
Analyze lighting and reflections: Observe how natural and artificial light illuminates this wall at different times. A painting placed in a zone of permanent backlighting will lose all its impact, while well-thought-out lighting will enhance it. Also note any sources of parasitic reflections.
⏱️ Time: 15 minutes (3 different moments) | ✅ Successful when: You know the areas of shadow and light | ⚠️ Attention: Lighting changes with the seasons - also check in the evening
✓ Validation of step 1: You must be able to clearly visualize a rectangle of large dimension on your chosen wall, know its technical constraints, and be certain that the lighting will enhance it. If something still bothers you, go back and measure - better 5 more minutes now than regret later.
OUR RECOMMENDED PRODUCTS
Step 2: Choose the format and style that will enhance your space
Now that you know your wall perfectly, you can choose with informed knowledge. This step is particularly rewarding because you move from technical analysis to creative choice, while maintaining a methodical approach that guarantees a harmonious result.
📐 Tools for making the right choice
Calculator or smartphone app: To apply the rule of proportions (60-75% of the width of the wall). Proportion calculations are not done by eye - a 10cm difference can make the difference between "perfect" and "something is wrong".
Kraft paper or cardboard: To simulate the actual size on the wall before purchase. This visualization step avoids 90% of format errors and gives you a precise idea of the visual impact before any financial investment.
Color samples from your room: Small pieces of fabric, paint, or photos of your existing elements. The choice of a painting is never done in the abstract - it must harmonize with your existing palette.
🎨 Progressive selection method
Calculate optimal dimensions: Apply the 60-75% rule to the width of your wall to obtain the ideal width of your painting. For the height, aim for 40-50% of the total height of the wall. These proportions automatically create a balanced visual impact without crushing or disproportion.
⏱️ Time: 5 minutes | ✅ Successful when: You have a precise measurement in centimeters | ⚠️ Warning: Never go below 60% width - the effect will be insufficient
Test the size with kraft paper: Cut out a rectangle to the calculated dimensions and temporarily attach it to the wall. Step back at different distances and observe the effect produced. This simulation immediately reveals whether the format structures the space as intended or if adjustments are needed.
⏱️ Time: 15 minutes | ✅ Successful when: The rectangle naturally attracts the eye and balances the room | ⚠️ Warning: Test from the entrance of the room - it's the first impression that counts
Define your style consistently: Analyze the overall ambiance of your room (modern, classic, industrial, bohemian) and choose a painting style that sublimates it without contradicting it. The goal is not a perfect match but a harmonious complementarity that enriches your world.
⏱️ Time: 20 minutes | ✅ Successful when: You can explain why this style suits your space | ⚠️ Warning: Avoid crushes that don't match your environment
✓ Validation of step 2: You have precise dimensions, you have tested the visual impact, and you know what style to look for. Your choice should make you vibrate while naturally integrating into your existing world.
Step 3: Strategic installation and final balancing
This final step definitively transforms your space. This is the moment when you go from being a beginner who hopesmasters
🔨 Professional installation equipment
60cm minimum spirit level: A crooked painting ruins the entire visual effect. Smartphone "level" apps are practical but less accurate than a real spirit level - invest in a quality tool that will serve you for all your decor projects.
Fixings suitable for weight and wall: Molly plugs for hollow walls, expansion plugs for solid walls. The weight of a large painting requires reinforced fixings - underestimating this point risks a catastrophic fall.
Tape measure and pencil: To mark the fixing points with precision. In decoration, 2cm difference can create a visible imbalance - millimeter precision makes the difference between amateur and professional.
🎯 Methodical installation protocol
Calculate the optimal height: Place the center of your artwork 5.4 feet (165cm) from the floor (standard eye level). For a piece above a sofa, leave 5.9–7.9 inches (15-20cm) between the back and the bottom of the frame. This rule ensures optimal visual comfort in all situations.
⏱️ Time: 10 minutes | ✅ Success when: Measurements are noted with pencil on the wall | ⚠️ Attention: Measure from the floor, not from a piece of furniture that could move
Mark and drill accurately: Transfer the fixing points while checking horizontality with a spirit level. Drill to the exact dimensions of your wall plugs taking into account the type of wall. A solid fixing is the guarantee of peace of mind for years to come.
⏱️ Time: 20 minutes | ✅ Success when: Fixings firmly support the weight | ⚠️ Attention: Always test the solidity before permanently hanging
Hang and adjust the final balance: Install your artwork while checking horizontality and alignment one last time. Step back to observe the overall effect and make minor adjustments that perfect the visual harmony of your new focal point.
⏱️ Time: 15 minutes | ✅ Success when: The whole looks natural and balanced | ⚠️ Attention: Final adjustments are crucial - take all the time you need
✓ Final validation: Your artwork should immediately attract the eye from the entrance, create a feeling of balance in the room, and make you want to settle comfortably facing it. If this is the case, congratulations: you have just created a true magnetic visual axis!
Rule of progression: Each step should give you a feeling of increasing satisfaction. If at any point you doubt, go back to the previous step to consolidate - a successful visual axis is built on solid foundations, not compromises.
Now that your visual axis is in place, you will discover the subtleties that make the difference between a "correct" result and an "exceptional" result. These professional tips give you that distinct advantage that will impress your guests.
🎨 Decorator's secret: Create a visual triangle by placing two smaller elements (lamp, plant, sculpture) on either side of your artwork, but at different heights. This calculated asymmetry naturally guides the eye and enriches the composition without competing with the main axis.
💭 Frequent question from our readers
"Do I risk getting tired of a piece so large?"
This concern is perfectly natural - we tend to think that a large format will be more "overpowering" than a small one. In reality, it's exactly the opposite that happens: a high-quality large-format artwork becomes like a landscape through the window. We don't tire of a beautiful landscape because it evolves with the light, the seasons, our mood. The more generous the format, the more details there are to discover over time.
💡 Compatibility test: Choose a work that truly touches you, not just one that "goes well" with your decor. Authentic emotion never goes out of style, unlike aesthetic trends.
The absolutely avoidable pitfalls (to protect your investment)
After supporting hundreds of projects, we have identified the mistakes that can compromise your success. These traps are tempting and seem logical, but they sabotage the desired effect. It is better to know them now to avoid them.
⚠️ Choosing a "reasonable" format out of caution: The fear of "doing too much" often leads many to reduce the planned size at the last moment. Result: an insufficient visual impact that will leave you with the frustration of "almost succeeded". Trust your proportion calculations and embrace the generosity of the format.
⚠️ Installing too high "to see better": Instinct tells us to hang it up high, but a picture hung too high loses its power of attraction and strains the eyes. Respect the 165cm rule at the center - your neck will thank you and the effect will be optimal.
⚠️ Multiplying lights on the artwork: Adding directional spotlights seems to enhance it, but too much artificial lighting kills the natural effect and creates annoying reflections. Indirect lighting that reveals without dazzling is always more elegant.
⚠️ Wanting "everything" to match perfectly: Harmony does not mean total matching. A controlled contrast creates depth and visual interest. Your artwork can be the only element that "misfits" subtly - it's often what makes it memorable.
⚠️ Changing your mind at the last minute: After weeks of reflection, last-minute panic leads to questioning everything. Trust your methodical process - last-minute doubts are rarely justified.
🛡️ Checkpoints before finalization: Does your artwork immediately attract the eye from the entrance? Does it clearly stand out from the wall without overwhelming it? Can you admire it comfortably from your favorite sitting position? Do the proportions seem natural after 24 hours? If yes to everything, you have succeeded in your visual axis.
Because you took the time to inform yourself, enjoy 10% discount on your first order:
ART10
⏰ Valid for 72h after reading • Applicable to all our products
🙋♀️ Your most frequently asked questions about the visual axis
📏 How much does a quality large format artwork actually cost and how long does it take to see the difference?
A large format artwork generally costs between €200 and €800 depending on the dimensions and technique. The visual impact is immediate - as soon as installation is complete. To optimize your budget, prioritize high-end prints on noble supports rather than low-cost canvases that will lose their luster.
🔨 Is it really difficult to install a large artwork without causing damage?
With the step-by-step method and the right tools, it is accessible to any occasional DIYer. The secret: never improvise fixings and always test the solidity before final installation. Allow 45 minutes for careful installation - it's a time investment that will save you years of regret.
🎨 How can I be sure that my artistic choice will still please in 5 years?
Prioritize your authentic favorite rather than the trends of the moment. An artwork that truly moves you develops an emotional richness that grows with time. Timeless works - landscapes, classic abstracts, portraits - transcend fashions without aging.
💡 What to do if my spouse is not convinced by the idea of a large format?
Start with step 1 together: analyze the space and test the dimensions with kraft paper. This concrete visualization often convinces even the most reluctant. Remember that the goal is not to "decorate" but to "structure" the space - it's more reassuring than an aesthetic whim.
🏠 Does this method work in a small space or only in large rooms?
It is even more effective in a small space! A well-defined visual axis visually enlarges the room by giving it a clear structure. In 20m², an 80cm artwork creates a more spectacular effect than 3 x 30cm artworks that clutter the space.
🌟 Your transformation begins now
In a few weeks, when your guests cross the threshold of your door, their gaze will be immediately magnetized by this powerful visual axis that you have created. They will instantly feel this sense of harmony and balance that characterizes interiors with character. Your space will no longer be "pretty" but memorable, and you will feel the discreet pride of a homeowner who masters their environment.
This transformation goes far beyond simple decoration: you will have developed a keen eye for proportions, visual balance, and the emotional impact of spaces. These skills will enrich your relationship with all future decor projects and strengthen your confidence in your aesthetic choices.
Understanding was the most difficult step - now you know exactly what to do and why. Your first move? Grab that measuring tape and go analyze your main wall. Within an hour, you'll have crossed the first step towards this transformation that you already feel.
✨ Your new decor chapter begins: You now have all the keys to create this magnetic visual axis that will definitely transform your perception of space. Your interior is waiting for your action!
📚 To go further in your decor expertise
Now that you master the art of the visual axis, discover how to harmonize colors and materials, create subtle lighting games, and develop your unique personal style to make your interior a true signature.


