

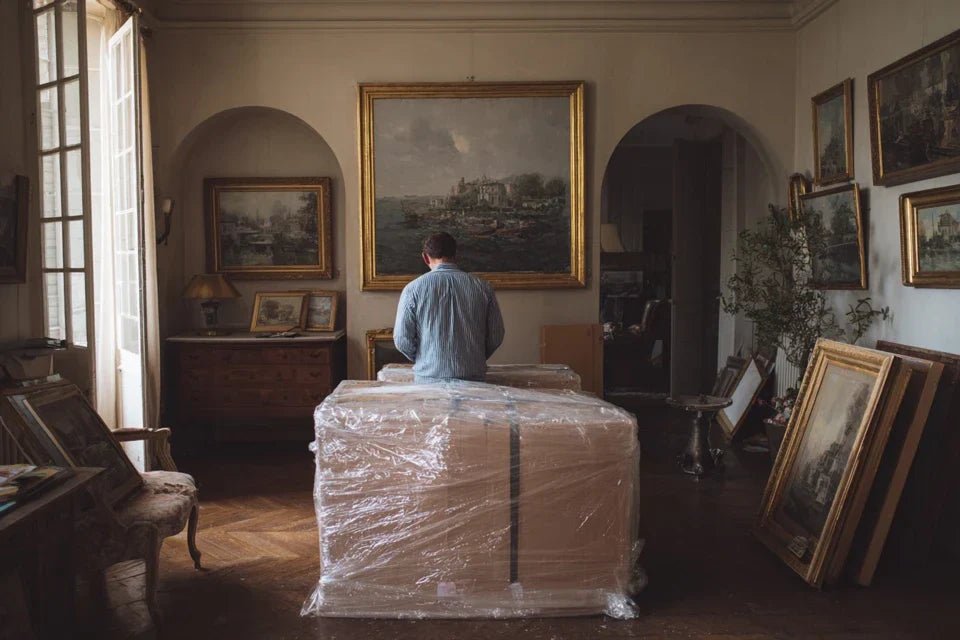
You’ve been admiring this magnificent artwork that graces your living room for months, and then anxiety strikes: how do you move it without damaging it? Do you really have to take everything apart, or is there another way?
This question has been nagging at you since you decided to rearrange your interior. You can already imagine the gaping holes in the wall, the lost fixings, the scratches on your favorite piece...
You may have tried simply lifting the artwork to see if it would move easily. Bad idea: the system resists, creaks, and you no longer dare to insist for fear of breaking everything.
Rest assured, this hesitation is perfectly normal! Most people think that all it takes is a "little pull" to move a picture, but each hanging system has its own disassembly rules.
By the end of this article, you will know exactly when and how to disassemble your fixings safely, and you’ll even discover tips for reinstalling your artwork more securely than ever before.
Why does this question divide so many art lovers?
Imagine that you had to move your collection in 15 days, and each painting represented hundreds of euros of artistic investment. One wrong move, and it’s years of passion that go up in smoke. It's exactly like wanting to transplant a century-old rose bush: you don't do that lightly!
📖 Customer testimonial: "I tried to move my 120cm triptych without removing the rails. The result: a 15cm scratch on the central canvas and a completely deformed fixing system. I should have taken 10 minutes to disassemble everything properly..."
💬 Conversation with a decor expert
The golden rule of artistic moving: Better 10 minutes of meticulous disassembly than 10 hours of emergency repairs. Your patience today will save you from regrets tomorrow!
Recognizing warning signs
Three situations probably resonate with you: your painting "moves" when you vacuum, it leans slightly to one side, or you hear a small noise when someone slams a door.
These symptoms reveal that your hanging system is already working at its limit. The problem isn't your installation, but the fact that no one explained to you how to "read" these warning signals.
It’s like a car making a strange noise: you can drive a few more miles, but it’s best to stop before running out of gas!
First clue: Actual weight vs. supported weight
Here's a truth that 90% of people ignore: a 5kg picture can exert a force of 15kg on its fixings depending on the angle of attachment. The difference between "static weight" and "dynamic force" changes everything!
Imagine a shopping bag: carried at arm's length, it feels like it weighs a ton. Pressed against your body, it becomes light. It’s the same for your pictures!
This lack of awareness explains why you hesitate to take down: you underestimate the real constraints on your fixings, and as a result, you fear that "everything will come loose" during handling.
🔍 Quick test: Gently place your hand behind the picture and push it very slightly towards the wall. If there is any “play” (even 2-3mm), it means that the system has already started to relax!
Second revelation: The invisible wear of fixings
Many people think a wall anchor "lasts forever". In reality, every micro-vibration (passages, music, heating) causes the material to work through cycles of expansion and contraction.
It’s exactly like an elastic band that is stretched 1000 times a day: after a few months, it has lost some of its resistance without being visible to the naked eye.
As a result: you live with the nagging anxiety that "it will come loose", and this tension prevents you from fully enjoying your wall art.
Third little-known factor: The domino effect of moving
Here's what no one tells you: moving a picture without taking it down creates cascading micro-shocks throughout the structure. Marie, an interior designer for 15 years, learned this firsthand with a wealthy client...
You can easily spot this phenomenon: look to see if your other framed pictures move slightly when you manipulate the first one. This is a sign that vibrations are spreading through the partition.
This chain reaction explains why some redecorations turn into nightmares: we thought we were moving ONE element, and we end up having to refix everything!
🚨 3 warning signs to watch out for:
- The picture "dances" when we pass : Your fixings have play, like shoes that are too big and move with every step
- Small white debris on the floor : The plaster is crumbling around the anchors, a sign that the load is pulling on the walls
- An angle that gradually changes : The system sags, like an overloaded shelf that eventually tilts
The trigger factor that changes everything
What really makes a difference is anticipating constraints. It’s like the domino effect: a professional visualizes the entire sequence before touching the first piece. You can spot this key moment by observing whether your instinctive gesture is to "hold" the picture with one hand while you touch the fixing with the other!
Universal safety rule: If you feel the need to "hold" the artwork while exploring the mounting system, that's because your instinct has already detected a risk. Listen to it!
| ❌ Misconception | ✅ Reality | 💡 Why this difference | 🎯 Practical advantage |
|---|---|---|---|
| "Taking apart = making holes" | Proper disassembly preserves walls | Technique makes all the difference | Reuse of the same fixing points |
| "It's complicated and long" | 5-10 minutes are enough with the right method | Organization avoids false maneuvers | Time saving in the long term |
| "The artwork will fall" | A controlled disassembly secures the work | We control each release step | Zero stress, no risk of falling |
| "I'll lose the parts" | A simple organization method exists | Professionals use "disassembly kits" | Quick and error-free reassembly |
The progressive method that reassures perfectionists
Now that you understand the stakes, let's move on to the enjoyable part: the technique that works. Imagine yourself as a watchmaker disassembling a precious watch: each gesture is considered, each piece has its place. The result? Immense satisfaction and the certainty of being able to reassemble everything with your eyes closed!
🎯 Overview of progression: We will proceed in 3 steps, like a chef who prepares ingredients, cooks, then plates. First secure (2 min), then release (3 min), finally organize for reassembly (2 min). At each step, you gain confidence!
Step 1: Prior security (the foundation of everything)
Starting with safety is like putting on your turn signal before turning: it seems obvious, but that's what avoids accidents! This step will give you that reassuring feeling of "having the situation under control" even before starting disassembly.
🛠️ What you need (and why)
- A flashlight or additional lighting: To see the details of fixings often hidden in the shadow cast by the artwork. A headlamp is preferable to a phone torch as it frees your hands. Direct lighting reveals the actual condition of the wall plugs and screws.
- A screwdriver adapted to the system: Most fixings use standard cruciform, but check beforehand! A magnetic screwdriver prevents losing screws on the floor. The right size avoids damaging screw heads.
- A transparent container or plastic bag: To collect ALL parts as you go. Choose transparent to immediately identify each element. This organization will save you 30 minutes of searching during reassembly!
Now, let's move on to concrete action:
🎯 Securing sequence
Photograph the entire system: Take 2-3 photos from different angles, including a close-up of the fixings. These photos will be your "reassembly plan" and will save you from racking your brains later. Also photograph the exact position of the artwork on the wall.
⏱️ Time: 1 minute | ✅ Success when: You can clearly see each screw, each bracket in the photos | ⚠️ Attention: Take the photos BEFORE touching anything, otherwise you lose the original configuration
Test the stability of the artwork: Place your two hands flat against the edges of the frame and apply very slight pressure towards the wall. You should feel if the system "works" or is rigid. This information will tell you whether to completely disassemble it or if a partial release is sufficient.
⏱️ Time: 30 seconds | ✅ Success when: You know if it moves, creaks, or stays firm | ⚠️ Attention: Never force during this test, it's just to "listen" to the system
Identify the release direction: Carefully observe how the artwork rests on its supports. Most systems are released by lifting slightly and then pulling towards you. Identify this movement before starting to unscrew anything.
⏱️ Time: 30 seconds | ✅ Success when: You visualize the exact release gesture | ⚠️ Attention: Some systems disengage downwards or by sliding laterally, do not generalize
✅ Checkpoint step 1: You have your reference photos, you know the "personality" of your fixing, and you know in which direction to release the artwork. If you are still unsure about any of these 3 pieces of information, calmly repeat this step. Otherwise, you are ready for the release!
OUR RECOMMENDED PRODUCTS
Step 2: Controlled release (the key moment)
We now move on to the heart of the process: releasing your artwork without stress or haste. At this stage, you are no longer an amateur who "hopes it will work", but someone who masters their technique. This step will give you that unique satisfaction of seeing your strategy work perfectly!
🔧 Specific tools for this phase
- Your hands as "sensors": One hand always remains in contact with the artwork to feel its reactions. The other hand handles the tool. This distribution of roles avoids sudden, unpredictable movements. Temporary support (cushion or towel): To be placed on the floor under the artwork to cushion an improbable fall. Even pros take this precaution. A sofa cushion is perfect. Mobile lighting: You will need to illuminate each fixing point precisely during unscrewing. Make sure you can direct the light with one hand.
🎯 Mastered release sequence
Loosen without completely removing: Unscrew each fixing by only 3-4 turns, just enough to create some play. This technique allows the painting to "relax" gradually rather than being released all at once. Proceed in order: left fixing, then right, then back to left.
⏱️ Time: 2 minutes | ✅ Successful when: The painting moves slightly when you push it gently | ⚠️ Attention: Never completely remove a screw until the others are loosened
Test the release movement: With both hands on the painting, reproduce the movement you identified (usually: lift 2-3cm then pull towards yourself). The painting should start to come away from its supports. If it resists, loosen another turn.
⏱️ Time: 1 minute | ✅ Successful when: The movement is effortless and without resistance | ⚠️ Attention: A system that resists indicates that a fixing is not loose enough
Final release and recovery of parts: Once the painting is free, place it safely and immediately retrieve all the fixings left on the wall. Unscrew each screw completely and place it with its system in your designated container.
⏱️ Time: 2 minutes | ✅ Successful when: All parts are in the container, clean wall | ⚠️ Attention: Some dowels may remain embedded in the wall, this is normal if they do not protrude
✅ Step 2 check point: Your painting is free and safe, all fixing parts have been recovered and organized, the wall has clean holes without debris. You feel that satisfaction of having mastered a slightly technical technique! Ready for the final organization?
Step 3: Organization for reassembly (the pro finish)
This last step transforms your amateur dismantling into a professional intervention. You will prepare the future reassembly with a method that will save you 80% of the time during reinstalling. This is where you make the difference between "doing" and "doing well"!
🎯 Pro organization method
Smart component labeling: Use masking tape to number each screw (1, 2, 3...) and write with pen its original position (left, right, center). Stick the label directly on the screw. This technique avoids any confusion during reassembly, even several weeks later.
⏱️ Time: 2 minutes | ✅ Successful when: Each part has a clear label | ⚠️ Attention: Use a permanent marker, not a pencil that erases
Test for fastener reusability: Examine each wall plug: it must be whole, without cracks, and return to its original shape. The screws must not be deformed at the thread level. If a piece seems doubtful, set it aside and note that it will need to be replaced.
⏱️ Time: 1 minute | ✅ Successful when: You know which pieces to keep and which to change | ⚠️ Warning: A damaged wall plug will never regain its original load capacity
Documentation of the wall support: Note on a paper the nature of the wall (drywall, concrete, brick) and the condition of the holes after disassembly. This information will be valuable for choosing the right wall plugs when reassembling, especially if you change the location of the artwork.
⏱️ Time: 1 minute | ✅ Successful when: You have a "technical sheet" of your installation | ⚠️ Warning: This information avoids costly errors during reassembly
✅ Final check point: Your components are labeled and sorted, you know the condition of your wall support, and you have a clear strategy for reassembly. You have just turned a stressful operation into a mastered process. Congratulations!
Disassembly progression rule: You are ready to move on to the next step when you no longer hesitate about the current step. Confidence is built gradually, never rush a step to save time!
You now master the fundamentals of secure disassembly. But true connoisseurs go further: they anticipate specific situations and optimize every gesture. Here are the subtleties that make all the difference...
🏆 Master framer's tip: Before reassembling, vacuum the holes to remove plaster dust. This dust prevents wall plugs from adhering perfectly and reduces their load capacity by 30%. A detail that changes everything!
🤔 Frequent question from our readers
"I have to move 8 artworks in the same room, should I disassemble them all at once?"
Excellent question! This hesitation is normal when discovering a new technique. The answer depends on your experience: for your first time, disassemble artwork by artwork to master each step properly. Once you have done 2-3 disassemblies, you can handle several works simultaneously by organizing your containers by number. The important thing is not to mix the fixing parts!
💡 Organization tip: Use compartmented boxes (like for DIY screw) and number each compartment according to the artwork. This will avoid any confusion and allow you to even prepare several reassemblies in parallel!
The pitfalls to absolutely avoid (feedback)
Even with the best method in the world, some mistakes keep happening. I prefer to tell you about them now to avoid inconveniences that I have seen too often among well-intentioned amateurs.
- ⚠️ Wanting to "save time" by not taking photos: It's tempting to think "I will remember it", but after 2-3 disassemblies, your memory will play tricks on you. Result: 20 minutes of groping during reassembly. Always take your reference photos, even for the simplest system.
- ⚠️ Completely unscrewing a fixing before others: This mistake turns a controlled disassembly into a free fall! The painting tilts to one side, pulls on the other fixings and can come off abruptly. Loosen gradually and in order.
- ⚠️ Neglecting the lighting of the work area: Working in the gloom is taking unnecessary risks. You miss important details, force screws that are seized, and do not see the wear of the components. Good lighting is 50% of the success!
- ⚠️ Mixing parts from several paintings: All screws look alike, but they are not interchangeable! Each system has its own specific lengths, diameters, and material. Always keep the pieces separate by painting.
- ⚠️ Forcing on an unexplained resistance: If something resists abnormally, STOP! There is necessarily a reason: seized screw, deformed dowel, or particular system. Forcing damages the wall AND the painting. Take the time to analyze the situation.
🛡️ Your safety checklist: Before each gesture, check that you know why you are doing it, that your two hands are free and stable, that your lighting is sufficient, and that you have planned where to place the painting once released. These 4 points avoid 95% of accidents!
🎁 Special offer for readers
Because you took the time to inform yourself, enjoy 10% discount on your first order:
🔧 Technical questions you are asking yourself
A professional charges between 50-80€ to disassemble and reassemble 3-4 medium paintings, with a delay of 2h on site. But with our method, you do it yourself in 15 minutes per painting! To optimize: group your disassemblies on the same day, prepare all your equipment in advance, and start with the smallest paintings to gain confidence.
Excellent question! On drywall, you can generally reuse holes IF the anchors are still in good condition and if the new artwork has the same weight or less. Test by gently reinserting the anchor: it should hold firm without spinning freely. If it moves, use larger anchors or shift 5cm.
🎯 Your new mastery of artistic movement
In a few weeks, when your friends hesitate in front of their own artworks to move, you will be the one who calmly explains the method to them. You will intervene with the confidence of someone who has already overcome this apprehension, and your surroundings will admire this new skill that transforms a chore into a mastered technical gesture.
This skill goes far beyond simply moving: you have developed an organized approach which applies to all your decoration projects. Analyze before acting, secure before modifying, organize to optimize... These reflexes will serve you in all your future arrangements!
The hardest part was understanding the real issues and overcoming your legitimate apprehensions. Now that you have the keys, your first concrete action can be to take photos of your current hanging systems. You'll see: this simple action will already give you the desire to move on to the next step!
🚀 Your success starts now: You are no longer in hesitation but in thoughtful action. Your next rearrangement will be a pleasure instead of a source of anxiety. That's true decorative freedom!


