


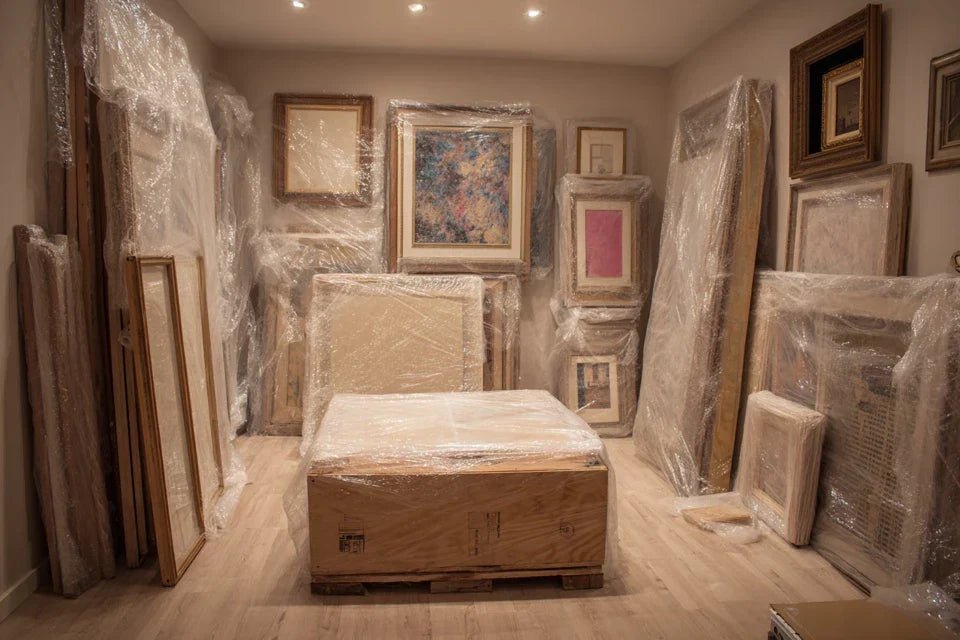
You’ve just moved in and your beautiful paintings are still leaning against the wall, in their protective packaging. Every time you walk past, you feel that little frustration: your new home doesn't yet feel like a real haven.
The white, bare walls remind you that something is sorely lacking. That warm atmosphere you created in your old home seems to have disappeared with the move, and you don’t know where to start recreating it.
You may have already tried to reposition your artworks at random, but the result disappoints you. The proportions no longer seem right, the colors clash with your new decor, and some paintings appear completely lost in the space.
Rest assured, this is perfectly normal! The problem doesn’t come from your works, but simply from the fact that each space has its own rules of harmony. Your old arrangement was perfect... for your old home.
By the end of this article, you will master professional repositioning techniques and be able to transform your new home into a true showcase for your works of art, creating an even more beautiful atmosphere than before.
Why is it so crucial to reposition paintings after a move?
Correctly repositioning your paintings in a new home is much more than just a matter of decoration. It's about recreating the soul of your home and regaining that feeling of “home” that you miss so much. Imagine walking into your living room and immediately feeling that warmth, that unique personality that only your well-positioned paintings can bring. If you wait too long, you risk getting used to bare walls and losing that motivation for redecorating that inspires you today.
🏠 Customer testimonial: "After 3 months in my new apartment, I had lost the habit of looking at my paintings. They were poorly positioned, and I didn’t even notice them anymore. When I finally took the time to reposition them correctly, I felt like I was rediscovering my collection!"
💬 Conversation with a decor expert
The golden rule of repositioning: Your artworks should interact with the architecture of your new space, not fight against it. Like an orchestra conductor adapting their score to a new concert hall, you will achieve a harmonious result in 2 to 3 repositioning sessions.
Understanding why your previous locations no longer work
You may recognize yourself in these three situations: your artworks seem to "float" on the walls, some works appear crushed by the space, or conversely, others seem to stifle the room. You feel that your artworks have lost their impact.
What's happening is that every space has its own proportions, its unique lighting and its flow of circulation. Your artworks were perfectly suited to your old environment, but they now need to learn to harmonize with new dimensions.
Think of a musician who would change instruments: their skills are intact, but they must relearn the specifics of their new tool to regain the same beauty of expression.
🔍 The question of natural lighting
Contrary to what many think, the orientation of your windows drastically influences the perception of your colors. A painting with warm tones that shone facing a south-facing window may seem dull with a north exposure.
It's like wearing a red sweater on a gray day versus a sunny day: the same garment will give you a completely different complexion depending on the light illuminating it.
This discovery will transform your way of choosing the location of your artworks. You will learn to use natural light as a spotlight to sublimate your paintings rather than having them suffer from it.
🌟 Immediate test: Take one of your paintings and move it near a window, then into a darker corner. Observe how the colors transform. This difference will help you understand the importance of lighting in positioning.
📏 The trap of wall proportions
Many believe that a large painting is always better than a small one on a large wall. In reality, harmony depends on the relationship between the dimensions of the artwork and the architecture of the room.
Imagine a large sofa in a small living room: even if it's exceptionally well made, it will overwhelm the space. Conversely, a small painting on an immense wall can create an elegant effect of solitude, provided that it is well positioned.
This understanding will allow you to play with volumes rather than be overwhelmed by them, and to create compositions that breathe perfectly in your new space.
🚶♀️ The impact of traffic flows
Here's a secret few people notice: the location of your doors and passages determines the "viewing angles" favored by your room. A painting visible from the entrance will not have the same impact as another discovered gradually.
You can identify these strategic areas by standing in the frame of each door and naturally observing where your gaze first falls.
This observation completely changes your positioning strategy: some artworks become "visual welcomes", while others are "discoveries" for those settling into the room.
🎯 3 signs of poor positioning:
- You no longer notice your artworks: They are positioned in "dead zones" of your usual field of vision
- Your guests no longer comment on them: The location no longer creates a moment of discovery or emotion
- You hesitate to show them off: Unconsciously, you feel that the harmony is not right
✨ The trigger factor: visual anchor effect
What really makes a difference is your ability to create "visual anchor points" in your new space. Like landmarks in a landscape, these points naturally guide the eye and structure the room's atmosphere. A well-positioned artwork becomes a visual magnet that attracts attention, then harmoniously redistributes it to other decorative elements. You will know you have found the right location when your gaze rests on it naturally and lingers with pleasure.
Rule of visual anchoring: Every room needs a "star" artwork that structures the space, and "supporting" artworks that create a visual dialogue. Test this rule by mentally designating your main artwork in each room.
| ❌ Old reflex | ✅ New approach | 💡 Why it works | 🎯 Visible result |
|---|---|---|---|
| Reproduce the old arrangement | Adapt to new dimensions | Each space has its own proportions | Natural harmony restored |
| Hang everything quickly | Position in thoughtful steps | Allows for adjustment and optimization | Balanced and evolving composition |
| Ignore natural lighting | Use light as an ally | Reveals colors and textures | Artworks sublimated and alive |
| Fill all the walls | Create visual breathing spaces | Empty space highlights the artworks | Impact reinforced for each artwork |
The 3-step method to reposition like a professional
Rest assured, repositioning your artworks with flair is not reserved for decorators! I will guide you step by step through a simple and progressive method, like a chef teaching you their secret recipe. We will proceed like an interior architect: first analyze the space, then create the composition, and finally refine the details. At each stage, you will feel the satisfaction of seeing your interior take shape and reveal its new personality.
🎨 Overview of the method: We will first "read" your new space like a musical score, then compose the visual harmony with your artworks, and finally adjust the details to create the perfect emotion. Each step will bring you closer to that magical feeling of "home" that you are looking for.
🧭 Step 1: Analyze and Tame Your New Space
Starting with this step will save you many costly trial-and-error sessions in terms of time and energy. It's like touring a garden before planting: you need to understand the exposure, soil, shade, and light areas. This observation phase will provide immediate satisfaction: you will finally understand your new environment and see the possibilities it offers rather than its constraints.
🛠️ What You Need for This Step
- A measuring tape: Choose a model of at least 5 meters to measure large surfaces. It will allow you to calculate the ideal proportions for your paintings. Avoid small sewing tapes that would force you to make complicated calculations.
- A notebook and pencil: To note your observations about the light at different times of the day. Paper is more practical than a phone for making quick sketches. Opt for a notebook with blank pages so you can draw easily.
- Kraft paper or newspapers: To create templates the size of your paintings. This professional trick will save you from drilling multiple holes in the walls and allow you to visualize the result before final hanging.
Now, let's move on to practice with simple actions:
🔍 Methodical Observation of Your Space
Map the light zones: Observe your room at three key times: morning (9am), afternoon (3pm), and evening (6pm). Note where natural light is most beautiful and where it would create annoying reflections. This observation will allow you to reserve the best locations for your favorite paintings.
⏱️ Time: 15 minutes per room | ✅ Success when: You have identified 2-3 "privileged" zones by light | ⚠️ Attention: Don't judge solely on strong brightness, sometimes soft light reveals nuances better
Measure wall proportions: Record the ceiling height and width of each available wall. Also note obstacles (switches, sockets, radiators) that will influence your choices. These measurements will allow you to calculate the ideal dimensions for your compositions.
⏱️ Time: 10 minutes per room | ✅ Success when: You have a simple plan with all dimensions | ⚠️ Attention: Don't forget to measure the distance between obstacles, not just their position
Identify natural "viewpoints": Stand successively at the entrance of the room, on the sofa, at the table, and note where your gaze naturally falls. These areas will become your premium locations for paintings you want to highlight.
⏱️ Time: 5 minutes per room | ✅ Success when: You have spotted 3-4 privileged "viewpoints" | ⚠️ Attention: Also think about guests: where do they usually sit?
✅ Step 1 Validation: You must have a clear vision of your space with its assets and constraints. You now know which walls "call" for your most beautiful artworks, and which are better suited for more discreet pieces. If you're still unsure, take a photo of each wall: this will help you visualize the possibilities.
OUR RECOMMENDED PRODUCTS
🎨 Step 2: Creating Your Visual Composition
Now that you know your space, we're going to move on to the next level: creating the perfect harmony between your artworks and your new environment. This is where the magic begins! This step is particularly rewarding as you will see your vision take shape. The snowball effect starts: each well-positioned artwork makes it easier to place the next.
🎯 Tools for this Creative Step
- Paper Templates: Cut out rectangles with the exact dimensions of your artworks. This professional decorator technique will allow you to test different compositions without damaging your walls. Use newspaper or kraft paper, which is easier to handle than cardboard.
- Repositionable Adhesive Putty: To temporarily fix your templates to the walls. Choose a putty that leaves no traces and supports the weight of the paper. This solution is more practical than tape, which can damage the paint.
- A Spirit Level: Essential for creating perfect alignments. Choose a model of at least 60 cm (24 inches) minimum, more stable and precise than small levels. A good alignment makes all the difference between an amateur and a professional hanging.
🏗️ Building Your Composition
Define your "Star" Artwork: Choose the artwork that will be the focal point of each room. Place its template at eye level (between 1.50m and 1.65m from the floor) on the most visible wall. This artwork will set the tone and structure the entire composition around it.
⏱️ Time: 10 minutes per room | ✅ Success when: The star artwork naturally attracts the eye | ⚠️ Attention: Avoid systematically choosing the largest one, sometimes a small colorful artwork makes a better focal point
Create Visual Dialogues: Position the other templates by creating "conversations" between artworks. Alternate sizes, play with heights, create imaginary triangles. The goal is for each artwork to have its place in a coherent ensemble.
⏱️ Time: 20 minutes per room | ✅ Success when: Your eye naturally moves from one artwork to the next | ⚠️ Attention: Let your artworks "breathe", an overloaded wall kills the impact of each artwork
Adjust proportions: Ensure your largest artworks don't occupy more than 60% of the wall width, and that smaller groupings remain legible. Step back regularly to judge the overall effect: it’s at this distance that your guests will discover your composition.
⏱️ Time: 15 minutes per room | ✅ Success when: The overall impression is balanced from the entrance | ⚠️ Caution: What looks perfect up close may seem unbalanced from afar
📸 Validation of step 2: Take a photo of your composition with the templates. This image will reveal the small adjustments needed that your accustomed eye no longer sees. You should feel a sense of satisfaction when looking at this photo, as if you were discovering the room for the first time.
Congratulations, you are now reaching mastery level! This final step transforms your composition from "very good" to "perfect". That's the difference between an enlightened amateur and a true connoisseur. The final result will exceed your expectations: your new home will have found its soul, and your artworks will reveal facets that you may never have noticed.
🔧 Professional finishing materials
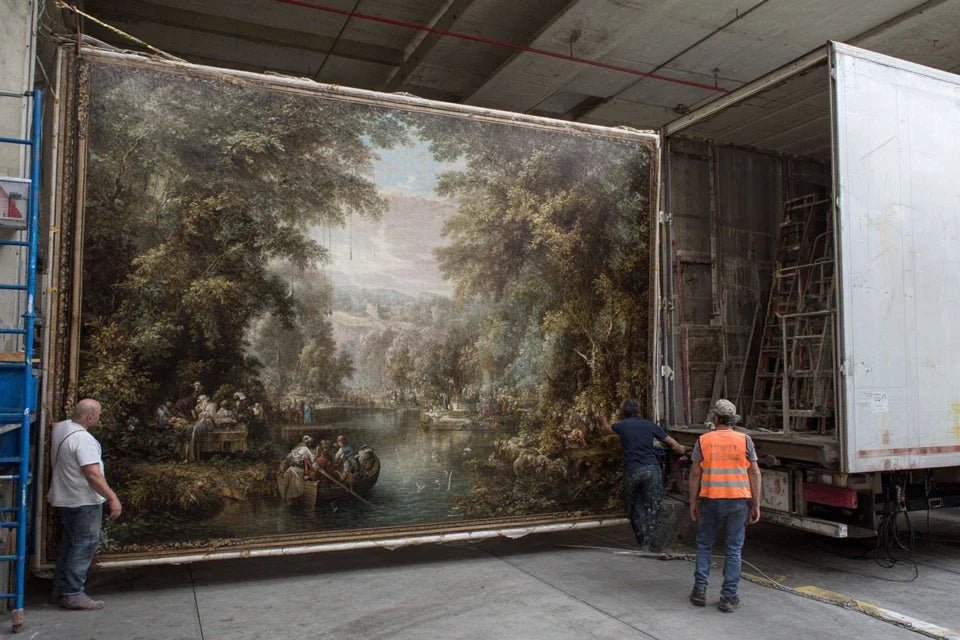
- Suitable hanging system: Hooks, dowels and screws chosen according to the weight of your artworks and the nature of your walls. A well-hung artwork can last for decades without moving. Avoid fragile systems that would force you to redo the work. Stud finder: To locate solid anchor points in partitions. This tool guarantees a secure and durable hanging. More reliable than the "tap on the wall" method, which can mislead you. Additional lighting (optional): Adjustable spotlights or sconces to enhance your works in the evening. Good lighting completely transforms the perception of your artworks and extends their impact after sunset.
✨ Finalizing your decorative artwork
Final hanging with precision: Replace the templates with your actual artworks, strictly respecting the tested positions. Use a level for each hanging to guarantee perfection. This final rigor makes the difference between an amateur and a professional result.
⏱️ Time: 30 minutes per room | ✅ Success when: All artworks are perfectly aligned and stable | ⚠️ Caution: Check the solidity of each hanging, a falling artwork can damage others
Test nighttime lighting: Turn on your usual lights and observe how your artworks react. Adjust the orientation of spotlights if necessary, or add additional lighting to reveal details of your favorite works. This step often reveals unsuspected aspects of your artworks.
⏱️ Time: 15 minutes per room | ✅ Successful when: Your artworks remain beautiful even after dark | ⚠️ Attention: Avoid direct lighting that creates distracting reflections
Final validation from a distance: Invite someone to discover your new arrangement and observe their spontaneous reactions. Their fresh perspective will reveal whether your composition really works. This is the ultimate test of success: the emotion that guests feel when discovering your interior.
⏱️ Time: 10 minutes per room | ✅ Successful when: Your guest spontaneously makes positive comments | ⚠️ Attention: Be receptive to remarks, even small ones, as they may reveal easy improvements
🏆 Validation of step 3: Your interior has regained its personality, and your artworks dialogue perfectly with their new environment. You feel that deep satisfaction of seeing your "home" finally complete. If something still bothers you, don't hesitate to make a small adjustment: perfection deserves these last efforts.
Rule for repositioning progression: You can move on to the next step when you feel satisfaction looking at your work. Trust your instinct: if something bothers you, it's worth adjusting. Patience today guarantees years of daily pleasure.
You now master the solid basics of professional repositioning. Here are some expert subtleties that will make a difference and give your interior that unique signature that your guests will immediately notice.
🎨 Professional decorator's tip: Create "visual echoes" by subtly repeating a dominant color from your star artwork in a smaller artwork in another room. This technique creates an overall harmony throughout your home and gives the impression of thoughtful and consistent decoration.
🤔 Frequent question from our readers
"I'm afraid of making holes in my new walls for nothing, what if I get the placement wrong?"
Your apprehension is perfectly understandable, and it's even a sign that you take care of your interior! The good news is that the paper template method eliminates this risk. By first testing with templates, you can modify as many times as necessary without damaging your walls. In addition, small hanging holes are easily filled with wood filler or patching compound. Start with your medium-sized artworks in locations where you are sure: you will gradually gain confidence.
💡 Reassuring advice: Start by temporarily hanging a picture with a repositionable adhesive hook. Live with it for 2-3 days, observe if the location still pleases you, then proceed to permanent installation. This gentle method will give you the confidence needed for the others.
⚠️ Pitfalls to Absolutely Avoid When Repositioning
Now that you know the method, I'm going to reveal the most common mistakes that can ruin all your work. These mistakes, I’ve seen hundreds of well-intentioned people make. The good news? They are easily avoidable when you know them!
- 🚫 Hanging too high out of fear of the "void": This is the natural tendency when you're afraid that a painting will seem "lost." The result: your artworks float on the ceiling and lose all visual contact with you. The simple rule: the center of the painting at eye level (1.60m from the floor). Rest assured, this mistake is easily corrected!
- 🚫 Reproducing the exact previous arrangement: Your old home had its proportions, your new one has others. Forcing the old arrangement is like trying to wear the same size clothes after you've grown. Accept that your paintings may reveal new facets in their new environment.
- 🚫 Neglecting changing natural lighting: A location may seem perfect in the morning and dull in the afternoon. This variation will gradually demotivate you without you understanding why. Always observe your space at different times before making a final decision.
- 🚫 Wanting to hang everything all at once: Haste is the enemy of reflection. You risk visually saturating your walls and regretting your choices. Proceed room by room, painting by painting. Rome wasn't built in a day, neither will your new cozy home!
- 🚫 Ignoring the proportions of the furniture: A painting above a sofa should be between 50% and 75% of its width. Too small, it will look ridiculous; too large, it will overwhelm the furniture. This simple rule avoids 80% of proportioning errors.
✅ Quick verification system: Before each final hanging, step back 3 meters and observe: does the painting naturally attract your gaze? Does it blend in with the surrounding furniture? Does it give you a pleasant feeling? If you hesitate on any of these questions, take the time to readjust.
🎁 Special offer for readers
Because you took the time to inform yourself, enjoy 10% discount on your first order:
⏰ Valid 72h after reading • Applicable to all our products
❓ Your most frequent questions about repositioning
🌟 Your decor transformation is underway!
In a few weeks, when you return home after a busy day, your gaze will naturally fall on your perfectly repositioned paintings. You will feel the deep satisfaction of seeing your personality expressed harmoniously in your new space. Your guests will immediately notice this cared for and welcoming atmosphere, and you will be proud to explain your thoughtful approach to them. Some may even ask you for advice on their own repositioning!
This mastery of repositioning will serve you well beyond this move: you are developing a decorative eye that will allow you to optimize any space. You will instinctively know where to place a new acquisition, how to reorganize according to the seasons, or how to welcome works offered by your loved ones.
Now that you understand the mechanics of visual harmony, the hardest part is behind you! Start today by observing your main room for a few minutes, identify its "featured wall", and let your creativity express itself. Your new home awaits your artistic signature!
🚀 Your first step to success: Choose your favorite artwork and find the perfect spot for it in your favorite room. This first success will give you the confidence and momentum to transform your entire interior. You are more talented than you think!


