

Composez votre galerie d'art

Des tableaux qui racontent votre histoire
Code d'initiation
ART10
10% offerts sur votre premiĆØre acquisition
DƩcouvrir la collection

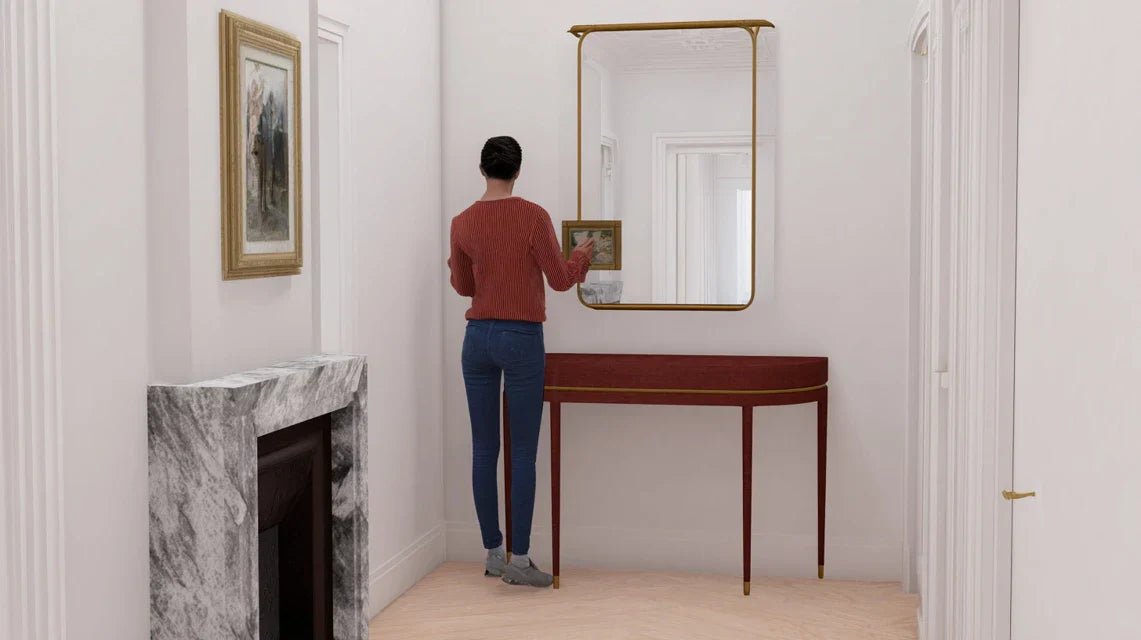
Transforming a Mudroom or Vestibule with a Small Artwork

Transformer un sas ou vestibule avec un petit tableau
ā±ļø Reading time : 8 minutes

You step through your front door, across that narrow space between the outside and your living room... and immediately feel this sense of emptiness, this lack of personality that makes you cringe every time you come home.

This entryway or vestibule stubbornly remains bare, with its white walls seeming to taunt you. You can already imagine your guests discovering this bland space before reaching your beautifully decorated living room.

You've tried placing a plant, a console table, or even a mirror... but nothing seems to work. The space remains impersonal, almost cold, like a simple passageway.

That’s perfectly normal! The problem isn't your lack of taste, but simply that these small spaces follow different rules than the rest of your interior. They require a specific approach.

By the end of this article, you will know exactly how to choose and place the perfect artwork to transform your entryway into a welcoming space that sets the tone from the moment guests arrive.

Why does your entryway deserve as much attention as a living room?

Imagine: your guests step across your threshold and immediately discover a glimpse of your personality through a carefully chosen artwork. This first impression is etched in their memory long before they reach your living room. If you neglect this space, you miss the opportunity to create that positive emotion from the very beginning.

šŸŽØ Customer testimonial: Marie-Claire, interior architect, tells us: "I installed a small abstract canvas with ochre tones in my vestibule. Now, my clients systematically ask me where I found it before even entering my office. This 40x30cm artwork has more impact than my €3,000 sofa!"

šŸ’¬ Conversation with a decor expert

"I'm afraid to put a painting in my entryway, I’m worried it will feel too cluttered in such a small space..."
On the contrary! A well-proportioned artwork will structure the space and give it soul. It's like wearing glasses: suddenly, everything becomes clear and harmonious. The important thing is to choose the right size.
"I’ve always been told that you need neutral colors in passageways so as not to tire the eye..."
That rule dates back to the 80s! Today, we prioritize emotion from the start. An entryway with a touch of well-balanced color creates a soft and welcoming transition to your interior.

The 7-second rule: It’s the amount of time it takes for a visitor to form a first impression of your interior. An artwork in your entryway transforms those 7 seconds into a memorable and personal moment.

Why haven't your previous attempts worked?

You may recognize yourself in these situations: you've tried a large mirror that made the space even narrower, attempted a console table that blocked the passage, or grown a plant that lacked light and sadly withered.

What’s really happening is that your entryway isn't a living room or a classic hallway. It’s a transition space with its own constraints: frequent passage, often reduced lighting, limited dimensions.

Think of your entryway as the opening of a book: it should make you want to discover what's next without revealing the whole story at once.

šŸ” Hidden cause number one: You think "decoration" instead of "transition"

Contrary to popular belief, your entryway doesn’t need to be decorated like a living room. Its role is to emotionally prepare you for discovering your interior.

It's like the entrance to a restaurant: it shouldn't compete with the dining room, but set the tone and ambiance of what awaits you.

This understanding changes everything in your approach: you’re no longer looking to "furnish" the space, but to create a positive anticipation with a unique and well-chosen decorative element.

🧪 Quick test: Stand in your entryway and close your eyes for 10 seconds. Open them: what's your first sensation? If it’s ā€œemptyā€ or ā€œcold,ā€ the space needs a soul.

šŸŽÆ Hidden cause number two: You underestimate the psychological impact of proportions

Many people think that a small space calls for small decorative elements. In reality, a table too small in an entryway gives a feeling of coolness and goes unnoticed.

It's like wearing a tie that’s too thin with a suit: even if it’s good quality, it gives the impression of being unbalanced and insecure.

You therefore experience the frustration of seeing your decorative effort ignored, whereas with the right proportions, that same painting would have transformed the atmosphere of your entrance.

⚔ Hidden cause number three: Lighting transforms everything (and you’re ignoring it)

Here's what almost no one notices: a beautiful painting becomes dull and uninteresting in an entryway with poor lighting. Lighting doesn't just reveal the artwork, it creates emotion.

Observe your entryway at different times of the day: morning, afternoon, evening. You’ll see that the quality of light completely changes the ambiance.

This variation explains why your decoration sometimes seems successful and sometimes fails depending on when you look at it.

šŸ” The 3 signals of an entryway that calls for a painting:

  • Your gaze immediately runs away: Your eyes don’t stop anywhere, indicating that the space lacks a focal point.
  • Feeling of "rushed passage": You pass through without stopping; the space doesn’t invite you to be present.
  • Impression of emptiness even when furnished: Despite a console table or plant, something is missing, revealing the need for an artistic expression.

šŸŽŖ The Trigger: The "Private Gallery" Effect

What really makes the difference is transforming your entryway into a personal mini-gallery. Like a domino effect, this simple perspective changes your approach: you no longer endure the space, you consciously create it. You'll recognize it by that new feeling of pride when you come home.

The "First Glance" Rule: If your eye naturally stops on something pleasant when entering, your entryway works. Otherwise, it needs that visual anchor provided by a well-chosen artwork.

Artwork that is proportioned and asserts its presenceThe transition space requires confidencePride and affirmed personalityColors that dialogue with the living roomThe transition must prepare, not isolateFluidity and perceived consistencyPosition adapted to the passage and lightingMovement changes perceptionOptimal visual comfort
āŒ Classic Approach āœ… Transition Approach šŸ’” Explanation šŸŽÆ Perceived Benefit
Small, discreet artwork to not disturb
Neutral colors to "enlarge"
Standard hanging at eye level

How to Create Your Entryway Gallery in 3 Simple Steps

Rassurez-vous : transformer votre sas ne demande ni gros budget ni compétences particulières. C'est comme composing a bouquet : il faut juste connaître les bons ingrédients et leur ordre d'assemblage. En suivant cette progression logique, vous obtiendrez un résultat harmonieux qui vous surprendra par son impact.

šŸ—ŗļø Your Roadmap: First analyze your space (foundations), then choose the perfect artwork (heart of the project), finally optimize the staging (finishing touches). Each step brings you closer to an entryway that truly resembles you.

šŸŽÆ Step 1: Decipher Your Space (The Foundations)

Commencer par cette analyse est crucial car chaque sas a sa architectural personality. Like a gardener studies their soil before planting, you will identify the assets and constraints of your space. This step avoids costly mistakes and saves you valuable time.

šŸ”§ What You Need for the Analysis

  • A Tape Measure: Choose a model of 3 meters minimum, more practical in confined spaces. It is used to precisely measure width, height and depth to calculate ideal proportions. Avoid smartphone apps that lack precision.
  • Your Smartphone (Photo Mode): The camera reveals flaws invisible to the naked eye and helps visualize different options. Take pictures at shoulder height to simulate the gaze of a visitor. Your phone's wide-angle lens shows the actual proportions.A notebook or notepad: Note your observations, solidify ideas, and avoid forgetting important details. Keep track of measurements and your first impressions. This is your external memory for this project.

Now let's move on to concrete action:

Measure useful dimensions: Record width, ceiling height, and passage depth. These measurements determine the maximum size of the painting and its optimal position. A 80cm wide space can accommodate a work of art no larger than 40-50cm.

ā±ļø Time: 5 minutes | āœ… Successful when: You have the 3 dimensions clearly noted | āš ļø Attention: Don't forget to measure taking into account radiators or electrical outlets

Photograph from all angles: Take a picture facing each wall, then from the entrance towards the living room. These photos reveal the overall atmosphere and shadow areas. You will often discover interesting architectural details to enhance.

ā±ļø Time: 3 minutes | āœ… Successful when: You have 4-5 clear photos of the whole | āš ļø Attention: Avoid flash which distorts natural lighting

Identify dominant light: Observe where the main light comes from (window, bay window, artificial lighting). This source determines the ideal wall for your painting and influences color choices. Natural light reveals nuances better.

ā±ļø Time: 2 minutes | āœ… Successful when: You know which wall is best lit | āš ļø Attention: Test at different times if possible

āœ… Validation of step 1: You should have a clear vision of your space: dimensions, reference photos, and preferred location identified. If some elements still escape you, calmly review the observation. This solid foundation guarantees the success of the following steps.

OUR RECOMMENDED PRODUCTS

šŸŽØ Step 2: Select your masterpiece (the heart of the project)

You are now moving on to the creative choice! This step is more rewarding because you finally see your project taking shape. The goal: find the work that dialogues perfectly with your space and your personality, creating that "wow effect" upon entering.

  • Format adapted to proportions: For a classic hallway, aim for 40x50cm or 50x70cm maximum. These dimensions create a striking presence without visually cluttering. Avoid square formats which lack dynamism in a passageway.
  • Consistent color palette: Choose a maximum of 2-3 colors, at least one of which is present in your living room. This continuity creates a natural fluidity between spaces. Warm tones (ochre, terracotta) instantly bring conviviality.
  • Style in harmony with your interior: Your artwork should hint at the ambiance of your living room without copying it. If your living room is modern, a contemporary work with clean lines perfectly prepares for discovery.

šŸ›’ Your selection process

Define your dominant style: Observe your living room and identify 3 keywords that describe it (modern, warm, minimalist...). These words guide your artwork search and ensure stylistic consistency. Your artwork should hint at this ambiance.

ā±ļø Time: 10 minutes | āœ… Success when: You have 3 precise keywords | āš ļø Attention: Avoid vague descriptions like "pretty" or "nice"

Select the ideal palette: Photograph your living room and identify the 2 dominant colors. Your artwork should incorporate at least one of them to create a visual link. This chromatic harmony unifies your entire entryway.

ā±ļø Time: 5 minutes | āœ… Success when: You have identified your reference colors | āš ļø Attention: Don't look for a perfect match, prioritize overall harmony

Virtually test the integration: Mentally overlay (or with an app) your selection onto your entryway photos. This visualization immediately reveals whether the artwork integrates naturally. Trust your first impression.

ā±ļø Time: 15 minutes | āœ… Success when: The artwork seems "in its place" | āš ļø Attention: If you hesitate for too long, it's probably not the right choice

šŸ—ļø Step 3: Orchestrate the perfect staging (expert finishing touches)

You are now reaching master level! This final step transforms your good choice into a true decorative success. It's the difference between "it’s pretty" and ā€œit’s magnificentā€ - those details that make you turn to look again.

šŸŽŖ The perfect hanging

Calculate the optimal height: Place the center of your artwork between 145 and 155cm from the floor, adapted to the average gaze in a passageway. This height ensures optimal visual comfort for all your visitors.

ā±ļø Time: 5 minutes | āœ… Success when: The artwork is naturally within the field of vision | āš ļø Attention: In an entryway with a low ceiling, lower it slightly to avoid a "crushed" effect

Optimize lighting: If possible, add an adjustable LED spotlight or a wall sconce to reveal your artwork. Dedicated lighting transforms a simple painting into a true focal point and extends its impact in the evening.

ā±ļø Time: 30 minutes (installation) | āœ… Successful when: The artwork is highlighted without glare | āš ļø Attention: Avoid direct lighting that creates reflections

Refine the environment: Declutter the space around the painting and possibly adjust the color of the supporting wall. A colored wall can enhance a work with neutral tones and create more character.

ā±ļø Time: Variable depending on adjustments | āœ… Successful when: The artwork shines in its environment | āš ļø Attention: Less is more - avoid decorative overload

The rule of natural progression: Move to the next step when the previous one seems obvious and mastered. Your decorative instinct develops gradually, trust it.

Congratulations! You now master the expert subtleties that distinguish a successful decoration from a simple picture hanging. These nuances make all the difference in the eyes of your visitors and give you that precious decorative confidence.

šŸŽÆ Pro decorator tip: Create a "visual echo" by subtly picking up a color from your painting in a detail of the living room visible from the entrance (cushion, vase, plaid). This pro technique visually unites your spaces and reveals your decorative sophistication.

šŸ’­ Frequent question from our readers

"I'm afraid my painting will be damaged by drafts and humidity in the entrance, how can I best protect it?"

This is a very legitimate concern that shows your attention to preserving your investment. Preferably choose a canvas on stretcher bars or a rigid support that resists variations in humidity better than simple paper under glass. Avoid direct placement facing the front door if it lets in air, and prefer a more stable side wall. Your artwork will last for years without alteration.

šŸ›”ļø Protective action: Check the airtightness of your entrance door and, if necessary, add an insulating seal. You are thus protecting your painting while improving the thermal comfort of your entrance.

āš ļø The 5 mistakes that sabotage your project (and how to avoid them)

After years of supporting individuals, we have identified the recurring pitfalls that turn a beautiful idea into disappointment. These errors are very human and easy to avoid when you know them.

  • šŸŽ­ Choosing a "love at first sight" painting without considering the space: Emotion takes over logic, you crack for a magnificent but unsuitable artwork for the proportions of your entrance. Result: the expected effect does not work. Solution: Always keep your measurements handy and visualize the integration before buying.
  • šŸ“ Underestimating the importance of hanging height: You hang it "by eye" without measuring, creating a visual imbalance that harms the overall harmony. A picture hung too high looks like it's escaping, too low it seems crushed. Solution: Respect the 150cm rule at the center and adjust according to your ceiling.
  • šŸ’” Neglecting the impact of lighting on colors: Your picture shines in store but becomes dull at home due to unsuitable lighting. Colors transform depending on the light. Solution: Test the effect of your current lighting and plan for adjustments if necessary.
  • šŸŽØ Wanting to absolutely have a "trendy" style rather than a personal one: You follow decor trends instead of listening to your deep tastes, creating an impersonal result that quickly tires you. Solution: First choose what moves you, then adapt to technical constraints.
  • ⚔ Rushing the choice out of impatience: The desire to see the result quickly leads you to validate the first "not bad" picture rather than waiting for the "perfect" one. This haste often creates regrets. Solution: Take time to reflect, your entryway deserves this attention.

šŸ” Your final validation checklist: Before buying, check that your picture respects your maximum dimensions, harmonizes with your dominant color palette, provides you with a positive emotion every time you look at it, and seems naturally "in its place" in your photos. If any of these points raise questions, take some more time.

šŸŽ Special offer for readers

Because you took the time to inform yourself, enjoy 10% discount on your first order:

ART10

ā° Valid 72h after reading • Applicable to all our products

ā“ Your most frequently asked questions about entryway decoration

šŸ• How long does it take to completely transform your entryway with a picture?

Allow 2 to 3 hours for the entire process: 30 minutes of space analysis, 1 hour to select the artwork (if you have prepared your criteria), and 1 hour to hang and adjust. To optimize: prepare your measurements and photos in advance, and choose a relaxed moment for artistic selection.

šŸ’° What budget should you plan for a truly successful result?

A quality picture for your entryway costs between 80 and 200€ depending on the size and technique. Add 30-50€ for dedicated lighting if necessary. This budget is quickly recouped by the daily impact on your well-being and the impression given to visitors. It's often one of the best value/impact decor investments.

šŸ”Ø Does hanging require any particular DIY skills?

Absolutely not! With modern mounting systems (screw hooks, discreet rails), a drill and a level, it's accessible to everyone. The most technical step is drilling straight, made easier by guide drills. If you really aren't comfortable, an artisan can install your artwork in 15 minutes for €30-40.

šŸŽØ How do I know if my personal style suits a passageway?

Your personal style always works, it's the intensity that needs to be adapted! If you like bright colors, choose an artwork with a touch of color on a neutral background. If you prefer minimalism, opt for a clean piece but with a striking detail. Authenticity counts more than "rules".

šŸ  Can these tips be applied to a hallway longer than a simple entryway?

Absolutely! In a hallway, apply the same logic but create a rhythm: either one large central artwork or a series of 3 small works in echo. Keep the same palette for unity, and ensure regular lighting. The height rule remains the same, but you can play with repetition to energize the space.

🌟 Your new daily ritual: coming home with pleasure

In a few weeks, you'll cross your threshold with this new feeling of pride. Your gaze will naturally stop on this artwork that resembles you, creating each day that little moment of personal happiness. Your guests will immediately notice this particular attention that sets the tone for your well-cared-for interior.

Beyond the visual transformation, you have developed a decorative eye that will serve you in all your future layout projects. This newly acquired confidence gives you the assurance of making assumed and personal choices in your decoration.

Now that you understand the mechanisms of this micro-space, all you have to do is take action. Start taking your measurements and photos today: this first concrete step launches your transformation and brings you closer to an entryway that finally resembles you.

šŸš€ Your next step: Your perfect entryway awaits only your decision. Trust your instincts and go for it: in a few days, you'll wonder why you waited so long to treat yourself to this daily pleasure!

Read more

Mettre un tableau dans les combles ou grenier amƩnagƩ
Tableaux dans une véranda : attention à la lumière