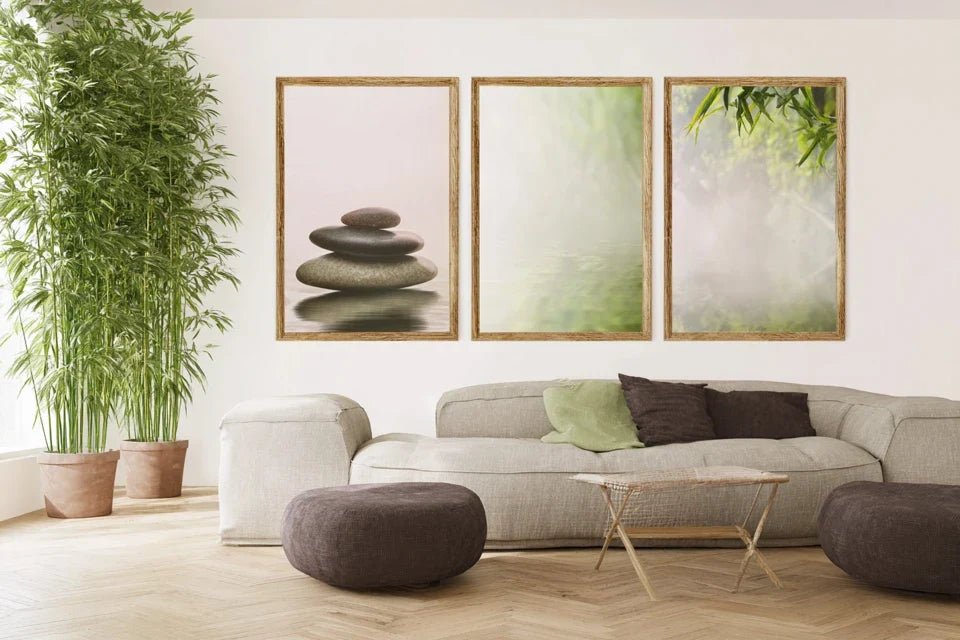
Composing a diptych or triptych wall: rules of harmony
By Alexandre MARY
⏱️ Reading time : 8 minutes
You've just hung this beautiful artwork in your living room, and yet... something feels off. The piece seems lost, isolated on that large white wall, like a solitary guest at a party. You love it, but there’s a lack of visual harmony that would transform your wall into a true art gallery.
You turn around, step back a few paces, tilt your head... That frustrating feeling that your decor lacks character even though you've invested in beautiful pieces. Your friends compliment politely, but you can feel that the visual impact isn’t quite there.
You may have tried adding a second painting at random, or followed classic advice "match colors at all costs". Result? A wall that looks more like a catalog than a thoughtful artistic composition.
Don't worry, it’s not your artistic sense that’s to blame! The real reason for this failure? No one has ever explained the fundamental rules of wall set composition to you. Creating a diptych or triptych decor obeys precise principles, like a musical score.
By the end of this article, you will master the diptych hanging rules and know how to create triptych decor that will transform your wall into a unified work of art. Imagine yourself in 15 days, proudly contemplating your wall composition while your guests marvel at this perfect harmony!
Why does your wall now crave an artistic composition?
Modern wall art is no longer satisfied with a single painting. Just as an orchestra needs several instruments to create a symphony, your wall needs multiple works to tell a complete story. If you wait, you risk getting used to this bland decor and losing that desire to create something exceptional.
🎨 Testimonial from an art lover: "I had this sublime 60x80cm abstract painting in my living room for two years. Beautiful, but insignificant. The day I added two smaller canvases on either side, respecting the golden proportions, my wife was speechless. Our guests only look at that wall now!"
💬 Conversation with a decor expert
"I'm afraid my new painting won’t go with it if I change my wall color..."
Relax! It’s exactly the opposite. A true artistic crush adapts and even reveals itself with new colors. It’s like a diamond that shines differently depending on the lighting!
"But I was told you always have to match colors..."
Who told you that? Modern decor plays with subtle contrasts. A painting in warm tones on a cool wall is like a fireplace in a blue room: magical!
The golden rule of wall sets: harmony comes from dialogue, not resemblance: Your artworks should respond to each other like dance partners, in 2 to 3 weeks you will naturally see your gaze settle on this composition rather than flitting around the room.
Let's discover together what is really happening in your decor
You are probably experiencing one of these situations: your painting seems to "float" on the wall without visual anchoring, or your multiple frames create a disordered "patchwork" effect, or your room lacks that "je ne sais quoi" that makes interiors remarkable.
What's really happening? Your eye naturally seeks landmarks and visual rhythms. Without structured composition, it gets tired and skips around. The problem is not your artistic taste, but the absence of a coherent visual grammar.
It's like trying to read text without punctuation: the words are beautiful individually, but there is a lack of breathing that gives meaning to the whole.
First hidden cause: you are suffering from the "single painting curse"
Contrary to what one might think, a single painting cannot carry all the ambiance of a wall. Even the most beautiful masterpiece needs "supporting elements" to reveal its splendor. The reality? The greatest collectors always create dialogues between their pieces.
Imagine a talented actor playing alone on stage: without a partner to give him lines, even the most beautiful performance falls flat.
Impact on your daily life: this persistent feeling that your decor lacks personality, while you have invested in beautiful pieces. Creating a diptych or triptych will transform this frustration into daily pride.
🔍 Immediate test: Take a photo of your current wall, then mentally mask your main painting. Does the wall appear empty or does it remain visually interesting? If it's empty, you need a composition!
Second hidden cause: the illusion of "perfect symmetrical hanging"
Many believe that you absolutely must center and perfectly balance. In reality, the most captivating compositions play on dynamic balances and controlled visual tensions. Perfect symmetry lulls the eye.
It's like the difference between a polite and predictable conversation, and an exciting exchange full of unexpected twists.
Direct consequence: your guests look at your wall for a second then move on, instead of stopping, intrigued by this composition that tells a story.
Third hidden cause: neglecting the "breathing spaces"
The invisible mistake that almost no one notices: the intervals between your artworks are as important as the artworks themselves. A Parisian collector explained to me: "I understood the day I saw my paintings 'breathe' after adjusting the spacing."
Signs you might need it at home: your gaze has trouble "circulating" from one work to another, or conversely your paintings seem lost in a sea of white wall.
Daily impact: this impression that "something is not right" without being able to put your finger on it, when the solution is often just centimeters away.
🎯 The 3 signals of a successful composition:
Your gaze naturally "follows" the composition: like following a melody, your eyes travel harmoniously from one work to another
The whole creates a "presence" in the room: you feel this quiet strength emanating from the wall, even without looking at it directly
Your guests spontaneously stop: they can't help but comment or ask questions about your composition
The trigger element: mastering the "visual golden triangle"
What really makes the difference between an amateur and a connoisseur: understanding that every successful diptych or triptych creates an invisible triangle that the eye perceives instinctively. It's the domino effect of wall harmony: once you place this triangle correctly, everything else naturally finds its place. Spot it by mentally tracing lines between the centers of your works - they should form a balanced but not rigid geometry.
Universal rule of harmonious triptych: the central work must create a "visual appeal" towards the lateral ones, check this by quickly blinking your eyes in front of your composition - your gaze should naturally go back and forth.
❌ Common belief
✅ Expert reality
💡 Why it works
🎯 Visible benefit
You absolutely need three identical paintings
Controlled variety creates more interest
The eye loves mastered surprisesComposition that intrigues and captivates
Colors must perfectly match
Subtle contrasts energize
Visual tension = artistic energyWall that "vibrates" with personality
Center everything meticulously
Asymmetrical balance fascinates more
Reproduces natural compositionsGaze that explores instead of skipping
The bigger, the better
Relational proportions are key
Harmonious dialogue between sizesCoherent and sophisticated ensemble
Your foolproof method for creating irresistible wall compositions
Rest assured, mastering the art of diptychs and triptychs is more accessible than it appears. We will proceed like an architect: first the foundations (choices and placement), then the structure (proportions and distances), finally the finishing touches (adjustments and final harmony). In 3 weeks, you'll look at your wall with the pride of having created something unique.
🏗️ Overview of your progress: Step 1 - Selecting and prioritizing your artworks (immediate satisfaction of seeing the potential), Step 2 - Precise placement and spacing (the magical moment when everything comes together), Step 3 - Fine-tuning and personalization (pride in mastering expert subtleties).
Step 1: Choose and organize your artworks like a professional curator
Starting with selection is crucial because it determines 80% of the final success. Just as a chef chooses their ingredients before cooking, this step lays the foundation for your future harmony. Once completed, you will feel that excitement of finally seeing the transformative potential of your wall.
🎨 Your "ingredients" for a successful composition
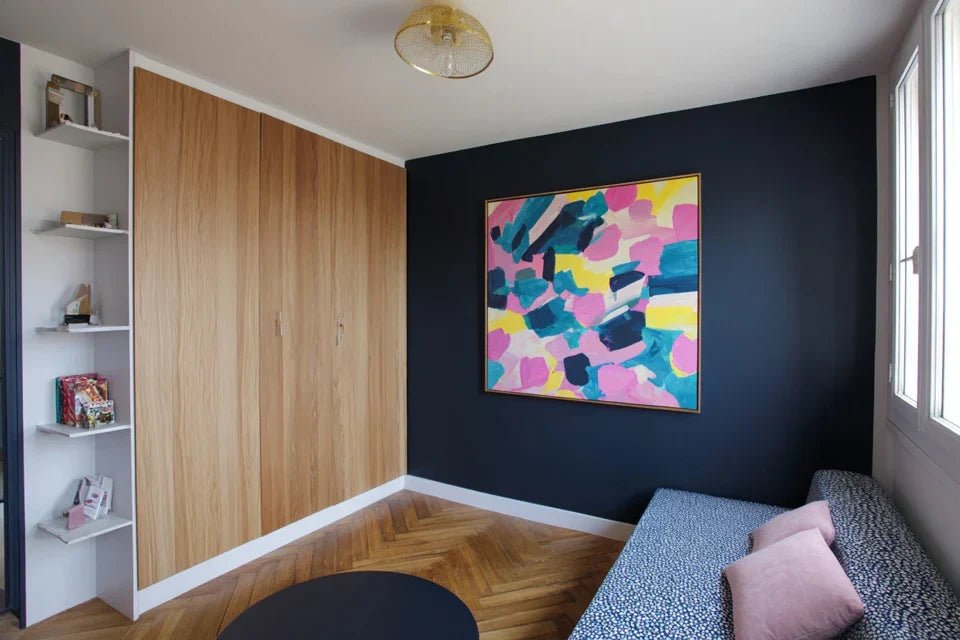
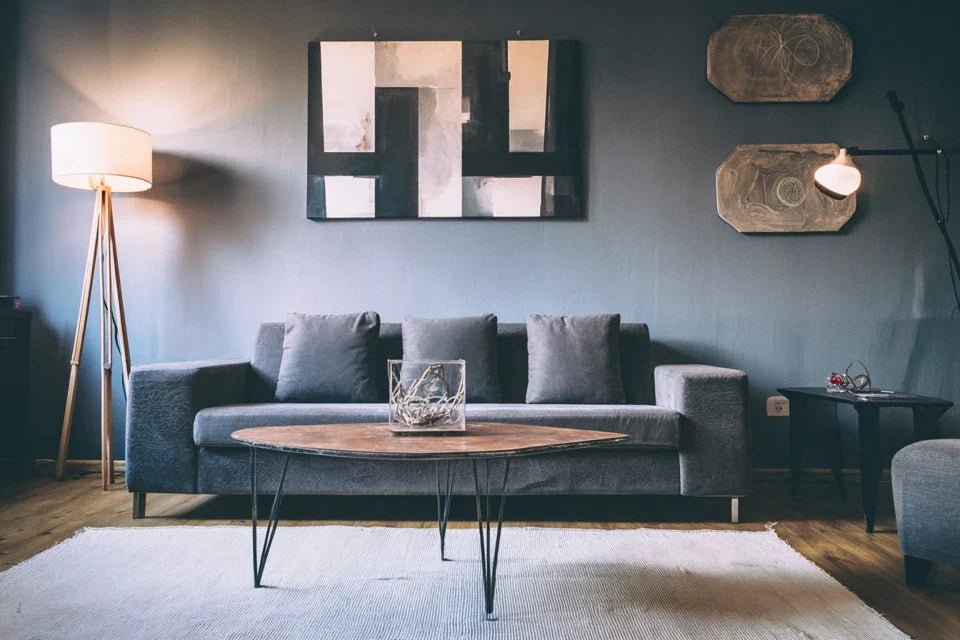
A "key" artwork (dominant): your most expressive or colorful piece, the one that naturally attracts the eye. Choose it larger or more intense than the others, avoid the "shy canvas" that visually disappears. It will set the tone for the entire composition.
"Echo" artworks (complementary): pieces that dialogue with the key artwork without competing, sharing a common element (color, style, emotion). Identify this subtle connection that creates unity; they amplify the message of the main artwork.
A thematic "thread": recurring element that ties everything together (technique, era, palette, emotion). More subtle than obvious, it creates that impression of an "artistic family" that fascinates the discerning eye.Now, let's move on to concrete action
🔍 Your infallible selection process
Gather all your potential artworks: take out everything you own, even pieces that have been put away. Often, the "forgotten" painting becomes the revelation of your triptych. Place them against the targeted wall; natural light will reveal their true colors and harmony potential.
⏱️ Time: 20 minutes | ✅ Successful when: you have at least 4-5 options in front of you | ⚠️ Attention: do not pre-select mentally, let yourself be surprised by unexpected associations
Identify your dominant artwork: the one that "speaks the loudest" visually, through its size, colors or emotional impact. Place it at the center of your future ensemble; it will dictate the scale and atmosphere of the entire composition.
⏱️ Time: 10 minutes | ✅ Successful when: an artwork naturally stands out | ⚠️ Attention: do not confuse "favorite" and "visually dominant"
Test pairings in pairs: place your dominant artwork with each other artwork, observe if they "respond" to each other or "compete" for attention. Harmony is immediately felt; trust your first visual impression.
✨ Validation of step 1: you must have selected 2-3 artworks that together create a coherent "visual family". Step back 3 meters: if your eye naturally flows from one piece to the next, you've got it! If you hesitate between two options, photograph them and compare - the image often reveals what the eye hesitates to decide.
OUR RECOMMENDED PRODUCTS
Step 2: Mastering the Art of Hanging and Proportions
You are now entering the most crucial technical phase. Like a musician moving from melody to rhythm, you will transform your good intentions into concrete visual harmony. This step is more rewarding because you immediately see the effect of each adjustment, the snowball effect of precision begins here.
🔧 Your Precision Tools
Laser or bubble level: the essential tool to avoid the "tilted" effect that ruins a composition. A deviation of 2° is enough to create permanent visual discomfort, invest in a quality level rather than the cheapest one which drifts.
Tape measure and pencil: to mark placement reference points. The pros' secret: always measure from a fixed point (wall corner) rather than by eye, accuracy to the nearest centimeter makes all the difference.
Kraft paper or cardboard cut to size: cutting templates with the exact sizes of your artworks allows you to test without damaging the wall. This preliminary visualization step avoids 90% of final placement errors.
📐 Your Professional Hanging Protocol
Define the horizon line of your composition: mentally draw a horizontal line at 1m50-1m60 from the floor, this is the natural height of the gaze. The center of your dominant artwork should align with this line, creating the visual anchor of the entire ensemble.
⏱️ Time: 5 minutes | ✅ Successful when: clear line and perfect level | ⚠️ Attention: adapt according to ceiling height, always aim for visual comfort
Calculate spacing according to the rule of thirds: the space between your artworks should represent 1/3 of the width of the smallest. Too close together, they "cannibalize" each other, too far apart, they lose their dialogue. This proportion naturally creates the desired harmony.
⏱️ Time: 10 minutes | ✅ Successful when: uniform and breathable spacing | ⚠️ Attention: always measure from the outer edges of the frames
Adjust the height of the side artworks: for a diptych, same height. For a triptych, the center can be slightly higher (2-3cm max) to create a subtle visual hierarchy. The desired effect: a gentle undulation that guides the eye.
⏱️ Time : 15 minutes | ✅ Successful when: balanced arrangement without rigidity | ⚠️ Caution: marked variations create a disturbing imbalance
🎯 Quality control step 2: Step back 4-5 meters and photograph your composition. On the image, draw imaginary lines connecting the centers of the artworks - they should form a balanced geometry. If something "catches" visually, adjust in small increments of 2-3cm until harmony is evident.
Step 3: Fine-tune like a wall composition expert
You are now reaching the level of subtle mastery. The difference between a satisfied amateur and a passionate connoisseur lies in these final adjustments that transform a "beautiful composition" into a "striking artwork". The final result: a wall that tells a story and which you will be proud of for years.
🎨 Your finishing touches
Accent lighting: directional spotlights or wall sconces that reveal textures and depths. An unlit artwork loses 50% of its impact, lighting transforms a decor into an artistic experience.
Visual linking elements: plant, decorative object or sculpture that echoes the composition without competing with it. This detail creates the link between your wall and the rest of the room.
Critical distance and external perspective: invite a friend to share their feelings - a fresh eye often identifies what you no longer see. The goal: confirm that your composition "speaks" to others as well as to you.
✨ Your perfectioning adjustments
Optimize the lighting of each artwork: test different light angles to reveal reliefs and colors. Ideally, a soft light that avoids reflections while creating subtle depth. Each work should be enhanced without dazzling.
⏱️ Time : 25 minutes | ✅ Successful when: every detail is visible and valued | ⚠️ Caution: avoid direct lighting that creates harsh shadows
Create the transition with the environment: add an element (console, plant, sculpture) that links your wall composition to the furniture. This anchoring avoids the "wall disconnected" effect and integrates your creation into the overall atmosphere.
⏱️ Time : 20 minutes | ✅ Successful when: harmony between wall and furniture | ⚠️ Caution: do not overload, one linking element is enough
Perform the "first glance" test: leave the room, return and note where your gaze instinctively falls. If it's on your composition, then if your eye naturally scans it, you have succeeded. Otherwise, identify the disruptive element to adjust.
⏱️ Time : 10 minutes | ✅ Successful when: your composition captures and retains attention | ⚠️ Caution: trust your instinctive feeling, not your analysis
🏆 Final check: your wall composition should now create a "presence" in the room, that quiet force which is felt even without looking directly at it. Ultimate test: invite someone who doesn't know your work - if they spontaneously stop in front of your wall, you have achieved excellence!
Rule of perfection progression: if you can spend 2 minutes contemplating your composition without getting bored AND discover new details with each look, you can move up a level by creating other compositions in the house.
Congratulations, you now master the subtleties that distinguish true art lovers! Here are expert secrets that will give that extra touch of sophistication, the one that makes people say "Wow, who composed this?"
🎩 Professional gallery secret: the "rule of the golden triangle" - in any successful triptych, the focal points of the three works form a triangle with no right angles. This subconscious geometry creates a captivating visual tension that the eye perceives without understanding it. Test by placing dots on a photo of your composition!
💭 Question from passionate reader
"I want to create a triptych with works of different styles (photo, painting, engraving). Is it possible or will it shock?"
Excellent intuition! Mixing techniques actually creates the most fascinating compositions when they respect a subtle common thread. A Parisian photographer regularly exhibits his black and white photos between antique engravings and contemporary watercolors - stunning result! The trick: choose a unifying element (color palette, emotion, theme) stronger than the technical differences. Your eye guides better than academic rules.
🧪 Immediate test: arrange your three different techniques side by side and squint to see masses and contrasts rather than details. If the whole remains harmonious in this blurred vision, your mix will work perfectly!
The sneaky pitfalls that sabotage your composition (and how to avoid them)
Beware, some mistakes seem harmless but ruin months of reflection! I want to save you from these frustrations that I have seen in so many talented amateurs. These errors are so common that even beginner decorators commit them.
⚠️ The trap of "feeling" hanging: it's tempting to trust your eye, but without precise references, you will drift 5-10cm without realizing it. Result: that diffuse feeling that "something is wrong" without knowing what. Solution: always measure and mark your reference points with pencil before drilling.
⚠️ The "too small, too high" mistake: many people hang their artworks like in museums, forgetting that they live in this space. Consequence: a composition that seems to "float" above your daily life. Simple rule: the center of your dominant artwork at eye level when sitting AND standing.
⚠️ The "bonus artwork" syndrome: adding a fourth piece "because it's pretty too". Fatal! Your triptych becomes a visual cacophony. Resist this temptation, keep that piece for another future composition.
⚠️ Neglecting existing lighting: creating your composition only in daylight, without testing the artificial evening lighting. Result: a harmony that evaporates after 6 p.m. ALWAYS check your composition in both types of light.
⚠️ The "final nailed" impatience: fixing your artworks as soon as it "looks good". Classic mistake! Live with your temporary composition (taped templates) for 48 hours before the final hanging. Your gaze will evolve.
🛡️ Your anti-error checklist: Measured and written proportions ✓ Composition tested in daylight AND evening light ✓ Photograph taken from 4 meters for verification ✓ Advice from an outside person collected ✓ Alarm signals: if you are still hesitating after these checks, wait an additional 24 hours.
Because you took the time to inform yourself, enjoy 10% discount on your first order:
ART10
⏰ Valid 72 hours after reading • Applicable to all our products
Your essential questions about creating diptychs and triptychs
❓ How long does it take to create a harmonious composition and what budget should you plan?
Allow 2-3 hours for design and 1 hour for final hanging, spread over a week to allow your choices to mature. Budget: €150-€500 for a triptych depending on the quality sought. Optimization: start by enhancing your existing artworks before buying, you will be surprised at the hidden treasures in your home!
🏠 Can we create a triptych in a small space without overloading it?
Absolutely! The key is to adapt the proportions, not abandon the project. In a reduced space, prioritize 3 artworks of maximum 20x30cm with spaces of 5-8cm between them. The effect remains striking and even gives the impression of enlarging the space thanks to the visual rhythm created.
🎨 How do I know if my current artworks can form a coherent ensemble?
Test it flawlessly: photograph them together and convert to black and white. If the masses, contrasts, and shapes remain balanced without the colors, your base is solid! Then look for a subtle common element: era, emotion, technique, or even controlled opposition (warm/cold, smooth/textured).
🔧 Hanging on a drywall requires special hardware?
Essential: Molly anchors or special drywall fixings for more than 2kg per artwork. Never compromise on safety! For a triptych, distribute the weight and use oversized fixings. Invest €20 in good anchors rather than risking a catastrophic fall.
✨ When do we know we've reached "expert" level in wall composition?
The click happens when you instantly “feel” whether a composition works, even before analyzing it technically. Another sign: your guests spontaneously ask you for advice on their own decor. Generally, after 2-3 successful compositions, this intuition develops naturally.
Your artistic transformation is underway
In 3 weeks, you will contemplate your wall with that discreet pride of true connoisseurs. Never again that frustration of “decor that doesn't work” - you will now have the keys to create compositions that tell a story. Your guests will stop, intrigued by this harmony they won’t know how to name but will feel intensely.
Beyond your transformed wall, you will have developed that artistic eye that changes everything: this ability to see spaces, proportions, visual dialogues everywhere around you. A valuable skill that will reflect on your entire approach to decoration and even aesthetics in general.
Understanding was the most difficult step, it's behind you now! Your first move? Gather your existing artworks this weekend and test a first association, even approximate. Action often reveals possibilities that pure reflection cannot discover.
🚀 Your artistic adventure begins now: you have all the tools to transform your vision into tangible reality. In a month, you will look at this article with a smile, proud of the journey and already planning your next composition!
🎯 Perfect your artistic expertise
Now that you master wall compositions, discover how to maintain and protect your artworks so they last through the years without losing their luster, as well as secrets for integrating art into an active family life.


