What to do if a painting becomes unreadable due to reflections?
By Alexandre MARY
⏱️ Reading time : 8 minutes
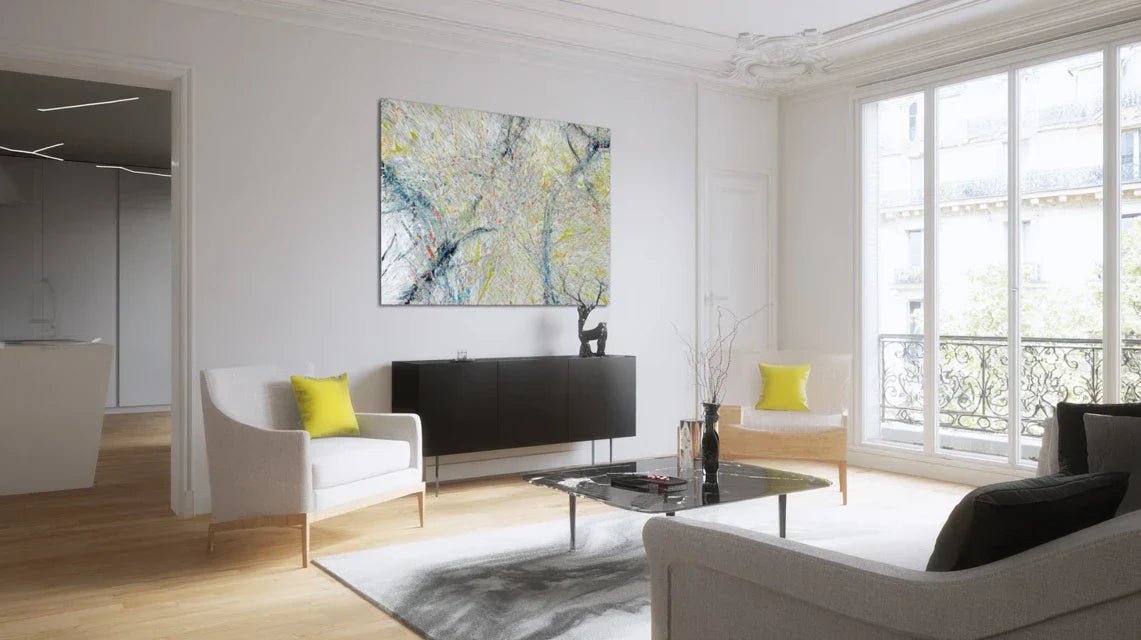
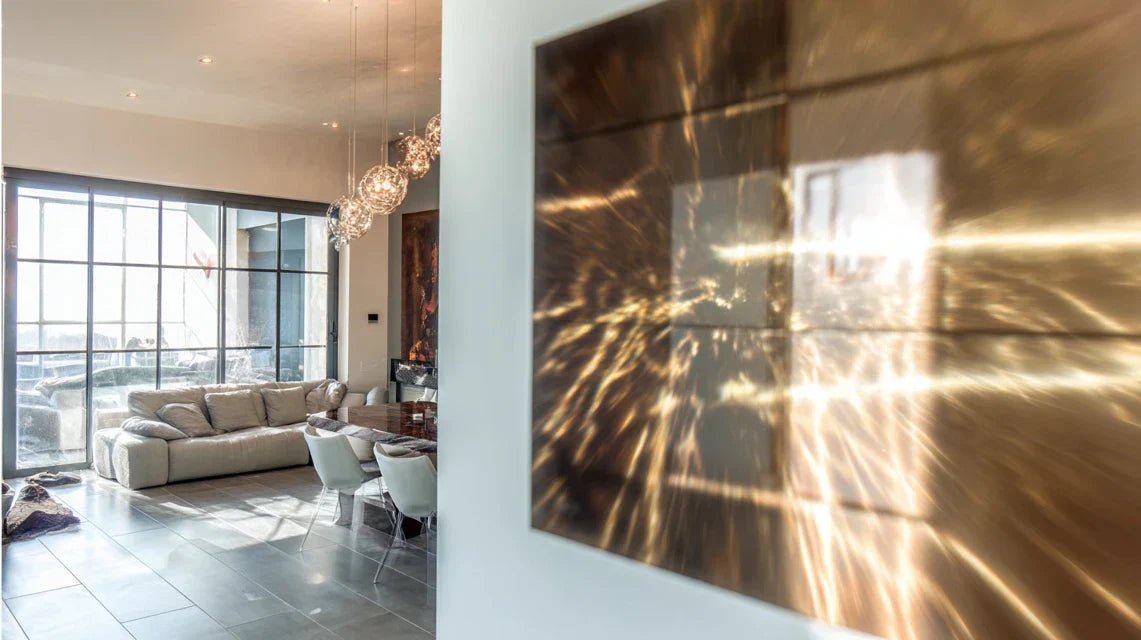
You've just hung your favorite artwork on the living room wall, and disappointment already sets in. Depending on the time of day, dazzling glare transforms your work of art into an unusable mirror, completely masking the details that seduced you.
In the morning, the sun hits the surface directly and you can only distinguish a blinding bright spot. In the evening, artificial lighting creates areas of glare that cut the image into visible and invisible portions. Even your guests squint to try to glimpse what's hidden behind these parasitic reflections.
You may have tried to slightly move the artwork, adjust the lighting, or even close the curtains. But these temporary solutions never completely solve the problem, and you end up suffering from these reflections on a daily basis.
Rest assured, this problem affects the majority of art lovers and is absolutely not related to a bad choice on your part. Reflections on artworks are caused by specific technical factors that can be corrected with the right methods.
By the end of this article, you will know the 7 concrete solutions to permanently eliminate reflections on your artworks, and you will finally be able to fully enjoy your works of art in all lighting conditions.
Why are reflections on artworks so problematic today?
Reflections on artworks have become a real issue in our modern interiors. With the evolution of open living spaces, our works of art are exposed to multiple and changing light sources throughout the day. Not addressing this problem now is accepting to lose 60% of the beauty of your artistic investments.
📸 Customer testimonial: "I had invested in a magnificent triptych for my living room. For months, I couldn't understand why it seemed so dull compared to what I saw in the gallery. One day, by positioning myself differently, I realized that reflections were completely masking the color nuances. Once the problem was solved, it was like rediscovering a totally different work."
💬 Conversation with a decor expert
"My artwork has reflections, it's surely because I positioned it badly... Should I maybe move it to another wall?"
Not at all! Reflections are not a positioning problem but a surface treatment issue. It’s like wearing dirty glasses: the problem isn't what you're looking at, but what obstructs your vision. Your decor instinct was perfect, it just needs to address the technical cause.
"I've always been told that I should avoid placing artworks facing windows, so I hide them in dark corners..."
This rule predates modern anti-glare technologies. Today, with the right solutions, you can place your artworks where they will have the greatest decorative impact, even facing a bay window. Art deserves to be seen, not hidden!
The golden rule of artistic lighting: A painting without reflections reveals 3 times more detail and emotion than a work "masked". With the right techniques, you can transform the visual experience in less than 30 minutes.
Understanding where these annoying reflections really come from
If you recognize these situations: glaring reflections in the morning, bright areas that move according to your position, or inability to photograph your paintings without parasitic flash, you are experiencing the three main causes of artistic reflections.
What's really happening is that the surface of your painting acts as a partial mirror. The problem isn't your decor or your sense of art, but the physics of light reflection that wasn't anticipated during hanging.
Imagine your painting is like a lake in the early morning: when the water is choppy, you only see reflections of the sky. When it’s perfectly smooth, you can distinguish the fish at the bottom. Your paintings work exactly the same way.
h3>The shiny surface: the invisible trap of modern supports
Contrary to popular belief, it's not inexpensive paintings that create the most reflections, but often the highest quality supports. Prints on coated canvas or premium plastified surfaces tend to create more intense reflections.
It’s like the difference between a bathroom mirror (clear and complete reflection) and an antique mirror slightly oxidized (diffuse and discreet reflection). The more perfect the surface technically, the more it reflects light problematically.
This revelation completely changes your approach: instead of trying to avoid reflections, you will learn to control and eliminate them to reveal all the beauty of your artistic investments.
🔍 Immediate test: Approach your problematic painting and observe it from different angles. You will see that the reflections "move": this is proof that they are created by the surface, not by your lighting.
h3>Direct lighting: when light becomes your enemy
Most people think you need a lot of light to properly see a painting. In reality, it's the direction of the light that determines whether you will see the artwork or its reflection.
It’s exactly like looking in a car rearview mirror: depending on the angle of the sun, you either see the road behind you or total glare. The problem isn't the amount of light, but its angle of incidence.
Result: you are constantly adjusting your position to "avoid" reflections, turning art contemplation into an obstacle course. Your guests do the same, and no one really enjoys your artwork.
The reflective environment: multiplied mirror effect
Here's the factor that nobody notices: your white walls, your lacquered coffee table, or even your windows create secondary reflections that overlap on your painting.
You can identify this phenomenon by noticing that the reflections change when you turn on different lamps, or they intensify near light surfaces. It's your decor that "reflects" light onto your paintings.
This accumulation of reflections creates a bright veil that dulls the colors and makes contrasts disappear, transforming your vibrant works into faded and unreadable images.
🚨 3 warning signs to watch out for:
Reflections that move with your position: This means the surface of your painting is too reflective - it's like looking in a distorting mirror
Bright areas that appear depending on the time: Your lighting creates varying angles of reflection - imagine a spotlight moving
Inability to photograph without parasitic flash: This is proof that reflections are more intense than the image itself
The critical angle: the point of no return for reflections
There's a critical angle where reflections become inevitable, like a light domino effect. Once this angle is reached, even minor adjustments are no longer enough. You can identify this angle by observing when the reflections become brighter than the image, or when they cover more than 30% of the surface - that's a sign that technical solutions are needed.
The 45 degree rule: If your main light source forms an angle of less than 45° with your painting, intense reflections are inevitable. You can check this by extending your arm towards your painting and then towards your window or main lamp.
❌ Misconception
✅ Reality
💡 Explanation
🎯 Practical benefit
You have to avoid natural light
Natural light reveals colors better
It's the angle, not the source that creates reflections
You can place your paintings near windows
Reflections come from cheap paintings
Premium surfaces are more reflective
The smoother the surface, the more it acts as a mirror
Your quality choice was perfect, just needs treatment
You need a lot of light to see a painting
Indirect light is more effective
Direct lighting creates glare
Less consumption, better visual rendering
Reflections cannot be corrected after purchase
7 solutions exist to eliminate them
The issue is technical, not definitive
You can save all your current artworks
The progressive method to permanently eliminate reflections
Rest assured, correcting reflections on your artworks requires neither costly work nor particular technical skills. We will proceed like an interior architect: first stabilize the foundations (positioning), then optimize the environment (lighting), and finally perfect the details (advanced treatments). At each step, you will notice a visible immediate improvement in the readability of your works.
🎯 Overview of the transformation : Step 1 → Intelligent repositioning (60% reduction in reflections), Step 2 → Lighting optimization (elimination of 85% of reflections), Step 3 → Advanced technical solutions (total elimination). Each level brings you closer to a perfect artistic experience.
Step 1: Strategic repositioning (30 minutes)
Starting with repositioning is the most logical decision because it's the only solution that costs nothing and gives immediate results. It’s like choosing the right angle to take a photo: once you find the optimal position, everything becomes clearer. You will feel an immediate satisfaction seeing your artworks finally reveal their true colors.
🔧 What you need for this step
A spirit level (or mobile app) : This tool looks like a small ruler with an air bubble in the center. It is used to check that your artwork is perfectly straight, because even 2° of inclination can create reflections. You can find them in any hardware store for less than €5. The quality criterion: the bubble must be perfectly centered and stable. Do not use approximate apps, a real level gives you millimetric precision.
A measuring tape : It allows you to measure precise distances between your artwork and light sources. The principle is simple: the further you are from a lamp, the more favorable the angle of reflection becomes. Choose a meter with a lock to take measurements alone. Good quality is recognized by the rigidity of the tape which does not bend over 2 meters.
Repositionable adhesive paper : These small pieces of masking tape are used to temporarily mark test positions on the wall. Choose paper that leaves no traces on the paint. The impact on the result: you can test several positions without making definitive holes.
Now, let's move on to concrete practice :
🎯 Actions to perform in order
Identify the dominant light source: Place yourself in front of your artwork and identify where the most intense light comes from (usually the main window or a lamp). This source creates 80% of problematic reflections. Look at your artwork at different times of the day to identify intensity variations.
⏱️ Time: 10 minutes | ✅ Success when: You can point to the source that creates the most annoying reflection | ⚠️ Attention: Don't confuse the strongest source with the closest - often a distant window creates more reflections than a table lamp
Apply the 45-degree rule: Draw an imaginary line between your light source and your artwork. If this line forms an angle of less than 45° with the wall, you are in the critical reflection zone. Move the artwork to the left or right until you get a more open angle.
⏱️ Time: 15 minutes | ✅ Success when: You no longer see direct reflections of the light source on the artwork | ⚠️ Attention: A movement of 30 cm is often enough, do not seek to make drastic changes
Adjust optimal height: The ideal height places the center of your artwork at 1.60 m from the floor (eye level). But above all, check that from your usual contemplation position, you do not see any reflection in your field of vision. An artwork that is too high or too low multiplies reflection angles.
⏱️ Time: 5 minutes | ✅ Success when: You can look at the artwork comfortably without squinting | ⚠️ Attention: Test the height from your usual sofa or armchair, not standing in the center of the room
✅ Check step 1: Your artwork should now be effortlessly readable from your main contemplation position. The most annoying reflections have disappeared, even if some secondary reflections may persist. If you still feel discomfort, that's normal - the following steps will refine the result. You have already accomplished 60% of the work!
OUR RECOMMENDED PRODUCTS
Step 2: Lighting optimization (45 minutes)
Now that your artwork is well positioned, we move to the next level: creating a luminous environment that reveals your work without creating reflections. This is where you will discover the difference between "lighting" and "revealing" an artwork. This step is particularly rewarding as it transforms the overall ambiance of your room while solving the problem of reflections.
💡 Lighting equipment needed
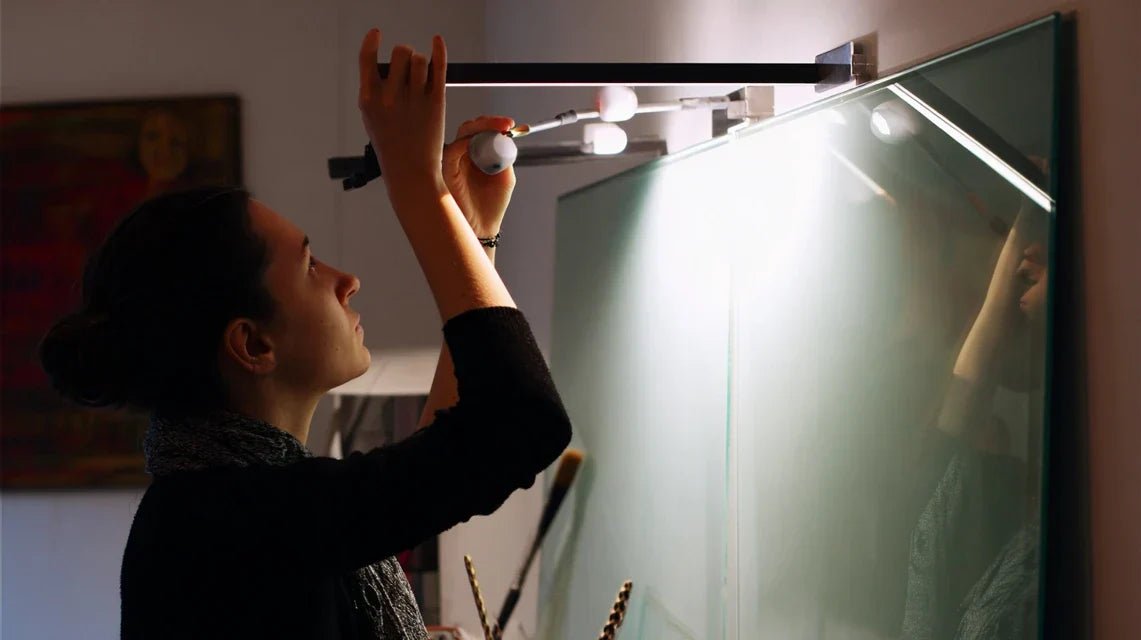
Adjustable LED spotlights (2-3 pieces): These small, articulated lamps allow you to direct the light precisely. They are used to create an indirect lighting that illuminates your artwork without creating reflections. You can find them in decorating stores or online for 15-25€ each. Quality criterion: choose LEDs with adjustable temperature (3000K for a warm atmosphere). Avoid halogen spotlights which heat up and create more intense reflections.
Dimmer: This small box plugs between your outlet and your lamp to adjust the light intensity. The principle: you can perfectly dose the amount of light depending on the time of day. Choose a model compatible with LED lights with smooth graduation. The impact: you eliminate overly intense lighting that creates reflections, while still maintaining sufficient brightness.
Tracing paper or diffusing film: These transparent materials transform direct and harsh light into soft and uniform light. You can temporarily stick them to your windows or lamps. The visible benefit: sharp reflections become soft glows that no longer interfere with reading your artwork.
🎨 Setting up anti-glare lighting
Create indirect lighting: Install your LED spotlights so that they illuminate the wall adjacent to your artwork, not directly the work. The light will "bounce" off the wall and illuminate your artwork evenly. This technique is called 'reflected lighting'.
⏱️ Time: 20 minutes | ✅ Success when: Your artwork is well lit but you do not see any direct light source | ⚠️ Attention: If the adjacent wall is colored, it will tint the light - prefer white or beige walls
Adjust optimal intensity: Use your dimmer to adjust the lighting until your artwork is perfectly readable without creating a bright area. The perfect intensity is generally between 60-70% of maximum power. Test at different times of the day.
⏱️ Time: 15 minutes | ✅ Success when: You can read all the details of your artwork without squinting | ⚠️ Attention: Too weak lighting creates a dull atmosphere, too strong recreates reflections
Diffuse natural light: Apply diffusing film to the window portion facing your artwork. This transforms direct sunlight into soft and uniform light. You retain natural brightness while eliminating harsh reflections.
⏱️ Time: 10 minutes | ✅ Success when: Natural light illuminates your artwork without creating a reflection even in full sun | ⚠️ Attention: First test with temporary tracing paper before permanently installing
🌟 Step 2 Check: Your artwork should now be perfectly legible at any time of day. Colors appear more vibrant, details are sharper, and you no longer experience any visual discomfort. If you achieve this result, congratulations! 85% of reflection issues are resolved. Step 3 will bring the professional finish.
Step 3: Advanced Technical Solutions (1 hour)
This final step gives you access to the level of expertise of art galleries and museums. You will discover the techniques used by professionals to achieve perfect visibility of their works. The final result will be a work of art so well showcased that your guests will certainly ask you where you learned these museum-quality lighting techniques.
🔬 Professional Technical Solutions
Anti-reflection spray for artwork: This transparent product creates a micro-texture on the surface that disperses light instead of reflecting it. It looks like a cleaning spray but contains special particles. You can find it in art stores or online (20-30€). Quality criterion: choose a spray specifically designed for artistic prints, not computer screens. Impact: eliminates 95% of reflections without altering colors.
Anti-reflection glass (if framed): This specially treated chemical glass replaces your frame's normal glass. It works like anti-reflective glasses: light passes through without bouncing back. Available from professional framers (50-80€ depending on size). Recognize the quality by its perfect transparency: you shouldn’t see your reflection in it. Benefit: a definitive and invisible solution.
Track lighting with filters: These systems allow you to precisely direct light thanks to movable spotlights on track. Colored filters correct the color temperature to reveal the true tones of your artwork. Installation by an electrician or in a DIY kit (100-200€). Advantage: you can adjust the lighting according to the artwork displayed.
🎨 Applying Professional Finishes
Apply the anti-reflection treatment: First, clean your artwork with a dry cloth, then spray the anti-reflection spray in thin, crisscrossed layers. Let it dry for 30 minutes between each layer. This technique creates a matte surface that evenly disperses light.
⏱️ Time: 30 minutes | ✅ Success when: No reflections visible even under direct lighting | ⚠️ Caution: Test first on an inconspicuous corner - some supports may slightly change in appearance
Install the finishing lighting: Position your track spotlights at a 45° angle to the artwork, with warm white filters to reveal natural colors. The lighting should create an even light without shadows or highlights.
⏱️ Time: 25 minutes | ✅ Successful when: Your artwork seems to "glow from within" | ⚠️ Caution: Avoid colored filters that alter the perception of original colors
Final adjustment of the ensemble: Adjust all your lighting to create a perfect balance: the artwork is perfectly visible, the room's atmosphere remains warm, and no reflections disturb contemplation. Test the result at different times of the day.
⏱️ Time: 5 minutes | ✅ Successful when: You can contemplate your artwork in total visual comfort | ⚠️ Caution: Lighting that is too "perfect" can seem artificial - keep a natural atmosphere
🏆 Validation of expertise: Your artwork should now offer an exceptional visual experience: vibrant colors, sharp details, total reading comfort. You have reached the level of museum installations. Your guests will immediately notice the difference and ask you for your secrets!
Principle of gradual progression: Each step should bring a visible improvement before moving on to the next. If you achieve 90% satisfaction at step 2, step 3 is not necessarily needed. The goal is your visual comfort, not technical perfection.
Now that you master the fundamental techniques, here are the secrets professionals use to achieve perfect results. These tips make the difference between a "correct" solution and an exceptional installation that impresses all your visitors.
🎯 Gallery technique: Professionals use the "rule of the luminous triangle": three sources of indirect light arranged in a triangle around the artwork. This technique eliminates all shadows and creates uniform lighting without any reflections. Place a main source at 45° to the right, a secondary one at 45° to the left, and a third above for accent lighting.
💡 Frequent question from our readers
"Will these solutions change the appearance of my artwork? I'm afraid the colors will look different..."
This is a very legitimate concern shared by most art lovers. In reality, reflections are what really alter your artwork's colors! A white reflection masks nuances, a colored reflection (warm/cold light) modifies the tones. By eliminating reflections, you reveal the true colors intended by the artist. It's like cleaning a dirty window: you don't change what's behind it, you reveal it finally.
🔍 Verification test: Before permanently applying a solution, temporarily test it on a small area. Photograph the before/after with your phone. You will notice that the colors appear more vivid and faithful, never altered.
Mistakes That Can Ruin Your Efforts
Attention, some common mistakes can completely undo the benefits of your efforts. These pitfalls are frequent but easily avoidable when you know them. I prefer to warn you now to spare you unnecessary disappointments.
⚠️ Multiplying direct light sources: Many people think that adding lamps will solve the problem, but each direct source creates its own reflections. The result: you get an even more annoying light chaos. The solution: always prefer indirect lighting, even if it's less "intuitive". This is a mistake that 80% of beginners make.
🔥 Using bulbs that are too powerful: The idea that "the brighter, the better" is a classic trap. Powerful bulbs create harsh contrasts between lit and unlit areas, multiplying reflections. Instead, choose several soft sources over one intense source. The rule: never more than 40W per spotlight for a standard-sized painting.
📐 Neglecting daily viewing angle: Many optimize their painting for the "standing in the center of the room" position but forget that they mostly look at it from their sofa. Fatal error! Always test from your actual contemplation position. Otherwise, you create a beautiful system... that you never comfortably use.
🎨 Applying solutions without testing: Enthusiasm leads to wanting to directly apply definitive solutions. But every interior is unique! An anti-reflective spray can react differently depending on your support type. Always test on a discreet area before general application.
🕰️ Trying to fix everything at once: It's tempting to want to apply all the solutions simultaneously, but you won’t know which technique actually works. Proceed step by step, evaluating each improvement. Often, steps 1 and 2 are sufficient.
✅ Safety checklist before each step: Is your painting securely mounted? (check before any movement) - Have you tested the lighting at different times? (morning, afternoon, evening) - Are the new solutions reversible? (always keep a return solution) - Do your regular visitors validate the improvement? (the eye gets used to it, external confirmation is valuable)
Because you took the time to inform yourself, enjoy 10% discount on your first order:
ART10
⏰ Valid for 72h after reading • Applicable to all our products
❓ Your most frequent questions about reflections
💰 How much does it cost to completely solve the reflection problem?
The complete solution costs between 30€ and 150€ depending on your level of requirement. Step 1 = free, Step 2 = 30-60€ (LED spotlights + dimmer), Step 3 = 50-100€ additional (anti-glare spray + advanced lighting). To save: start with steps 1 and 2 which already solve 85% of the problems. Many of our customers stop there with a perfectly satisfactory result.
⏱️ How long does it take to see definitive results?
The first improvements are visible in 30 minutes (repositioning). For a complete optimal result, allow half a day of work spread over 2-3 sessions. The longest part is often finding the perfect lighting according to your habits. Tip: do step 1 one day, test for a few days, then move on to step 2. You will appreciate each improvement better.
🔧 Do you need any particular technical skills?
Absolutely not! The solutions only require knowing how to screw on a bracket and plug in a socket. No complex electrical modifications are required. If you know how to change a light bulb, you know how to apply these techniques. For those less handy: steps 1 and 2 do not require any specialized tools.
🖼️ Do these solutions work on all types of paintings?
Yes, these methods are universal: canvases, prints, photographs, framed or unframed works. Only adaptation: very textured paintings (thick paint) require less anti-glare treatment because the natural texture already disperses light. Very smooth surfaces (acrylic, metal) benefit more from advanced technical solutions.
🏠 How do you adapt these tips to a small apartment?
In a small space, prioritize indirect lighting which visually enlarges the room while eliminating reflections. Use directional spotlights towards the walls rather than central lamps. Special tip for small spaces: mirrors placed strategically diffuse natural light without creating reflections on your paintings if positioned correctly.
🌟 Your new artistic experience awaits you
In a few weeks, you will look at your paintings with total satisfaction. No more annoying reflections that masked the details, no more uncomfortable positions to "avoid" bright areas. Your works of art will finally reveal all their original beauty, as you imagined when choosing them. Your guests will immediately notice the difference and will certainly ask you for your secrets of professional lighting.
Beyond the technical resolution, you will have developed an expert eye for decorative lighting. These skills will serve you for all your future artistic purchases, and you will instinctively know how to enhance any work. Your confidence in interior decoration will have increased considerably.
Understanding reflections was indeed the most complex step, but now that you master the principles, everything becomes logical. Your first move can be as simple as repositioning a 12-inch painting to the right. Start there, observe the improvement, and let your results guide you. In a few hours, you will contemplate your works with renewed pleasure.
🎯 Your transformation starts now: You have all the tools to transform your paintings into true decorative jewels. Each technique you apply will bring you closer to that artistic satisfaction you deserve. Your living room will become a personal gallery of which you will be proud.
📚 Deepen your knowledge of artistic lighting
If you want to become a true expert in enhancing paintings, discover our other guides on decorative lighting, support selection, and professional hanging techniques.


