

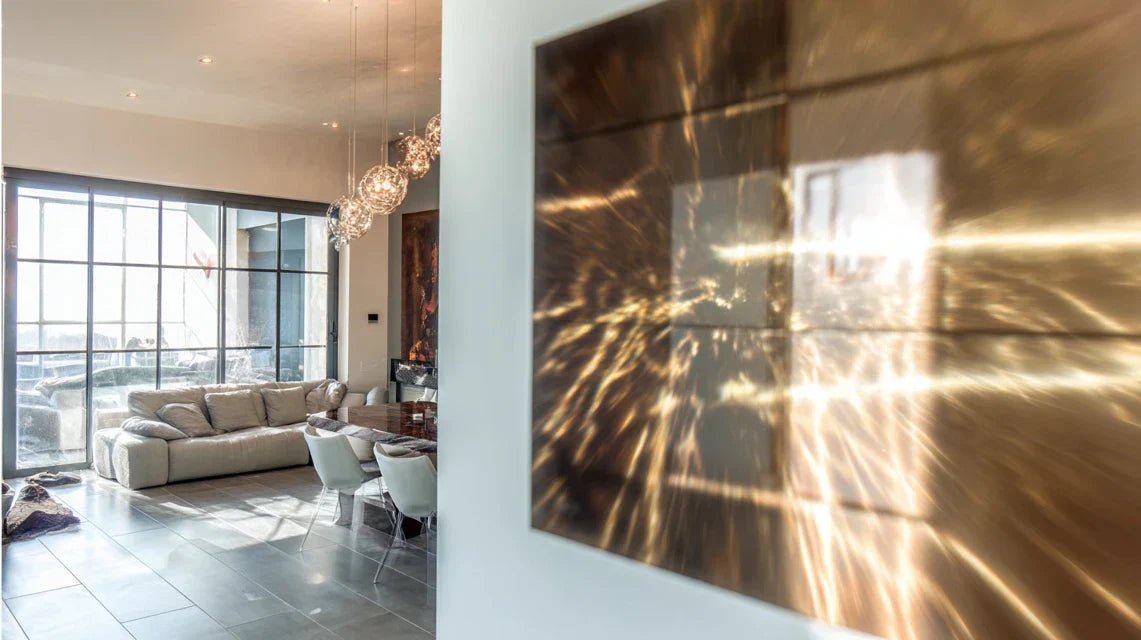
You've just hung your magnificent acrylic glass artwork in your living room, but here's the thing: as soon as daylight hits the surface, annoying reflections come to mask the details of your favorite piece.
It’s impossible to fully admire the vibrant colors and subtle nuances that you so appreciated when you made your purchase. Reflections transform your artistic investment into a frustrating mirror, especially at times when you want to enjoy it most.
You may have already tried to change the lighting in the room or move the artwork to a less exposed wall, without lasting success. These makeshift solutions only shift the problem without truly resolving it.
Rest assured, this phenomenon is perfectly normal and does not question your decorative choice. Reflections on acrylic glass are due to the optical properties of the material, which naturally reflects light at specific angles.
In this article, you will discover proven professional techniques to permanently eliminate these annoying reflections, in order to reveal all the beauty of your artwork under any lighting conditions.
Why do reflections ruin the experience of your work of art?
Reflections on acrylic glass are not just a visual annoyance: they transform your artistic investment into a source of daily frustration. Imagine having guests and being unable to share your passion fully for this unique piece that adorns your wall.
📸 Customer testimonial: "I invested in a sublime painting depicting a sunset over the ocean. But every afternoon, when the natural light was at its most beautiful, it was impossible to make out the waves from the reflections of my bay window. My artwork lost all its poetry."
💬 Conversation with a decor expert
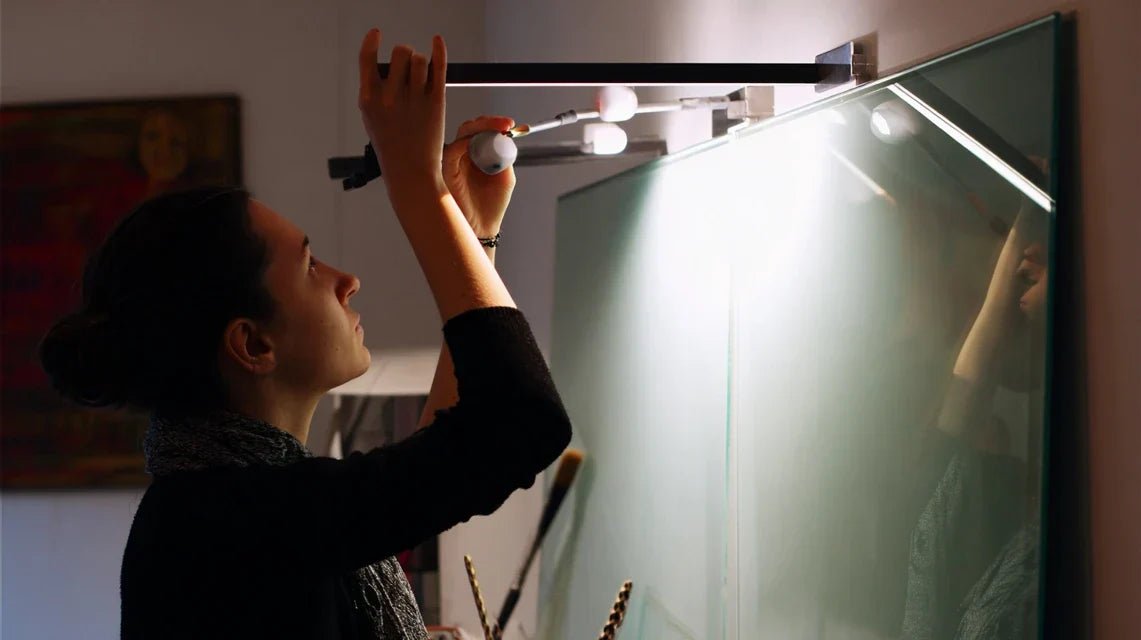
The anti-glare golden rule: Master the angle of reflection rather than suffering from ambient lighting. Like a professional photographer who positions their light sources, you can redirect reflections to reveal your artwork in all its splendor, in less than 30 minutes.
Understanding what really generates those annoying reflections
Do you recognize yourself in these three situations? Reflections mainly appear in the afternoon when the sun hits your wall directly, your artwork becomes unreadable from your favorite sofa, or artificial lighting in the evening creates dazzling areas on the surface.
These symptoms reveal that your artwork is subject to the laws of optics without adequate protection. The problem isn't your choice of location or your lighting, but the lack of preventative treatment during installation.
Think of a car windshield: without anti-glare treatment, it would become dangerous to drive facing the sun. Your artwork deserves the same professional attention.
The real cause: the angle of incidence of light
Contrary to what many believe, it's not the amount of light that is a problem, but its angle of arrival on the surface. A grazing light will always create more reflections than a perpendicular light, even if it is weaker.
Imagine throwing a stone into a pond: depending on the angle, it bounces or sinks. Light works exactly the same way on your acrylic glass.
This discovery will revolutionize your approach to decorative lighting. Rather than decreasing light intensity, you'll learn to play with angles to sublimate your artwork.
🧪 Instant test: Stand in front of your artwork and slowly move your head from left to right. You will notice that reflections disappear and reappear depending on your position. This is proof that the problem is geometric, not luminous!
The impact of surface texture
Many think that all acrylic glasses are equal, but reality is more nuanced. The surface finish determines how light is reflected or diffused.
It's like the difference between a mirror and frosted glass: the same material, completely different optical behavior when facing light.
Understanding this distinction will allow you to choose the right treatments and avoid costly mistakes that sometimes worsen the initial problem.
The multiplier effect of light sources
A detail that almost no one notices: each light source (window, lamp, spotlight) creates its own reflection on your artwork. The more sources you have, the more intense the phenomenon becomes.
Observe your artwork in the evening with all lights turned on: you will probably discover 3 to 5 different reflections that you had not consciously identified.
This awareness explains why partial solutions fail: addressing a single light source only partially resolves the overall problem.
🔍 The 3 telltale signs of reflection problems:
- You change position to view your artwork: This means that the optimal viewing angle is very restricted, like watching a poorly oriented screen Your artwork looks better in the morning than in the afternoon: The changing natural light reveals an unsuitable exposure to daily variations Your guests don't immediately notice your artwork: Reflections create a visual barrier that diminishes the decorative impact of your investment
The trigger factor: the geometry of your room
The architecture of your space naturally amplifies or attenuates reflections. A room with large bay windows facing the artwork will create a double exposure effect, while a wall perpendicular to the windows will benefit from more favorable lighting. This is the spatial domino effect: each architectural element influences the behavior of light on your work.
The 45-degree rule: A reflection always appears at an angle equal to that of the light source. Identify your main sources and mentally visualize their trajectory of reflection to immediately locate problem areas.
| ❌ Limiting belief | ✅ Technical reality | 💡 Simple explanation | 🎯 Practical benefit |
|---|---|---|---|
| You have to accept reflections on glass | Reflections can be perfectly controlled | Like a photographer masters their lighting | Enjoy your artwork at any time |
| More light = more reflections | Angle matters more than intensity | Well-oriented light eliminates reflections | Keep an interior bright and pleasant |
| Changing the location solves everything | Surface treatment is more effective | Modify the artwork, not the environment | Total freedom of arrangement |
| Solutions cost a lot | Accessible techniques exist | Materials and methods within everyone's reach | Professional results without a large budget |
The progressive method to permanently eliminate reflections
Now that you understand the mechanisms at work, let's move on to the concrete solution. This progressive method will allow you to treat reflections in order of importance, like an architect who builds floor by floor. Each step brings a visible improvement, and the final result will reveal all the beauty of your artwork under optimal lighting conditions.
🎯 Action plan in 3 steps: First eliminate main reflections with lighting adjustments, then treat the surface with anti-reflective solutions, and finally optimize the environment for lasting results. This logical progression guarantees immediate improvements at each level.
🔧 Step 1: Neutralize main sources of reflection
Let's start by identifying and addressing the most annoying reflections, those that truly obscure your artwork. This step is like laying a solid foundation: it conditions the effectiveness of everything else and will give you immediate satisfaction as you see your painting regain readability.
🛠️ Materials needed for this step
- Flashlight or smartphone: To visualize the paths of light and precisely identify where the reflections come from. More practical than a fixed lamp as you can move it easily to test different angles.
- Repositionable adhesive paper: To temporarily mark critical areas on your wall without damaging it. Avoid standard tape which could leave marks on your paint.
- Tape measure: To measure distances and angles accurately. A tailor's flexible measuring tape works perfectly and is easier to handle in confined spaces.
Let's move on to practice with your painting
✅ Reflection detection method
Map your light sources: Stand in front of your painting and turn them on one by one each light source (windows, lamps, spotlights). Mark each reflection that appears with adhesive paper, as our brain tends to ignore them unconsciously when they are all present simultaneously.
⏱️ Time: 10 minutes | ✅ Success when: You have identified 3 to 5 distinct reflections on your painting | ⚠️ Attention: Do not test all lights at the same time, you will lose track of individual sources
Measure critical angles: With your flashlight, reproduce the path of each light source towards your painting, then towards your eyes. Note that the angle of arrival equals the angle of reflection - this is the fundamental law governing all reflections.
⏱️ Time: 15 minutes | ✅ Success when: You can predict where a reflection will appear depending on your position | ⚠️ Attention: Angles change according to the height of your eyes, test while sitting and standing
Prioritize interventions: Rank your reflections by order of annoyance: those that obscure the main subject of your painting, then those visible from your usual position (sofa, table), finally those that only appear under certain conditions.
⏱️ Time: 5 minutes | ✅ Successful when: You have a clear list of the top 2-3 priority reflections | ⚠️ Caution: Resist the temptation to address everything at once, progress step by step
🎯 Step 1 Check: Your artwork should be noticeably more legible from your usual viewing position, with at least 70% of distracting reflections eliminated. If you are still hesitant to show off your work to guests, this step deserves refinement before moving on to the next.
OUR RECOMMENDED PRODUCTS
🎨 Step 2: Apply Durable Anti-Reflection Solutions
Now that you have neutralized the main reflections, let's move to the next level: creating a durable protection that works in all lighting conditions. This step is more rewarding as it definitively transforms your experience of the artwork, with a snowball effect on the visual comfort of your entire room.
🛠️ Materials for Anti-Reflection Treatments
- Transparent anti-reflection film: Looks like a thin plastic film but contains micro-diffusing particles that break up direct reflection. Available in hardware stores in the glasswork section, choose a film specifically designed for acrylic (not classic glass).
- Temporary anti-reflection spray: Liquid solution that creates a fine matte finish on your artwork. Very practical for testing the effect before a permanent treatment, and perfectly reversible with proper cleaning.
- Lint-free microfiber cloth: Essential for applying treatments without creating streaks or scratches. Regular cloths leave residues that can worsen reflections rather than reduce them.
✅ Applying Anti-Reflection Treatments
Surface preparation: Gently clean your artwork with a specialized acrylic cleaner (never alcohol or ammonia, which can create micro-scratches). A perfectly clean surface is essential because every speck of dust will create a parasitic reflection point.
⏱️ Time: 10 minutes | ✅ Successful when: No traces, dust or fingerprints visible on the surface | ⚠️ Caution: Work in an environment without drafts to avoid dust deposits during cleaning
Temporary treatment test: Apply the anti-reflection spray to a discreet area (lower corner) to assess the effect on your specific artwork. Each image reacts differently depending on its colors and contrasts, this test avoids unpleasant surprises.
⏱️ Time: 5 minutes + 10 minutes drying time | ✅ Successful when: The anti-glare effect is visible without altering the colors | ⚠️ Caution: Strictly adhere to the drying time, a wet product creates more reflections than before treatment
Application of the final film: If the test is conclusive, cut the anti-glare film to the exact dimensions of your painting plus a 2cm margin. Apply by gradually chasing out air bubbles with a soft spatula, starting from the center towards the edges.
⏱️ Time: 25 minutes | ✅ Successful when: No visible air bubbles and perfect adhesion over the entire surface | ⚠️ Caution: An air bubble will create a localized reflection area, take your time to properly smooth out the film
🎯 Step 2 Verification: Your painting should be perfectly legible under all lighting conditions in your room, with colors preserved and a uniform surface. The anti-glare effect should be invisible but effective, like a protection that reveals rather than hides.
🏆 Step 3: Optimize the environment for perfect results
You have now reached an advanced level of mastery that allows you to create ideal conditions to sublimate your work. This final step makes the difference between a satisfied amateur and a connoisseur who reveals the full potential of their artistic investment. The final result will transform your painting into a true focal point of your decor.
🛠️ Material for environmental optimization
- Adjustable LED lighting: Spotlights or rails allowing you to precisely orient the light on your painting. Prefer LEDs with adjustable color temperature (2700K to 4000K) to adapt to the desired atmosphere.
- Mobile reflector: White or silver panel to redirect natural light optimally. A simple rigid white cardboard of 50x70cm can do wonders to homogenize lighting.
- Dimmer switch: To finely adjust the light intensity according to the time of day. Essential for maintaining optimal lighting between day and night.
✅ Creating an optimal environment
Install dedicated lighting: Position your LED lighting at a 30 degree angle to the perpendicular of your painting, at a distance equal to 1.5 times the width of the artwork. This geometry eliminates reflections while creating uniform and enhancing lighting.
⏱️ Time: 45 minutes | ✅ Successful when: Uniform lighting without shadows or parasitic reflections | ⚠️ Caution: Lighting that is too close creates hot spots and reflections, too far away it becomes ineffective
Optimize natural light: Use a portable reflector to redirect window light and create indirect lighting on your artwork. Test different positions until you achieve a soft, even illumination that reveals all the details.
⏱️ Time: 20 minutes | ✅ Success when: Your artwork remains perfectly visible even in full sun | ⚠️ Attention: The optimal position of the reflector changes depending on the time of day, so plan for an adjustable mounting system
Adjust intensity according to use: Program your dimmer switch for 3 lighting levels: daytime (30% to supplement natural light), evening (70% for main lighting), and night (100% for a spectacular highlight during receptions).
⏱️ Time: 15 minutes | ✅ Success when: Smooth transition between atmospheres without ever losing readability | ⚠️ Attention: Excessive brightness fatigues the eyes and can create secondary reflections on surrounding objects
🎯 Step 3 Check: Your artwork should be beautifully highlighted at all times of day, with lighting that naturally adapts to variations in natural light. The overall effect should seem natural and professional, like in an art gallery.
The rule of mastered progression: Each step must bring a visible improvement before moving on to the next. If you are still hesitating between two solutions, it means that the previous step deserves to be perfected. Excellence is built gradually, not in haste.
You now master professional techniques to permanently eliminate reflections from your acrylic paintings. These expert subtleties give you a considerable advantage for creating luminous atmospheres that enhance your works instead of masking them.
🎯 Professional secret: Low, indirect lighting - install a thin LED light behind your artwork, directed towards the wall. This reflected light creates a subtle halo that makes your work "float" and permanently eliminates parasitic reflections, while creating a spectacular atmosphere for your evenings.
💬 "How can I be sure that the treatment will not damage my artwork?"
"I'm afraid that anti-reflective products will alter the colors or leave permanent traces..."
This concern is perfectly legitimate when you have invested in a work that is dear to your heart. The good news is that all modern treatments are completely reversible and specially designed to preserve the integrity of colors. It's like applying transparent sunscreen: maximum protection, total invisibility.
🧪 Safety test: Always start with a test on a hidden area (lower back corner) using a cotton swab. Wait 24h and check that no alteration is visible. This method guarantees you total safety.
⚠️ Mistakes that can ruin your efforts
Now that you know the method, I want to avoid common pitfalls that can turn your project into a disaster. These mistakes are very common because they seem logical at first glance, but they often worsen the initial problem.
- 🚫 Cleaning with classic household products: Ammonia and alcohol may seem effective but create micro-scratches that multiply reflection points. Result: more reflections than before! Use only acrylic-specific products, it's a minimal investment that preserves your artwork.
- 🚫 Applying the anti-reflective film on a dirty surface: Each trapped grain of dust becomes a permanent reflection point. The film then amplifies defects instead of masking them. Take the time to clean perfectly, it's the basis of any successful treatment.
- 🚫 Multiplying light sources to "better illuminate": More light does not mean better illuminated, but more different reflections. Three poorly oriented spotlights create more problems than a single well-positioned spotlight. Always prioritize quality over quantity.
- 🚫 Positioning lighting facing the painting: Frontal lighting = guaranteed direct reflection. This mistake turns your lighting system into a reflection generator. Remember: at least 30 degrees angle, always!
- 🚫 Ignoring "secondary" reflections: You treat the window but forget the desk lamp that also creates reflections. A neglected source can spoil all the work on the others. Map all your light sources without exception.
🔍 Quick verification system: Before finalizing your installation, test all lights turned on simultaneously from your 3 favorite positions in the room. Check that colors remain vibrant, details are sharp, and no reflection obscures the main subject. If you squint to see certain details, it means there is still work to be done!
🎁 Special readers offer
Because you took the time to inform yourself, enjoy 10% discount on your first order:
⏰ Valid 72h after reading • Applicable to all our products
🤔 Your most frequent questions about reflections
A high-quality anti-reflective film lasts 5 to 7 years without visible degradation. The temporary spray needs to be renewed annually. LED lighting works for more than 10 years. Your initial investment therefore offers you several years of peace of mind with minimal maintenance.
Absolutely! 95% of the steps can be done without taking down your artwork. Only thorough cleaning may require temporary removal. The beauty of this method is its total flexibility: you can adapt it to your existing installation without starting over.
Modern treatments are perfectly transparent and preserve 100% of the original colors. They simply reveal your artwork rather than masking it. It's like cleaning a dirty window: you don’t change what is behind, you reveal it in all its splendor.
If reflections reappear, it's usually because a new light source has been added or lighting has been moved. Use your detection method to identify the source and apply the appropriate solution. Diagnosis is now your superpower to instantly solve any future problem.
🌟 Your new perspective on wall art
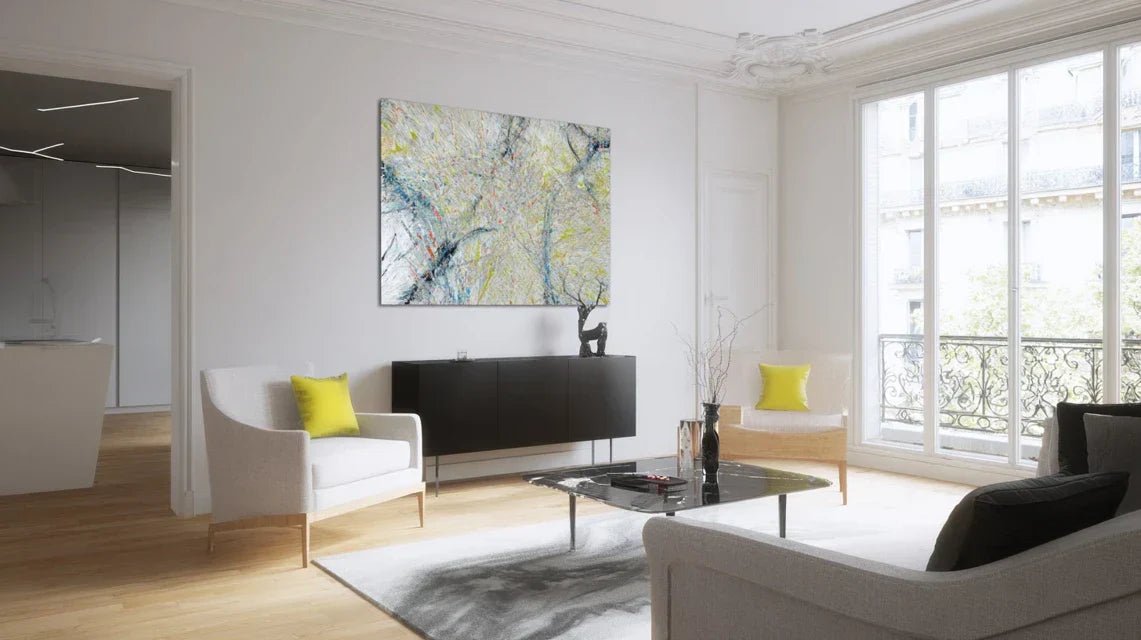
In a few weeks, you will contemplate your perfectly revealed artwork without any visual discomfort. Your guests will immediately notice this piece that naturally attracts the eye, and you will feel that discreet pride of owning an interior where every detail is mastered. You will never change position to admire your art again.
This technical skill opens the doors to a more ambitious decoration: you can now choose the ideal location according to your tastes, not according to lighting constraints. Your confidence in interior design will reach a new level, and you will naturally become the go-to person in your circle for artistic arrangement questions.
Understanding reflections was indeed the main obstacle between you and your artistic enjoyment. Now that you have mastered this science of light, start today by mapping the light sources of your painting. This first action will instantly give you a clear vision of your situation and the desire to see this transformation through.
🎯 Your next decisive step: Take a photo of your painting in its current conditions, then reread this article with your work before your eyes. You will immediately see the solutions to apply and visualize the spectacular result that awaits you. Your masterpiece deserves this professional attention!


