


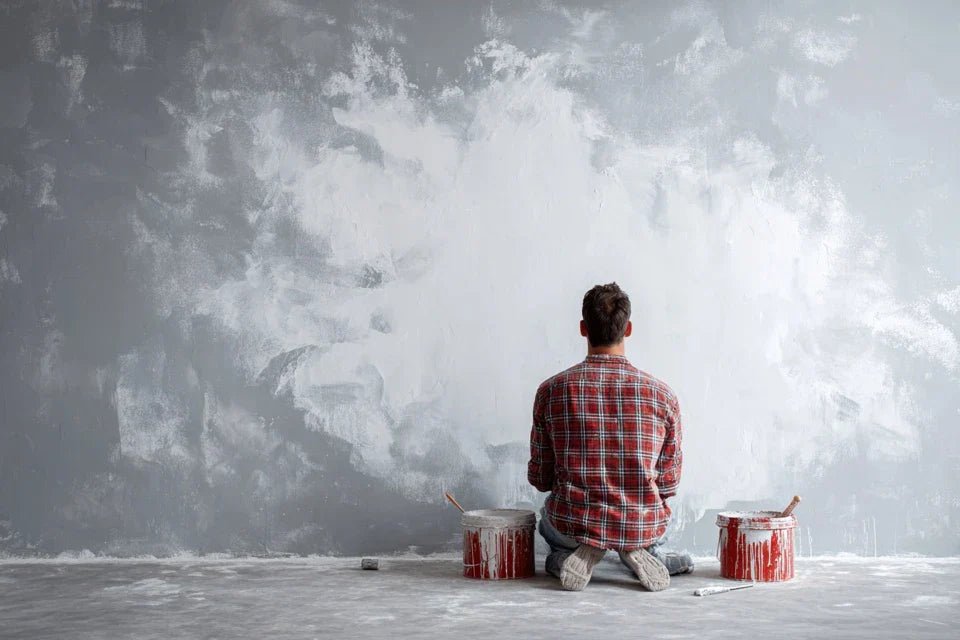
You've just acquired this magnificent aluminium Dibond print that will transform your living room. You grab your hammer, take a classic nail from the toolbox... and then disaster strikes: your work of art deforms before your eyes or, worse still, comes crashing off the wall.
The dull thud of the fall still echoes in your mind. Your heart sinks as you see the deformation marks on this support, despite its reputation for robustness. This feeling of waste, this frustration of seeing an artistic investment compromised by a simple hanging gesture.
You followed the usual advice: "a solid nail, well planted". But with aluminium Dibond, these traditional methods become your worst enemies. You are not the first to experience this bitter disappointment.
It's normal to have failed with this approach. Aluminium composite Dibond obeys specific physical laws that classic hanging methods completely ignore. The problem doesn't come from your clumsiness, but from the total inadequacy between the metal support and traditional fastening.
By the end of this article, you will master specialized fixing techniques for Dibond and discover how to turn this technical constraint into a decorative advantage for perfectly secure and aesthetic hanging.
Why your Dibond print deserves more than just a nail?
Imagine entrusting a Ferrari to a mechanic who uses the same tools as for an old 2CV. That's exactly what happens when you hang an aluminium Dibond print with a traditional nail. This revolutionary support, prized by professional photographers and high-end decorators, requires a technically adapted approach to its sophistication.
📸 Customer testimonial: "I had invested €400 in a photographic art reproduction on Dibond. Three months after hanging it with a simple nail, I found a permanent deformation in the shape of a wave across the entire surface. The seller explained to me that the aluminium had 'worked' due to the punctual pressure of the nail."
💬 Conversation with a decor expert
The Dibond golden rule: The more you distribute the weight across the surface, the better your artwork will retain its perfect flatness and exceptional durability. Visible result in 24h: an invisible hanging system and a perfectly flat surface.
Finally understand why your previous attempts failed
Do you recognize yourself? You tried the reinforced "special artwork" nail, you even attempted the large-headed nail to "better distribute". Maybe you also tested decorative pins or adhesive hooks that weren't powerful enough.
What really happens is an invisible physical conflict between the composite nature of Dibond and the punctual pressure of the nail. The composite aluminum reacts to mechanical stresses like a stretched membrane: any localized pressure spreads in ripples across the entire surface.
Imagine placing a lead ball in the center of a trampoline. The fabric deforms far beyond the point of contact. This is exactly what happens with your Dibond and this cursed nail.
First hidden cause: the "pressure point" effect
Contrary to popular belief, Dibond aluminum is not a rigid metal plate but a sandwich of materials: two thin layers of aluminum separated by a polyethylene core. This structure gives it its lightness and strength, but also its sensitivity to punctual pressures.
It's like trying to support puff pastry with the tip of a knife: the layers delaminate locally and create permanent bumps. The nail acts as a micro-punch that disstructures the composite assembly.
This deformation is not only aesthetic: it weakens the entire structure and can cause cascading cracks which definitely compromise your artwork. Worse, these defects worsen over time due to temperature variations.
🔍 Immediate test: Gently press with the tip of your finger on a corner of your Dibond artwork. Can you feel this slight flexibility? That's exactly what the surface experiences under a nail, but permanently and concentrated.
Second cause: the "lightweight" trap
"It’s light, so a small nail is enough!" This logic seems undeniable but completely ignores the leverage factor. An artwork, even lightweight, generates considerable force in cantilever relative to the wall.
Think of a pool diving board: even if it weighs only a few kilos, the stress at the base is enormous due to the leverage effect. Your 40x60cm Dibond artwork exerts pressure equivalent to several times its weight on the fixing point.
Result: the nail gradually deforms, tilts, and ends up tearing the aluminum or creating an irregular perforation that widens with each micro-movement. Your artistic investment becomes a sword of Damocles above your sofa.
Third cause: invisible galvanic oxidation
Here's the factor almost no one suspects: direct metal-aluminum contact creates an electrochemical reaction called galvanic corrosion. Simply put, your steel nail is literally "eating" away at the aluminum in the Dibond.
You can spot this phenomenon by the appearance of brownish stains around the fixing point, traces of "rust" that seem to come from nowhere, or even a gradual discoloration of the white surface of the Dibond around the nail.
This silent corrosion weakens the anchoring and compromises the aesthetics of your artwork. It's as if your wall is slowly "digesting" your painting, creating an area of weakness that gradually spreads.
3 warning signs to watch out for:
- "Smile" or "wave" deformation: The surface is no longer perfectly flat, a sign that the composite structure is yielding under point pressure
- Progressive tilt: The painting tilts more and more, indicating that the nail is slowly pulling out of the aluminum
- Corrosion traces: Stains or discolorations appear around the fixing point, revealing the electrochemical attack
The trigger factor: thermal variations
Aluminum has a coefficient of expansion different from your nail's steel. Each temperature change - heating in winter, air conditioning in summer, direct sunlight - causes the two materials to "breathe" differently. It’s like having a puzzle where the pieces slightly change size with each season: stresses accumulate until breakage. You can identify this phenomenon if your painting seems to “move” according to the seasons or if cracking noises appear when temperatures change.
Dibond survival rule: Never direct ferrous metal contact on aluminum. Immediately check your current fixing: do you see shiny metal touching the surface? If so, your painting is in danger.
| ❌ Misconception | ✅ Technical reality | 💡 Explanation | 🎯 Benefit |
|---|---|---|---|
| Aluminum is super strong, a nail must hold | Dibond is a flexible composite that requires weight distributionSandwich structure sensitive to point pressures | Perfect preservation of planarity | |
| The lighter it is, the less it pulls on the fixing | The lever effect multiplies stresses at the anchor point | Force proportional to surface and distance from the wall | Durable fixation without tearing |
| A reinforced nail solves all problems | Ferrous-aluminum contact creates destructive corrosion | Electrochemical reaction between different metals | Long-term aesthetic preservation |
| Once hung, it doesn't move | Thermal expansions create cyclical stresses | Different coefficients of expansion between materials | Stability even with temperature variations |
The professional method for a perfect hanging
Rassurez-vous, maintenant que vous comprenez les enjeux techniques, la solution devient limpide. Les professionnels utilisent une approche en trois étapes qui transforme cette contrainte en avantage : isolation, répartition, stabilisation. C'est comme construire une maison : fondations solides, structure adaptée, finitions soignées. Au final, you will get a hanging invisible, durable and which values your artistic investment.
🎯 Overview of the method: Step 1 - Preparation of the support with galvanic insulation, Step 2 - Installation of the distribution system, Step 3 - Positioning and final adjustments. Each step secures your work while simplifying the next.
Step 1: Create the protective isolation
This first step is crucial as it lays the foundations for durability. Think of the foundations of a house: invisible but decisive for the solidity of the whole. Once this protection is installed, you will immediately feel the satisfaction of knowing your work perfectly protected from chemical and mechanical attacks.
Protection materials needed
- Anti-corrosion adhesive pads: Small rubber or technical plastic discs, available in hardware stores in the wall fixings section. Quality criteria: UV resistance and minimum thickness of 2mm. Avoid foam pads that settle and lose their protective effectiveness.
- Stainless steel screw hooks: Fixings specially designed for lightweight metals, with anti-corrosion coating. Operating principle: distribution of weight over a larger surface than a nail. Quality index: "inox A4" marking or zinc coating. Impact on the result: no rust traces even after years of exposure.
- Distribution washers: Metal or plastic discs that diffuse pressure. Visible benefit: no local deformation of the aluminum, preservation of the perfect planarity of your painting.
Now, let's move on to the actual installation
Installation of anti-corrosion protection
Positioning the insulating pads: Glue the adhesive pads to the contact points provided between the hook and the back of the painting. Technical reason: create a physical barrier preventing direct iron-aluminum contact. Important detail: degrease the surface with household alcohol to ensure adhesion. It's simpler than it seems.
⏱️ Time: 5 minutes | ✅ Successful when: No metal part of the hook touches the aluminum directly | ⚠️ Attention: Pads not centered that create an imbalance - check alignment before pressing definitively
Wall mount preparation: Mark the fixing points with a pencil, respecting the spacing of your hanging system. The goal is to achieve a balanced weight distribution. Crucial technical detail: use a spirit level to guarantee perfect horizontality. Accuracy at this stage determines the final result.
⏱️ Time: 10 minutes | ✅ Success when: The markings are perfectly aligned and the spacing exactly matches that of the artwork | ⚠️ Attention: Approximate measurements requiring re-drilling - measure three times, drill once
Installation of specialized hooks: Screw in the stainless steel hooks with their spreading washers. These elements distribute force over a surface 10 times greater than that of a nail. Technical point: tighten firmly but not excessively to avoid deforming the washer. The effectiveness is immediate.
⏱️ Time: 15 minutes | ✅ Success when: The hooks are securely fixed and perfectly horizontal | ⚠️ Attention: Excessive tightening that cracks the wall or deforms the washer - resistance must come from the anchor, not compression
✓ Quality control step 1: Your basic installation is operational: no direct metal contact, hooks perfectly aligned and stable. If you encounter resistance when screwing, check the quality of your wall plugs. You are now ready for the decisive stage: actually hanging the artwork.
OUR RECOMMENDED PRODUCTS
Step 2: Setting up the distribution system
You are now entering the high precision phase. This step transforms your basic installation into a professional system. The effect is spectacular: your artwork seems to "float" against the wall, perfectly stable and with no visible stress points. That's the difference between craftsmanship and expertise.
Professional suspension system
- Suspension cable or rail: Ultra-resistant braided metal wire or anodized aluminum rail. Principle: distribute weight across the entire width rather than on two points. Available from specialist art supply stores. Quality criterion: load capacity 3 times greater than the weight of the artwork. Economical option not recommended: string or wire that slackens and marks the aluminum. Safety fasteners: Clips or eyelets specifically designed for Dibond, with an enlarged contact surface. Functionality: pressure distributed over several square centimeters instead of a few millimeters. Quality index: plastic coating or rubber which protects the aluminum. Visible benefit: no marks or deformation on the support. Adjustment system: Fine-tuning mechanism allowing adjustment of position without disassembly. Crucial advantage: correction of minor mounting defects without damaging the wall or artwork.
Installing the distribution system
Cable or rail fixing: Install the horizontal suspension system ensuring perfect tension. Technical objective: create a continuous load line that cancels out stress points. Crucial detail: the cable must be slightly taut but not rigid, to absorb micro-movements. Controlled flexibility is key to durability.
⏱️ Time: 20 minutes | ✅ Successful when: The system is perfectly horizontal and the tension is uniform | ⚠️ Attention: Cable too tight generating excessive stress at anchor points - controlled flexibility takes precedence over rigidity
Positioning safety fasteners: Fix the suspension clips to the back of the Dibond respecting the optimal spacing. Technical rule: one fastener every 30cm maximum for perfect distribution. Point of attention: progressive and uniform tightening to avoid any local deformation. Efficiency is immediately measured by the stability achieved.
⏱️ Time: 15 minutes | ✅ Successful when: Each fastener holds firmly without deforming the aluminum | ⚠️ Attention: Uneven tightening that creates asymmetrical tensions - proceed in successive quarter turns
Step 3: Positioning and final stabilization
The culmination of your expertise: this final phase reveals professional mastery. Your artwork finds its definitive position with millimeter precision, unwavering stability and impeccable aesthetic rendering. This is the moment you measure the difference between an amateur installation and a gallery art hanging.
Finalizing the installation
Hanging and leveling: Gently suspend the artwork and proceed with fine position adjustments. Professional technique: progressive adjustments by micromovements until perfect balance is achieved. Technical point: stability must be immediate, without oscillations or imbalance. The quality of this step is immediately visible.
⏱️ Time: 10 minutes | ✅ Successful when: The artwork remains perfectly stable and horizontal without assistance | ⚠️ Attention: Sudden movements that may damage the suspension system - delicacy is essential for this final step
Safety check: Test the solidity of the whole by slight controlled movements. Objective: to ensure the absence of weak points and the homogeneous distribution of stresses. Final detail: check that nothing rubs or marks the aluminum. This precaution guarantees the durability of your installation.
⏱️ Time: 5 minutes | ✅ Successful when: No parasitic movement, perfect stability in all circumstances | ⚠️ Attention: Tests that are too energetic which could reveal hidden weaknesses - gradual progression allows you to identify problems without aggravating them
Expert progression rule: Only move on to the next step when the previous one gives perfect results with no effort or constraint. Objective criteria: immediate stability, absence of deformation, ease of handling. Excellence requires patience but rewards durability.
You have just crossed the threshold between amateur and connoisseur. These subtleties make the difference between a hanging that "holds" and an installation that truly enhances your artistic investment. You now have a decisive advantage: mastery of the technical constraints specific to Dibond.
🎯 Gallery tip: For large formats (over 80cm), double the suspension system with an auxiliary rail at mid-height. This invisible redundancy completely eliminates the risk of deformation and allows stress-free handling. Professional collectors never hang otherwise.
❓ Frequent question from our readers
"I have never tinkered, will I really be able to do it without damaging my painting?"
This hesitation is perfectly normal and even reassuring: it shows that you are aware of the value of your work. In reality, this method is much simpler than traditional hanging because each step is immediately verified. Unlike the "blind" nail, you control each phase and can correct before finalizing. One of our clients, a Parisian antique dealer, confided to us: "The first time I took an hour, now 20 minutes are enough." Technical precision replaces brute force.
💡 Startup tip: Start with a medium-sized painting (40x60cm) in a little visible place to familiarize yourself with the technique. You will immediately notice the difference in stability and can then apply this expertise to your most valuable pieces.
The mistakes that cost money (and how to avoid them)
After supporting hundreds of customers in their installations, we have identified the recurring traps that turn a technical success into a disaster. These errors are tempting because they seem logical, but they irrevocably compromise your artistic investment.
- ⚠️ Saving on fixings: "These hooks cost €15, I'm going to take the cheapest at €3." This false economy will cost you much more: a €300 Dibond painting destroyed by faulty fixings. Quality components are recognizable by their anti-corrosion warranty and certified load capacity. A €12 saving can cost you €300 in replacement.
- 🔧 Makeshift DIY : "I'm going to adapt my old hardware rather than buying specialized." Adapting objects diverts them from their optimal use. A canvas hook doesn't have the same constraints as a Dibond support. Guaranteed result: deformation, tearing or falling. Each material requires its specific technique.
- 📏 The "approximately" in measurements : "2-3mm of difference won’t be noticeable." On a large format, this approximation generates asymmetrical constraints that progressively deform the aluminum. Millimetric precision during installation avoids destructive retouching later on. It's normal to be perfectionist about this point.
- ⚡ Rushing during assembly : "I’ll assemble everything at once, it will go faster." Each step validates the previous one and prepares the next. Skipping steps multiplies the risk of error and turns a 30-minute installation into several hours of repair. The progressive method secures each phase.
- 🎯 Neglecting the installation environment : "My plasterboard wall will hold up fine." The wall support totally conditions the success. A fragile wall compromises even the best Dibond fixing technique. Systematically check the nature of the wall and adapt your anchors accordingly. This prior verification avoids 90% of failures.
✅ Quality control system : Before each step, verify that you have the right equipment, measurements and technique. Warning signs: unusual difficulties, excessive resistance, results different from your expectations. If in doubt, take a break and check your method before continuing.
🎁 Special offer for readers
Because you took the time to inform yourself, enjoy 10% discount on your first order :
⏰ Valid 72h after reading • Applicable to all our products
Your technical questions about Dibond fixing
Allow between 15€ and 35€ of equipment depending on the size of your artwork: 15€ for a 40x60cm format, 35€ for a large 80x120cm format. This investment represents 5 to 10% of the cost of the artwork and guarantees its lifetime preservation. To optimize: buy in bulk if you have several artworks, quality hooks are kept and reused indefinitely.
The first installation takes 45 minutes to 1 hour as you discover each step. From the second one, you go down to 30 minutes. After the third, 20 minutes are enough. The learning curve is very fast because the method is logical and each step is visually validated.
Yes, but adapting the fixation anchors is crucial: molly anchors for drywall, chemical anchors for cellular concrete, metal anchors for solid concrete. The load distribution principle remains the same; only the wall anchoring changes. If you are unsure about your wall type, a test with a small drill will immediately reveal its nature.
It all depends on the extent of the damage. Minor deformations (less than 2mm) can sometimes be corrected by removing the stress and allowing the Dibond to "rest" flat for 24 hours. Significant deformations require replacement. Our experience: 70% of recent deformations resolve with the flat resting method.
No, because the flexible suspension system absorbs the natural expansion of aluminum. Unlike a rigid nail that creates stress points, the cable or rail adapts to micro-movements. Result: perfect stability even with temperature differences of 20°C. This is exactly the principle used in climate-controlled museums.


