Composez votre galerie d'art

Des tableaux qui racontent votre histoire
Code d'initiation
ART10
10% offerts sur votre première acquisition
Découvrir la collection

Hanging a painting from the ceiling or at an angle: is it possible?

Fixer un tableau au plafond ou en inclinaison : possible ou non ?
⏱️ Reading time : 8 minutes
You've just acquired this favorite artwork that makes you vibrate, but here's the thing: it’s impossible to find the perfect place for it on your already cluttered walls. You desperately look at your overloaded partitions, your living room lacking visual height, and that frustrating feeling that your work of art deserves better than a random corner.

You may have even imagined your artwork suspended from the ceiling as in contemporary art galleries, or installed at an audacious angle to create a unique perspective. But doubts immediately arise: is it really possible? Could it fall? How do you technically do it?

You've probably consulted some classic tutorials that only talk about traditional wall mounting, tested basic systems that don’t suit your creative ambitions. Result: your artwork remains stored, waiting for a solution that is slow to come.

Rest assured, this blockage is perfectly normal! Most installation guides completely ignore unconventional hanging techniques which nevertheless allow you to create spectacular atmospheres. The problem isn't your artwork or your space, but simply the lack of specialized information.

By the end of this article, you will master all the techniques to install your artwork on the ceiling or at an angle, transforming your interior into a true personalized art gallery!

Why atypical installation is revolutionizing your decor now?

Traditional wall mounting is reaching saturation in our modern interiors. With the rise of teleworking and our multifunctional living spaces, every square centimeter of wall is used: screens, shelves, mirrors... If you wait any longer, you risk seeing your exceptional artwork relegated to a closet, deprived of the attention it deserves. It's like having a diamond in a drawer!

🎨 Customer testimonial: "I had invested in a magnificent abstract canvas, but my living room was already saturated with artworks. By installing it on the ceiling above my dining table, I created a spectacular focal point that surprises all my guests. My dinners have become true artistic experiences!"

💬 Conversation with a decor expert

“I'm afraid that a ceiling artwork will give an impression of being crushed..."
Relax! It’s exactly the opposite. A suspended artwork creates a feeling of elevation and visually expands the space. It’s like opening a window to the sky in your ceiling!
“But I was told it was too risky technically..."
Who told you that? With modern fixing systems, it’s safer than a poorly done wall mounting! Art galleries have been using these techniques for decades.

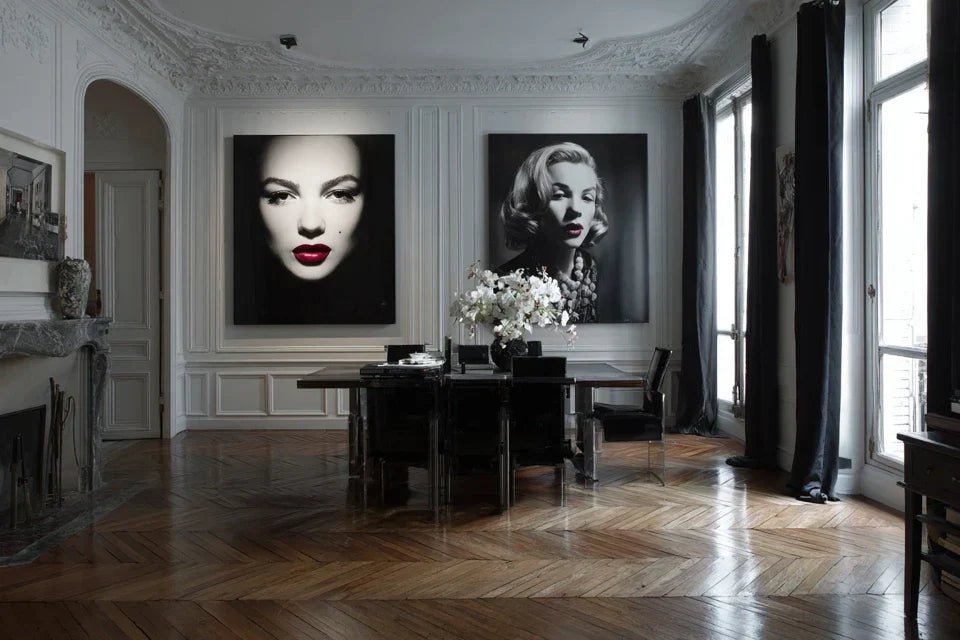
An unconventional installation transforms your space into a private gallery: By freeing your walls from the constraint of "everything at eye level", you triple your display possibilities, creating unprecedented perspectives that enhance each work. The result is visible with a single installation: your interior instantly gains character and sophistication!

What does your desire for alternative hanging really reveal?

You probably feel this underlying frustration with your saturated walls, the desire to create something unique that your friends don't have, or even the need to showcase an important artistic acquisition. Perhaps you are also looking to optimize an atypical space such as a mezzanine or staircase.

What is really happening is that your artistic sensitivity has evolved beyond conventional decorative codes. You're no longer just looking to "decorate" but to "stage" your living space. This evolution is natural among art enthusiasts who develop their critical eye.

It’s like moving from the stage of “consumer of beauty” to that of “creator of atmospheres” - an exciting transformation that simply requires the right techniques!

The first hidden cause: the illusion of technical complexity

Contrary to popular belief, installing a painting on the ceiling is not more complicated than wall hanging – it’s just different. The real difficulty lies in choosing the appropriate fixing system, not in the execution itself.

Imagine you wanted to hang a chandelier: no one questions its feasibility! For your painting, it's exactly the same principle, with specific adaptations to artistic constraints.

This revelation changes everything in your approach: instead of asking yourself "is it possible?", you focus on "which system is best suited?". Your energy channels into concrete solutions rather than paralyzing doubts.

🔍 Immediate test: Tap your ceiling in different places with a hard object. Areas that sound “full” (dull noise) can support hanging, those that sound “hollow” require a special wall anchor. You've just done your first technical diagnosis!

The second hidden cause: the myth of the "too heavy" artwork

Many think that a painting on the ceiling is automatically at risk of falling due to its weight. In reality, the distribution of forces on the ceiling can be more stable than on the wall, because gravity works along the axis of the fixing.

It’s like the difference between carrying a backpack (weight distributed on your shoulders) and holding it out at arm's length (constant tension). The ceiling “carries” the weight naturally, where the wall has to “hold back”.

This understanding frees you from the anxiety of weight so that you can focus on the quality of the fixing. Even a large-format canvas can find its place on the ceiling with the right system!

The third hidden cause: the psychological influence of perspective

We are conditioned to look at art "straight on," which leads us to neglect the emotional impact of unexpected perspectives. A tilted or suspended artwork creates a visual tension that captures attention much longer than a classic arrangement.

Observe your behavior in a museum: you stop more often in front of works presented in an original way. Your brain is naturally drawn to what is out of the ordinary.

This awareness transforms your decorative approach: you no longer seek only harmony but the controlled surprise that energizes your living spaces.

🎯 The 3 signals that your installation will be successful:

  • The space "breathes" visually: Your gaze circulates naturally in the room without snag, like a fluid dance between the elements
  • The artwork dialogues with the architecture: The painting seems "made for" this location, creating an obvious harmony between art and structure
  • The "theater effect" works: Visitors immediately notice the installation and understand the artistic intention behind your choice

The trigger: the rule of "decor three dimensions"

What really makes the difference is to exploit the three dimensions of your space instead of limiting yourself to wall surfaces. Like a professional interior architect, you orchestrate floor, walls AND ceiling to create an immersive experience. This three-dimensional approach multiplies your creative possibilities and reveals the hidden potential of each room.

The golden rule of alternative hanging: A successful installation respects the balance between visual boldness and technical safety. Immediately check by asking yourself: "Does this installation surprise without worrying?" If so, you have your winning concept!

❌ Common belief ✅ Technical reality 💡 Explanation 🎯 Practical benefit
"It's too risky to hang from the ceiling" More stable than a poorly made wall mounting Gravity works with the fixing, not against it Reinforced safety and peace of mind
"It will visually overwhelm the space" Creates a feeling of elevation and spaciousness The gaze naturally rises, enlarging the perception Spaces that appear larger and more airy
"It's too technically complicated" Simple techniques with suitable hardware Same principle as a chandelier or suspension Installation in a maximum of half a day
"My guests will find it strange" Guaranteed "wow" effect and stimulating conversations Controlled originality fascinates more than it disturbs Reputation as a connoisseur of decoration

The progressive method to succeed with your atypical installation

Rest assured, we will proceed step by step, like a master pastry chef building their cake: first the solid foundations (diagnosis and preparation), then the structure (choice and installation of fixings), finally the perfect finish (adjustments and enhancement). At each stage, you will feel that satisfaction of mastering a new skill, leading to the immense pride of contemplating your unique decorative masterpiece!

🏗️ Overview of your project: Three distinct phases lead you to success: technical analysis of your space (to secure), proper installation (to realize), and aesthetic optimization (to sublimate). Each phase brings you closer to that spectacular transformation where your artwork becomes the masterful focal point of your interior!

🔍 Step 1: Diagnosis and preparation of the space

Starting with this analysis is crucial as it determines the feasibility and installation method. It's like examining the terrain before building: this phase avoids unpleasant surprises and gives you confidence for what follows. Once completed, you will feel that satisfaction of perfectly mastering your project!

🛠️ Essential diagnostic tools

  • Electronic stud detector: Small device that "sees" within your walls to locate load-bearing structures. Available in hardware stores for 15-30€. Make sure it detects metal AND wood, as some basic models only detect metal - you would miss the wooden joists which are ideal!
  • Rotary laser level or line: Projects a perfectly straight line onto your surfaces to visualize layout. Principle: a beam that never lies, unlike the human eye. Rental 20€/day or purchase 50-80€. Recognize quality by the sharpness of the projected line - a blurry laser = approximate measurements!
  • Rigid measuring tape 5m minimum: For precise measurements in all positions, including on the ceiling. The impact: accurate dimensions avoid unsightly misalignments that spoil the desired visual effect

Let's move on to concrete action now:

🎯 Practical application of diagnosis

Map your ceiling: Pass the detector in a tight grid to locate all joists or beams. These structures are your "highways" for fixing - they support significant loads without flinching. Discreetly mark them with light pencil to keep a visual trace during installation.

⏱️ Time: 30 minutes | ✅ Successful when: You have identified at least 2-3 bearing points in your installation area | ⚠️ Attention: False ceilings made of gypsum plasterboard can hide the real structures - don't hesitate to drill a small test hole with a fine drill bit

Test the resistance in situ: On each identified point, temporarily screw in a 6cm wood screw and hang a weight equivalent to your artwork (use water bottles as ballast). This simulation immediately reveals whether your diagnosis is correct and reliable.

⏱️ Time: 15 minutes per point | ✅ Successful when: No sagging, no cracking after 10 minutes of suspension | ⚠️ Attention: If it moves even slightly, move on to the next point - it's better to be demanding now than disappointed later

Project the installation with laser: Position your laser level to visualize exactly where your artwork will be, at what height, and according to which angle of inclination. This step transforms your abstract idea into a concrete reality and allows you to adjust before permanently drilling.

⏱️ Time: 20 minutes | ✅ Successful when: The location pleases you from all angles of the room | ⚠️ Attention: Don't forget to check that no one will bump their head underneath!

Validation of step 1: Your space is perfectly analyzed, you know its strengths and constraints, and you visualize the final result precisely. If in doubt about a point, calmly re-measure - it's better to spend 10 more minutes now than to have an approximate installation. This solid foundation already gives you confidence to tackle the rest!

OUR RECOMMENDED PRODUCTS

🔧 Step 2: Installation of the fixing system

You are now moving on to the technical core of your project! This step is more rewarding because you see your installation taking shape concretely. The precision of step 1 greatly facilitates this transition to action - everything flows naturally when the foundations are solid!

🔩 Fixing system for ceiling

  • M8 or M10 metal expansion anchors: Metallic cylinders that expand into the material to create a permanent anchor. For concrete, cinder block or massive wood beam. Load capacity: 150-200kg per anchor! Recognize quality by the thickness of the metal and the brand (Hilti, Fischer, Rawl are references). Avoid low-cost plastic anchors that melt under prolonged stress.
  • 2-3mm diameter stainless steel cable: Ultra-strong and almost invisible suspension material. Stainless steel never rusts and ages beautifully. Principle: distributes weight over several points for maximum safety. The visual impact: total discretion that makes your artwork "float" in space!
  • Adjustable cable clamps and tensioners: Allow precise adjustments of height and inclination after installation. The benefit: you can fine-tune the visual effect without dismantling everything, like a precision fine adjustment

⚙️ Step-by-step installation

Precision drilling: Use a drill with a depth stop set to 6-8cm depending on your wall plug. Drill perpendicular to the ceiling, regularly removing dust to prevent jamming. The quality of the drilling determines everything - a clean hole = a durable fixing.

⏱️ Time: 5 minutes per point | ✅ Success when: The hole is perfectly round, without cracks around | ⚠️ Attention: If the drill bit gets too hot, it's forcing - let it cool down and resume intermittently

Wall plug installation: Insert the wall plug by hand until perfectly flush with the ceiling, then screw in the fixing element counting the turns for even tightening on all points. A well-placed wall plug doesn't budge a millimeter - that's your safety guarantee.

⏱️ Time: 3 minutes per wall plug | ✅ Success when: Firm resistance to the screwdriver without excessive force | ⚠️ Attention: If it spins in the void, the wall plug is not suitable for the material - change model

Suspension system adjustment: Fix the cables calculating the final desired height, keeping 10cm margin for adjustments. Test each fixing point with a progressive manual traction - your installation must be unshakable before hanging your precious painting.

⏱️ Time: 15 minutes | ✅ Success when: Stable system without parasitic oscillation | ⚠️ Attention: Check that the cables do not rub anywhere - abrasive wear is the most insidious trap

🎨 Step 3: Hanging and aesthetic optimization

You are now reaching the level of decorative mastery! This final step transforms your technical installation into a true artistic staging. The difference between a DIYer and a decorator is made here: in these details that make your painting seem to have always belonged to this space, as an aesthetic evidence!

🎭 Final Staging

Hanging and balancing: Fix your painting to the suspension system, then make millimeter adjustments of height and inclination. Observe the effect from different viewpoints in the room - your work must create a visual harmony from every angle of observation.

⏱️ Time: 20 minutes | ✅ Success when: The installation seems natural and obvious | ⚠️ Attention: Take the time for this step - it's what transforms technical prowess into decorative success

Additional lighting: Install a discreet directional lighting that reveals the nuances of your work without creating glare. A suspended painting deserves special lighting that accentuates its exceptional character and creates a gallery atmosphere in your interior.

⏱️ Time: 30 minutes | ✅ Successful when: The artwork is highlighted without parasitic shadows | ⚠️ Attention: Avoid direct lighting that can discolor some paintings - prefer indirect reflected lighting

The connoisseur's progression rule: You know your installation is perfectly mastered when it evokes admiring questions rather than security concerns. Objective criteria: perfect stability, consistent aesthetics, and that personal satisfaction of seeing your creative vision come to life. The balance between artistic ambition and technical rigor is your signature as an experienced decorator!

Congratulations! You now master the expert subtleties of alternative hanging. This skill clearly distinguishes you from amateurs and gives you that creative confidence to dare other decor innovations. You join the restricted circle of enthusiasts who truly transform their interior into a personal art space!

🎯 Professional gallery tip: For a spectacular effect, create an "eye path" by installing 2-3 artworks at staggered heights that naturally guide the eye through the space. This museum staging technique transforms your living room into an immersive artistic journey - just like in the most beautiful contemporary exhibitions!

🤔 Frequent question from our readers

"Can I install several suspended paintings in the same room without it being too cluttered?"

Excellent question that shows your developed aesthetic sense! The key is consistency of the hanging system and thoughtful spacing. Like an orchestra conductor distributing his musicians, you create a visual dialogue between your works. Limit yourself to a maximum of 2-3 pieces per space, varying heights to create a dynamic rhythm. The result: a sophisticated private gallery that reveals your artistic personality without ever tiring the eye!

🎨 Immediate harmony test: Photograph your room with and without the suspended paintings, then compare the visual impact. You will immediately notice the effect of depth and character that this installation brings to your decor!

⚠️ Pitfalls to absolutely avoid to preserve your investment

Attention, some mistakes can compromise your installation and even damage your precious work of art! These errors are tempting because they seem to simplify the process, but they create avoidable risks. Here's how to identify them and circumvent them intelligently:

  • ⚠️ Underestimating the actual weight of the entire assembly: It is tempting to calculate only the weight of the painting, forgetting the frame, the hanging system and dynamic constraints (vibrations, drafts). The consequence: undersized fixings that gradually loosen. Solution: always increase the estimated weight by 50% and test with this safety margin. This is a very common mistake among enthusiastic beginners! [HTML]
  • 🔧 Save money by using reclaimed hardware: Old cables, mismatched wall plugs or second-hand fixings are tempting from a budget perspective, but their reliability is unpredictable. Dramatic consequence: your artwork falls and suffers irreparable damage. Smart alternative: invest in the fixing hardware (€20-50) to protect your painting which is often worth 10 times more! Even professionals will tell you it's false economy.
  • 📏 Neglecting the impact of humidity on fixings: It seems logical to install first and then worry about maintenance later, but humidity (kitchen, bathroom) gradually alters metal fixings. Sneaky result: invisible corrosion that weakens the whole thing. Effective solution: use marine stainless steel exclusively in damp rooms and check the condition of the fixings annually. This preventative vigilance avoids unpleasant surprises!
  • 🎨 Installing without testing natural lighting: The desire to quickly see the final result leads to installation without observing daily light variations. Vicious trap: annoying reflections at times of high brightness or shaded areas that dull the artwork. Preventative solution: observe your location at different times of the day before permanent installation. This initial patience guarantees you lasting visual pleasure!
  • 🏠 Ignoring the specifics of your type of habitat: Every construction has its constraints: old houses with irregular beams, modern apartments with false ceilings, wooden constructions with expansions... Classic mistake: applying a universal solution without adaptation. Winning approach: first identify your type of construction and then adapt the method accordingly. Even experienced DIYers can stumble on this specificity!

🛡️ Monthly verification system: Visually check the condition of the fixings (no signs of corrosion, no play in the wall plugs), test stability by applying slight lateral pressure to the frame, check alignment which may reveal progressive sagging, and monitor cables that should show no fraying. Warning signs: cracking noises, abnormal oscillations when passing, traces of rust or visible deformation of fixing elements.

🎨 Discover all our wall art collections

🎁 Special offer for readers

Because you took the time to inform yourself, enjoy 10% discount on your first order:

ART10

⏰ Valid 72 hours after reading • Applicable to all our products

❓ Frequently asked technical questions about alternative hanging

💰 What budget to plan for a professional installation of suspended painting?

Expect to spend €50-120 for materials depending on complexity: €20-40 for basic fixings, €15-30 for the suspension system, and €15-50 for optional accent lighting. To optimize your costs, group your purchases in hardware stores and prioritize professional brands that guarantee durability. A concrete example: for an 80x60cm (32x24in) artwork weighing 8kg (17.6lbs), budget €65 for impeccable installation that will last decades!

⏱️ How long does it really take to master this technique?
A first installation takes 3-4 hours (including assessment), subsequent installations will only take 2 hours once the method is assimilated. The learning curve is rapid as gestures are repeated. Efficiency tip: start with a light artwork (less than 5kg/11lbs) to gain confidence, then move on to more ambitious pieces. After 2-3 installations, you develop this technical intuition that makes the difference between an amateur and a connoisseur!

🏠 My apartment is rented, can I still install an artwork on the ceiling?
Excellent question from a responsible tenant! Technically yes, but with precautions: use quality wall plugs that come out cleanly, photograph the initial condition, and keep a pot of retouching paint. Negotiate with your landlord by presenting your project as a temporary aesthetic enhancement. Alternative solution: tension systems between wall and ceiling that require no drilling but are suitable for light artworks only.

🎨 What types of artworks best suit suspended hanging?
Abstract and contemporary works excel in this presentation as they naturally interact with the architectural space. Recommended formats: 50x70cm (20x28in) to 100x150cm (39x59in) for optimal impact without visual clutter. Avoid canvases with very textured surfaces that accumulate dust horizontally, and prioritize light frames (aluminum, thin wood) which lighten the overall look. Aesthetic rule: the more graphic and refined the artwork is, the more spectacular the suspended effect will be!

🔧 How do I adapt the technique for a very hard concrete ceiling?
Reinforced concrete requires professional equipment but identical technique: percussion drill is mandatory, tungsten carbide masonry drill bits, chemical anchors for heavy loads (type Hilti). Drilling time multiplied by 3-4, but the result is indestructible! Pro tip: drill in successive passes of 2cm (0.8in) to avoid excessive overheating. Equipment investment: €80-100 renting tools, but you get a fixing capable of supporting 200kg/440lbs per point - definitive!

🌟 Your transformation into an exceptional decorator is complete!

In a few weeks, when your friends discover your spectacular installation, you will feel that immense pride of the creator who dared to go off the beaten path. Your living room will no longer be just a living space but a true private art gallery that tells your unique aesthetic sensibility. This transformation goes far beyond simple decoration: you have gained that creative confidence that allows you to consider other ambitious projects!

This technical mastery opens the doors to a professional decorative approach: you now know how to analyze a space in three dimensions, calculate loads, anticipate structural constraints. These transferable skills enrich your overall vision of layout and give you the peaceful assurance of an expert who masters their art.

Now that you understand the fundamental principles, your first step will be to look at your ceiling with new eyes - you will already see the creative possibilities available to you! This revelation marks the beginning of your adventure in avant-garde decoration. Start today: your exceptional painting is waiting for that exceptional frame that only you can offer it!

🚀 Your decorative signature awaits you: You now have all the keys to create this unique installation that will be the pride of your interior and the admiration of your loved ones. The most difficult thing - understanding and mastering the technique - is behind you. All that remains is to realize your artistic vision to join the circle of true lovers of contemporary art!

Read more

Peut-on fixer un tableau sur du papier peint ou un revêtement mural ?
Pourquoi éviter les clous classiques pour les tableaux en alu Dibond ?