

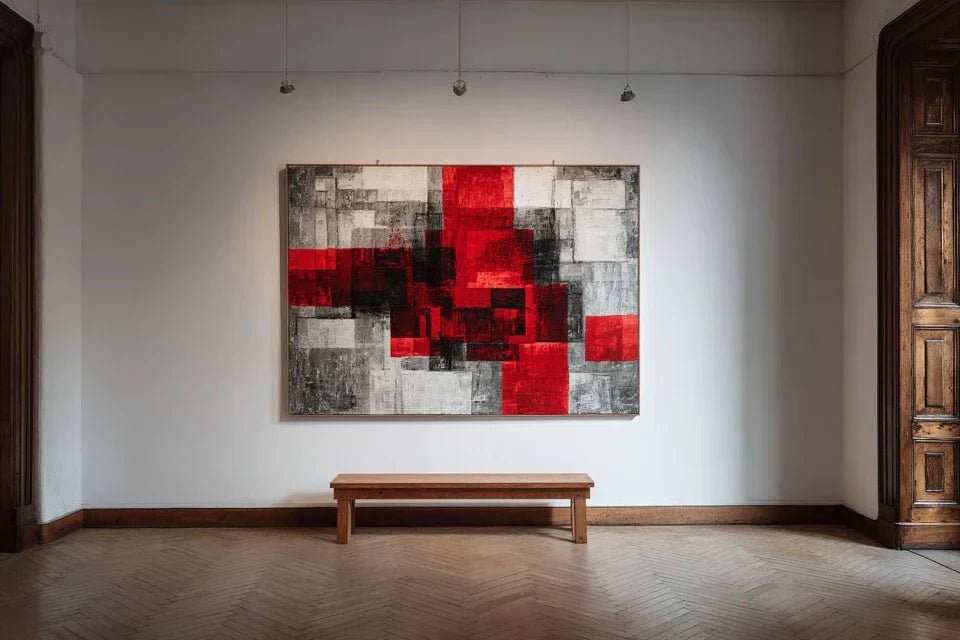
You just bought that magnificent artwork you've been longing for weeks. You can already imagine it enhancing your living room, creating the cozy atmosphere you dreamed of... But here's the thing: as soon as you think about hanging it, anxiety creeps in. What if the nail isn't strong enough? What if your artwork falls to the floor in the middle of the night?
This underlying fear of seeing your artistic investment end up in pieces paralyzes you. You’ve been circling your painting for days, oscillating between wanting to enjoy its beauty and being terrified of messing it up.
You may have already tried your luck with a simple tack or reinforced picture hook. The result? Unsightly holes in the wall, sleepless nights worrying about the slightest creak, and this persistent feeling that your artwork isn't secure.
Don’t blame yourself: the problem is that you’ve been led to believe that one type of hanging system suits all artworks. It’s like trying to wear the same coat in summer and winter: it simply can't work.
By the end of this article, you will know exactly which hanging system to choose according to the weight of your artwork, and you can finally sleep soundly admiring your perfectly secured piece on your wall.
Why is choosing the right hanging system so crucial for your artworks?
Imagine building a house on foundations unsuitable for the terrain. For a few months, everything seems to hold. PThen one day, everything collapses. That's exactly what happens with a poorly chosen fixing: it can last weeks before it suddenly gives way, often when you least expect it.
🏠 Customer testimonial: "I had hung my favorite canvas with a simple adhesive hook. Three months later, I found it on the floor one morning, the frame cracked. I realized that saving 3 euros on the fixing had cost me 200 euros of artwork."
💬 Conversation with a decor expert
The golden rule of secure hanging: Your fixing must be able to support 3 times the actual weight of your artwork. This safety margin guarantees you total peace of mind, even during slight tremors due to passing or slamming doors.
Understanding What Lies Behind Your Hanging Hesitations
Have you been hesitating to hang your artwork for weeks? Do you keep going back to the hardware store without ever buying the right materials? Do you ask three different people for advice and get three contradictory answers?
This paralysis has nothing to do with your manual skills. It comes from the fact that no one has ever explained to you the simple logic that governs the choice of a fixing. They give you technical solutions without explaining why they work.
It's like being given a cooking recipe without being told why certain ingredients pair well together. As a result, you apply blindly, without understanding or adapting.
First Revelation: Weight Isn’t the Only Important Criterion
Everyone focuses on the weight of the artwork, but that overlooks a crucial detail: the distribution of that weight. A 5 kg artwork with a single hanging point exerts a different constraint than the same artwork with two hanging points.
Imagine carrying a 10 kg bag: with a single handle, your shoulder hurts. With two handles distributed, the same weight becomes comfortable. Your wall works exactly the same way.
This discovery will transform your approach: instead of looking for the "perfect" fixing, you'll learn to intelligently distribute the load to secure even your heaviest artworks.
✋ Quick test: Lift your artwork with one hand in the center, then with two hands on the sides. You immediately feel the difference! Your wall feels it too.
Second Revelation: Your Wall Type Changes Everything
They sell you "universal" fixings, but the truth is that a concrete wall and a plasterboard partition don't react at all the same way to constraints. It’s the difference between planting a stake in cement and in sand.
Your modern plasterboard partition may seem solid to the touch, but it can only support a fraction of the weight that a load-bearing wall could handle. Hence these unexplained failures with fixings supposedly "designed for 15 kg".
Consequence: you lose confidence in your abilities while the problem comes from the initial misdiagnosis. Once you know how to identify your wall type, choosing the right fixing will become a piece of cake.
Third Revelation: The Quality of the Material Makes All the Difference
You think you’re saving money by buying the cheapest hanging kit? In reality, you're taking a huge risk. The price difference between a low-end fixing and a quality fixing is often less than the price of a coffee... to secure an artwork that cost you ten times more!
A low-quality hook can deform under load, even if it remains within the announced limits. You won’t see it, but your artwork will move imperceptibly until metal fatigue causes breakage.
Result: you’re living with a sword of Damocles hanging over your head, without even realizing it. Investing just 5 euros more in professional-grade hardware guarantees decades of peace of mind.
🔍 The 3 warning signs of poor-quality fixings:
- The metal bends easily under finger pressure: Sign that the alloy is too soft and will deform under load The finish has imperfections or burrs: Indicator of a rushed manufacturing process that affects strength The packaging doesn't mention any European standards: Absence of certification guaranteeing mandatory resistance tests
The Trigger: Understanding Dynamic Load
Here’s what nobody tells you: your artwork is never perfectly still. Footsteps, air currents, wall expansion create constant micro-movements. It's this dynamic load, invisible but real, that causes premature fatigue of undersized fixings.
The safety factor rule: Always multiply the weight of your artwork by 3 to choose your fixing. This margin absorbs dynamic stresses and guarantees absolute security for years.
| ❌ Misconception | ✅ Reality | 💡 Why | 🎯 Practical Benefit |
|---|---|---|---|
| A nail is enough for small artworks | Even 2 kg requires a suitable fixing | Vibrations amplify stresses | Zero risk of unexpected falls |
| The more expensive it is, the stronger it is | You must first identify your wall type | Each wall has its own technical specifications | Guaranteed savings and efficiency |
| Universal fixings exist | Each weight requires its solution | Physics doesn't compromise | Optimal security for each artwork |
| You can improvise with available materials | Only suitable hardware guarantees safety | Standards exist for good reasons | Complete peace of mind |
The progressive method for choosing your hanging system
Now that you understand the stakes, let’s move on to practice with a simple and safe method. Like an architect who starts by analyzing the terrain before drawing up plans, we will proceed step by step. At the end, you'll know exactly what to buy and how to install it for maximum safety.
🎯 Your action plan in 3 steps: First identify the weight and wall type (the foundations), then choose the appropriate fixing (the structure), finally install correctly (the finishing). Each step brings you closer to the perfect solution for your situation.
Step 1: Determine precisely the weight and analyze your wall
This initial step is crucial as it dictates everything else. Like a doctor who makes a diagnosis before prescribing, we need to know exactly your situation. An error here compromises the entire process, but if done well, it will give you total confidence for the following steps.
What you'll need for this assessment:
- A precise kitchen scale: The one you use in baking will do perfectly well. It will give you the actual weight to the gram, much more reliable than visual estimates. Avoid bathroom scales which lack precision for light objects.
- A material detector (optional but recommended): This tool reveals the hidden structure of your wall by detecting metal studs or beams. Available for less than 20 euros, it will prevent you from drilling into empty space and transform your hanging into a true professional installation.
- A drill with suitable drill bits: Essential to test the hardness of your wall. A concrete drill bit that struggles to enter reveals a solid load-bearing wall, while a wood drill bit that easily passes through indicates a plasterboard partition.
Now let's move on to practical action:
Weighing and analysis of your artwork:
Complete weighing with frame and protection: Place your entire painting on the scale, including the frame, protective glass and hanging system already in place. This measurement represents the actual load that your wall mounting will have to support. Note this weight precisely as it will determine all your subsequent decisions.
⏱️ Time: 2 minutes | ✅ Successful when: You obtain a stable weight within 50g | ⚠️ Attention: Don't forget to include protective elements like the glass, which is often heavier than the canvas itself
Wall percussion test: Lightly tap your wall with the joints in different places around the hanging area. A hollow sound indicates a plasterboard partition, a dull sound reveals a concrete or cinder block load-bearing wall. This difference is crucial as it divides by 3 the admissible load of your standard fixings.
⏱️ Time: 3 minutes | ✅ Successful when: You clearly identify the type of material | ⚠️ Attention: Mixed walls exist: one area may be in plasterboard and the other in concrete depending on the construction
Available thickness measurement: With a thin metal rod or straightened paperclip, sound delicately into an existing small hole (disconnected electrical outlet) to assess the thickness of your partition. This information determines the minimum length of your fixings and avoids unpleasant surprises when drilling.
⏱️ Time: 5 minutes | ✅ Successful when: You know the thickness within 1 cm | ⚠️ Attention: Modern partitions may hide electrical conduits, be delicate in your probes
🎯 Step 1 Validation: You must know the exact weight of your artwork, the type of wall (load-bearing/partition) and its approximate thickness. These three data points form your "technical identity card" which will guide you infallibly to the right solution. If in doubt, repeat the tests: it's better to spend 10 more minutes now than regrets later!
OUR RECOMMENDED PRODUCTS
Step 2: Select the fixing according to the weight
Now that you know your situation perfectly, we are getting to the heart of the matter: choosing THE fixing that will guarantee the safety of your artwork. This step is more rewarding because you will finally see a concrete solution taking shape. You will feel the satisfaction of the puzzle coming together!
Selection guide by weight ranges:
- Light artworks (less than 2 kg): Professional quality self-adhesive hooks or 30mm nail hooks with a large head. These solutions offer the advantage of simplicity while guaranteeing perfect hold. Absolutely avoid low-cost adhesive hooks that lose their stickiness with humidity and temperature variations. Medium artworks (2 to 5 kg): 6mm nylon wall plugs with countersunk screws, or specialized picture hooks with reinforced anchoring. These fixings distribute the load better and adapt to most walls. For plasterboard partitions, prefer toggle anchors that open behind the partition for maximum grip. Heavy artworks (5 to 10 kg): Double fixing with expansion metal wall plugs or professional hanging rail. At this weight, safety requires a load distribution over at least two points. Rails also allow you to horizontally adjust your artwork after installation. Very heavy artworks (more than 10 kg): Fixing system on load-bearing beams is mandatory, with metal brackets or stainless steel cable system. These installations require precisely locating the structural elements of the wall for anchoring in the solid. Provide a safety factor of 4 for this type of load.
Installation according to your wall type:
Concrete/blockwork load-bearing wall: Use a concrete drill bit of the appropriate diameter for your wall plug, drill at slow speed to avoid overheating. The dust that comes out should be gray and fine. Push your wall plug flush with the wall, never deeper. The screw must resist when you try to unscrew it by hand.
⏱️ Time: 10 minutes per point | ✅ Successful when: The fixing does not move a millimeter when you pull on it | ⚠️ Attention: A drilling that easily goes through can indicate a mortar joint, shift a few centimeters
Standard plasterboard partition: Locate the metal studs with your detector or by tapping. If you need to pass between the studs, use only special plasterboard toggle anchors. Do not overtighten: the partition could deform and weaken the fixing.
⏱️ Time: 15 minutes per point | ✅ Success when: The anchor no longer turns in its housing | ⚠️ Attention: If the drill sinks too easily, you may be in the insulation, not in the plasterboard
Mandatory load test: Before hanging your artwork, test your fixing with an equivalent weight (water bottles, books...). Leave the load for 30 minutes and check that no movement appears. This step will give you complete confidence and reveal any defects before it is too late.
You are now at the most rewarding moment: seeing your artwork take its definitive place in your interior! At this stage, you have complete mastery of your technical situation. This final step transforms your meticulous preparation in a visible and lasting result. Your surroundings will be impressed by the professional quality of your installation.
Finishing and precision adjustments:
- Professional spirit level: A minimum 60 cm (24 inch) spirit level guarantees perfect horizontality even on large canvases. Short levels can be misleading on slightly warped walls. Invest in a three-bubble model to also control verticality during complex installations.
- Tape measure and pencil: To accurately mark the fixing points and check distances. A metal tape measure deforms less than a flexible one and gives more reliable measurements for long distances. The pencil erases easily after installation.
- Construction vacuum or broom: To immediately clean up drilling dust that could stain your wall or floor. This attention to detail makes the difference between an amateur job and a professional finish.
Final installation process:
Marking and pre-positioning: Mark the desired location of your artwork with a pencil, using the spirit level. Measure the distance between the hanging points on the back of the artwork and transfer it exactly to the wall. Check three times before drilling: correcting a bad hole always costs more than taking your time.
⏱️ Time: 15 minutes | ✅ Success when: Your marks are perfectly aligned and at the correct distances | ⚠️ Attention: Take into account the standard eye height (160 cm from the floor to the center of the artwork) for optimal visual comfort
Final hanging and checks: Gently hang your artwork, starting with one side, then the other. Immediately check for levelness and make micro-adjustments. Test stability with slight movements: your artwork should return naturally to its position without oscillating.
⏱️ Time: 10 minutes | ✅ Success when: The artwork is perfectly horizontal and stable | ⚠️ Attention: A slightly tilted artwork often reveals a fixation that is starting to give way, check immediately
The rule of evolutionary installation: Always plan your fixings for a weight greater than your current needs. Your artistic tastes evolve, and you will be able to change artwork without redoing the installation. A well-thought-out fixing lasts decades and adapts to all your future artistic crushes.
You now master the fundamentals of secure hanging! But a few expert subtleties can transform your correct installation into a true professional success. These details make the difference between "it holds" and "it's perfect".
🎖️ Pro tip - Revealing lighting: Turn on all your light sources before final hanging. Reflections and shadows reveal alignment defects invisible in natural light. A perfectly straight artwork under one lighting can appear tilted under another. This check avoids 90% of subsequent readjustments.
🤔 "Can I trust the seller's weight indications?"
“My frame indicates 3 kg but I’m afraid it might be heavier in reality...”
Your suspicion is justified! Sellers often round down to reassure, and the weight can vary depending on humidity (old canvases) or repairs (putties, reinforcements). Personal weighing remains the only reliable way to know the actual load. Furthermore, you control the evolution of the weight if you change frame or add protection. This habit will give you expertise that even professionals will respect!
💡 Quick trust test: Weigh a painting whose theoretical weight you know. The difference will reveal the usual error coefficient and calibrate you for all your future purchases.
The traps to absolutely avoid during your installation
After supporting hundreds of art lovers in their installations, I have identified the recurring errors that can turn your project into a nightmare. These traps are insidious because they only reveal themselves weeks after installation, when it is too late to act easily.
- ⚠️ Beware of "universal" anchors: These marketing products promise to hold in all walls, but physics knows no miracles. On drywall, they lose 70% of the advertised pulling strength. The result? A false sense of security that can cost a lot. Always prefer a specialized anchor: drywall, concrete, or brick.
- ⚠️ Neglecting the lever effect: A painting far from the wall (frame relief, suspension cable) multiplies stresses by distance. 5 cm of clearance can double the force on your fixing. That's why large antique paintings with thick frames are more likely to come off than modern flat canvases.
- ⚠️ Reusing old holes: A hole widened by a previous fixing loses 50% of its holding capacity. Even if your new anchor seems to hold well, vibrations will gradually enlarge the opening. Always move at least 10 cm or properly fill and re-drill.
- ⚠️ Installing during climatic variations: Materials work differently depending on humidity and temperature. Hanging in very dry weather can loosen with the first autumn rains. Avoid installation in extreme cold (reduced dilation) or high humidity (swollen materials).
- ⚠️ Forgetting preventive maintenance: A perfect fixing today can degrade over time. Urban vibrations, thermal variations, material aging create invisible wear. Schedule an annual check: a few minutes that can prevent irreparable damage.
🛡️ Your monthly safety checklist: Check that your painting does not move when you vacuum nearby, is there no trace of rust or deformation on the fixings, that the wall around the anchor points shows no micro-cracks, and that your painting remains perfectly horizontal. A defect detected early is easily corrected, a collapse is difficult to repair.
🎁 Special readers offer
Because you took the time to inform yourself, enjoy 10% discount on your first order:
⏰ Valid 72h after reading • Applicable to all our products
Frequently asked questions about hanging paintings
With the detailed method above, your first installation will take about 2 hours (including diagnosis). From the second artwork, you'll reduce that time to 45 minutes. After 5 installations, you’ll work like a professional and finish in just 20 minutes. The investment of time pays off very quickly and gives you complete autonomy for all your future arrangements.
Absolutely! This technique requires no particular skills, just precision and methodology. It's more like cooking than DIY: follow the recipe step by step and the result is guaranteed. More than 80% of our readers succeed on their first try, even without ever having held a drill. The key? Take your time and don’t skip any steps.
Old apartments often have more solid walls (stone, solid brick) that can better support heavy loads. Your main challenge will be to identify the exact nature of your wall as successive renovations can mix several materials. The percussion test becomes even more important: take the time to "map" your wall before any intervention. Once the diagnosis is made, installation will be even more reassuring than in new construction!
Round, triangular or very large format artworks follow the same physical principles but require adapted load distribution. Golden rule: the more original the shape, the more points of attachment you need. A 6 kg round artwork will need 3 hanging points in a triangle, while a panoramic format will require a suspension rail. The weight remains your main guide, but geometry influences distribution.
Your transformation into a wall-hanging expert is complete
In a few weeks, when your friends admire your artworks perfectly installed, you will feel that discreet pride of mastering a solid technical know-how. No more stress of approximate hanging, make way for the confidence of someone who knows exactly what they are doing. Your interior gains credibility, and you sleep soundly knowing your works are perfectly safe.
This expertise goes beyond simply hanging pictures: you've learned to analyze a technical problem, to identify the real constraints, and choose the right solution. These skills naturally transfer to all your future decorating projects, from shelves to lighting fixtures to mirrors. Your confidence in DIY will blossom gradually.
Now that you have all the keys, the hardest part is behind you. Start by weighing your first picture and identifying your wall type. This initial analysis will give you the momentum needed to take action. In 2 hours, you'll contemplate your perfectly hung artwork with the satisfaction of a job well done!
🚀 Your next step: Choose the picture you've been putting off hanging for the longest time. It’s waiting for its moment of glory on your wall! With your new expertise, transform this hesitation into a brilliant success that will impress everyone around you.


