

You've just splurged on a stunning new piece of art that will transform your living room, but one question is nagging at you: do you need to drill new holes in your perfectly repainted wall, or can you use the existing fixings from your old picture?
This hesitation has been eating away at you for weeks. You can already visualize your new artwork illuminating your space, but the thought of drilling into your wall again is discouraging. Between the dust from drilling, the paint touch-ups, and the risk of misplacing the new fixings, you keep putting off this decorating project.
You may have tried to roughly measure the location, or looked for universal fixings, but nothing really reassures you. This uncertainty prevents you from fully enjoying your artistic acquisition.
Rassurez-vous, this frustration is perfectly normal and doesn't reflect your decorating skills at all. The real reason for this confusion? Most guides talk about installing pictures, but never about intelligently reusing existing fixings.
By the end of this article, you will know exactly how to safely reuse your existing wall hooks, and you'll even discover pro tips for optimizing the hanging of your new artwork without drilling a single extra hole.
Why is this question becoming so crucial now?
In a world where sustainability and the circular economy are gaining importance, reusing existing fixings isn't just a practical matter anymore; it’s become a thoughtful approach. Imagine: avoiding new holes, preserving the integrity of your walls, and installing your artwork in minutes instead of hours. It's exactly like reusing a solid foundation to build a new house!
🏠 Customer testimonial: "I moved into an apartment with 6 fixing holes in the living room. Instead of filling them and making new ones, I chose my new pictures based on these locations. The result? A perfect hanging in 15 minutes and total harmony in the room!"
💬 Conversation with a decorating expert
The golden rule of smart reuse: A well-installed wall mounting can support several generations of paintings, provided that weight limits are respected and the hanging system is adapted. You will get a flawless result in less than 30 minutes!
Let's discover what really blocks you in this approach
Three situations surely speak to you: you stare for a long time at the old mounting holes wondering if they are still solid, you hesitate in front of your new painting imagining that it necessarily requires a specific system, or you postpone installation for fear of making an irreversible mistake.
These doubts do not reflect your incompetence, but rather the lack of clear information on compatibility of hanging systems. The reality? Most wall mountings follow industrial standards designed to facilitate exactly what you want to do.
It's like a set of keys: even if they seem all different, they use the same basic mechanical principles. Your concern comes from the fact that no one has explained these universal mounting codes to you.
🔍 The first truth about hanging systems
Contrary to what many think, there are only four main types of wall mountings for paintings, and they are designed to be interchangeable. The decoration industry has standardized these systems to avoid exactly the problem you are encountering.
Imagine the mountings as A4 paper formats: regardless of your printer brand, the paper always adapts. Painting and mounting manufacturers follow the same logic of universality.
This standardization completely transforms your approach: instead of looking for the perfect mounting for YOUR painting, you will simply identify the type of existing system and check compatibility. It's a change in perspective that makes everything much simpler.
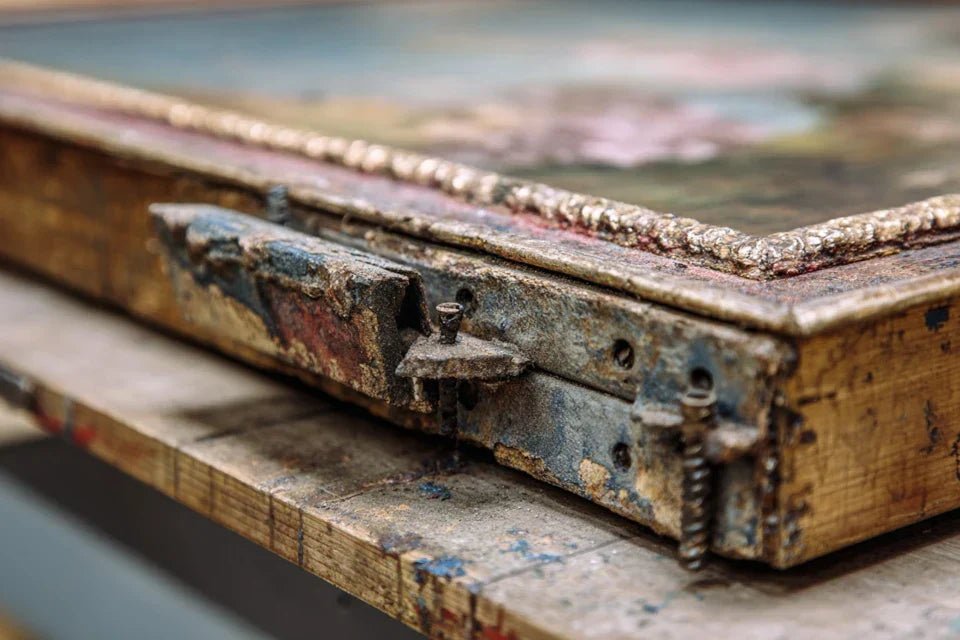
🧪 Quick test: Look at the back of your new painting. You will see either a metal cable, or D rings, or a horizontal bar, or notches. Now observe your wall mountings: they necessarily correspond to one of these four systems!
🔧 The second truth about the strength of mountings
Many believe that a mounting ages and loses its solidity over time. In reality, a quality wall mounting installed correctly even becomes more stable with years, as it "becomes one" with the wall.
It's like a tree developing its roots: the longer it stays in place, the stronger the anchorage. The only enemies of a mounting are excessive humidity and repeated vibrations.
This reality changes everything: instead of distrusting old mountings, you can trust them and even consider them as more reliable than new ones. Your energy will be better used to check compatibility than to doubt solidity.
⚖️ The third truth about weight and balance
The most overlooked factor in fastener reuse? Weight distribution rather than total weight. A 3 kg painting that is poorly balanced can be more problematic than an 8 kg painting perfectly centered.
You can easily check this by observing the wear marks around your existing fasteners. If they are uniform and discreet, it's a sign of a well-balanced system that can accommodate your new artwork.
This knowledge frees you from weight anxiety: focus on balance and adapting the hanging system, and you will achieve a professional result without any risk.
🎯 The 3 green signals for carefree reuse:
- Fastener stable to the touch: It doesn't move when you apply slight pressure - it’s like testing the solidity of a door handle
- No rust or deformation: The metal retains its original shape - a sign that the previous load was appropriate
- Wall without cracks around the fastener: The anchor is healthy and can support a new painting of equivalent weight
🚀 The trigger element: compatibility of the hanging system
The real secret to successful reuse lies not in the brand of the fastener, nor in the age of the artwork, but in adapting the rear hanging system. It's a positive domino effect: once this compatibility is ensured, everything else follows naturally. You will recognize this compatibility by observing that the hanging system of your new painting naturally "fits" your existing fasteners.
The universal rule of compatibility: If your new painting and the old one have similar hanging systems and equivalent weight (± 30%), reuse is not only possible but recommended. Test by gently approaching the painting to the fastener.
| ❌ Common belief | ✅ Reality on the ground | 💡 Why this difference | 🎯 Practical advantage |
|---|---|---|---|
| You have to change fasteners for each new painting | Quality fasteners serve several successive paintings | Standardization of hanging systems in the industry | Installation in 15 minutes instead of 2 hours |
| Old fasteners are necessarily fragile | They strengthen with time if properly installed | Mechanical anchoring improves through stabilization | Superior reliability to new fasteners |
| Each painting requires specific fasteners | 4 types of systems cover 95% of needs | Manufacturers' desire to simplify installation | Choice of paintings without technical constraints |
| Total weight determines compatibility | Distribution and balance are prioritized | Physics of forces: distribution > absolute mass | Optimal safety even with heavier paintings |
The progressive method to successfully reuse your fasteners
Now that you understand the mechanisms, let's move on to practice with a reassuring and methodical approach. Just like building flat-pack furniture, we will proceed step by step, checking each point before moving on to the next. At the end, you will have the satisfaction of having installed your artwork like a professional, without stress or error.
🎯 Method overview: Three logical steps like preparing a successful dish - first the analysis of ingredients (assessment), then preparation (adaptation), finally cooking (installation). Each step brings you closer to the final result: your artwork perfectly hung safely.
🔍 Step 1: Intelligent assessment of what exists
Starting with this step avoids unpleasant surprises and gives you confidence for the rest. It's like examining foundations before building: this analysis allows you to make the right decisions. Once this assessment is complete, you will feel an immediate sense of relief as you will know exactly where you are going.
🧰 What you need for assessment
- A measuring tape: Choose a metal model of at least 3 meters - it remains rigid for vertical measurements and will give you measurements accurate to the millimeter. Flexible fabric tapes distort measurements over short distances. Investing in a good measuring tape transforms the precision of your future decor projects.
- A small flashlight or your phone: Direct lighting reveals details invisible to the naked eye - micro-cracks, signs of wear, perfect alignment of fixings. This is your diagnostic tool that makes the difference between an amateur and a connoisseur. Good lighting gives you confidence in your observations.
- A pocket spirit level: Even a small 20 cm level is sufficient - it detects imperceptible deviations that would impact the final aesthetics. It's the assurance that your new artwork will have the elegance of a professional hanging.
Let's move on to the practical inspection of your fixings now
🔎 Methodical inspection in 3 steps
Stability test by touch: Apply gentle but firm pressure on each fixing, pushing it in different directions. A healthy fixing should have no play or movement. This check instantly reveals the condition of the anchor in the wall - your first indicator of reliability.
⏱️ Time: 2 minutes per fixing | ✅ Successful when: No perceptible movement, clear metallic sound when tapped | ⚠️ Attention: Slight play may indicate a dowel that is working - normal after a few years, but check that it does not worsen
Measurement of the distance between fixings: Measure the exact distance between your existing fixings (center to center). This measurement determines whether your new artwork can be adapted without modification. Note this distance precisely - it becomes your reference for all future art purchases.
⏱️ Time: 3 minutes | ✅ Successful when: Measurement noted to the millimeter, checked twice | ⚠️ Attention: Always measure between the centers of the fixings, not between the edges - a common mistake that throws off the entire process
Identification of fixing type: Observe the shape and mechanism of your wall fixings. Photograph them in good lighting - this image will serve as a reference when you make purchases or searches. Each type has its own usage specifics and advantages.
⏱️ Time: 1 minute | ✅ Successful when: Type identified and clear photo taken | ⚠️ Attention: Do not confuse a simple hook with a safety hook - they do not have the same load capacity
✅ Validation of step 1: Your fixings are stable, you know their precise pitch and type. If one of the checks reveals a minor problem, don't panic - most are easily correctable. You are now ready to move on to analyzing your new artwork!
OUR RECOMMENDED PRODUCTS
🎨 Step 2: Analyzing the compatibility of your new artwork
Now that you have mastered your existing setup, let's discover the secrets of your new artwork. This step reveals the hidden information that determines the success of the installation. This is where you develop your expert eye and understand why some hangings are perfect and others approximate.
🔧 Analysis tools for your artwork
- A kitchen scale: To weigh your artwork precisely - the actual weight often differs by 20% from the estimated weight. A precise scale to the gram avoids dangerous approximations. This is the most critical technical information for safety. Your measuring tape: To measure the pitch of the rear hanging system and verify compatibility with your wall fixings. This double measurement (wall + artwork) instantly reveals the feasibility of the project.
📏 The technical analysis in 2 crucial checks
Weighing and load evaluation: Weigh your artwork and compare this weight to the capacity of your existing fixings (usually indicated on the original packaging or estimable according to the type). Apply a safety margin of 30% - if your fixings support 10kg, limit yourself to a maximum of 7kg.
⏱️ Time: 5 minutes | ✅ Successful when: Exact weight known and compatible with safety margin | ⚠️ Attention: Never neglect the weight of the frame - it can double the weight of the artwork alone
Hanging hole spacing verification: Measure the distance between your artwork's hanging points. This measurement must correspond exactly (±2mm) to the spacing of your wall fixings. This is an absolute compatibility criterion - without a perfect match, installation will be impossible or dangerous.
⏱️ Time: 3 minutes | ✅ Success when: Hole spacings identical within 2mm | ⚠️ Attention: Always measure on a flat-laid artwork – the perspective standing distorts measurements
🔧 Step 3: Expert and Secure Installation
You've reached the long-awaited moment: the actual installation. Having completed your thorough analysis, you will proceed with the precision of a professional. This final step will give you immense satisfaction - that of perfectly mastering your wall decor project.
🎯 The Professional Installation Sequence
Positioning and dry run: Gently bring your artwork close to the fixings without forcing, just to check for perfect alignment. This step reveals the micro-adjustments necessary before final hanging. It's your dress rehearsal that guarantees an impeccable result.
⏱️ Time: 5 minutes | ✅ Success when: Perfect alignment without force | ⚠️ Attention: Never force - if it resists, double-check your measurements
Hanging and safety test: Hang your artwork by applying gentle but firm pressure to properly engage the hanging system. Then perform a stability test by slightly moving the artwork in different directions. It should be perfectly stable with no play.
⏱️ Time: 3 minutes | ✅ Success when: Artwork stable, perfectly level | ⚠️ Attention: An artwork that leans slightly often reveals a fixing that is not well anchored - to be monitored
Final verification and adjustments: Step back 2 meters and observe the whole. Check the level with your spirit level and the visual harmony with the rest of the room. This final step refines the aesthetics and confirms the success of your installation.
⏱️ Time: 5 minutes | ✅ Success when: Artwork perfectly horizontal and aesthetically harmonious | ⚠️ Attention: The eye detects deviations invisible to level - first trust the level then adjust according to your perception


