

You’ve just discovered that your favorite artwork has ripples on the edges, or worse, that it starts to warp in the center. This piece that perfectly illuminated your living room now seems to be slightly sagging, and you feel that familiar pit in your stomach: "Is my artwork ruined?"
You observe these unpleasant little waves that break the harmony of your wall decor. Anxiety rises: how much will it cost to have it restored? Should you take it down immediately? Has humidity permanently damaged your artistic investment?
You may have already tried to reposition it in another room or adjust the heating, but the deformations persist. You wonder if you chose the wrong location, if the quality wasn't up to par, or if it’s simply fate.
Rassurez-vous : an artwork that sags due to humidity is not necessarily doomed. In 80% of cases, these deformations are reversible with the right techniques. The problem rarely comes from the quality of the artwork, but rather from a temporary environmental imbalance.
By the end of this article, you will know exactly how to diagnose the level of damage, apply the right recovery techniques, and above all definitively prevent this problem to protect all your wall artworks.
Why does humidity transform your artwork into an unwanted “artistic wave”?
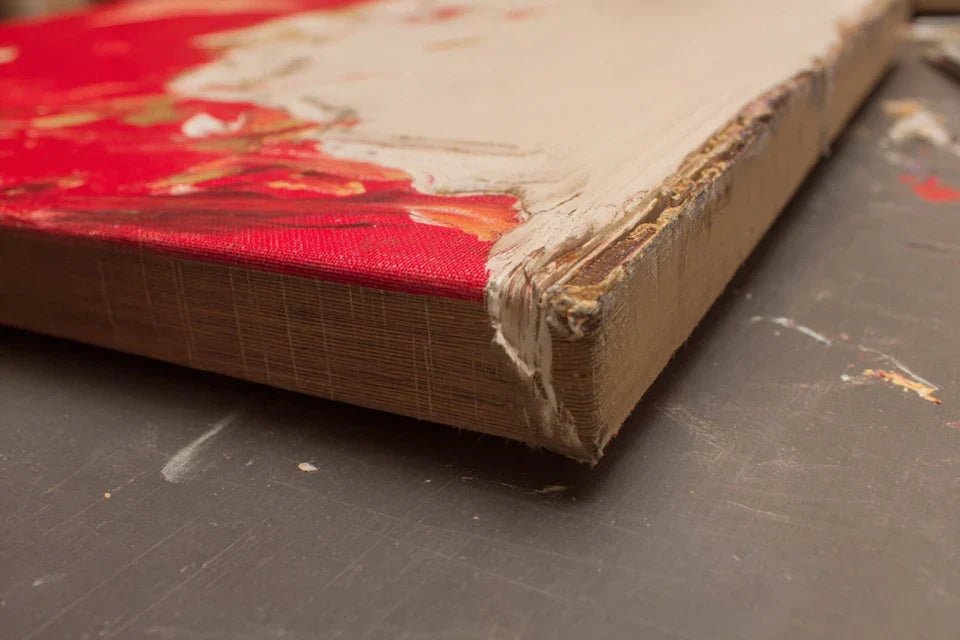
The humidity attacking your wall artwork is not just a simple aesthetic nuisance. It's a physical phenomenon that can worsen quickly if you wait. Like a sponge absorbing water unevenly, your canvas reacts to changes in humidity by contracting and expanding. The longer you wait to act, the more deformations permanently fix themselves into the material.
🏠 Customer testimonial: "I had hung my favorite abstract canvas above the fireplace. After the first autumn rains, I noticed slight warping on the edges. In three weeks, without intervention, the deformation had spread to the center and required professional restoration costing €150.”
💬 Conversation with a decor expert
The 72-hour rule: A tableaux warped by humidity can be easily saved if treated within 72 hours of the first signs appearing. Beyond that, the canvas fibers "memorize" the deformation and require more advanced techniques.
Understanding What's Really Happening to Your Warped Artwork
Does your situation seem familiar? Have you noticed slight morning undulations that seem to diminish during the day, or conversely, deformations that worsen on rainy days. Perhaps your artwork has asymmetrical warps, more pronounced on one side than the other.
What's happening has nothing to do with a manufacturing defect or poor quality. Your canvas is simply experiencing the humidity variations in your interior like a living barometer. The problem comes from the environment, not the artwork itself.
Imagine your canvas as the skin of a drum: when the air becomes humid, it absorbs this humidity unevenly and loses its perfect tension. It's a natural and predictable phenomenon.
The #1 Hidden Cause: The Invisible Humidity Gradient
Contrary to what many think, it’s not the overall humidity level of the room that is problematic, but rather the differences in humidity between the front and back of your artwork. Your wall may be cooler and more humid than the ambient air, creating an invisible imbalance.
It's exactly like placing a wet towel on a radiator: it doesn’t dry evenly, but in patches. Your artwork lives the same experience constantly.
This difference in humidity creates uneven tensions in the canvas, which translates into these characteristic undulations. Your frustration is therefore perfectly justified: you couldn't have guessed this invisible phenomenon!
🔍 Quick test: Pass your hand 2 cm behind your artwork: if you feel a difference in temperature or humidity compared to the ambient air, you’ve found the source of the problem!
Many instinctively place their wall artworks near sources of life: above the sofa, near the window for light, or in the entrance to welcome guests. These locations seem logical but often create unfavorable microclimates.
It's like planting a rose bush directly under the gutter: the intention is good, but the environment creates invisible stresses. Your artwork experiences drafts, temperature variations, and humidity spikes without you realizing it.
Result? You end up with these frustrating deformations that spoil your decor, when a few centimeters of difference would have changed everything.
The Forgotten Factor: Your Home's Breathing
Your home "breathes" in time with the seasons, the weather, and even your daily activities. When you cook, shower, or simply ventilate, you create humidity fluctuations that your artwork faithfully records.
You can spot these fluctuations by observing whether distortions become more pronounced after certain activities: intensive cooking, laundry, or even after hosting several guests (breathing + activity = humidity).
These variations directly impact your daily enjoyment: it's impossible to fully enjoy your decor when you are constantly worried about the condition of your wall art.
🎯 The 4 warning signs to watch out for:
- Morning undulations that diminish: Indicates excessive nighttime humidity, often linked to poor ventilation during sleep
- Asymmetrical distortions: Reveals a draft or a punctual source of humidity (window, radiator, potted plant)
- Warping that worsens in rainy weather: Signals minor infiltration or poor wall insulation
The trigger no one suspects
The real trigger is neither the quality of the artwork nor even the humidity level, but the speed of changes. Like an elastic band stretched too quickly, your canvas supports gradual changes well, but cracks under sudden hygrometric shocks. You can identify these shocks by noting whether distortions appear after abrupt changes: switching from heating to ventilation, returning from vacation, or a sudden weather change.
The rule of gradual change: An artwork can adapt to almost any humidity condition, provided the change is gradual over several days. Always favor gentle transitions to preserve your wall art.
| ❌ Misconception | ✅ Reality | 💡 Explanation | 🎯 Practical benefit |
|---|---|---|---|
| A quality artwork should never warp | All artworks react to humidity, it's natural | Textile fibers are alive and hygroscopic | You no longer feel guilty and look for real solutions |
| You need a perfect humidity level throughout the house | Only stability matters, not the exact level | Gradual adaptation avoids shocks to the canvas | Energy savings and simple solutions |
| A warped artwork is permanently damaged | 80% of distortions are reversible | Shape memory can be "erased" | Your artistic investments are protected |
| You must absolutely avoid humidity | You must avoid sudden variations | Stable balance is more important than the absolute level | Normal life without excessive constraints |
The gentle 3-step method to recover your artwork
Now that you understand the mechanism, it’s time to take action! This progressive approach respects the nature of your artwork while achieving visible results. Like a physical therapist resetting a joint, we will re-educate your painting so that it regains its original shape. By following these steps in order, you should see an improvement within the first 24 hours.
🎯 Overview of your recovery: Step 1 - Stabilization (stop the worsening), Step 2 - Progressive relaxation (release tension), Step 3 - Definitive reshaping (restore perfect flatness). Each step prepares for the next, like layers of varnish that reinforce each other.
🚀 Step 1: Emergency stabilization (0-24h)
This first step is crucial because it immediately stops the worsening of deformations. Like when you immobilize a sprain, the goal is to put your painting "at rest" in neutral conditions. You will feel an immediate sense of relief knowing that you are finally taking control of the situation.
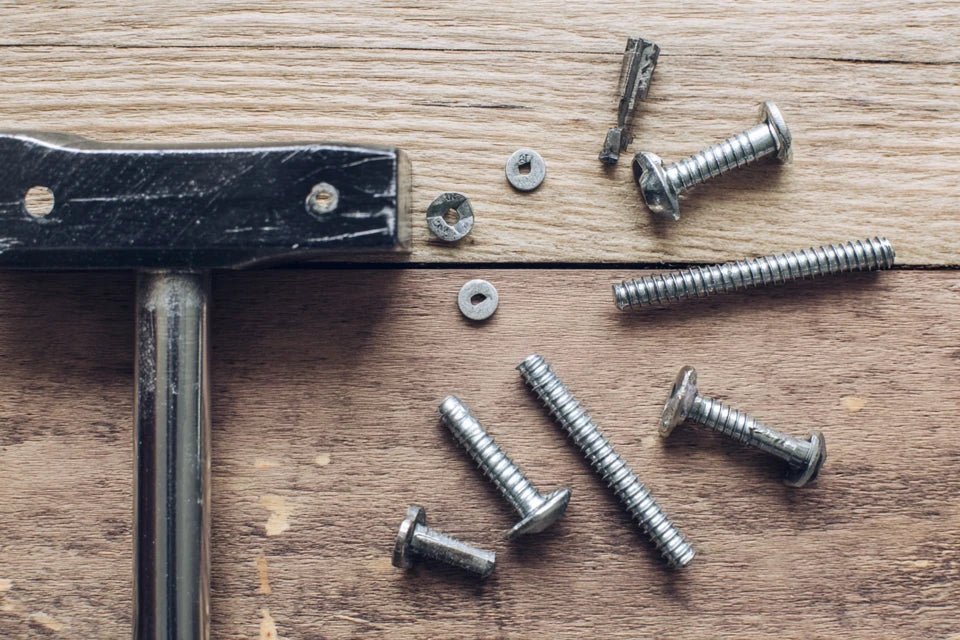
🛠️ What you need (probably already at home)
- Clean, dry towels: They will absorb excess moisture and create a protective barrier. Avoid fluffy fabrics that could mark the surface. A cotton sheet works perfectly well as it breathes naturally.
- Flat, rigid support: Table, ironing board, or even the floor if necessary. The important thing is to have a perfectly flat surface that will serve as a geometric reference. Avoid mattresses or soft surfaces that would conform to the deformations.
- Lightweight, distributed weights: Books, canned goods, or any object allowing gentle and uniform pressure. The secret lies in distribution, not brute force.
Now let's move on to concrete action:
🎬 Stabilization procedure
Secure removal: Carefully remove your painting from its wall mount. The moisture has made the canvas more fragile, handle it like a precious object. Hold it by the frame, not by the canvas itself.
⏱️ Time: 5 minutes | ✅ Successful when: The painting rests flat, canvas facing up | ⚠️ Attention: Avoid point pressures that would create new creases
Placement on neutral surface: Place your painting face up on the flat support. This position allows the canvas to "remember" its original shape without constraint. Uniform air circulation on both sides naturally rebalances humidity.
⏱️ Time: 2 minutes | ✅ Successful when: No forced contact with the surface | ⚠️ Attention: Check that the support has no irregularities
Protective breathable cover: Lightly cover with a clean towel to protect from dust while allowing air to circulate. This crucial step avoids thermal shock while maintaining a stable microclimate.
⏱️ Time: 1 minute | ✅ Successful when: Protection without compression | ⚠️ Caution: Do not create a "greenhouse" effect with a waterproof cover
✨ 24h Check: Your ripples should have diminished by 30 to 50%. If the artwork still shows marked deformations, this is normal and expected. You've stopped the aggravation, prepare for the next step!
OUR RECOMMENDED PRODUCTS
🎨 Step 2: Gradual Relaxation (24h-72h)
Now that your artwork is stabilized, we move on to active fiber rehabilitation. This step exploits the natural ability of your canvas to regain its original shape. It's more rewarding because you will visibly see deformations decrease day after day.
🌡️ Gradual Relaxation Tools
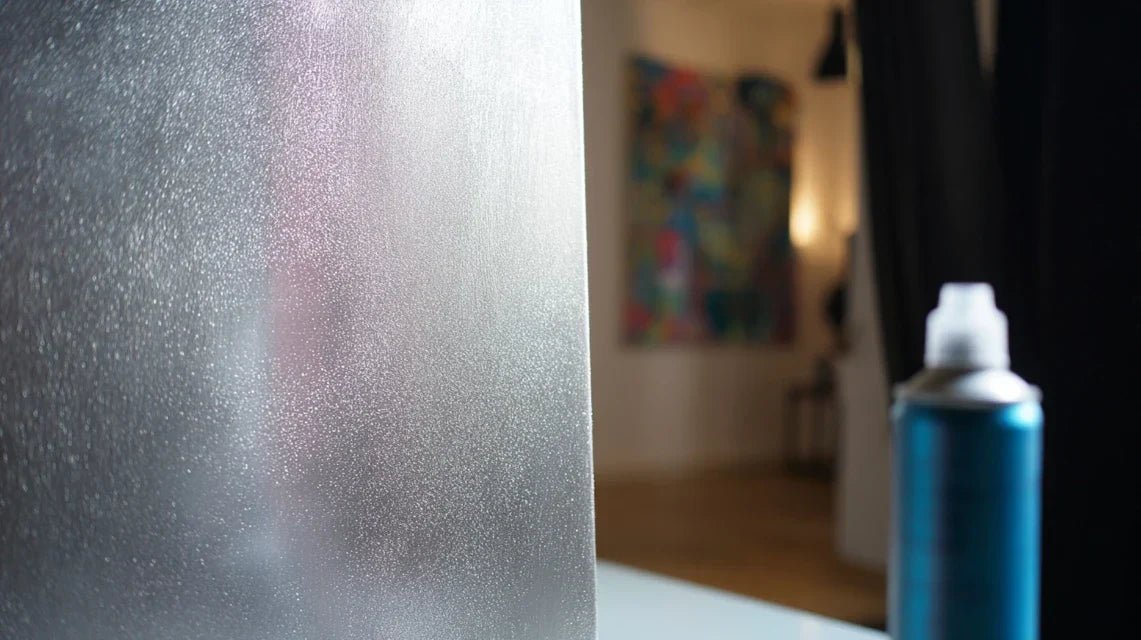
- Air humidifier or basin of water: To create controlled and homogeneous humidity. A simple bowl of warm water will do, the natural evaporation gradually humidifies the surrounding air.
- Fan on low speed: To ensure a gentle and regular airflow. Avoid direct drafts that would create uneven drying areas.
- Hygrometer thermometer: Optional but reassuring gadget to monitor evolution. Goal: stable humidity between 45% and 60%.
🌊 Controlled Relaxation Procedure
Creation of a stable microclimate: Place a gentle moisture source 1 meter from your artwork. The goal is to slightly humidify the air so that the fibers relax evenly. Like a plant slowly rehydrating.
⏱️ Time: 48h continuously | ✅ Successful when: Humidity remains stable without condensation | ⚠️ Caution: Never direct humidity on the canvas
Invisible massage by air circulation: Direct a fan in gentle mode towards the ceiling to create a homogeneous circulation. This imperceptible breeze helps the fibers reposition naturally without mechanical stress.
⏱️ Time: 6-8h per day | ✅ Successful when: Barely perceptible airflow | ⚠️ Caution: Never direct flow onto the artwork
🎯 72h Check: Ripples should have decreased by a minimum of 70%. If your artwork still has minor irregularities, this is the perfect time to move on to the final shaping stage.
🏆 Step 3: Final Shaping
This final step transforms your partial recovery into a complete and lasting success. You will master the techniques of professionals to achieve perfect flatness. This is where you go from "amateur handyman" to "knowledgeable connoisseur" capable of preserving all your wall art.
🎓 The Perfect Connoisseur's Arsenal
- Pressing weight : Large books or boards with evenly distributed weight. The principle is to exert uniform and constant pressure to "memorize" flatness in the fibers.
- Parchment paper or food film : Protection between weights and your artwork to avoid any marking. These materials naturally slide and do not adhere to paint.
- Thickness shims : Small, thin objects (cards, rulers) to adjust pressure according to still deformed areas.
⚡ Professional Pressing Technique
Gradual and targeted pressing : Start with the least deformed areas to "educate" the canvas progressively. Increase pressure every 12 hours while monitoring the material's response. It’s like taming a horse: patience and consistency.
⏱️ Time : 48-72h depending on initial deformation | ✅ Successful when : Perfect flatness maintained 24 hours after removing weights | ⚠️ Attention : Excessive pressure = risk of cracking
Shape memory test : Gradually remove the weights while monitoring whether the canvas retains its shape. A successful recovery shows stable flatness immediately after unloading.
⏱️ Time : Observation over 6 hours | ✅ Successful when : No reappearance of waviness | ⚠️ Attention : Too rapid removal = loss of benefits gained
The secure progression rule : Do not move on to the next step unless the improvement from the previous step reaches at least 70%. This patience guarantees a definitive result and avoids discouraging relapses.
Congratulations! You now master professional recovery techniques. But knowing these expert tips makes all the difference between a temporary result and a permanent cure. These subtleties give you the advantage of connoisseurs over amateurs.
🎯 Professional restorer's tip : Before final reassembly, let your painting acclimatize for 24 hours in its destination room. This "adaptation period" allows the canvas to balance with its future environment and prevents relapses. Galleries systematically use this technique.
❓ "Could I permanently damage my painting by trying these manipulations?"
"I'm afraid of doing more harm than good, my painting has sentimental value..."
Your caution is perfectly understandable and even commendable. The good news is that these techniques are specifically designed to be gentler than inaction. Leaving a painting to warp represents a much higher risk than applying these progressive methods. Think about it: we're simply reproducing ideal natural conditions, without any chemicals or excessive force. Start with step 1 on a small test area if that reassures you.
🛡️ Maximum safety: Photograph your painting before intervention to document the initial condition. This record will give you confidence and allow you to objectively measure progress.
⚠️ The 5 mistakes that can worsen the situation
Now that you know the right method, let's protect your success by avoiding common pitfalls. These mistakes are tempting because they seem logical, but they can undo all your efforts or even aggravate the damage.
- 🚫 Using an iron or hairdryer: The idea of "smoothing" seems obvious, but direct heat brutally dehydrates the canvas and permanently fixes distortions. It's like trying to dewrinkle a delicate fabric at high temperature: guaranteed irreversible damage.
- 🚫 Putting it back on the wall immediately after improvement: Your eagerness to get your decoration back is natural, but partial recovery can relapse within hours if unfavorable conditions persist. Patience = durability.
- 🚫 Wetting the canvas directly: "More humidity = more flexibility" seems logical, but direct water soaks through the canvas, saturates the adhesive, and can cause paint to peel off. Ambient humidification only!
- 🚫 Applying excessive pressure from the beginning: The desire to speed up the process leads to "forcing", but stretched fibers break instead of relaxing. Like stretching an elastic too quickly, a rupture is inevitable.
- 🚫 Ignoring the destination environment: Perfectly restoring your painting and putting it back in the same unfavorable conditions guarantees a relapse within 15 days. Treat the cause, not just the symptoms.
🎯 Anti-error verification system: Before each action, ask yourself: "Am I imitating ideal natural conditions?" If the answer is no, reconsider your approach. Monitor these warning signs: appearance of new distortions, color change, or abnormal resistance of the canvas.
🎁 Special readers offer
Because you took the time to inform yourself, enjoy 10% discount on your first order:
⏰ Valid 72h after reading • Applicable to all our products
❓ Frequently Asked Questions about Recovering Sagging Paintings
For slight to moderate distortions, allow 3 to 7 days with the progressive method. Severe cases may require 2 to 3 weeks. To optimize: start at the first signs, maintain stable conditions, and be patient with the steps. A concrete example: a customer recovered their 40x60cm sagging painting in exactly 10 days after 2 months.
A professional restoration costs €80-300 depending on the size and damage. Our method costs you €0 and works in 80% of cases. If it fails, you've only lost time, and a professional can always intervene. For valuable artworks (+€500), consult an expert directly.
Cracks indicate deeper damage affecting the pictorial layer. Our method can stabilize the situation but will not repair the fissures. Apply step 1 (stabilization) then consult a restorer to assess the feasibility of repairing the cracks.
Choose a stable location: avoid areas with drafts (hallways, near windows), variable heat sources (radiators, fireplaces), and very humid rooms (bathroom, kitchen). Ideal: interior wall, indirect lighting, stable temperature 18-22°C. A hygrometer (€15) helps you monitor.
Canvas on frame are more sensitive than rigid supports (wood, metal). Acrylic paints are more resistant than oil. Canvas prints react like original paintings. Our method adapts to all, only the duration varies: 3-5 days for acrylic, 5-10 days for oil.


