

You’ve just hung your new artwork with its beautiful brushed aluminum frame, and already, a few weeks later, you notice those little dull marks that ruin the whole effect. Worse still, your vintage brass frame is starting to show signs of oxidation despite your efforts.
That feeling of disappointment when you walk past your favorite piece of art and your gaze immediately falls on these imperfections rather than the beauty of the artwork itself. The contrast between the brilliance of the first day and this unwanted patina that gradually settles in.
You’ve probably tried classic store-bought products, maybe even that famous miracle product your neighbor recommended. Result: either it did nothing, or it was even worse with micro-scratches that catch the light.
Rest assured, it's not your fault. Most general purpose cleaning products are formulated for common surfaces, not for the subtleties of the precious metals in your frames. Each alloy has its own characteristics and reacts differently to treatments.
By the end of this article, you will master professional techniques to restore the original shine to your metal frames and protect them durably, without risking any damage.
Why do your metal frames lose their shine so quickly?
The oxidation of your metal frames is not inevitable, but it accelerates dramatically in our modern interiors. Between the humidity of the kitchen, temperature variations and even our daily gestures, your frames are subjected to a real bombardment of invisible aggressions. It's like having a car parked outside versus a car under shelter: the wear is not the same.
💡 Customer testimonial: Marie, a Parisian art collector, saw her collection of brass frames tarnish in just six months after installing a humidifier in her living room. "I felt like my artworks were losing their prestige, as if they had become cheap reproductions," she confides.
💬 Conversation with a decor expert
The 30-day rule: A well-maintained metal frame keeps its shine for decades, while a neglected frame shows signs of wear in less than a month in some environments.
Understanding What Really Attacks Your Metal Frames
Do your frames show stubborn fingerprints, duller areas near light sources, or that greenish patina that settles on brass? These three signals reveal that your frames are experiencing accelerated oxidation due to your specific environment.
In reality, what's happening has nothing to do with the quality of your frames or your neglect. It’s a natural chemical process that accelerates according to precise factors you can control. The problem is that no one has explained how to identify these factors in your interior.
Imagine your frames as metal sponges that absorb everything floating in the air: cooking particles, humidity, even the natural oils from your fingers. Each contact leaves a microscopic trace that accumulates.
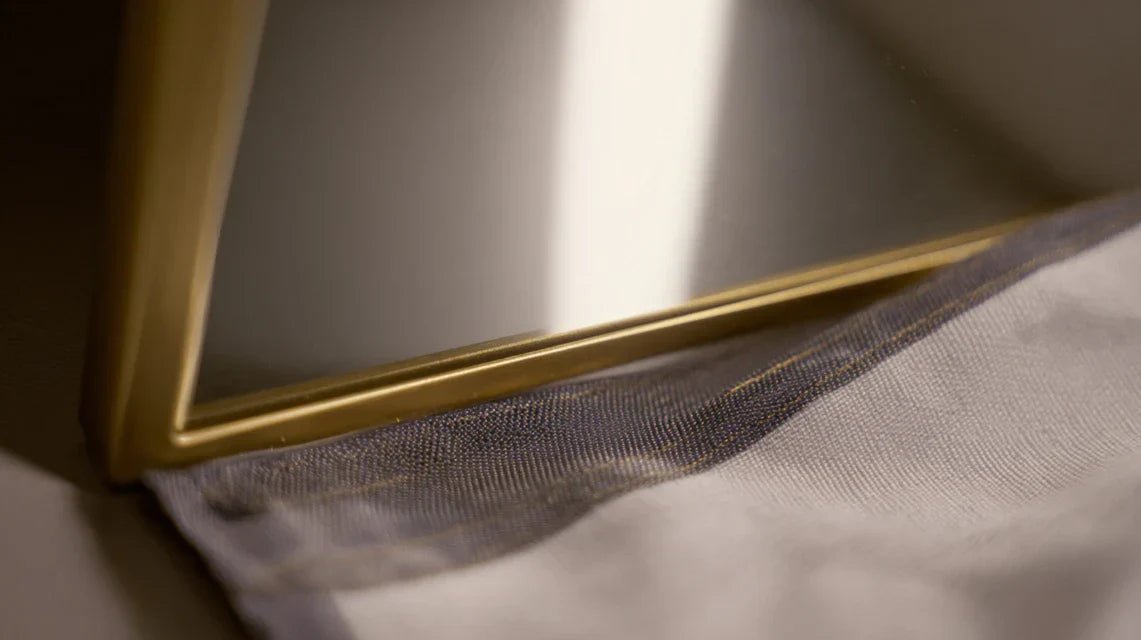
The myth of "stainless metal": why aluminum still tarnishes
Contrary to what many think, anodized aluminum is not eternal. Its protective layer wears down gradually, just like the varnish on a piece of furniture. This revelation completely changes how you should maintain it.
It's like having a raincoat: at first, water runs off perfectly, but after a few months of use, you need to re-waterproof it. Your frames work exactly the same way with their original protection.
This discovery explains why your new frames stayed perfect for months, then suddenly deteriorated. Once the natural protection is exhausted, oxidation accelerates exponentially. But the good news is that you can restore this protection easily.
🔍 Quick test: Run your finger over the surface of your frame. If you feel a slightly rough texture instead of a perfectly smooth surface, it's a sign that the original protection has been altered.
The fatal error: why "all metal" products destroy your frames
Universal products contain “gentle” abrasives that are suitable for copper or steel, but which irrevocably scratch aluminum and brass. It's like using 400 grit sandpaper on precious wood: the effect is invisible at first, but catastrophic in the long term.
Think about the difference between cleaning an inox saucepan and polishing a luxury watch. Your frames deserve the same attention as fine horology, because they often use similar alloys.
This incompatibility explains why your frames appear clean right after cleaning, then tarnish even faster than before. Micro-scratches create irregularities that catch dust and accelerate oxidation.
The invisible factor: the impact of temperature variations
Your frames expand and contract imperceptibly with each change in temperature. These micro-movements create tensions in the metal that favor the appearance of micro-cracks in the surface protection.
Observe if your frames are closest to a heat source (radiator, halogen lighting) or in a drafty hallway. These areas experience repeated thermal shocks, which weaken the metal structure.
This discovery transforms your approach to maintenance: instead of cleaning uniformly, you must adapt your technique according to the location of each frame and its exposure to climatic variations.
🎯 The 3 warning signs to watch for:
- Halo-like traces: Indicate excessive humidity exposure - like limescale marks on a faucet
- Discoloration in areas: Reveal an imbalance in ventilation - some parts "breathe" less well
- Starburst micro-scratches: Signal the use of unsuitable tools - like scratches on a smartphone screen
The main trigger: the domino effect of the first alteration
Once an area of your frame begins to tarnish, it becomes a catalyst for the rest of the surface. It's like a domino effect: the first imperfection creates an electrochemical imbalance that spreads gradually. You can identify this starting point by looking for the most altered area - usually a corner or a frequent contact point.
The weak point rule: Always prioritize treating the most degraded area of your frame first. Once this area is restored, the rest of the surface stabilizes naturally.
| ❌ Misconception | ✅ Reality | 💡 Explanation | 🎯 Practical benefit |
|---|---|---|---|
| The more I clean, the more I damage | Adapted maintenance preserves and enhances | Each metal has its own needs | Frames look better than new |
| Expensive products are just marketing | Specialization avoids costly damage | Formulations designed for each alloy | Long-term savings |
| Oxidation is irreversible | Almost all damage can be repaired | Progressive restoration techniques | Second life for your damaged frames |
| Only professionals know how to do it | The right techniques are accessible | Step-by-step proven methods | Autonomy and personal satisfaction |
The professional method to restore your metal frames
Rest assured, restoring the shine of your frames is not rocket science once you know the right progression. It's like learning to cook: you have to follow the recipe in order, with the right ingredients. I will guide you through the three fundamental steps that professional restorers use: preparation, treatment and protection. At each step, you will see a visible improvement that will motivate you for the next.
🎯 Method Overview: Like building a house, we start by clearing the ground (decontamination), then restore the structure (polishing), and finally apply the finish (protection). Each step reveals a little more of the hidden beauty of your frames.
Step 1: Gentle Decontamination - The Foundations of Restoration
This first step is crucial as it determines the quality of everything else. It's like preparing a wall before painting it: if you rush this step, even the best product won’t give satisfactory results. Once this decontamination is complete, you will already feel immediate satisfaction seeing the most stubborn traces disappear.
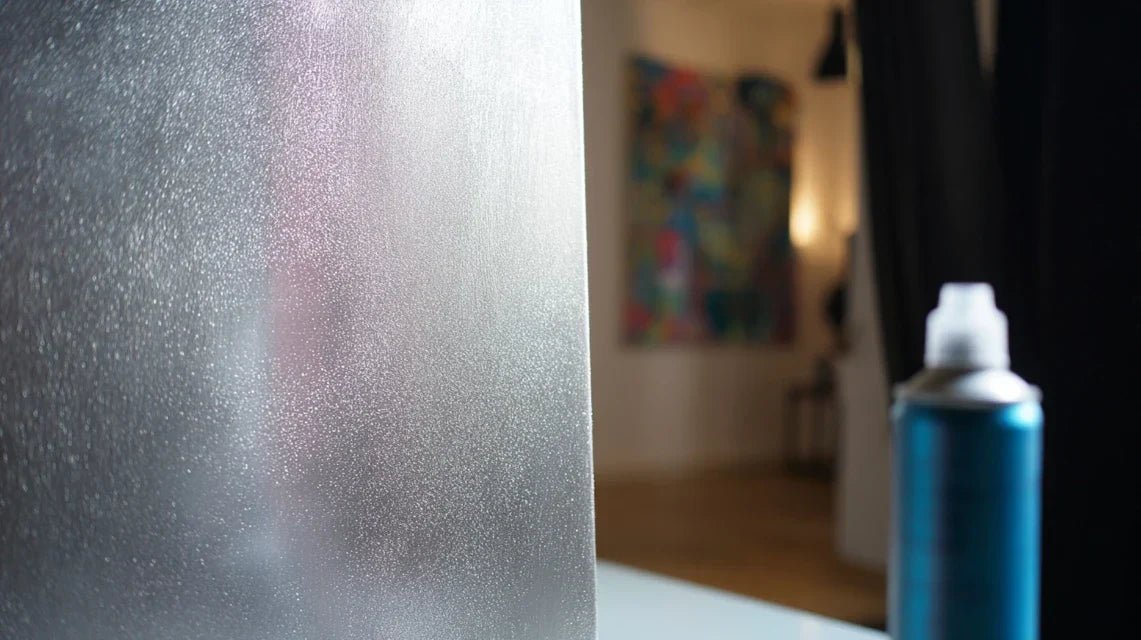
🧰 Your Professional Decontamination Tools
- Specialized Metal Microfibers: Resemble thick wipes with ultra-fine fibers. They "grab" dirt without scratching, like millions of tiny gentle hands. Find them in high-end hardware stores or online. Make sure they are labeled "non-abrasive" - avoid classic microfibers which are too rough.
- Neutral Degreaser for Precious Metals: Transparent, slightly viscous liquid that dissolves oils without attacking the metal. Works like an ultra-gentle soap that respects the natural protection. Look for a neutral pH (between 6.5 and 7.5) - this is your guarantee of safety for all types of frames.
- Demineralized Water: Pure water sold in jugs at auto supply stores. Eliminates lime scale traces that tarnish your frames after drying. This difference is immediately visible: no more white halos spoiling all your work.
Now, let's move on to practice with the three-pass technique:
🔧 Performing Decontamination
First Pass - Degreasing: Lightly soak your microfiber with degreaser and wipe the entire surface in gentle circular motions. This step dissolves oils and embedded particles without forcing. The secret: never press, let the product do the work.
⏱️ Time: 3-5 minutes per frame | ✅ Successful when: The surface appears uniform, with no shiny or dull areas | ⚠️ Attention: If you see streaks, it means you are using too much product - reduce the dose
Second Pass - Rinsing: With a clean microfiber moistened with demineralized water, remove all traces of degreaser. This step prepares the surface for polishing by removing any chemical residue that could interfere.
⏱️ Time: 2 minutes per frame | ✅ Successful when: No trace of product remains visible | ⚠️ Attention: Change microfiber areas regularly to avoid spreading dirt
Third passage - Drying: With a perfectly dry microfiber cloth, eliminate any traces of moisture by light dabbing, then polish in straight lines. This technique avoids circular marks that catch the light.
⏱️ Time: 1-2 minutes per frame | ✅ Success when: Perfectly matte and uniform surface | ⚠️ Attention: Never rub - dab then polish
✓ Final check: Observe your frame under different lighting conditions. You should see a uniform surface without streaks, halos or dull areas. If some imperfections persist, that's normal - the polishing step will eliminate them. Congratulations, you have laid a solid foundation!
OUR RECOMMENDED PRODUCTS
Step 2: Restorative Polishing - Revealing Hidden Brilliance
Now that your frames are perfectly clean, you will discover their true potential. This step is magical because it gradually reveals the original brilliance that you thought was lost forever. It's like gently sanding an antique painting to rediscover the hidden fresco underneath. The snowball effect begins here: each polished area motivates you to continue.
🎨 Your Specialized Polishing Tools
- Ultra-Fine Polish Paste: Slightly grainy white cream that contains microscopic abrasives. Acts like a very soft eraser that erases micro-scratches without creating new damage. Choose a grain size of less than 1 micron - it's written on the packaging. Avoid "quick" pastes which are too aggressive. Felt Polishing Pads: Soft rounds that attach to a drill or mini-grinder. Distribute pressure evenly for a professional result. Make sure they are specified as "fine metals" - standard pads are too hard. Chamois Finishing Cloths: Ultra-soft synthetic leathers that polish without scratching. Give the final shine you admire on luxury frames. Recognizable by their velvety texture and pale yellow color.
✨ Professional Polishing Technique
Paste Application: Apply a nut of paste to the felt pad and spread it evenly. Start with the corners and most damaged areas, in slow circular motions. The paste will gradually become transparent - this is a sign that it's doing its job.
⏱️ Time: 5-8 minutes per frame | ✅ Success when: Micro-scratches disappear and the surface becomes reflective | ⚠️ Attention: Maximum speed 1500 rpm - faster = overheating of the metal
Final polishing : Remove any paste residue with a clean cloth, then polish with a suede cloth in straight lines. This step reveals the true shine and eliminates any traces of treatment.
⏱️ Time : 3-4 minutes per frame | ✅ Success when : You see your reflection clearly in the metal | ⚠️ Caution : Change cloth area as soon as it becomes soiled
🎯 Intermediate quality control : Your frames should now have regained their original shine with a perfectly reflective surface. If some areas resist, repeat the polishing with a little more paste. It's normal to have a few stubborn ones - patience is your best ally!
Step 3 : Durable protection - Preserving your investment
Congratulations! Your frames now have the shine of brand new high-end frames. This final step will lock in this result for months, or even years depending on your environment. It's like applying varnish to a furniture restoration: this invisible protection makes all the difference between an amateur job and a durable professional result.
🛡️ Your arsenal of protection
- Precious metal protective wax : Translucent paste that dries into an invisible film. Creates a barrier against humidity and daily aggressions. Look for a "long lasting" wax with polymers - it lasts 6 months minimum compared to 2-3 weeks for a classic wax. Anti-oxidation spray : Aerosol that penetrates the micropores of the metal. Blocks chemical reactions responsible for tarnishing. Choose a "food contact" spray - guaranteed safe for your interior. Foam applicators : Small sponges without alveoli that evenly distribute products. Avoid thick spots that create traces after drying. Available in the automotive section of supermarkets.
🏆 Final shielding of your frames
Applying protection : Spray the anti-oxidation spray from 20cm away in a thin, even layer. Let it penetrate for 5 minutes, then apply the wax in small areas with the foam applicator. This double protection acts as an immune system for your frames.
⏱️ Time : 8-10 minutes per frame | ✅ Success when : Slightly satin surface without traces or streaks | ⚠️ Caution : Too much product = white streaks difficult to remove
Finishing polish : After 15 minutes of drying time, gently polish with a dry microfiber cloth. This step activates the protection and gives the final shine. You should feel the surface "glide" under the cloth - a sign that the protection is active.
⏱️ Time : 2-3 minutes per frame | ✅ Success when : Uniform sheen and very smooth surface to the touch | ⚠️ Caution : Light movements - you are finishing, you are not forcing
🎉 Final check: Your frames should now have a deep, uniform sheen, with a surface that repels dust and fingerprints. Test by lightly touching a corner: your mark should disappear with a simple breath. Mission accomplished!
Personalized progression rule: Start with a less visible frame to gain confidence, then move on to your most valuable rooms. Each success gives you the assurance to face greater challenges.
You now master the techniques used by professional restorers. But true experts know a few extra subtleties that make the difference between a good result and an exceptional one. These little secrets will give you an edge over 95% of amateurs.
🔥 Restorer's tip: Always work your frames at a stable temperature (18-22°C). Thermal variations during treatment create internal stresses that can cause microscopic cracking. That’s why professional workshops are climate controlled - they leave nothing to chance.
🤔 Frequent question from our readers
"I'm afraid of ruining my valuable frames by treating them myself..."
This concern is perfectly normal and even reveals your good sense! No one wants to damage a precious piece due to lack of experience. The professional solution is simple: start with a secondary or damaged frame to gain the gesture. Once you’ve seen the spectacular transformation on this “guinea pig,” you'll have the confidence necessary for your valuable pieces. It's exactly like learning to drive: you don't start on the highway!
✅ Practical advice: First test your technique on a inconspicuous corner of your most precious frame. You’ll immediately see if the method is suitable, without risking the entire piece.
The pitfalls to avoid at all costs - Protect your investment
After guiding hundreds of collectors, I know the mistakes that can ruin months of work in a few minutes. These traps are insidious because they seem logical at first glance, but they hide disastrous consequences. I will reveal them to you to avoid these costly disappointments.
- ⚠️ The "more is better" error: Using a powerful household degreaser seems effective, but these products contain bases that chemically attack your metals. Result: irreversible corrosion that turns your frames into porous metal. Always use pH neutral products - it’s a golden rule without exception. 🔥 The trap of excessive speed: Wanting to go fast with a quick rotary tool generates heat that dilates the metal and creates permanent micro-cracks. Like burning a steak: once it's done, it's irreparable. Always limit yourself to a maximum of 1500 rpm. 💧 The illusion of tap water: Tap water leaves limescale deposits that encrust polished metal. These traces become increasingly difficult to remove and eventually create a permanent whitish patina. Demineralized water costs €2 per liter and avoids this nightmare.
- 🕐 Fatal haste: Applying protection before the polish is completely dry traps moisture under the wax. This humidity will create dark spots that penetrate the protection - impossible to correct without starting over.
- 🧽 The lie of "universal" microfibers: Classic microfiber has fibers that are too thick and scratch fine metals. It's like using a toothbrush on a mirror. Invest in special metal microfibers - the difference is spectacular.
🎯 Your safety checklist: Before each step, check that your tools are clean, your product is at room temperature, your work area is stable and well lit, and you have all the necessary materials within reach. If you feel unusual resistance during the work, stop immediately - it's your warning signal.
🎁 Special offer for readers
Because you took the time to inform yourself, enjoy 10% discount on your first order:
⏰ Valid 72h after reading • Applicable to all our products
🔧 Your most frequent technical questions
A complete kit costs between €45 and €80 depending on the quality chosen, and will allow you to treat 15-20 frames easily. For a standard frame, count 20-30 minutes of actual work. It's an investment that pays for itself after the third frame compared to professional cleaning. Start with a basic kit at €45 - you can always enrich your equipment later.
Excellent question! In 15 years of restoration, I have seen very few truly unrecoverable cases. Even frames with advanced oxidation can regain 80-90% of their original shine. The secret: progress step by step without forcing. For extreme cases, start with intensive degreasing with a prolonged soaking time (15-20 minutes), then polishing in several light passes. Patience gives spectacular results.
This depends entirely on your environment, but here's my rule of thumb: weekly dusting with a dry microfiber cloth, thorough cleaning every 3-4 months, and renewal of protection twice a year. In challenging environments (kitchen, bathroom), double the frequency. A well-protected frame requires 90% less maintenance than a neglected one.


