

You've just finished your spring cleaning, proud of your sparkling living room... just as your eyes land on your wall art. They seem dull, dusty, like destined to remain in the shadow of your freshly cleaned interior.
This feeling of unfinished work haunts you. You pass these artworks several times a day, noticing every trace, every particle that tarnishes their brilliance. The contrast with the rest of your impeccable decor becomes striking.
You may have already tried some quick fixes: a quick wipe, a duster passed in a hurry before guests arrive. But the result disappointed you. Even worse, you fear damaging your wall art with unsuitable products.
Rest assured: this apprehension is perfectly normal! Most artwork owners make the same cleaning mistakes, lacking knowledge of the specific techniques for each type of artistic support.
By the end of this article, you will master expert gestures to clean your artworks safely and reveal their full decorative potential in your refined interior.
Why Your Artworks Deserve Special Attention Now?
Imagine receiving guests in your perfectly tidy living room, where only your neglected artworks betray a lack of care. It's like wearing a beautiful outfit with dirty shoes: the whole ensemble loses its elegance. By postponing this cleaning, you deprive your wall decor of its optimal visual impact.
🎨 Collector’s testimony: “I discovered that my favorite abstract painting had shades of blue I had never noticed! After proper cleaning, the colors became so vibrant that my guests systematically ask me where I found it. Yet it was the same painting for 3 years...”
💬 Conversation with a Decor Expert
The golden rule of the informed collector: A clean painting reveals 30% extra brilliance and transforms the ambiance of your room in less than 15 minutes of expert attention.
Why Your Previous Attempts Haven't Worked?
Perhaps you recognize yourself in these situations: You quickly wipe with a damp cloth "to see", You use the same product as for your furniture, Or you completely avoid touching your wall artworks for fear of damaging them.
What's really happening is that each artistic support has its own requirements. Treating a canvas like glass is like washing a cashmere sweater with the same method as jeans: The result will be disappointing, even disastrous.
Think of your beauty routine: You don't use the same care for your face and hair. Your paintings deserve the same personalized approach.
The myth of the "universal miracle product"
Contrary to popular belief, a one-size-fits-all solution does not exist to clean all types of paintings. This illusion comes from our habit of using "all-in-one" household products.
It's like believing that a single shampoo is suitable for all hair types: technically possible, but far from optimal. Each artistic technique requires a specific approach.
This lack of knowledge explains why your paintings remain dull despite your efforts, and why you feel this frustration when facing artworks that don't reveal their potential.
🧪 Revealing test: Look at your paintings under different lighting (natural light, lamp, ceiling). If you notice variations in shine or dull areas, it is a sign of inadequate or insufficient cleaning.
The mistake of haste during spring cleaning
During spring cleanings, we are in a dynamic of efficiency where every gesture must be quick and visible. This urgency leads us to apply the same energy to elements that require delicacy.
It's like wanting to eat lunch at the same speed as you clean your windows: The pace doesn't match the activity.
Result: you rush the cleaning of your paintings or ignore them completely, creating this visual imbalance that frustrates you for months afterwards.
The paralyzing fear of "doing wrong"
Many owners develop an excessive apprehension towards their works of art, as if they were sacred untouchable objects. This attitude often comes from a bad experience or preconceived notions.
You know when this fear paralyzes you: you avoid eye contact with your dusty paintings, you postpone their maintenance "for later", you feel awkward when guests notice them.
This paralysis deprives your wall decor of its impact and makes you lose confidence in your abilities to maintain your personal collection.
🔍 The 3 warning signs of a painting that needs help:
- The "dull veil" effect: Colors appear as if covered with a grayish filter, this is the accumulation of fine dust
- Uneven reflections: Some areas shine more than others under the light, revealing partial or inadequate cleaning
- Loss of contrast: Details fade and the artwork loses its visual depth, a sign of progressive soiling
The deciding factor: technique before product
What really makes the difference in artwork cleaning, is the application method more than the product itself. It's like cooking: the same ingredients give different results according to the technique used. Recognize this approach when you observe a professional: their gestures are precise, their rhythm controlled, their tools chosen according to each situation.
The rule of experienced collectors: Always test the technique on an inconspicuous area before treating the entire artwork. This 30-second precaution can prevent months of regret.
| ❌ Instinctive approach | ✅ Expert method | 💡 Why it's different | 🎯 Visible benefit |
|---|---|---|---|
| Cleaning "in passing" during housework | Dedicate a specific time to artworks | Each artwork requires particular attention | Homogeneous and lasting result |
| Using everyday products | Adapt the product to the support | Each material reacts differently | Preservation of colors and textures |
| Avoiding for fear of damage | Learn safe gestures | Knowledge replaces apprehension | Confidence and vibrant artworks |
| Treating all frames the same | Identify the type before acting | Canvas, glass, metal have specific needs | Optimal revelation of each artwork |
The 3-step method for risk-free cleaning
Rest assured, you don't need to be a conservation expert to achieve professional results. This logical progression follows the principle of building a house: first the foundations (preparation), then the structure (cleaning), and finally the finishing touches (protection). At each step, you will notice a visible improvement that will motivate you for the rest.
🎯 Overview of your transformation: Expert preparation (5 min) → Adapted cleaning (10 min) → Protective finish (2 min). This sequence guarantees a lasting result and optimal preservation of your artworks.
Step 1: Expert Preparation (the foundations of your success)
Starting with this step avoids 90% of common mistakes and gives you that quiet assurance of connoisseurs. It's like preparing your skin before a treatment: the final result depends entirely on it. Once this base is mastered, you will approach cleaning with the confidence of a professional.
🧰 Your expert's arsenal in 3 elements
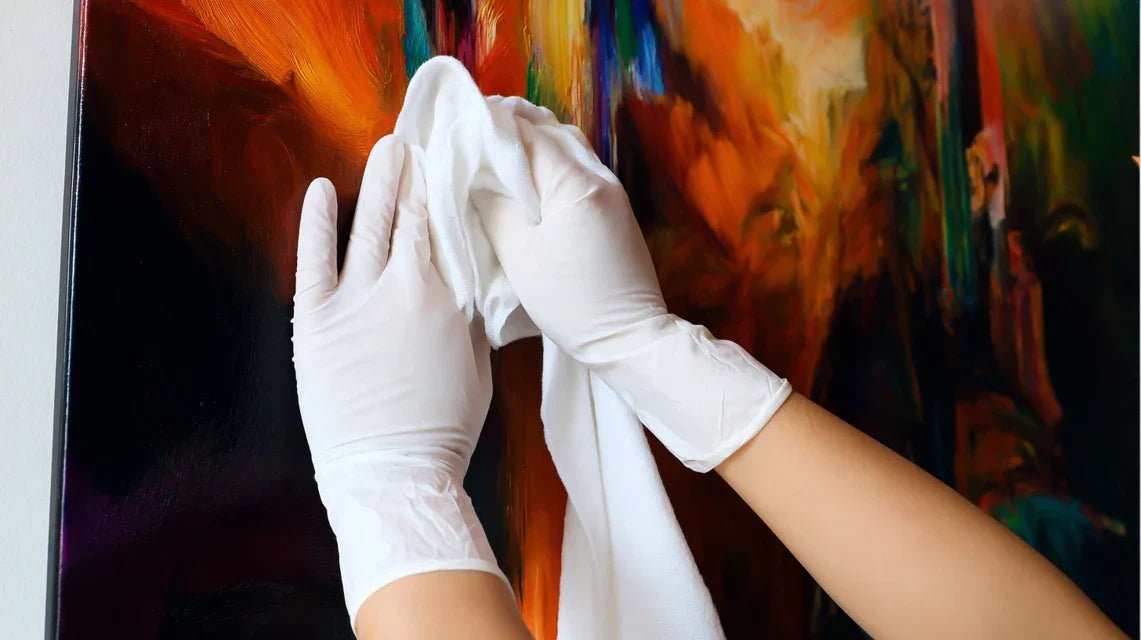
- Specialized microfiber cloths: Recognizable by their ultra-soft texture and ability to capture dust without scratching. Avoid classic cloths that can snag the canvas fibers. Available in art or professional cleaning stores. The test: run your hand over it, it should be softer than baby fabric. Art-specific neutral product: Alcohol-free, ammonia-free formula with a balanced pH. Works by gently dissolving particles without attacking pigments. Recognize the quality by the absence of strong odor and the "conservation" mention on the label. Impact: preserves color vibrancy for years.
- Natural hair brushes: Essential for delicate areas and reliefs. Their flexibility allows you to reach corners without applying pressure. The difference: they conform to shapes instead of scraping. Visible benefit: complete cleaning even in complex details.
🎯 Optimal setup
Lighting and positioning: Position yourself so that you have side lighting on the artwork (never facing it to avoid reflections). This position reveals all impurities and allows you to control your progress. Slightly move your body to vary the viewing angle.
⏱️ Time: 2 minutes | ✅ Successful when: You can clearly distinguish each area to be cleaned without shadows | ⚠️ Caution: Direct lighting creates misleading reflections that mask defects
Discreet compatibility test: Choose a less visible corner and test your method on a 2cm² area. This precaution avoids any unpleasant surprises and gives you confidence for the rest. Wait 30 seconds to observe the reaction.
⏱️ Time: 1 minute | ✅ Successful when: No color or texture changes are visible | ⚠️ Caution: Some varnishes react with a delay, hence the importance of the observation time
Securing the environment: Remove jewelry, watches and any object that could scratch. Protect the floor under the artwork and have your tools within reach. This organization allows you to focus solely on the technical gesture.
⏱️ Time: 2 minutes | ✅ Successful when: Your movements are free and safe | ⚠️ Caution: Haste is responsible for 80% of cleaning accidents
✅ Step 1 validation: Your space is organized, your lighting optimal, and your test conclusive. You feel the serenity of a professional who masters their environment. If in doubt about the lighting, move around: you should see the details without squinting. Ready for action!
OUR RECOMMENDED PRODUCTS
Step 2: Targeted Cleaning (Your Technique Refines)
You are now moving to the next level: targeted cleaning according to the support. This step is more rewarding as you immediately see the transformation of your works. The cumulative effect of good practices creates that satisfaction of a job well done.
🎨 Technique by Type of Artwork
For canvases and paintings: Very light circular movements starting from the center outwards. This method follows the natural direction of the fibers and avoids accumulations in the corners. Renew your cloth as soon as it becomes dusty to avoid redistributing impurities.
⏱️ Time: 3-5 minutes depending on size | ✅ Successful when: Colors regain their original saturation | ⚠️ Attention: Too much pressure can deform a stretched canvas
For works under glass: Spray the product onto the cloth (never directly onto the artwork) then clean in a horizontal S shape to avoid streaks. Finish with a vertical pass with a dry cloth. This sequence guarantees perfect transparency.
⏱️ Time: 2-3 minutes | ✅ Successful when: No traces or parasitic reflections visible | ⚠️ Attention: Moisture can seep between the glass and artwork if sprayed directly
For ornate frames: Use the brush to dislodge dust from the reliefs, then a slightly damp cloth following the direction of the patterns. The corners require particular attention as they accumulate more residue.
⏱️ Time: 4-6 minutes for an elaborate frame | ✅ Successful when: Every sculpted detail is clean and shiny | ⚠️ Attention: Old gilding can flake off with too much pressure
🎯 Quality Control Level 2: Step back 2 meters and observe the homogeneity of the result. Your paintings should have regained their original luster, without any residual dull areas. The feeling of satisfaction confirms that you now master the technique adapted to each support.
Step 3: Protective Finish (The Expert Level)
You are now reaching the level of experienced collectors. This final step makes the difference between an amateur cleaning and a professional maintenance. The final result you will be proud of will permanently transform the visual impact of your wall decor.
✨ Expert Finishing Touches
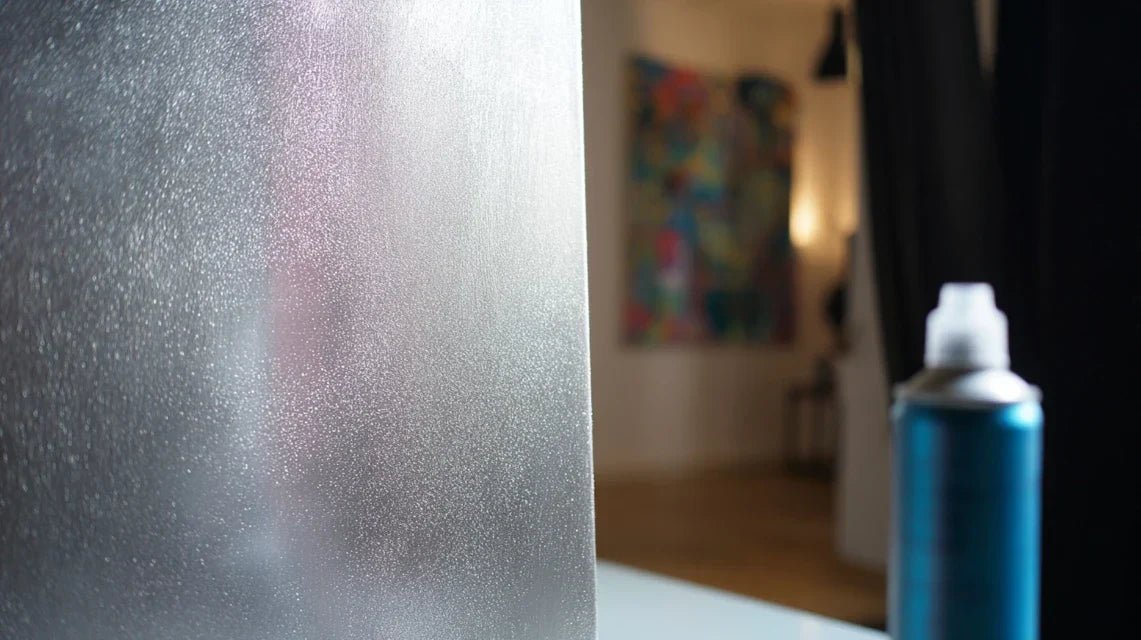
Anti-dust protection: Application of a specialized antistatic product that repels dust for 2-3 months. Spray onto a clean cloth and pass in wide, even strokes. This invisible protection significantly extends the effect of your cleaning.
⏱️ Time: Under 2 minutes per artwork | ✅ Success when: Slightly satin finish, without excess product | ⚠️ Attention: Excess antistatic product can create a dull veil
Hanging adjustment: Take advantage of this cleaning to check and correct the position of your artworks. A slightly crooked artwork spoils all the effect of a perfect cleaning. Use a level or your phone app for millimeter precision.
⏱️ Time: 30 seconds per artwork | ✅ Success when: Perfect alignment and stability ensured | ⚠️ Attention: Excessive tightening can damage the wall or frame
Highlighting lighting: Test different lighting to reveal the beauty of your freshly cleaned artworks. Warm LED lighting at 2700K particularly reveals color nuances without altering pigments.
⏱️ Time: 3-5 minutes observation | ✅ Success when: Each artwork "radiates" in your space | ⚠️ Attention: Direct continuous lighting can fade some sensitive artworks
🏆 Expert level result: Your artworks now reveal all their depth and nuances. The entire wall decoration forms a harmonious and dazzling whole. This lasting transformation fully justifies the time invested and gives you the pride of expert work accomplished.
Collector's progression rule: Wait 24h before judging the final result. Some products reveal their full effect over time, and your eye gradually gets used to this new shine. Patience distinguishes the amateur from the expert.
You have now crossed the threshold of professional cleaning and discovered these expert subtleties that make all the difference. This mastery places you in the circle of informed collectors who know how to reveal and preserve the beauty of their artworks.
🎓 Curator's tip: Photograph your artworks before and after cleaning with the same lighting. This documentation helps you space out cleanings ideally (generally 3-6 months depending on exposure) and constitutes a valuable record for maintaining your collection.
🤔 Frequent question from our readers
"What if I don't have all the specialized products at hand, can I still start?"
Absolutely! Your motivation is better than waiting for perfect equipment. Start with a quality microfiber cloth and demineralized water for an initial dusting. This gentle approach poses no risk and will already give you 70% of the expected result. Investment in specialized products will come naturally when you see the spectacular improvement.
💡 Quick action: Test now a delicate dusting with a dry cloth on an inconspicuous area. You will immediately see the difference and it will give you confidence to deepen the method.
The 5 mistakes that can ruin your efforts (and how to avoid them)
After guiding hundreds of owners in the maintenance of their collections, j'ai identifié ces pièges récurrents qui transforment un geste bienveillant en catastrophe. Knowing these mistakes saves you months of regrets and preserves the value of your works.
- ⚠️ The rush of a big cleaning: Wanting to clean your paintings "at the same time" as the rest creates a negative time pressure. Haste makes you ignore the specificities of each work. Consequence: sloppy cleaning or damage by negligence. Solution: dedicate a specific moment, even short, exclusively to the works. This error affects 9 owners out of 10! 💧 The temptation of the "one-size-fits-all" product: Using the same glass cleaner, furniture cleaner and paintings seems logical and economical. Problem: these products often contain ammonia or alcohol which alter pigments and varnishes. Alternative: invest in a specialized neutral product, the long-term economy is obvious. 🧽 The sponge or paper reflex: These materials may seem soft but their fibers can subtly scratch delicate surfaces. You only notice it after several cleanings when the work loses its luster. Always prefer quality artistic microfiber, even if the initial investment seems high. 🚿 Direct spraying: Spraying the product directly onto the painting seems more effective but moisture can seep behind the glass, into the frame joints or soak the canvas. Always spray on the cloth first. This simple reflex avoids 90% of damage related to humidity. 🔥 Cleaning in full sun: Heat dries the product too quickly, creating difficult-to-remove streaks and potentially altering certain sensitive pigments. Wait for a cooler time or choose a shaded location. A few hours of patience avoid weeks of frustration.
🛡️ Your anti-error verification system: Before each gesture, ask yourself these 4 questions: "Is my equipment specialized?", "Have I tested discreetly?", "Is my gesture gentle and controlled?", "Is the environment optimal?". If one answer is no, stop. Warning signs: resistance of the support, immediate color change, texture that snags, or abnormal reflections.
Immediate stop! Photograph the area and do not attempt any further intervention. For recent stains (less than 24h), a gentle blotting with a damp cloth may suffice. For older damage or embedded stains, consult a restorer. This precaution preserves the value of your artwork and avoids aggravating the situation.
For works over 50 years old or worth more than €500, limit yourself to dry brushing. These pieces often require specific products and techniques according to their era and creation technique. Investing in a restorer consultation (€50-80) will inform you about the appropriate maintenance and protect your artistic heritage.


