

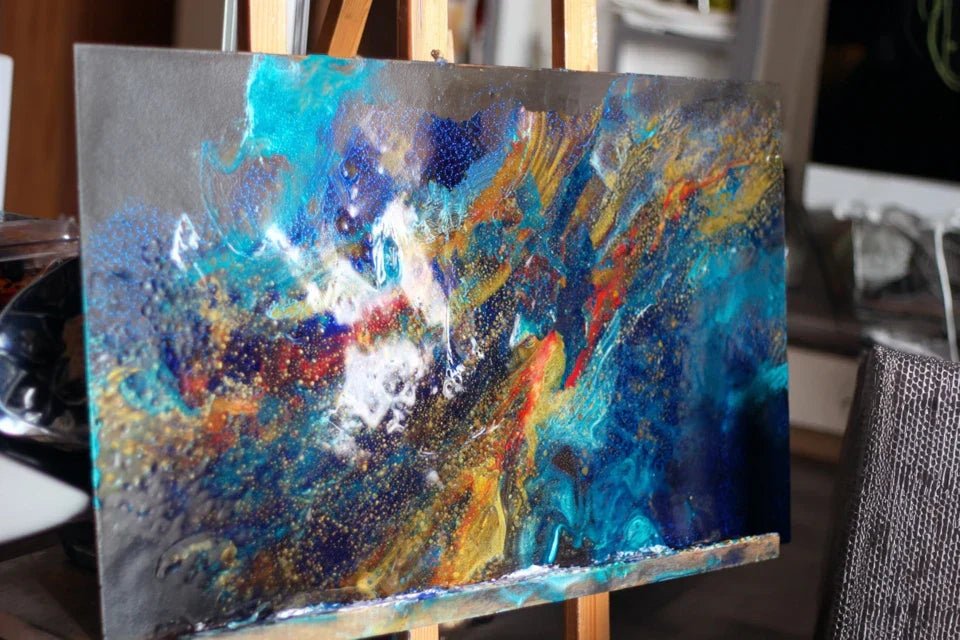
You've just acquired this magnificent acrylic glass artwork that brightens your living room, but now a fingerprint appears on its crystalline surface. Your heart sinks: how to clean an acrylic plexiglas painting without risking tarnishing it forever?
This anxiety paralyzes you every time you see dust or a mark on your artwork. You stand there, cloth in hand, hesitant to make the slightest gesture for fear of creating irreversible micro-scratches on this delicate surface.
You may have already tried cleaning it with your usual glass cleaner or a classic microfiber cloth. Result? Milky streaks, unsightly reflections, or even scratches that ruined the original luster of your artistic investment.
Rest assured, this apprehension is perfectly normal. Acrylic glass maintenance actually requires a specific approach, very different from cleaning an ordinary window. The problem isn't your clumsiness, but using methods unsuitable for this noble material.
By the end of this article, you will master the professional technique to preserve the luster of your acrylic artworks and keep them like new for decades, while cleaning with confidence and serenity.
Why is maintaining your acrylic painting so crucial today?
Contemporary art in acrylic glass represents a considerable emotional and financial investment. Waiting for traces to accumulate is like letting rust corrode a collector's car body: the longer you wait, the more irreversible the damage becomes and the more expensive it is to repair.
📸 Customer testimonial: "I waited six months before cleaning my plexiglas photo painting. In the meantime, dust had become embedded in the micro-roughness, creating a permanent veil that even a professional couldn't completely remove. I should have acted at the first signs."
💬 Conversation with a decor expert
The golden rule of acrylic maintenance: A delicate weekly gesture is better than a monthly stripping. This preventative approach maintains the original luster and saves you hundreds of euros in professional restoration.
Understanding why your previous attempts failed
Do you recognize yourself in these situations? Whitish traces after cleaning, reflections that catch the eye in the wrong place, or that unpleasant feeling of having "spoiled" your beautiful artwork acquisition?
The problem isn't your technique, but a lack of understanding of the specifics of acrylic glass. This material reacts differently to the products and gestures we instinctively use to clean a transparent surface.
Imagine trying to wash a cashmere sweater with the same technique you would use for jeans: the result would be disastrous, not because of a lack of good will, but due to an inappropriate method.
🔍 Hidden first cause: The "universal glass cleaner" illusion
Contrary to what marketing suggests, conventional glass cleaners contain ammonia which literally attacks the acrylic surface. It's like using bleach on silk: it cleans, but destroys the molecular structure.
Think of an abrasive sponge on a car body: even if it removes dirt, it leaves invisible micro-scratches that gradually tarnish the shine.
This discovery will transform your approach: you will finally understand why your previous cleanings left a feeling of "not quite clean" and those unsightly reflections that spoiled the artistic effect.
🧪 Revealing test: Pass your finger over the surface of your artwork. If you feel a slightly rough or sticky texture, it means chemical residues from unsuitable products have settled. A good cleaning should leave a perfectly smooth surface.
⚡ Hidden second cause: The "all-terrain" microfiber cloth myth
Not all microfibers are created equal for artwork maintenance. Cheap versions contain fibers that are too rigid and create micro-scratches, like using very fine sandpaper on a polished surface.
It's the difference between stroking a cat with a feather or with a metal brush: even gently, the inappropriate tool causes damage.
This revelation explains why your conscientious attempts resulted in traces and will give you confidence to handle your artworks without stress.
🌡️ Hidden third cause: The invisible temperature effect
Few people realize that cleaning an acrylic artwork in full sun or near a radiator causes too rapid drying which freezes product traces. It's exactly like washing a car under the blazing sun: guaranteed to leave marks!
Observe carefully: if your traces always appear in the same place, it is probably where direct light or heat accelerates drying.
This awareness will transform your results: a simple change of time or location for cleaning can take your technique from "catastrophic" to "professional".
🎯 3 signals that betray poor maintenance:
- Irregular reflections under indirect lighting: Reveal chemical residues invisible to the naked eye, like a thin layer of soap on glass
- Rough feel to the touch: Indicates the accumulation of abrasive micro-particles from unsuitable cloths
- Marks that reappear quickly: Signal that dirt adheres to residues of products, creating a vicious cycle of re-contamination
🎭 The Trigger: The "Spiral Gesture" Technique
The difference between a successful and failed cleaning often lies in a detail: the sense of movement. Cleaning in circles or back and forth creates micro-vortices that redistribute dirt, like stirring mud instead of evacuating it. The professional gesture follows a logic of progressive evacuation that respects the molecular structure of acrylic.
The "3 C" rule: Suitable cloth + Compatible product + Consistent gesture = perfect result. Check immediately by observing your reflection in the artwork: it should be clear and undistorted.
| ❌ Instinctive Approach | ✅ Professional Method | 💡 Why It Works | 🎯 Visible Benefit |
|---|---|---|---|
| Glass cleaner + paper towel | Neutral solution + optical cloth | Respects the molecular structure | Durable crystalline transparency |
| Energetic, punctual cleaning | Gentle and regular maintenance | Prevents dirt from becoming embedded | Constant shine without effort |
| Rapid circular movements | Progressive linear gestures | Evacuates without redistributing | Perfectly uniform surface |
| Air drying | Immediate controlled wiping | Avoids mineral deposits | Trace-free finish |
🎯 The Professional Method in 3 Simple Steps
Rest assured, we're going to transform this anxiety-inducing task into a natural and rewarding maintenance gesture. Imagine yourself in a few minutes, admiring your perfectly translucent acrylic artwork, without any traces or scratches, regaining all its original splendor as on the first day.
🏗️ Restoration Overview: Secure preparation (2 min) → Professional cleaning (5 min) → Expert finishing (3 min). Each step builds upon the previous one, like a chef preparing his ingredients before cooking an exceptional dish.
🛡️ Step 1: Secure Preparation of Your Workspace
Starting by securing the environment is the guarantee of a professional result. Exactly as a surgeon prepares their operating room: every detail counts to avoid any contamination. Once this step is completed, you will feel that serene confidence of professionals.
🧰 Essential Professional Equipment
- Premium microfibre optical cloth: Recognizable by its ultra-soft texture and "optical grade" label. Found in camera or optics stores. Quality criterion: should glide like silk on your skin. Absolutely avoid the too rough "car" versions that scratch irreparably.
- Neutral plastic-specific cleaning solution: Transparent liquid without ammonia, neutral pH between 6.5 and 7.5. The principle: dissolves grease without attacking the molecular surface. Quality indicator: does not foam and dries without residue. Impact: preserves transparency for decades.
- Fine mist sprayer: Bottle that produces microscopic droplets rather than a jet. Essential for even distribution without excess that runs. The visible benefit: uniform humidified surface without unsightly streaks.
🎬 Staging your temporary workshop
🌡️ Creating ideal conditions
Control of lighting and temperature: Keep your artwork away from direct heat sources and work under indirect lighting. The reason: avoid premature drying that fixes traces. Crucial technical detail: the surface must remain cool to the touch throughout the operation. It's simpler than it seems!
⏱️ Time: 30 seconds | ✅ Successful when: No dazzling reflections + cool surface | ⚠️ Caution: Avoid drafts that accelerate drying
Dry dusting: Gently pass the dry cloth in vertical movements from top to bottom to remove dust and lint. This step prevents micro-scratches during wet cleaning. Pro technique: a single pass per area, without going back over already collected particles.
⏱️ Time: 1 minute | ✅ Successful when: Surface free of visible particles + clean cloth | ⚠️ Caution: Never insist on a stuck particle, you will treat it in the next step
✅ Validation of preparation: Your artwork should be in a temperate environment, free of airborne dust, with all your tools within reach. If you still see particles, that's normal: the wet step will dissolve them. You are ready for the transformation!
OUR RECOMMENDED PRODUCTS
💎 Step 2: Professional gentle cleaning
You are now moving to the next level: true plexiglass artwork cleaning. This step instantly reveals the difference between amateur and connoisseur. You will see your work regain its original luster before your eyes, creating that rewarding "wow" effect.
🎯 Mastering spraying technique
- Optimal distance setting: Hold the sprayer 15-20 cm from the surface. This distance creates micro-droplets that settle evenly without creating streaks. Desired effect: uniform humid veil that shimmers in the light.
- Professional vaporizing pattern: Slow "S" movement from left to right, then from right to left downwards. Physical principle: uniform coverage without excessive overlap. Visible result: humidification without accumulation.
🏆 Expert cleaning execution
Controlled solution application: Spray according to the "S" pattern while maintaining a regular flow. The surface should shine evenly without beading droplets. This professional technique ensures optimal dissolution of dirt without damaging saturation.
⏱️ Time: 45 seconds | ✅ Successful when: Homogeneous shiny surface + no dry areas | ⚠️ Attention: If droplets form, you are too close or the flow is too strong
Linear wiping technique: Use the optical cloth in slow and regular horizontal movements, starting from the top. Each pass should slightly overlap the previous one. Professional secret: turn the cloth over as soon as one side becomes damp to maintain absorption efficiency.
⏱️ Time: 2 minutes | ✅ Successful when: Smooth movements + surface that dries immediately | ⚠️ Attention: Do not press hard, let the cloth do the work
✨ Step 3: Expert finishing for a perfect result
You are now reaching the level of mastery that makes the difference between "clean" and "perfect". This final step reveals all your maintenance talent and gives you this brilliant acrylic painting that you will be proud of for years.
🎨 Quality control and refinement
Inspection from different angles: Move around the painting observing reflections under several lights. This verification reveals any residual traces invisible from the front. Expert technique: the eye should glide naturally over the surface without catching on any defects.
⏱️ Time: 1 minute | ✅ Successful when: Sharp and uniform reflections + no distortion | ⚠️ Attention: Traces are better seen in grazing light
Targeted touch-ups if necessary: For any persistent traces, slightly moisten a clean corner of the cloth and gently dab the area concerned, then immediately wipe with the dry part. This "localized polishing" technique erases the last imperfections without compromising the overall work.
⏱️ Time: 30 seconds per area | ✅ Successful when: Treated area invisible from the rest | ⚠️ Attention: Maximum 3 passes on the same area
Final validation rule: Your acrylic glass maintenance is successful when you can read a fine text placed behind the painting without any distortion. This perfect transparency indicates the total absence of residues and traces.
Congratulations! You now master the subtleties that separate the informed enthusiast from a true expert in contemporary artwork maintenance. These professional finishes give you the serene confidence of those who know how to preserve their artistic investments.
🎓 Museum curator tip: After cleaning, photograph your painting under different lighting conditions. These "before/after" shots will allow you to detect changes in soiling and optimize maintenance frequency. That's what professionals do to keep collections in perfect condition!
🤔 "Am I likely to damage my painting if I get the product dosage wrong?"
"I'm afraid of putting too much or not enough product on my acrylic painting..."
This concern is very understandable when you are just starting out with precious artworks! The beauty of this method is its tolerance: a slight excess of neutral product simply evaporates, and an insufficient amount can be corrected with a light second spray. Start by testing on a discreet corner to gain confidence, just as you would test new laundry detergent on a delicate garment. If in doubt, two light passes are better than one heavily loaded pass!
💡 Confidence test: Start with a less valuable painting or a plexiglass sample to familiarize yourself with the sensations and gestures. You will quickly see that the technique is very intuitive and reassuring.
⚠️ Pitfalls to absolutely avoid to protect your investment
Now that you have mastered the technique, let's protect your know-how by identifying errors that could compromise your efforts. These pitfalls are tempting because they seem logical, but they hide real risks for your acrylic paintings.
- 🚫 Using "multi-surface" wipes: They seem practical because they are pre-impregnated, but contain degreasing agents that are too aggressive and create invisible micro-porosity. Result: your painting attracts more dust afterwards. Safe alternative: your optical cloth + homemade neutral solution duo. 🚫 Cleaning "in a row" several paintings: Cross-contamination of the cloth transports dirt from one artwork to another, creating unexpected deposits. Frustrating consequence: some paintings seem impossible to clean perfectly. Solution: one cloth per painting or intermediate rinsing. 🚫 Storing wet equipment: A poorly dried cloth develops bacteria that leave stubborn organic traces at the next use. It's like reusing an unrinsed kitchen sponge. Habit to adopt: always let air dry before storage. 🚫 Cleaning with diluted products to save money: Diluting your solution neutralizes its effectiveness and wastes your time and energy for a disappointing result. Perverse impact: you risk mechanically insisting and creating micro-scratches. Reminder: an appropriate product, even more expensive, remains economical in the long run.
- 🚫 Ignoring weather warnings: Cleaning in very humid or very dry weather disrupts natural drying and sets stains. This is particularly insidious because the error only appears after complete drying. Simple advice: prefer temperate and stable days.
🛡️ Anti-error verification system: Before each cleaning, check that your cloth slides effortlessly over your skin, that your product does not foam on contact, that the lighting does not create glare, and that the surface remains cool. Warning sign: if drying takes more than 2 minutes, stop and ventilate the area.
🎁 Special reader offer
Because you took the time to inform yourself, enjoy 10% discount on your first order:
⏰ Valid 72h after reading • Applicable to all our products
🙋 Frequently asked questions about acrylic painting maintenance
For a painting in a normal living room, cleaning once a month is quite sufficient. In a kitchen or near a window, opt for a bi-monthly rhythm. The trick: observe the accumulation of dust on your other glazed surfaces, your painting follows the same pace. Excessive maintenance needlessly fatigues the surface, like brushing your teeth 10 times a day!
Allow €25-35 for a complete kit of professional quality (optical cloth + solution + spray bottle). This unique investment easily maintains 10-15 paintings for 2-3 years. Compared to the hourly cost of a professional (€80-€120), you are profitable after the first cleaning!
Absolutely! This technique works perfectly on all acrylic supports: cooker protection plate, shower wall, storefront, computer screen... The only adaptation: reduce pressure on touch screens which are more sensitive. You become an expert in maintaining all your delicate surfaces!
Superficial micro-scratches often polish with a special acrylic polishing paste (available at marine supply stores). Apply in very gentle circular motions with a soft cloth, then clean as usual. For deep scratches, consult a restorer: early intervention costs €50-100 versus €200-400 if you let the problem worsen.
🌟 Your transformation into an expert in contemporary art
In a few weeks, this routine for acrylic glass maintenance will have become a natural and even meditative gesture. You will appreciate these privileged moments with your artworks, observing every detail, every play of light that reveals the beauty of your personal collection. Your guests will instantly notice the perfect shine of your paintings and ask you for advice.
This technical mastery opens the doors to a more ambitious collection for you with complete peace of mind. You now know how to preserve the investment that these acrylic artworks represent, and this confidence encourages you to discover new artists, new styles, without fear of maintenance.
The best thing about this learning? You have developed an expert eye that instantly detects the maintenance quality of an acrylic surface. Start today by gathering your supplies: you are only a few minutes away from restoring the original shine of your paintings!
🚀 Your first master's gesture: Look at your most beautiful acrylic painting and visualize it in its restored splendor. This image already guides you towards the perfect gesture, because you now know exactly how to achieve it!


