You've just installed your new favorite artwork in your living room, but you can’t seem to appreciate it peacefully: children running around, the TV resonating, guests passing by constantly... Your wall art seems lost in this daily chaos.
Every time you look at your wall, you feel that dull frustration: the magnificent painting you chose with such care literally disappears into the surrounding hustle and bustle. Vibrations slightly shake the frame, frequent passages worry you about its safety, and the acoustics of the room turn your decor space into a train station.
You may have already tried moving the artwork, adding protections, or even thought about changing rooms. But nothing works: either the painting loses its visual impact, or it remains vulnerable to noise and constant movement in the house.
Rest assured, it's not your choice of location that’s the problem. It's simply that no one has explained to you the technical specifications of paintings suitable for dynamic environments. There are artistic solutions specifically designed for these challenges.
In 8 minutes, you will master the secrets to choosing and installing wall art that perfectly resists noisy and high-traffic rooms, while maintaining its elegance and decorative impact.
Why your main room deserves the most beautiful paintings?
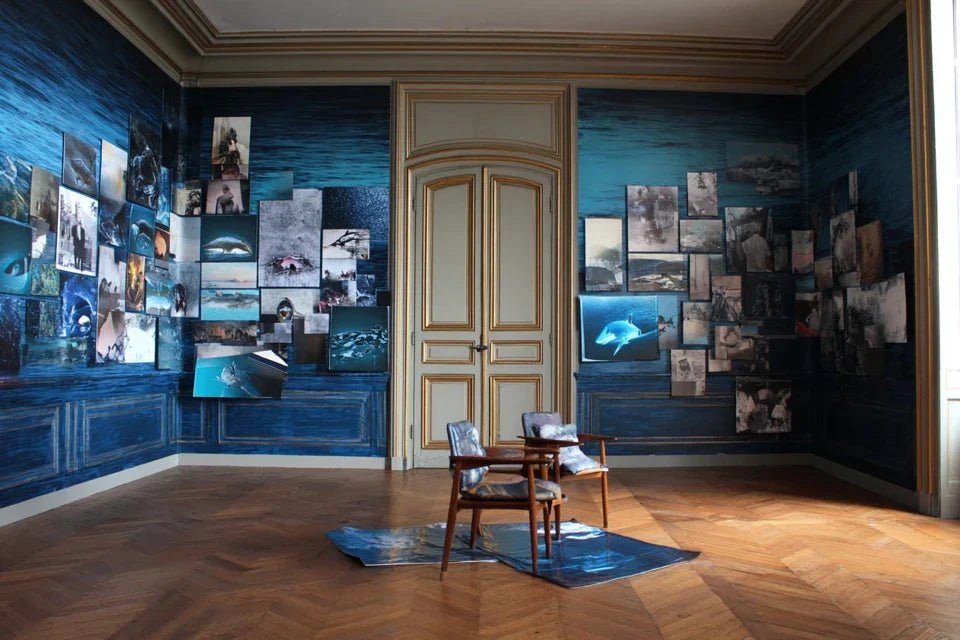
It's in the most lively spaces that art takes on its full meaning. Contrary to popular belief, a noisy or busy room is not the enemy of wall decoration – it’s its preferred ground! Imagine the effect of a resistant and acoustic painting that transforms chaotic energy into visual harmony, like a conductor who channels cacophony into symphony.
🏡 Customer testimonial: "I had given up decorating my family living room, thinking it was impossible with three children and a dog. Until the day I discovered paintings on reinforced acoustic backing. Now, not only does my artwork withstand everything, but it also absorbs some of the noise! My room is more beautiful AND quieter."
💬 Conversation with a decor expert
"I'm afraid my new painting won’t match if I change my wall color..."
Relax! It's exactly the opposite. A true artistic favorite adapts and even reveals itself with new colors. It's like a diamond that shines differently depending on the lighting!
"But I was told you always had to match colors..."
Who told you that? Modern decor plays on subtle contrasts. A painting with warm tones on a cool wall is like a fireplace in a blue room: magical!
The golden rule of durable wall art: The more intensely your room lives, the more your artwork should be designed to last and impress. In just 24 hours, you'll see the difference between a standard artwork and one adapted for dynamic environments.
Understanding what really weakens your wall art
Do you recognize these situations: your frame slightly detaching after each lively party, that feeling that your artwork "vibrates" with the music, or even this constant worry that a flying object will damage it during children's games?
What you are experiencing is nothing unusual. The problem doesn't come from your space or your lifestyle, but from a fundamental misunderstanding: not all artworks are designed to withstand the constraints of living rooms. It’s like trying to play sports with city shoes.
Imagine your artwork as a delicate musical instrument in a professional recording studio: it needs the right protections and environment to reveal all its beauty without risking damage.
The truth about sound and visual vibrations
Contrary to what one might think, it's not the loud, occasional noises that are problematic, but constant micro-vibrations. Every step, every door slamming, every conversation creates waves that spread through the walls and imperceptibly move your artwork.
It’s exactly like a drop of water falling regularly on a stone: a single impact does nothing, but repetition eventually carves it out. Your fixings come loose, your frame deforms slightly, and the artwork gradually loses its stature.
This invisible mechanical fatigue explains why some artworks seem to "fade" in lively rooms, while they retain all their brilliance in quiet bedrooms. Understanding this mechanism is already having the key to counter it effectively.
🔍 Revealing test: Gently place your hand against the wall near your artwork while a child runs in the room. You will feel the vibrations that run through the structure. Now, imagine what your work endures 24/7!
The little-known impact of acoustics on artistic perception
Here's something even experienced decorators often ignore: the acoustics of a room directly influence how we perceive the colors and shapes of an artwork. A chaotic sound environment unconsciously fatigues our gaze.
It’s like trying to appreciate a good wine in a noisy restaurant: our senses "close" to protect themselves from sound stress, and we miss subtleties that we would have noticed in a serene setting.
Concrete result in your daily life: even the most beautiful artwork in the world seems bland and flat in a room with aggressive acoustics. Fortunately, some acoustic wall supports can transform this constraint into a decorative asset.
The circulation factor: when space becomes hostile to art
There’s something no one tells you about heavily trafficked pieces: each passage creates a micro-current of air that slightly oscillates lightweight artworks. These repeated movements prematurely wear out traditional mounting systems.
Carefully observe your living room during an evening: count how many times someone walks past your artwork in 10 minutes. If it’s more than 3 times, your piece is undergoing mechanical stress equivalent to that of an outdoor billboard!
This constant circulation also explains why some artworks accumulate dust faster and lose visual clarity. The stirred air carries micro-particles and humidity which settle on the surface.
🎯 5 signs your artwork is suffering from its environment:
The frame is no longer perfectly level: Sign that vibrations have misaligned the mounting, like a clock slowing down due to shocks
Dust accumulates faster than in other rooms: Reveals disturbed airflow turning your artwork into a "particle trap"
You notice fewer details than at first: Your eye has become accustomed to the visual stress of the environment, masking the beauty of the work
The game-changing trigger: support thickness
Here’s the determining factor that 90% of buyers ignore: the thickness and density of your artwork's support directly influences its resistance to environmental constraints. It’s the positive domino effect: a suitable support stabilizes the mounting, improves acoustics, and even reveals colors better through improved depth rendering.
Law of resilient wall art: The thicker and denser the support, the more visually “anchored” the artwork is to the space and the more resistant it is to disturbances. Immediately check the thickness of your current artworks to understand their weaknesses.
❌ Common misconception
✅ Technical reality
💡 Simple explanation
🎯 Practical benefit
Lightweight artworks are easier to hang
Heavy and thick artworks hold better
Weight creates inertia that resists vibrations
Stable mounting for years
You should avoid art in noisy rooms
Some supports absorb sounds
Dense materials capture sound waves
Quieter AND more beautiful room
Thin frames are more elegant
Thick supports give more presence
Thickness creates a striking sense of depth
Impact visually multiplied
A fragile artwork will last if you’re careful
Only reinforced artworks stand the test of time
Daily wear is invisible but constant
Durable and secure investment
The 3-step method for artworks that defy noise and agitation
Now that you understand the real stakes, here’s how to transform your most vibrant room into a resilient and soothing art gallery. This logical progression will guide you from diagnosis to perfect installation, like an architect who builds foundations before erecting walls. At each step, you'll gain confidence and expertise.
🎯 Your path to excellence: Step 1 - Assess your space and choose the right support (solid foundations), Step 2 - Select the artwork and optimize acoustics (harmonious construction), Step 3 - Install and secure permanently (master craftsman finishes). Result: a room transformed where art and daily life enhance each other.
Step 1: Diagnose and choose the ideal support
Starting with the support is like choosing the right shoes before a hike: it determines comfort and the success of the entire adventure. This step will give you that unique satisfaction of knowing that you are starting on solid technical foundations, eliminating 80% of future problems from the outset.
🔧 Technical supports to know
High density honeycomb support: Resembles an ultra-resistant sandwich panel, absorbs vibrations like a car shock absorber, available in all professional art stores, check the minimum thickness of 20mm, avoid "eco" versions that are too light and still vibrate
Integrated acoustic box: Hollow structure filled with sound absorbing material, functions as a miniature soundproof chamber that traps background noise, recognize quality by weight (must be heavy), transforms your painting into a soundproofing element
Treated solid wood support: Dense wood such as oak or maple, absolute stability thanks to the natural fibrous structure, choose a minimum thickness of 3cm for the "anchoring" visual effect that commands respect and captivates the eye
Let's move on to assessing your space now
🏠 How to measure your room’s constraints
Ambient sound level test: Sit in your room for 10 minutes under normal usage conditions, count the number of sound interruptions per minute. The goal is to identify noise peaks to size the necessary resistance - it's simpler than a professional diagnosis
⏱️ Time: 15 minutes | ✅ Success when: You can classify your room as "moderately lively" or "very dynamic" | ⚠️ Attention: Don’t test during the quietest hours, as you would underestimate needs
Traffic flow analysis: Observe during a typical evening the recurring routes in front of your future painting location, mark frequent passage areas on the floor. This reveals air currents and accidental contact risks, like an urban planner studying traffic before installing a monument
⏱️ Time: 30 minutes | ✅ Successful when: You clearly visualize your room's "highways" and "back roads" | ⚠️ Attention: Children and pets create unpredictable flows, allow for extra space
Test of load-bearing wall strength: Gently tap the wall with your fist; a dull sound indicates a solid wall, a hollow sound reveals a partition wall. This determines the type of fixing possible, just like a doctor who examines to diagnose
⏱️ Time: 5 minutes | ✅ Successful when: You know the nature of your wall support | ⚠️ Attention: Modern partition walls can be misleading; don't hesitate to drill a small test hole
✓ Validation of step 1: You have identified the level of constraint in your room, chosen the appropriate support type, and verified the wall's strength. If you are still unsure, always choose the most robust solution - it is better to have an "overprotected" painting than a weakened work. Onward to step 2!
OUR RECOMMENDED PRODUCTS
Step 2: Select the artwork and optimize acoustic impact
Now that your foundations are solid, you access the next level: choosing a work that harmoniously dialogues with the energy of your room. This step is infinitely more rewarding because you see your space transform concretely. The snowball effect begins: each good choice facilitates and improves the following.
🎨 Artistic criteria for dynamic rooms
Strong contrast colors: Palettes that "resist" ambient visual noise, choose tones that assert themselves even in agitation, available in all artistic ranges, check the intense saturation that does not fade, avoid pastel shades that disappear in movement
Geometric or graphic compositions: Sharp shapes that visually structure the chaotic space, act as "anchors" for tired eyes, recognize quality by the precision of the lines, bring a feeling of order and immediate serenity
Relief textures or materials: Surfaces that catch the light differently depending on the angle, create a "relief" that resists ambient visual vibrations, prioritize matte effects that absorb parasitic reflections
🎵 Integrated acoustic optimization
Anti-resonance positioning: Place your painting away from room corners that amplify echoes, look for areas where the sound seems more "round" and less metallic. This prevents your work from becoming a sounding box, like choosing the right location for a piano
⏱️ Time: 20 minutes | ✅ Successful when: The hand clap resonates less in front of your chosen location | ⚠️ Caution: Walls opposite windows often create echoes, test before fixing
Creating an "acoustic cushion": Add a textile or absorbent material between the artwork and the wall, even 2cm of thickness transforms the local acoustics, it creates a zone of calm around the work, just like recording studios isolate their equipment
⏱️ Time: 10 minutes | ✅ Successful when: The sound seems more "muffled" near the artwork | ⚠️ Caution: Check that the insulator does not retain moisture
✓ Validation of step 2: Your work is chosen according to criteria of visual and acoustic resistance, the location optimizes sound absorption. You already feel that the atmosphere of the room changes for the better. On to the final step for a master installation!
Step 3: Secure Installation and Expert Finishing
You are now reaching the professional mastery level. This final step transforms your enlightened amateur competence into confirmed decorator expertise. The result you will obtain will impress even the most demanding visitors: a painting that seems to defy the laws of gravity and noise, anchored in your room as if it had been its soul forever.
🔨 Professional Fixing Material
High-strength chemical anchors: Resin sealing system that permanently solidifies the fixing to the wall, supports 10 times more weight than classic anchors, available in professional hardware stores, recognize quality by the Hilti or Fischer brand, an investment that secures your art for 20 years
Invisible suspension rail: System that distributes the weight across the entire width of the painting, eliminates localized stress points that fatigue the hanging, discreet installation that preserves aesthetics, works like the suspension of a bridge to distribute forces
Anti-vibration dampers: Small pieces of technical rubber placed between fixings and artwork, absorb micro-movements like car shock absorbers, invisible once installed but immediate effect on stability
🎯 Definitive Installation Protocol
Precision laser tracing: Use a laser level to mark the fixing points with millimeter precision, this accuracy avoids unsightly corrections and adjustments, a perfectly horizontal painting "reassures" the eye unconsciously, like a straight horizon soothes the gaze at sea
⏱️ Time: 25 minutes | ✅ Successful when: Your points are aligned to the millimeter and checked twice | ⚠️ Caution: Old walls may be deformed, rely on the level, not the lines of the wall
Anti-vibration system installation: Mount the dampers according to the technical manual, test stability by gently tapping the frame; the goal is a picture that doesn't move even with loud music - this stability immediately reveals the professionalism of the installation
⏱️ Time: 15 minutes | ✅ Success when: The painting remains motionless even if you tap the wall next to it | ⚠️ Attention: Do not overtighten the dampers, they must be able to "work"
Anti-glare lighting adjustment: Orient the lighting to avoid reflections that strain the eye in a noisy room; test from all frequent viewing angles - good lighting reveals details even when attention is scattered, just like museum lighting naturally guides the eye
⏱️ Time: 20 minutes | ✅ Success when: You can distinguish all the details from any armchair | ⚠️ Attention: Warm LED lighting (2700K) is less tiring on the eyes than cool white
✓ Final validation: Your painting holds perfectly, no longer vibrates, is ideally illuminated and resists all stability tests. You have just completed a museum-level installation! Savor this pride: few people master these expert techniques.
Rule of progression for the perfect installer: Only move on to the next step when the previous one seems "obvious" and mastered. Keep ambition but respect your learning pace - expertise is built layer by layer, never in haste.
You have just crossed the line that separates the amateur from the connoisseur. Mastering these technical subtleties gives you a huge advantage: you can now advise those around you and instantly spot approximate installations. This expertise saves you time, money, and above all the serenity of knowing your works are perfectly protected.
🔥 Professional secret: Experienced decorators always test the "sound resistance" of their installations by playing loud music for 10 minutes. If the painting still vibrates, the hanging is not optimal. This trick immediately reveals invisible weaknesses.
💬 Frequent question from our readers
"I don't know anything about DIY, can I really do it myself?"
That’s exactly the concern Marielle had before transforming her family living room. Your apprehension is understandable, but you are mistaken: these techniques require no particular talent, just method and a little patience. Start with a small test painting in a less visible corner - you will be surprised to find that it's simpler than changing a light bulb! In a maximum of 2 hours, you will master the basic gestures that will serve you for life.
💡 Starter tip: Practicing first with a heavy photo frame in your hallway. Succeeding at this simple installation will give you the confidence to move on to real works of art. Your first success will give you the assurance that you have the skills.
⚠️ Pitfalls that can ruin your installation
Attention, some mistakes can turn your project into a disaster. I share these pitfalls not to discourage you, but to avoid the disappointments I have seen too often. These errors seem logical at the time, but cause lasting problems.
🚫 Underestimating the final weight: It is tempting to calculate just the weight of the painting, but you forget the effect of vibrations that multiply the stress by 3. Result: a hanging that comes loose after 6 months. Always calculate generously, it's the reflex of professionals who never experience accidents.
🚫 Choosing the location for beauty only: This wall pleases you aesthetically, but it is exactly where all the pipes and electrical conduits pass! You discover the problem when drilling. Always check with a metal detector before tracing, this avoids costly surprises.
🚫 Neglecting seasonal expansion: Rigid fixings break because they do not "breathe" with temperature and humidity variations in the room. A very common beginner's mistake when using central heating. Always provide systems with a little flexibility.
🚫 Installing during summer vacation: The dry air of summer slightly deforms wooden supports and walls. Your perfect installation in August becomes wobbly in November with humidity. Prefer autumn or spring for stable conditions representative of the year.
🚫 Trusting the wall plugs supplied with the painting: These basic fixings are designed for perfect walls and light decorative use. In a dynamic room, they quickly come loose. Invest in real load-bearing wall plugs sold separately, it's €5 that saves you €500 in damage.
🛡️ Anti-error verification system: Before drilling permanently, test your installation with strong double-sided tape for 48h, check that nothing leaks/vibrates/gets in the way, ask a friend for their opinion on the aesthetics and stability, monitor warning signs: creaking, slight movements, traces of wear on the fixings.
Because you took the time to inform yourself, enjoy 10% discount on your first order:
ART10
⏰ Valid 72h after reading • Applicable to all our products
❓ Frequently asked technical questions
🕐 How long should I plan for a complete installation and what is the budget?
Allow 3 hours for your first installation (including diagnostics) and 1.5 hours for subsequent installations when you are comfortable. Average budget: €45 for professional fixing hardware + the price of your artwork. To optimize, order hardware in bulk for multiple projects. Concrete example: Julien equipped his living room, bedroom and office for a total of €89 in fixings, or €30 per room.
🧮 My wall is made of plasterboard, is that enough to support a large artwork?
Absolutely, but with the right technique! Plasterboard alone supports a maximum of 20kg, but with Molly high-resistance anchors or rail fixings, you can increase it to 80kg without problems. The secret: distribute the weight over several points. I've seen artworks 1.5m wide perfectly stable on standard partition walls thanks to this method.
💡 How do I know if my artwork really improves the acoustics of the room?
Simple test: record 30 seconds of normal conversation on your phone before and after installation. When listening, the "after" should sound rounder, less metallic. Another clue: you naturally speak less loudly in the equipped room. My clients notice this difference from day one, especially families with children.
🔧 I made a mistake when drilling, how can I fix it properly?
No worries, it's recoverable! Fill the hole with fiber repair compound, sand after drying, and offset your new drill hole by at least 15cm. Pro-tip: always keep a tube of filler matching the color of your wall for touch-ups. This situation happens even to experienced decorators!
⚡ My artwork is perfect but I would like to move it next year, is that possible?
That's the advantage of rail systems: hanging and re-hanging in 10 minutes without damaging the wall or the artwork! Keep the original fixings carefully, they can be reused. Advanced tip: photograph your installation before disassembly to easily find the correct setting elsewhere.
🌟 Your new life with artworks that transform space
In 3 weeks, when your guests cross the threshold of your living room, they will stop dead. Not only in front of the beauty of your artwork perfectly integrated, but facing this magical transformation: a room formerly noisy and chaotic becoming elegant and soothing. You will feel that discreet pride of knowing that your invisible technical expertise makes this visible harmony possible for everyone.
This mastery of resistant and acoustic artworks goes far beyond simple decoration. You have acquired an expert's eye which serves you in all your future arrangements, a comprehension of space that impresses even professionals, and above all the serenity of living surrounded by durable art and protected.
Understanding your space was the biggest challenge - it's behind you now. Your first concrete step? Choose the wall that inspires you most and apply the diagnostic method you just learned. Starting tonight, you will know exactly what to do to make your most vibrant rooms your most beautiful artistic frames.
🚀 Your moment is now: You have all the keys to succeed in this transformation. Start small, aim true, and in a month you will look at your room with the satisfaction of having created something unique and lasting!
📚 To go further in your expertise
Now that you master adapting to acoustic constraints, discover our other practical guides: daily artwork maintenance, anti-burglary securing, and managing paintings with pets or young children.


