

You've just discovered the perfect artwork – the one that makes your heart skip a beat with every glance. But here’s the thing: your bathroom desperately lacks character, and you dream of bringing an artistic touch to it, transforming your everyday moments into a true aesthetic escape.
Every time you imagine your artwork in this space, the fear of humidity paralyzes you. That steam that fogs the mirror, those droplets that bead on surfaces... What if your precious artwork deteriorates? What if the colors fade?
You may have already tried a cheap reproduction, only to see it peel or warp after a few weeks. Or perhaps you've given up out of fear, leaving your walls bare while your decorating instinct screamed at you to dress them.
Rest assured: this is neither a utopia nor a reckless risk! Previous failures simply stem from a lack of knowledge about suitable materials and appropriate protection techniques.
By the end of this article, you will know exactly what types of artworks to choose for a bathroom, how to protect them effectively, and where to position them to create a decor space that is both elegant and durable – without ever worrying about your artwork.
Why transforming your bathroom into an art gallery isn't an impossible dream anymore?
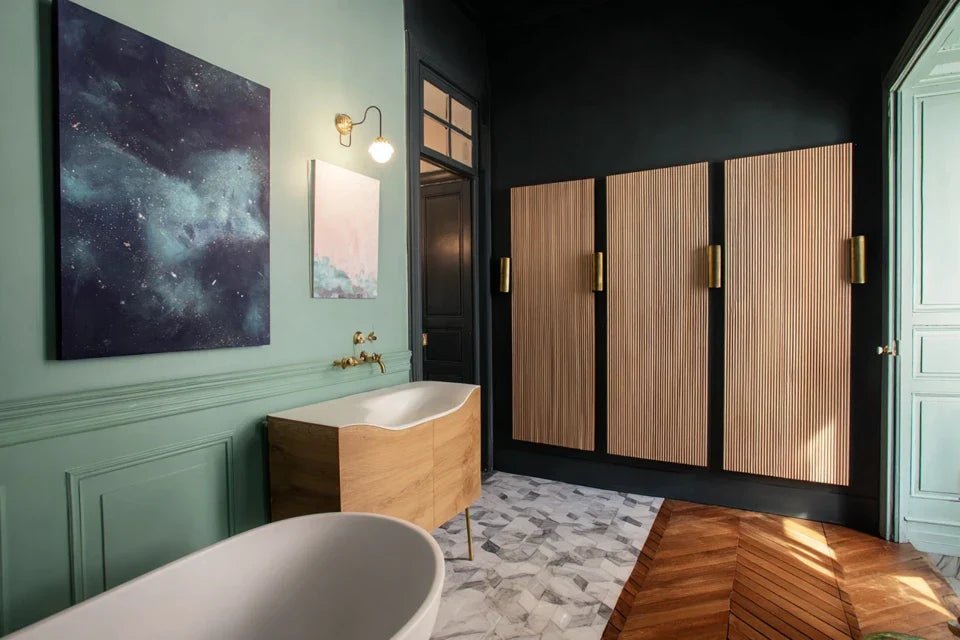
The modern bathroom is no longer that simple functional space of the past. It has become our wellness sanctuary, our daily refuge where we recharge. Neglecting its decor means missing out on privileged moments that could nourish your artistic soul from the moment you wake up. Imagine yourself in the shower, contemplating a work that inspires you, or brushing your teeth facing a creation that makes you smile. These small everyday pleasures completely transform your relationship with this intimate space.
🎨 Sarah’s testimony, interior designer: "I hesitated for a long time before installing an ocean-toned abstract canvas in my bathroom. Three years later, it hasn't moved an inch and gives the room a crazy personality. My guests always ask me where I found that audacity!"
💬 Conversation with a decor expert
The golden rule of art in humid environments: A well-chosen and protected artwork resists humidity better than a solid wood piece of furniture in your living room. With the right techniques, you can create a unique decor space in just 48 hours.
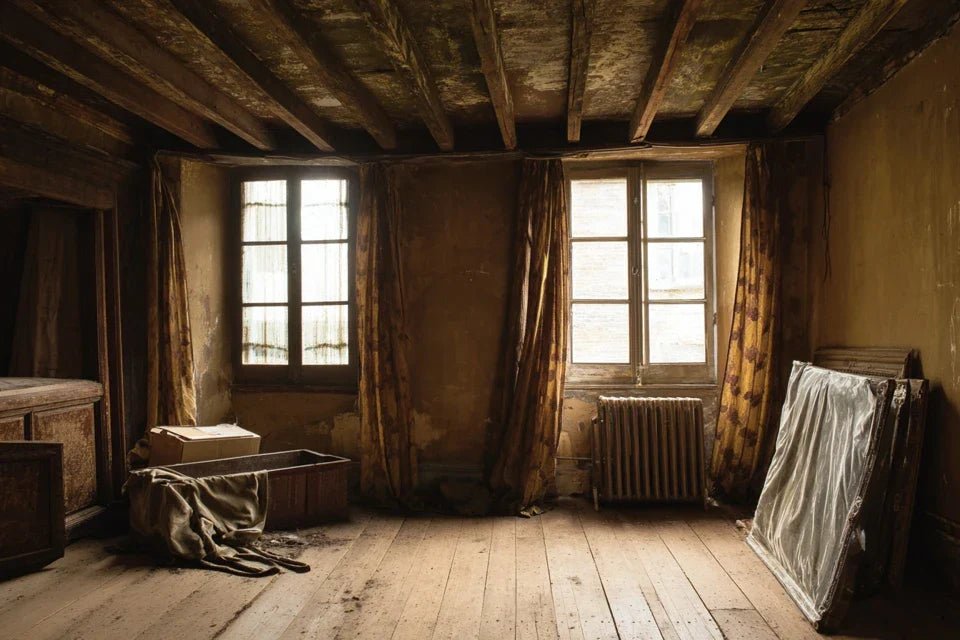
Why your previous attempts failed (and it's not your fault)
Do you recognize yourself in these situations? Canvas that warps after a few hot showers, colors that mysteriously fade, or a frame that slowly peels off... These failures reveal common technical errors, not a flaw on your part.
The real cause of these disappointments lies in the inadequacy of the materials chosen for the environment. It's like wearing leather shoes in the rain: the problem isn't the walking, but the unsuitable equipment.
Understand this well: your decor instinct was perfect. Only the method needed a technical adjustment that no one had explained to you clearly.
🔍 The false belief about total waterproofing
Contrary to popular belief, you should not seek to create a perfectly waterproof barrier around the artwork. This approach actually creates trapped condensation zones that are much more destructive than normal ambient humidity.
Think about your windows in winter: it's when they are hermetically closed that mist accumulates most. The secret lies in controlled breathing of the materials.
This revelation changes everything in your approach: instead of "sealing" your work, you will learn to let it adapt naturally to its environment while protecting it intelligently. Result: superior durability and optimal visual rendering.
🧪 Immediate test: Place a small mirror in your bathroom after a shower. Observe where the mist forms least: that's exactly where your artwork will be most comfortable!
💨 The positioning error that ruins everything
Most people instinctively place their artwork facing the shower, thinking they are creating an aesthetic focal point. Big mistake! This area receives direct projections of hot water and the densest steam.
It's like installing a laptop right next to your boiling kettle: even if it’s high quality, it will eventually suffer from this direct and repeated exposure.
Result: you experience support deformation, premature discoloration, and the frustration of seeing your decor investment degrade before your eyes. The solution? A strategic positioning that we will detail later.
🎨 The trap of cheap materials
Plasticized photo paper, standard inkjet print, agglomerated frame... These choices, tempting because of their price, are the worst enemies of art in humid environments. No one has explained to you that the initial savings turn into a medium-term cost.
You can easily identify this trap in your current situation: if your artwork currently exhibits ripples, colors that fade, or edges that peel off, it's exactly this phenomenon in action.
This discovery releases a huge mental burden: it's not your bathroom that's the problem, it's the choice of components. With the right materials, even a windowless bathroom can permanently accommodate art.
🔎 3 warning signs to watch out for:
- Support warping: The paper or canvas "waves" → moisture absorption by an untreated material
- Colors losing their vibrancy: The print becomes dull → inks not resistant to humidity
- Frame detaching or warping: Joints loosen → unsuitable wood or composite material
⚡ The trigger factor: neglected ventilation
Here's the lever that 90% of people neglect: air circulation. A painting can survive a lot of humidity if it benefits from regular air renewal. This is the positive domino effect that protects all your decor choices. You can immediately identify this factor in your bathroom: if the air stagnates after a shower, if the smell of humidity lingers, or if the mirror remains fogged for a long time, your ventilation needs to be improved before any artistic hanging.
The 15-minute rule: If your bathroom returns to its normal state in less than 15 minutes after a hot shower, it can accommodate any properly chosen painting. Quick test: time how long it takes for the fog on your mirror to disappear.
| ❌ Common belief | ✅ Reality | 💡 Explanation | 🎯 Practical benefit |
|---|---|---|---|
| You have to completely seal the painting | You need to allow for controlled breathing | Total sealing traps moisture and creates condensation | Superior durability and optimal rendering |
| Only laminated reproductions are resistant | Treated canvases are more durable | Plastic yellows and peels off, canvas adapts | Artistic authenticity + long-term resistance |
| The more expensive it is, the better it resists humidity | It's the specific materials that matter | A well-chosen €50 painting outperforms a €500 unsuitable one | Controlled investment and guaranteed result |
| You have to avoid bright colors in humid environments | Good inks retain their vibrancy for years | Resistance depends on the quality of printing, not the color | Total creative freedom in your aesthetic choices |
The foolproof method for hanging your painting with complete peace of mind
Now that you know the real causes of failure, let's move on to the solution! This progressive method leads you from the initial choice to the final result in 3 logical steps, like building a house: solid foundations, suitable structure, protective finishes. At each step, you will feel the satisfaction of mastering a technical aspect, until that magical moment when you contemplate your transformed bathroom, knowing that your work will thrive there for years to come.
🏗️ Transformation Overview: Step 1 = Material Selection (Ensuring Safety), Step 2 = Strategic Positioning and Protection (Optimisation Satisfaction), Step 3 = Installation and Durable Finishes (Professional Result Pride).
🎯 Step 1: Choosing the Right Materials (The Foundation of Your Success)
This first step determines 80% of your final success. It's like choosing the right shoes before a hike: neglect this base, and even the most beautiful road becomes a torment. Once you master this selection, you will feel that quiet confidence knowing that your investment is protected, no matter what happens in your bathroom.
🛠️ Your Anti-Humidity Shopping List
- Canvas or Support: Prioritize humidity-treated canvas or aluminum dibond (modern metallic look). Absolutely avoid photo paper, even laminated – it always ends up swelling at the corners. Recognize quality by feel: good canvas remains flexible but firm. Why not PVC? It yellows and gives your art an unnoble "plastic" appearance.
- Inks and Prints: Demand UV pigment inks (100+ year resistance) and not dye inks (maximum 5-10 years). The test: explicitly ask the seller about the printing technology used. The additional investment (20-30% of the price) guarantees vibrant colors even after years of exposure.
- Protective Varnish: A matte acrylic anti-UV varnish applied in a thin layer protects without creating annoying reflections. It forms an invisible barrier that repels moisture while allowing the artwork to breathe. Visible result: colors remain deep and the rendering retains its natural appearance.
🎨 Transition to Concrete Action: Now that you know what to look for, let's move on to the practical selection of your work.
✅ How to Choose Well
Check Support Resistance: Explicitly ask if the support is humidity treated. A serious seller will give you precise technical details (type of treatment, warranty...). This question immediately reveals whether you are dealing with a professional or a basic reseller who ignores these crucial specifics.
⏱️ Time: 5 minutes per artwork | ✅ Success when: You have a precise technical answer and written guarantee | ⚠️ Attention: Be wary of evasive answers like "yes, it is resistant" without detail – often a sign of the seller's ignorance
Test Print Quality: Observe the artwork under different lighting conditions (natural light, artificial light, raking light). Good inks reveal subtle nuances and retain their depth from all angles. Standard print quality often appears "flat" under raking light and exhibits color variations depending on the viewing angle.
⏱️ Time: 3 minutes | ✅ Successful when: Colors remain consistent under all lighting conditions | ⚠️ Caution: Low-quality prints reveal "banding" (color bands) in direct light
Negotiate included protection: Many sellers offer the application of a protective varnish as a service. It's often more economical and professional than doing it yourself. Take advantage of your purchase to have this protection included in the overall price – a selling point for the merchant, peace of mind for you.
⏱️ Time: 2-minute discussion | ✅ Successful when: Protection included or preferential rate obtained | ⚠️ Caution: Some sellers overcharge for this simple service – compare with the price of varnish and brush in store
✨ Validation of step 1: Your chosen artwork features a treated backing, durable inks, and suitable protection. You can move on without worry and look at your reflection in the mirror: you've just made an expert choice! If in doubt about any criterion, it’s better to wait and continue your research than to give in to urgency.
OUR RECOMMENDED PRODUCTS
📐 Step 2: Mastering Strategic Placement
You are now moving to the level of interior architect! This step reveals the difference between a haphazard hanging and a thoughtful placement. The unexpected bonus: by optimizing for durability, you automatically create the optimal visual conditions. The positive snowball effect starts here.
🎯 Your Anti-Humidity Radar
- Safety zone: Identify the wall perpendicular or opposite the shower, at a minimum of 1.5 meters from any direct water source. Visualize possible splash trajectories – your artwork should remain outside these "impact zones". Test with a few drops of water: if it doesn't reach the wall under normal conditions, that’s perfect.
- Optimal height: Position the center of the work at 1.60m from the floor (standard eye-level height). This elevation avoids splashes from the sink while remaining within the natural field of vision. Higher, the artwork becomes decorative but less contemplative; lower, it risks exposure to projections.
- Air circulation: Ensure that no furniture or accessories block the natural ventilation around the artwork. A 15cm free space on the sides allows air to circulate freely. Result: rapid evaporation of any residual moisture.
🔧 Step-by-Step Installation
Map your bathroom: Take 10 minutes to observe the airflow and humidity after a hot shower. Mentally note where the condensation lingers longest and where it disappears first. These fast-drying areas are your premium locations for art.
⏱️ Time: 10 minutes of observation | ✅ Success when: You clearly identify 2-3 favorable zones | ⚠️ Attention: Don’t forget to test after a really hot shower, not just a hand wash
Materialize the location: Use newspaper or magazine to simulate the size of your future artwork. Temporarily tape it up and live with it for a few days. This trick reveals visual interactions with lighting and validates daily visual comfort before making a final purchase.
⏱️ Time: 5 minutes + 3 days of testing | ✅ Success when: The location satisfies you at all times | ⚠️ Attention: Some perfect locations in the morning can become bothersome in the evening depending on the lighting
🎯 Quality control step 2: Your chosen location remains dry after showers, offers optimal visibility and benefits from good airflow. Test by placing a towel on it: if it dries quickly, your artwork will thrive there. Ready for permanent installation!
Final stretch towards your dream bathroom! This final step transforms your acquired expertise into concrete achievement. You are now accessing the level of professional decorators: every gesture is important, every detail contributes to the exceptional durability of your installation.
🛠️ Your premium installation kit
- Special humidity fixings: Use expanding nylon wall plugs and stainless steel screws, never standard metal which would rust. These fixings cost €3 more but avoid rust stains on your white walls. Allow one plug per 2kg increment of the framed artwork’s weight. Ventilated hanging system: Prefer spaced hooks that keep the artwork 5mm from the wall. This micro-ventilation prevents condensation from forming between the work and the wall support. Alternative: modern suspension rails which add a contemporary touch. Peripheral sealing joints: A thin transparent silicone seal on the frame (sides and top only, never at the bottom to avoid a trap effect) repels direct projections while preserving the aesthetic appearance.
⚙️ Permanent installation protocol
Prepare the wall support: Clean the area with a degreasing detergent and let it dry completely. Check for residual moisture with your hands – the wall must be perfectly dry and at room temperature. This preparation conditions the durable adhesion of your fixings.
⏱️ Time: 15 minutes | ✅ Successful when: Wall is clean, dry and at a stable temperature | ⚠️ Attention: Avoid installing immediately after a hot shower - wait 2h for the temperature to stabilize
Install the mounting system: Drill with a drill bit suitable for your wall (concrete/drywall/tile) and fix securely. Test the resistance by pulling gently: no play should be perceptible. The stability of this base determines the longevity of your entire artistic installation.
⏱️ Time: 20 minutes | ✅ Successful when: Fixation is perfectly stable without movement | ⚠️ Attention: If the wall is tiled, use a special tile drill bit to avoid cracks
Position and fine-tune: Hang your artwork and check its level with a spirit level (or your smartphone's level app). Adjust until you achieve perfect alignment. This final precision reveals your attention to detail and enhances the work of art as a whole.
⏱️ Time: 10 minutes | ✅ Successful when: Artwork is perfectly straight and stable | ⚠️ Attention: Never force an adjustment - if it resists, double-check your fixings rather than insisting
🏆 Final validation: Your artwork is securely fixed, perfectly straight, with a ventilated spacing from the wall. Test by gently passing your hand around it: you should feel a slight air gap. Mission accomplished! Your bathroom now has its lasting artistic signature.
Expert progression rule: Wait 48h before definitively validating your installation. This delay reveals any necessary micro-adjustments and confirms that the artwork truly inhabits its new environment. Patience rewarded = lasting satisfaction.
Congratulations! You now master the subtleties that only professional decorators know. This expertise gives you a considerable advantage: you know why some installations fail and others last for decades.
🎖️ High-end decorator tip: For an even more professional finish, install an adjustable mini LED spotlight that subtly illuminates your artwork in the evening. This indirect light enhances colors and creates a luxury spa atmosphere. Secret: position it at an angle to avoid reflections.
🤔 "What if my painting still comes off?"
"I'm still a little stressed... What if, despite all these precautions, my artwork ends up having problems?"
This concern is perfectly normal – we've all had decor disappointments! Rest assured: with the method you just learned, the risks are almost zero. But let's be honest: even professionals take precautions. Here’s the secret: start with a medium-sized artwork (maximum 40x60cm) for your first experience. If everything works perfectly after 6 months (and it will! ), you can consider more ambitious formats with confidence. This progressive approach eliminates stress and allows you to refine your technique.
🛡️ Backup plan: Photograph your initial installation and visually check it once a month in the beginning. If you have any doubts, you can intervene quickly. But frankly, with your new skills, you are likely to become the decor reference for your loved ones!
⚠️ The 5 mistakes that sabotage even the best intentions
Before you start, let's protect your investment! These mistakes are so common that even experienced decorators sometimes fall for them. Knowing them is avoiding them definitively.
- 🚿 Falling for the "facing the shower" location: This location seems magical visually, but it's a trap! Even with the best materials, direct and repeated exposure to hot projections prematurely wears down any protection. Alternative: the perpendicular wall offers the same visual satisfaction without the risks. It’s mistake #1 for enthusiastic beginners.
- 🎨 Choosing aesthetics first, then checking resistance: Falling in love with a painting and then trying to adapt it to humidity often leads to regrettable technical compromises. It's better to define your resistance criteria BEFORE cracking aesthetically. Believe me, there are artistic wonders in every range of suitable materials!
- 💨 Neglecting ventilation improvement: Many people settle for existing VMC without optimizing airflow. Result: even an excellent painting suffers in a poorly ventilated environment. Simple solution: leaving the door slightly open 15 minutes after each shower works miracles.
- 🔧 Using standard "leftover" fixings: These small €5 savings cause drama! Screws that rust, dowels that come loose, marks on walls... Invest in stainless steel hardware from the start. Your painting deserves better than a makeshift fixing recovered from an old hanging.
- ⏰ Rushing the installation: The excitement of decorating leads to installing immediately after purchase. Mistake! Take 24 hours to analyze the optimal location, check the weather (avoid very humid days), and properly prepare your tools. This initial patience avoids tedious repositioning.
🛡️ Your anti-error checklist: Before each step, check: 1) The location remains dry after a hot shower, 2) Materials are labeled "moisture resistant", 3) Stainless steel fixings in stock, 4) Effective ventilation tested. Warning signs: persistent fogging > 20 minutes, musty odor, condensation on walls.
🎁 Special offer for readers
Because you took the time to inform yourself, enjoy 10% discount on your first order:
⏰ Valid 72h after reading • Applicable to all our products
❓ Your most frequently asked questions about art in the bathroom
Allow 80-200€ for a 50x70cm format with all the appropriate treatments. Budget optimization: buy directly from a professional printer rather than in a gallery (save 40% on the same product). Concrete example: a canvas treated + pigment inks + protective varnish + aluminum frame costs around €120 from a good printer, versus €300 in a decor shop.
With the right techniques, a minimum of 10-15 years without visible degradation! Examples in luxury hotels prove it: their works withstand years of intensive use. My client Sarah (mentioned above) is now in her third year with no alteration whatsoever. The secret: scrupulously respecting the selection and installation steps.
Totally accessible for DIY! Required level: drilling a wall and using a level. If you've already hung a picture in your living room, you master 90% of the technique. The only difference: choose the right materials and respect safety distances. Professional intervention budget: €80-120, to be saved for investing in a second artwork!
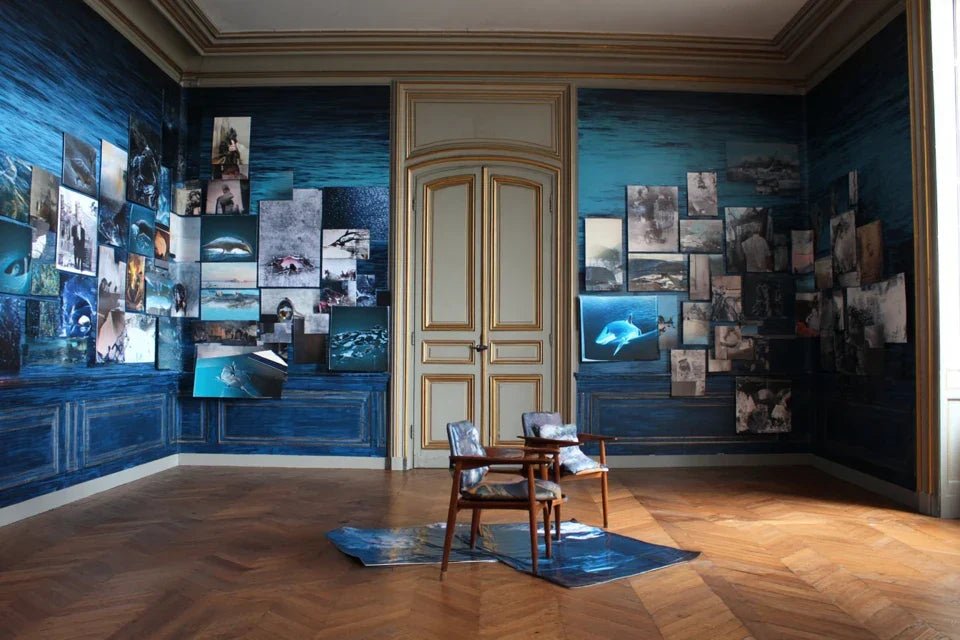
Total creative freedom! Abstract, landscapes, portraits, photography... only the printing technique matters, not the artistic content. Little trick: works with a lot of blues and greens naturally harmonize with the "bathroom" atmosphere, but warm colors (reds, oranges) create a striking contrast very trendy in modern decor.
Absolutely! That’s even one of the biggest advantages: the mounting system stays in place, only the artwork changes. Seasonal rotation, evolving tastes, or a desire for novelty... you can transform the ambiance of your bathroom in 5 minutes. Pro tip: keep the standard dimensions (50x70, 40x60) to facilitate future changes.
🌟 Your bathroom, your personal gallery
In a few weeks, when you enter your bathroom in the morning, it won’t be the same space anymore. The look you give your artwork will make you smile before even your first coffee. Your guests will stop, surprised by this daring decor that transforms a utilitarian room into a true artistic cocoon. This success will reveal a new facet of your personality: the one who dares, innovates, and doesn’t settle for ready-made solutions. Your entourage will ask you for advice, admiring this transformation they thought impossible.
But beyond external recognition, you will have gained something more valuable: mastery of a technical know-how transferable to all your future decor ambitions. This expertise in moisture management will open up other possibilities: kitchen, veranda, wine cellar... Your confidence in decoration will know no limits.
The best part of it all? This transformation begins with a simple first step: choosing your first resistant artwork. Everything else follows naturally from this initial decision. In 72 hours, you could be contemplating your transformed bathroom. What’s holding you back?
🚀 Your moment has arrived: You now have all the keys in hand to succeed where others have failed. Your bathroom is waiting for your artistic signature to reveal its hidden potential. And if this was THE project that launches your new passion for decor?


