Creating a Gallery Atmosphere in a Small Space: Visual Rules to Follow
By Alexandre MARY
⏱️ Reading time: 8 minutes
Do you dream of transforming your studio or small living room into a sophisticated art gallery, but every attempt ends in a cluttered or amateurish result. Your paintings seem lost on the walls, the lighting doesn't highlight anything, and the whole thing lacks that museum elegance you admire so much.
Imagine that cozy atmosphere where each work breathes, where light gently caresses the canvases, where your guests instinctively stop to contemplate. But the reality of your small space brings you back down to earth: overcrowded walls, failed proportions, chaotic ambiance.
You've probably tried hanging all your favorite pieces at once, imitating those Instagram interiors without considering your space constraints. The result: your passion for art turns into daily decorative frustration.
This is perfectly normal: creating a gallery atmosphere cannot be improvised, and the rules of large spaces do not apply to small surfaces. The real difficulty lies in the art of selection and strategic placement.
By the end of this article, you will master the 5 essential visual rules to transform any small space into a private gallery, even with a modest budget and without drilling hundreds of holes in your walls.
Why Your Small Space Can Become Your Greatest Artistic Asset?
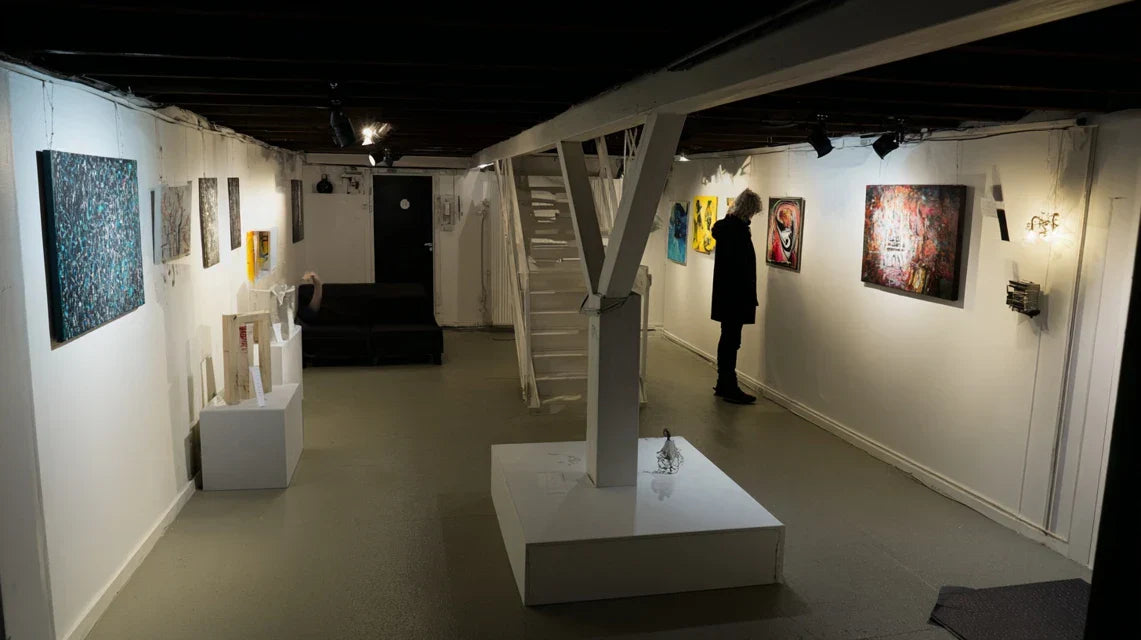
Contrary to popular belief, a small space offers an intimacy and emotional intensity impossible to reproduce in a large room. Now is the time to act: the more you wait, the more you get used to a decor that doesn't look like you. Imagine receiving guests in a living room where every gaze naturally rests on a perfectly staged work of art. This visual transformation creates a striking surprise effect for your guests.
🎨 Revelation from a Decorator: Marie, owner of a 35m² Parisian apartment, transformed her living room into a personal gallery by applying one rule only: one wall, one flagship artwork, dedicated lighting. The result: her guests think she lives in an artist's loft when she lives under the roofs.
💬 Conversation with a Decor Expert
"I'm afraid my paintings will look too imposing in my small living room, it will overwhelm the space, won’t it?"
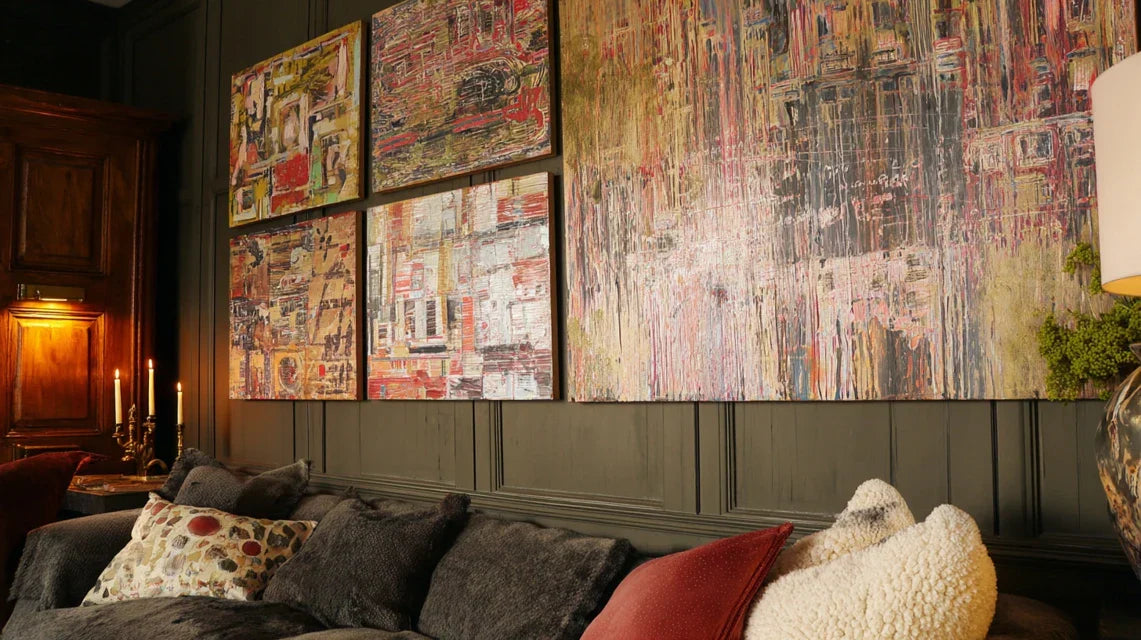
On the contrary! A beautiful sized painting in a small space creates visual depth that expands the room. It's like looking out of a window: your eye travels beyond the physical walls. The mistake would be to multiply the small formats which create a “stamp” effect and visually shrink the space.
"I’ve always been told that you need white walls to have a gallery, but my apartment has character with its colored walls..."
This rule dates back to the 90s! Today, the most beautiful private galleries play with colored or textured walls that enhance certain works. A sage green wall can magnify a black and white photograph, an anthracite wall reveals the brilliance of gold leafing. The important thing is consistency, not neutrality.
The golden rule of the domestic gallery: Fewer works, better presented create more impact than a cluttered accumulation. In 48h, you'll already see the difference by applying this principle of rigorous selection.
Discover what is really sabotaging your gallery atmosphere
Perhaps you recognize yourself in these situations: your paintings seem to float on the walls without logic, the general lighting of the room does not highlight any work, or your gaze no longer knows where to settle because there are so many competing visual elements.
What's really happening is that your eye desperately seeks a visual anchor in the decorative chaos. The problem isn't your artistic taste, but the lack of clear visual hierarchy in your layout.
Imagine your gaze as a museum visitor: it needs a logical path, points of rest and moments of intensity. Without this orchestration, even the most beautiful works lose their power of attraction.
First hidden cause: the illusion of standard height
Contrary to what everyone believes, hanging all your paintings at 1m60 from the floor is a fatal mistake in a small space. This museum rule applies to large rooms with high ceilings, not to your cozy living room.
It's exactly like wearing the same size clothing as a mannequin without taking into account your morphology: the result cannot work. Each space requires a personalized adjustment.
This uniform approach prevents your works from harmoniously interacting with your furniture and creates that unpleasant impression of a pasted-on decor, without soul. Your paintings become isolated elements instead of being integrated into your universe.
🔍 Immediate test: Stand in your living room and close your eyes for 10 seconds. Open them: does your gaze naturally settle on a work or does it wander aimlessly? This first impression reveals the effectiveness of your current arrangement.
Second hidden cause: the trap of uniform lighting
Many think that general good lighting is enough to enhance their works. In reality, this uniform light "flattens" visually your paintings and drowns them in the overall decor.
It's like trying to photograph a jewel under a kitchen neon: even the most beautiful diamond would lose its brilliance. Your works need their own light to reveal their personality.
Without dedicated lighting, you miss out on the theatrical effect that transforms a simple painting into a magnetic focal point. Your guests hardly notice your works because they do not benefit from any lighting staging.
Third Hidden Cause: Invisible Visual Clutter
The most neglected factor: your walls accumulate visual elements without you realizing it. Mirrors, shelves, hanging plants, electrical outlets... everything competes for the attention of your artworks.
Observe your main wall: how many different elements do you count? Beyond 3 visual elements, your brain struggles to prioritize information and the gallery effect disappears.
This visual saturation deprives you of those moments of silent contemplation that characterize a true gallery atmosphere. Your space becomes chatty instead of eloquent.
5 signs that your space lacks visual hierarchy:
Your gaze sweeps across the room without stopping: No element captures enough attention to create a lasting visual anchor
Your guests never comment on your artworks: They go unnoticed in the overall decor, a sign of a lack of highlighting
You regularly change the position of your paintings: Symptom of a hanging arrangement that never finds its optimal balance
The Triggering Element: The Power of a Single Focal Point
What really makes the difference is the ability to designate one artwork as the star of your space. Like a soloist in an orchestra, this masterpiece organizes everything else around it.
You can identify it by looking for the work that always makes you smile when you look at it, the one that best reflects your personality or that generates the most reactions from your guests.
80-20-10 rule in artistic decoration:70% of attention on a main work, 20% on a secondary element, 10% on the details. Test it immediately by mentally redesigning your main wall according to this distribution.
❌ Amateur Approach
✅ Gallery Vision
💡 Why It Changes Everything
🎯 Immediate Benefit
Filling all available walls
Creating visual breathing zones
The eye needs rest to appreciate
Each artwork gains impact
Same height for all paintings
Adaptation to each work and furniture
Creates a harmonious dialogue with the space
Custom-made impression
Single general lighting
Dedicated spotlights and ambient lighting
Reveals textures and colors
Dramatic and professional effect
Accumulation of decorative objects
Rigorous selection of elements
Avoids visual competition
Soothing and sophisticated atmosphere
Your 3-Step Method for a Successful Gallery Transformation
Rassurez-vous : creating your gallery atmosphere doesn’t require a large budget or specific technical skills. The method follows a simple logic, like building a house: solid foundations (selection and placement), visible structure (lighting), then refined finishing touches (ambiance details).
By following this progression, you will get a professional result in one weekend, with the satisfaction of seeing your works finally revealed in their full beauty.
🎯 Overview of your transformation: Step 1 - Create your focal point (Saturday morning), Step 2 - Orchestrate lighting (Saturday afternoon), Step 3 - Perfect the ambiance (Sunday). Each step immediately reveals its effect, naturally motivating you to continue.
Step 1: Choose and install your star artwork
Starting by choosing your masterpiece is logical: it will determine the overall atmosphere and guide all your other choices. Like the foundations of a house, this decision influences everything else.
Once your star is installed, you’ll immediately feel that satisfaction of seeing your space take a clear and assumed direction.
What you need to succeed in this step
Classic spirit level: Essential for perfect hanging, even if you have a good eye. The few imperceptible degrees of inclination create a subconscious discomfort in the observer. Avoid phone apps, which are less precise for this type of meticulous work.
Kraft paper or newspaper: To create a template with the exact dimensions of your artwork and test different locations without drilling. This pro technique avoids regrets and unnecessary holes. The template immediately reveals the real visual impact of your choice.
Temporary lighting (adjustable desk lamp): To preview the effect of light on your artwork from different angles. This preview determines the optimal location and prevents unpleasant surprises once the final hanging is done.
Now, let's move on to concrete implementation
Specific actions to install your focal point
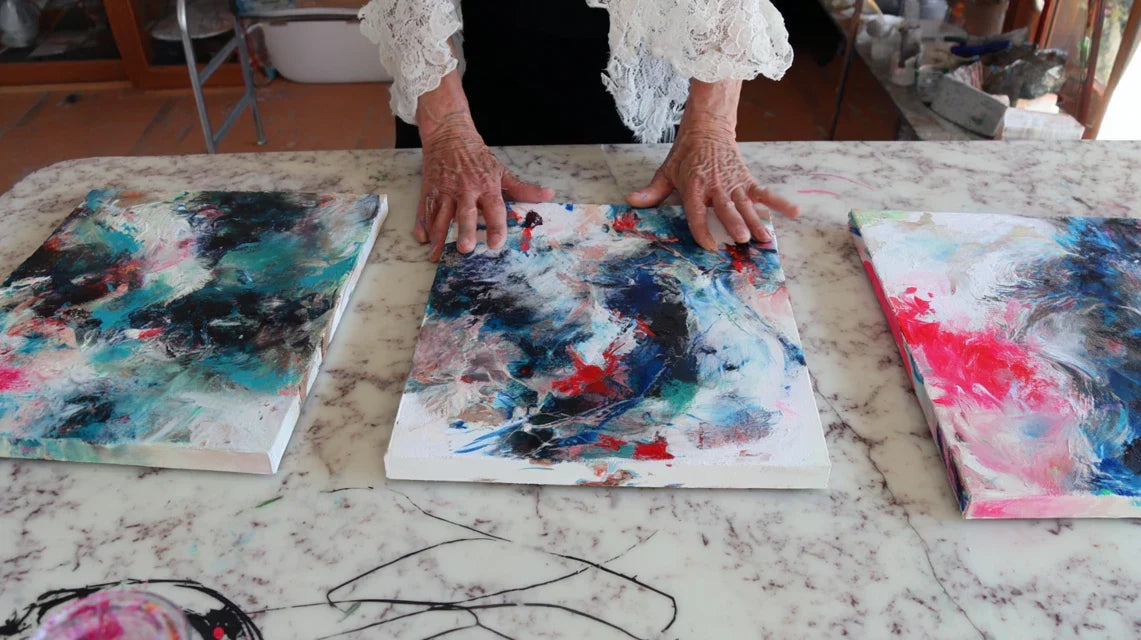
Select your star artwork: Choose the painting that moves you the most or one that best reflects the desired atmosphere. This work must be able to “carry” your space visually, so prioritize a generous format (minimum 40x50cm for a living room). Trust your instinct: the work that naturally attracts your gaze will be the one that captivates your guests.
⏱️ Time: 15 minutes | ✅ Success when: You feel an obviousness, a certainty that “this is it” | ⚠️ Attention: Don’t choose by elimination but by love at first sight - emotion shines through the final atmosphere
Determine the optimal location: Test your paper template on the wall you see first when entering the room. Adjust the height according to your furniture: the bottom of the artwork aligned with the back of your sofa, or the center of the work at eye level while seated. The artwork should interact with your furniture, not ignore it.
⏱️ Time: 20 minutes | ✅ Successful when: The artwork seems "in its place" naturally, in harmony with the furniture | ⚠️ Attention: Too high = a sense of displacement, too low = visually overwhelming your furniture
Test preliminary lighting: With your adjustable lamp, explore different angles of light on your template. Note the angle that best reveals the textures without creating a reflection. This step determines the future location of your definitive lighting and confirms your choice of location.
⏱️ Time: 10 minutes | ✅ Successful when: You clearly visualize the final effect with dedicated lighting | ⚠️ Attention: Avoid direct frontal lighting that creates annoying reflections
✨ Validation of step 1: Your masterpiece installed immediately attracts the eye upon entering the room. It creates a sense of balance with your furniture and seems to "live" naturally in its space. If in doubt, test by photographing it: the effect should be striking even in photos. Congratulations, your focal point is born!
OUR RECOMMENDED PRODUCTS
Step 2: Create your lighting design
Now that your star is in place, it's time to give it the spotlights it deserves. This step transforms your artwork into a true gallery piece. Dedicated lighting reveals details previously invisible and creates that characteristic atmosphere of sophisticated artistic spaces.
Professional Lighting Equipment
LED spotlights on rail or adjustable wall lights: Choose 3000K (warm white) LEDs which faithfully restore colors without straining the eye. Absolutely avoid halogens which heat up and discolor your artworks over time. A power of 7-10W LED is sufficient for a medium-sized artwork.
Dimmer switch: Essential to adapt the atmosphere according to the moments: intense lighting for contemplation, soft light for relaxing evenings. This investment transforms a basic installation into a professional ambiance system.
Adhesive cable concealers: For a clean and professional finish. Exposed cables immediately break the gallery illusion and betray an amateur arrangement. Choose your wall color for maximum discretion.
Installing Your Showcase Lighting
Position your light source: Install your spotlight at 30-45° relative to your artwork, ideally above and slightly offset to the side. This angle avoids reflections while creating a subtle modeling that reveals textures. The light should caress your work, not assault it.
⏱️ Time: 45 minutes | ✅ Success when: No visible reflections, uniform lighting across the artwork | ⚠️ Attention: Too close = uneven lighting, too far away = loss of intensity
Adjust intensity and temperature: Start with medium intensity then adjust according to the desired ambiance. Your artwork should stand out clearly from the wall without creating a violent contrast with the ambient lighting in the room. The effect sought: subtle but undeniable enhancement.
⏱️ Time: 15 minutes | ✅ Success when: The work "shines" naturally without dazzling | ⚠️ Attention: Too intense = aggressive spotlight effect, too weak = loss of the desired effect
Step 3: Perfecting Your Gallery Ambiance
This final step refines your installation to achieve a private gallery level. You now master the fundamentals, it is about adding those details that make the difference between an enthusiastic amateur and an informed connoisseur. These finishes create that sophisticated atmosphere that your guests will notice without being able to explain.
Expert-Level Refinements
Create visual breathing zones:Free up the space around your star artwork: remove decorative objects, secondary photos or plants that compete for attention. This purification reveals the power of your masterpiece. The void becomes a setting that sublimates your art.
⏱️ Time: 30 minutes | ✅ Success when: The eye immediately focuses on your artwork without distraction | ⚠️ Attention: Do not confuse purification with total emptiness - maintain balance
Harmonize the room's lighting: Reduce the intensity of your general lighting so that your artwork spotlight naturally becomes the dominant light point. This luminous hierarchy subtly guides the eye and creates a soft atmosphere characteristic of galleries. Your living room transforms into an intimate showcase.
⏱️ Time: 10 minutes | ✅ Success when: Soft ambiance with your artwork as the main light point | ⚠️ Attention: Retain enough light for circulation and reading
Expert progression indicator:You are ready for the next step when your gaze naturally finds its destination upon entering the room, without hesitation or scanning. Patience and demandingness are key: it is better to perfect an installation than to multiply approximate attempts.
Congratulations! You have just crossed the border between amateur decoration and artistic curation. Now that you master these fundamentals, let's discover the subtleties that distinguish true art lovers from simple collectors. These gallery secrets will give you that edge that impresses connoisseurs.
🎨 Professional gallery secret: The "rule of thirds": your three most important elements (main artwork, key furniture piece, lighting point) must form a balanced visual triangle. This invisible geometry creates a subconscious harmony that soothes and captivates simultaneously. Test by mentally connecting these three points: the triangle should be balanced, neither too elongated nor too crushed.
💭 "I only have one small artwork that I love, but it will look ridiculous on my large wall..."
"I only have one small artwork that I love, but it will look ridiculous on my large wall..."
I perfectly understand this concern! It's exactly like wearing a delicate piece of jewelry: its beauty depends not on its size but on how it is showcased. A small work can become dazzling with the right techniques.
Create a "visual setting" for it: dedicated lighting, an elegant frame, and above all free space around it. Like a diamond set in gold, your small artwork will gain presence and sophistication. The intimacy it creates can be more captivating than a poorly showcased large format.
💡 Immediate action: Test with a reading spotlight directed at your small artwork tonight. You will discover its unsuspected ability to transform the atmosphere of the entire room by its simply magnified presence.
The 5 pitfalls that ruin a gallery ambiance (and how to avoid them)
After supporting hundreds of art enthusiasts, I have identified the recurring mistakes that sabotage even the most beautiful projects. These traps are insidious because they seem logical at first glance. Knowing yourself will protect you and save you months of frustrating trial and error.
⚠️ Wanting to exhibit your entire collection at once: Enthusiasm leads to wanting to show everything simultaneously, creating a visual cacophony that drowns each work in the mass. Resist! Prefer a quarterly rotation that renews your pleasure and preserves the impact of each piece. Your guests will notice and appreciate each change.
⚠️ Copy a Pinterest style exactly: These inspirations are beautiful but designed for specific spaces and budgets. Adapt the spirit, not the exact form. Your personality must shine through, otherwise the atmosphere will remain cold and impersonal despite all your efforts.
⚠️ Neglecting the viewing angle from the entrance: You look at your works from your sofa, but your guests discover them from the door. Systematically test this first impression: it determines the immediate impact of your layout. A work invisible from the entrance loses 80% of its potential.
⚠️ Underestimating the importance of frames: Poor framing can devalue an exceptional artwork more surely than a bad placement. Invest in quality frames, even simple ones: they unify your collection and reveal your refined aesthetic sense.
⚠️ Installing lighting last: Lighting influences everything: colors, atmosphere, highlighting. Planning it from the beginning avoids disappointing compromises and shaky installations that betray an improvised layout.
🔍 Quick validation checklist:Your gallery ambiance works if: your gaze immediately finds its destination upon entering, you feel a sense of calm in the room, your guests spontaneously comment on your artworks, you are proud to show your space. If any of these criteria are missing, rework the corresponding element before continuing.
Because you took the time to inform yourself, enjoy 10% discount on your first order:
ART10
⏰ Valid for 72h after reading • Applicable to all our products
🎯 Your most frequent questions about the gallery ambiance
💰 "What budget should I allocate to transform my living room into a gallery worthy of the name?"
Between 150 and 400€ for a professional result, depending on your choices of lighting and framing. Start with a quality LED spotlight (50-80€) and one or two elegant frames (30-60€ each). The visual impact of these targeted investments will be disproportionate to the cost. It is better to have one work perfectly highlighted than three poorly presented.
⏰ "How long does it take to see a real difference?"
The effect is immediate as soon as your dedicated lighting is installed ! However, allow 2-3 weeks for your eye to get used to it and fully appreciate the transformation. This is the time needed for your brain to integrate this new atmosphere and measure its impact on your daily well-being.
🔧 "I'm not a handyman, can I still succeed with this transformation?"
Absolutely! 90% of the success lies in placement and selection, not in technicality. For lighting, opt for no-drill solutions: magnetic rails, fixing clips or adjustable floor spotlights. Your artistic sensitivity counts more than your manual skills.
🎨 "How to choose between my different artworks to create the focal point?"
Choose the one that generates the most emotion in you, not necessarily the most expensive or largest. Test it by looking at it for 30 seconds: if it continues to captivate you, it's the right one. A work that touches you deeply will naturally touch your guests. Authentic emotion cannot be simulated.
🏠 "Will my current decor clash with this gallery approach?"
A gallery atmosphere adapts to all decorative styles: industrial, Scandinavian, classic or eclectic. The secret lies in the consistency of choices rather than an imposed style. Your existing decorative personality enriches the gallery atmosphere; it does not contradict it. Art reveals and magnifies your universe.
Your new life with a real gallery atmosphere
In a few weeks, your relationship with your space will have fundamentally changed. You'll come home with the deep satisfaction of finding a place that truly resembles you. Your artworks will no longer be mere decorations but daily companions that nourish your inspiration and soothe your mind. Your guests will immediately notice this transformation: your space now exudes a natural sophistication that reflects your refined personality.
Mastering the gallery atmosphere develops your artistic eye and your confidence in your aesthetic choices. These skills will radiate in all your future decorative projects: you will instinctively know how to create harmony and emotion in any space. You join the circle of enlightened art lovers who know how to reveal beauty with subtlety and intelligence.
Understanding was the most complex step, now action becomes natural and rewarding. Start this weekend by choosing your star artwork and testing its location with a template. Your gallery transformation begins with this first decisive gesture that will unleash your creativity and reveal the artistic curator sleeping within you.
✨ Your new chapter begins now:You have all the tools to create the gallery atmosphere you dream of. Your passion for art deserves a setting worthy of it, and you now know how to create it. Your unique and sophisticated space awaits you !
📚 Enhance your artistic expertise
Now that you have mastered the gallery atmosphere, discover our other guides to become a true connoisseur of art decoration: advanced hanging techniques, color association, creation of wall compositions...


