

Have you just moved into your new living room and are already haunted by this question: how to create a sophisticated atmosphere without falling into the "too much" trap? You look at your bare walls imagining grandiose paintings, but a little voice whispers to you “what if it’s vulgar?”
Each visit to friends becomes an intensive observation lesson. You scrutinize their walls, analyze their decor choices, and return home with this growing frustration of not knowing where to set the cursor between "too simple" and “glitzy”.
You may have already tried a few purchases: that large colorful painting which ultimately shouts more than it whispers, or that series of small canvases that get completely lost on your wall. The result? Either it’s bland, or it’s garish. Never this elegant middle ground you are aiming for.
Rest assured, this tension between sophistication and simplicity is perfectly normal. The problem isn't your taste, but the lack of clear guidelines to navigate the world of chic decor without ostentation.
By the end of this article, you will know exactly how to choose and arrange your wall art to create that refined and soothing atmosphere you dream of, the one where your guests immediately feel good without being able to explain why.
Why does subtle wall art instantly transform an interior?
Subtle wall art acts as a revealer of personality: it speaks for you without shouting, creates a warm intimacy, and immediately establishes the level of refinement of your interior. Conversely, waiting for the “perfect painting” makes you lose months living in a space that doesn't look like you, as if wearing an ill-fitting suit every day.
🏠 Customer testimonial: "My in-laws were coming to our new apartment for the first time. My mother-in-law, known for her... direct comments, entered the living room and stopped dead in front of our three abstract watercolors with muted tones. 'That’s exactly how I imagine a real home', she murmured. I knew we had hit the mark."
💬 Conversation with a decor expert
The golden rule of understated elegance: A well-chosen artwork should be able to catch the eye and then fade into the background, like a delicate perfume that never imposes itself but whose absence would be noticed. Visible result in 24h: your guests will immediately feel more relaxed in your space.
Why haven't your previous attempts worked?
Do you recognize these situations? You stand for 5 minutes in front of a wall wondering if this artwork will be "too much". You obsessively photograph your walls from every angle. You keep putting off buying that piece has been catching your eye for weeks.
What's really happening? You are confusing "discretion" with "insignificance", and "elegance" with "perfection". It’s not a matter of taste, but of method: you have never been taught the codes of accessible sophistication.
It's like learning to cook without knowing cooking times: you have all the ingredients, but you lack the technique to transform them into something harmonious.
First hidden cause: you are searching for the perfect piece
Contrary to what one might think, elegance is born from thoughtful accumulation rather than a single exceptional piece. The reality? The most refined interiors mix works from different eras and techniques.
It's like building a wardrobe: a single perfect garment does not make a style, but several well-chosen pieces create a signature.
Impact on your life: you remain paralyzed in the wait for that hypothetical perfect artwork, when all it would take is to start with a first acquisition that serves as a cornerstone for your future collection.
🔍 Immediate test: Look around you and count how many "perfect" objects you already own. You will realize that it is often the imperfect accumulations that create the charm of your interior.
Second cause: you underestimate the power of neutral tones
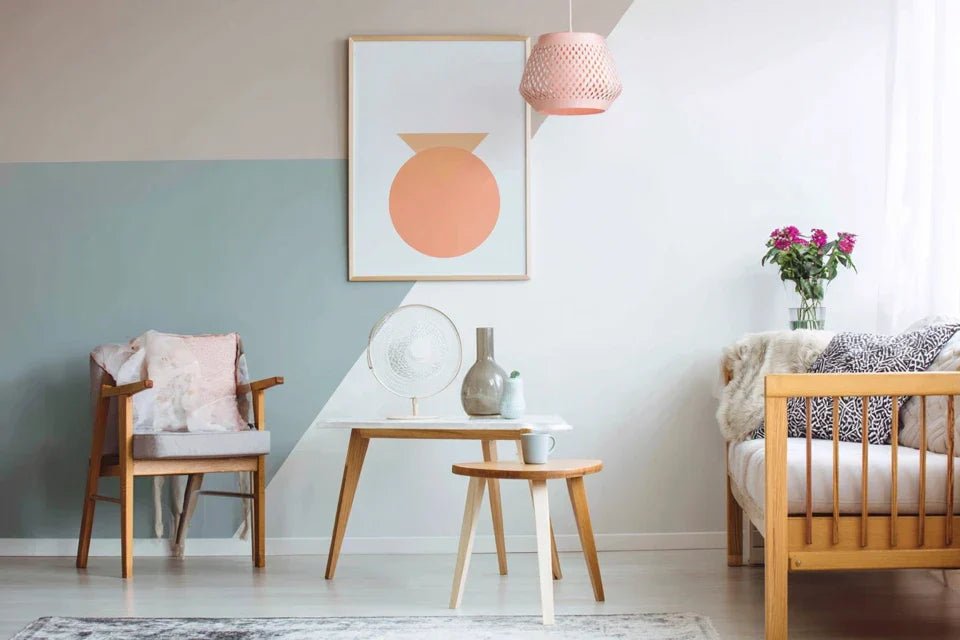
Many think that "neutral" means "boring". In reality, muted tones and subtle nuances create a visual depth much more sophisticated than saturated colors.
It's like the difference between a pure malt whisky and a colorful cocktail: one reveals its aromas gradually, the other impresses at first glance but quickly becomes tiresome.
Consequence? You miss out on magnificent artworks fearing they won’t “stand out” enough, when they would create exactly that cozy and soothing atmosphere you are looking for.
Third cause: you neglect the lighting of your artworks
Here's what almost no one notices: an artwork with poor lighting loses 70% of its impact. It’s like wearing a beautiful outfit in the dark: no one can appreciate its quality.
Signs to spot it at home: your paintings seem "dull" in the evening, you squint to distinguish them, or they create annoying reflections depending on the time.
Daily impact: you end up not seeing your artworks anymore, they become invisible and your investment loses all its decorative meaning.
The 3 signals that betray faulty lighting:
- The reflection test: If you see your silhouette in the frame's glass, the lighting angle is too direct (like a mirror that blinds you)
- Nocturnal disappearance: Your artworks become invisible after 6 PM, sign that the ambient lighting doesn’t highlight them (like jewels in a poorly lit display case)
- The "postcard" effect: Colors seem flat and without relief, indicating too uniform lighting that doesn't reveal textures
The trigger factor: the anchoring effect
What really makes the difference is the anchoring effect: a first well-placed artwork that becomes the reference point around which everything else naturally organizes. It's like the first note of a guitar chord that determines the harmony of the whole melody. You’ll recognize this successful anchor when your guests aturally look towards that point when entering the room.
Anchoring rule: Always start by choosing ONE favorite artwork for the most visible location in your main room. Check immediately: if it attracts the eye without dominating, you’ve found your cornerstone.
| ❌ Scattered approach | ✅ Anchoring approach | 💡 Why it works | 🎯 Immediate benefit |
|---|---|---|---|
| I want everything to be perfect at once | I start with a masterpiece | The eye needs a focal point to orient itself | Your room instantly has more character |
| I buy according to my current crushes | Each addition dialogues with the initial anchor | Coherence is born from the conversation between artworks | Your future acquisitions seem "obvious" |
| I change everything if it doesn't work | I gradually adjust around my base | Gradual evolution preserves the investment | Your decor grows with your tastes |
| I copy Pinterest inspirations | I develop my personal signature | The anchor reveals your unique personality | Your interior tells your story |
The method of 3 circles for elegant and discreet wall art
Forget complicated rules and mathematical proportions. Accessible sophistication rests on three concentric circles: your impact zone (the anchor), your dialogue zone (the echoes), and your breathing zone (empty spaces). Like a French garden where each element has its logical place, this natural progression will lead you to a balanced interior where each look discovers a new detail without ever being saturated.
🎯 Your transformation overview: First you create your focal point (the room that defines the atmosphere), then you weave visual links (works in echo), finally you master silence (the art of letting breathe). Each step brings its satisfaction: confidence, coherence, serenity.
Step 1: Create your visual anchor (the focal point)
This first step lays the foundation for all your decorative universe. Like planting the master tree of a garden, this anchor work will determine the general atmosphere of your room. Once in place, you will immediately feel that satisfaction of seeing your space "take shape" and reveal its personality.
What you need to succeed with your anchor
- A work of significant size (minimum 60x40cm): It should occupy the space without overwhelming it, like a comfortable armchair that structures a living room. Find it in local galleries or specialty stores. Quality criterion: the support must be rigid (stretched canvas, wood, metal) because flexible supports deform and lose their impact. Avoid paper prints which age badly.
- A professional hanging system: Invest in X hooks or threaded rods according to the weight of the work. The principle: distribute the load over several points to avoid sagging. Quality sign: the system must support 3 times the actual weight of the work. Impact on result: a solid mounting gives confidence and allows adjustments without fear.
- Dedicated lighting (adjustable spotlight or wall lamp): Light reveals textures and nuances that general lighting drowns in uniformity. Like a theater projector sculpting the face of an actor. Visible benefit: your colors remain vibrant even in the evening.
Now, let's move on to practice with your first work
How to install your anchor like a professional
Determine the perfect height: Place the center of your work 1m60 from the floor (eye level of an upright person). This universal rule guarantees optimal visual comfort. Technical detail: if your ceiling is over 3m, add 10cm to balance the proportions. It's simpler than the complicated calculations you see everywhere.
⏱️ Time: 5 minutes | ✅ Successful when: In a natural standing position, your gaze falls directly on the center of the work | ⚠️ Attention: Do not take furniture into account to calculate the height - they can change, people's circulation does not
Choose the strategic location: Your anchor work should be visible from the entrance of the room but not facing the door (to avoid the "target" effect). Place it on the wall you see first when entering, slightly off-center. Technique: if you are hesitating between several walls, choose the one that receives the most natural light during the day.
⏱️ Time: 10 minutes of testing | ✅ Successful when: Upon entering the room, your eye naturally settles on the artwork without effort | ⚠️ Attention: Avoid walls facing windows where reflections create visual discomfort
Adjust accent lighting: Orient your spotlight 30° from the surface of the artwork to reveal textures without creating reflections. The goal is to create a "bath of light" that enhances without dazzling. Technical tip: test the lighting in the evening when natural light no longer masks imperfections.
⏱️ Time: 15 minutes of adjustments | ✅ Successful when: Colors retain their intensity and no reflections are distracting from seating positions | ⚠️ Attention: Excessive lighting can fade pigments over time
✨ Validation of your successful anchoring: Your room now has a visual "center of gravity": the artwork naturally attracts the eye without dominating, the lighting enhances it at all times, and it harmoniously dialogues with existing architecture. If something still seems unstable, adjust the position by 5cm rather than questioning everything. You have just created the heart of your future collection!
RECOMMENDED PRODUCTS
Step 2: Develop the visual dialogue (the echoes)
Now that your anchor sets the tone, you are going to create "visual conversations." This is the most rewarding step because you will see your space gain depth and sophistication. Like a conductor gradually adding instruments to his main melody, each new addition amplifies the overall harmony without creating cacophony.
Elements for creating your visual echoes
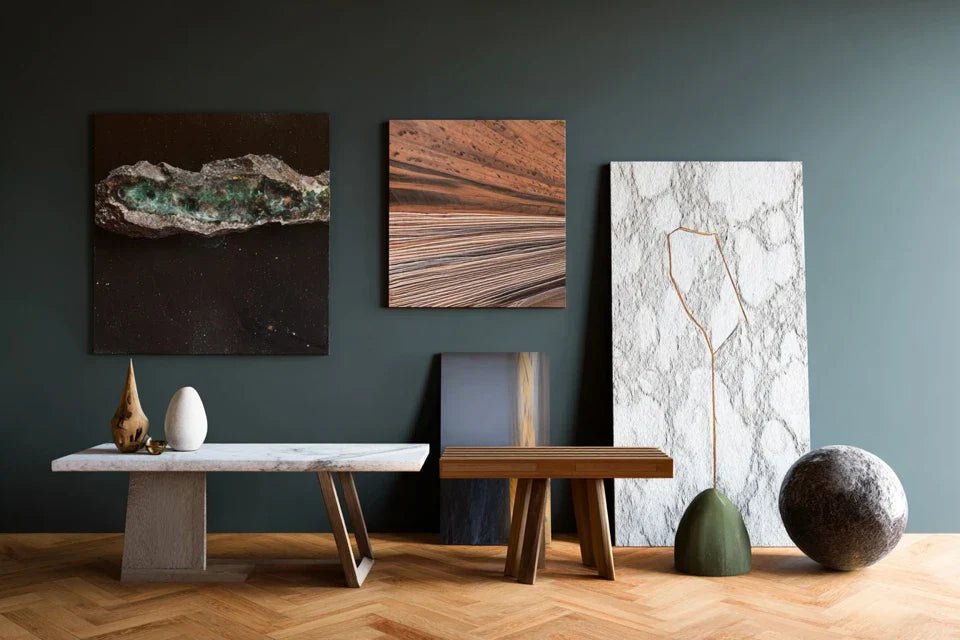
- 2 to 3 complementary sized artworks: Prioritize smaller formats than your anchor (between 7.9x11.8in and 15.7x19.7in) to create a natural hierarchy. Like the accompanying notes of a piano solo. Where to find them: local art markets, artist studios, decor shops. Selection criteria: they must share ONE element with your anchor (color, style, theme) without copying it.
- Frames in the same family: Vary sizes but maintain material consistency (all wood, all metal, or mastered 70/30 blend). The principle: unity in diversity, like a collection of vases with different shapes but the same material. Visual impact: the collection seems built over time, not bought at once.
- A tailor's measuring tape: To respect harmonious distances between artworks without approximation. Like spacing plants in a garden: too close, they suffocate; too far, they seem abandoned.
Positioning techniques for a successful dialogue
Apply the 2/3 rule: Secondary artworks should never exceed 2/3 of your anchor's size. This natural proportion avoids visual competition. Concrete example: if your anchor is 80x60cm, your echoes remain under 50x40cm. Why it works: the human eye instinctively seeks a hierarchy to rest.
⏱️ Time: 5 minutes of calculation | ✅ Successful when: No secondary artwork "steals the show" from your anchor | ⚠️ Attention: This rule applies to the overall surface area, not just one dimension
Create groups of 3 or 5 elements: Odd numbers naturally create more visual balance than pairs (absolutely avoid groups of 4). Technique: form imaginary triangles between your artworks, even on different walls. Pro tip: a group of 3 can include a decorative object (vase, sculpture) to move away from the "all painting" effect.
⏱️ Time: 20 minutes of trials | ✅ Successful when: Your gaze naturally moves from one artwork to another without jerks | ⚠️ Attention: Respect a minimum spacing of 15-25cm between artworks to avoid the “patchwork” effect
Balance visual masses: A dark artwork "weighs" more than a light one, a textured one more than a smooth one. Compensate by adjusting sizes and positions. Simple method: squint your eyes while looking at your wall; the areas that still attract your gaze are your “strong masses” to balance with softer elements elsewhere.
⏱️ Time: 10 minutes of observation | ✅ Successful when: No area seems "too heavy" or "too empty" | ⚠️ Attention: Perfect balance rarely exists, aim for overall harmony rather than symmetry
🎨 Validation of your successful echoes: Your gaze now travels pleasantly through the room, discovering details with each observation without ever being saturated. Artworks seem to "respond" naturally, creating that sophisticated impression of a collection assembled with taste and patience. You now master the art of wall composition!
Distinguishes enlightened amateurs from true connoisseurs: Knowing when to stop and let your artworks breathe. Like a great chef who lets the quality of his ingredients speak without drowning them in spices, you will create these spaces of visual silence that give all their nobility to your artistic choices.
The tools of visual breathing
- A pocket mirror or your smartphone: To observe your walls from new angles and identify overloaded areas that your accustomed eye no longer sees. Mirror technique: it reverses perspective and reveals imbalances. The camera captures the “first time” impression your guests will have. Minimalist decorative elements: A few refined objects (vase, sculpture, plant) to punctuate without overwhelming. Selection criterion: they must be able to "converse" with your artworks without competing. Impact: they create refreshing visual pauses.
- Controlled ambient lighting: Dimmers and multiple light sources to modulate the intensity according to the moments. Like a dimmer that transforms a restaurant by creating intimacy. Benefit: your artworks reveal different facets depending on the lighting.
How to create balance between full and empty
Apply the 40% rule: Your walls should never be occupied by more than 40% of their surface. This proportion guarantees the necessary visual breathing space for elegance. Simple calculation: on a 3m x 2.5m (7.5m²) wall, your artworks do not exceed 3m². Beyond that, the "overloaded gallery" effect kills sophistication.
⏱️ Time: 10 minutes of calculation | ✅ Successful when: Your eyes naturally find resting areas between the artworks | ⚠️ Attention: Count the frames in the surface, not just the images
Create strategic "visual silences": Intentionally leave some areas empty so that the eye can rest. Like the whites in typography that make a text readable. Technique: imagine your wall as a page from a high-end magazine where the empty spaces are part of the design.
⏱️ Time: 15 minutes of adjustment | ✅ Successful when: The empty areas seem intentional, not forgotten | ⚠️ Attention: Too much emptiness isolates the artworks, too little stifles them
Modulate lighting according to moods: Create 3 light scenarios: day (natural light + spotlights), evening (soft ambient light + artwork accentuation), night (spotlights alone at low intensity). The goal: your artworks reveal different facets depending on the moments, like an actor who changes expression with the light.
⏱️ Time: 30 minutes of settings | ✅ Successful when: Each scenario creates a distinct but consistent atmosphere | ⚠️ Attention: Avoid harsh contrasts that tire the eye
🌟 Validation of your complete mastery: Your interior now breathes natural sophistication: your artworks are gradually revealed according to lighting and viewing angle, the empty spaces are an integral part of the composition, and the whole exudes that elegant serenity of true connoisseurs. You have created an interior that tells your story without shouting it!
Rule of accomplished elegance: When your guests compliment the overall atmosphere before noticing individual artworks, you have achieved discreet sophistication. Check by observing reactions: true connoisseurs will immediately feel the level of refinement without analyzing every detail.
Congratulations! You now master the codes of sophisticated wall art. But like any expert, you can still refine a few subtleties that will make the difference between "it's pretty" and "it has exquisite taste." These expert finishes will give you that edge which subtly impresses your most discerning guests.
🎯 Master decorator technique: The "progressive revelation" effect: place a discreet but exceptional artwork in a corner that your guests only discover when they leave. This final surprise etches the impression of an interior "full of secrets" and makes people want to come back to observe what they may have missed. Example: a delicate engraving near the entrance, visible only upon departure.
🤔 Question from an attentive reader
"I'm afraid of investing in multiple artworks and getting tired of them after a few months..."
This concern is perfectly legitimate and even healthy! It’s precisely the proof that you are aiming for a lasting choice rather than a trend. The beauty of the 3 circles method is that it allows evolution: your anchor remains stable (it's your "signature piece"), but your echoes can evolve with your tastes. Like a perfume whose base note is kept by varying the top notes according to the seasons.
💡 Anti-boredom test: Before any purchase, live for a week with a temporary taped reproduction on the wall. If after 7 days it still makes you smile when you come home, then it has passed the habit test. Guaranteed result: zero regretted impulse purchases!
The 5 pitfalls that sabotage even the best-intentioned
Attention, these errors seem trivial but destroy months of effort! I prefer to tell you about them now to avoid these disappointments that I have seen in so many well-informed clients. These traps are so common that they seem "logical" on the moment, hence their danger.
- ⚠️ The trap of too strict a theme: Wanting all your artworks to talk about the same subject (marine landscapes, geometric abstracts...) seems coherent, but quickly creates a "hotel decoration" effect. Consequence: your interior loses its unique personality. Alternative: maintain an harmony of tones or style rather than subject. It's a very common beginner mistake, even decor magazines sometimes fall into it!
- 🎨 The "all or nothing" error: Waiting to have the budget to buy everything at once instead of gradually building your collection. Impact: you live for months in an unfinished interior that does not inspire you. Solution: start with your anchor and add 1 piece every 2-3 months. The pleasure of progressive discovery is worth all group purchases!
- 💡 The trap of single lighting: Only using the room's general lighting thinking it saves or simplifies. Result: your works become invisible as soon as natural light fades. Correction: a simple adjustable spotlight for €25 completely transforms the perception of your artworks. Never neglect this step!
- 📏 The obsession with perfect measurements: Wanting everything to be millimeter-perfect and symmetrical like in magazines. Problem: your interior becomes cold and impersonal. Reality: the most beautiful interiors have this "controlled imperfection" that tells a story. Accept 2-3cm of approximation, that's what creates charm!
- 🛒 The temptation of impulse buying: Crashing for a work of heart without checking its compatibility with your existing decor. Consequence: it clashes with the rest and ends up in a closet. Solution: always take a photo of your decor with you when you're looking for complements. It's your "decor compass"!
🛡️ Your safety checklist before any purchase: Does the artwork dialogue with your decor? Do you have the lighting to reveal it? Does its size respect the 2/3 rule? Can you do without this acquisition for 48 hours without regret? If an answer is "no", postpone the purchase. Warning signs: haste, excessive infatuation, desire to "change everything".
🎁 Special readers offer
Because you took the time to inform yourself, enjoy 10% discount on your first order:
⏰ Valid 72h after reading • Applicable to all our products
Practical questions for a chic decor
Allow €300-800 to completely transform a main room (anchor + 2-3 echoes + lighting). Optimization: start with an anchor at €150-250, then add €50-100/month for complements. Concrete example: Marine created her sophisticated living room with €480 spread over 6 months, starting with a 40x60cm watercolor that set the tone for everything else.
Only for works weighing more than 5kg or of great value. For the rest, modern systems allow secure self-hanging. Pro budget: €80-120 per artwork. Alternative: invest €30 in a good stud finder and suitable fixings, you will save €300-500 on a complete set while keeping the flexibility of adjustments.
Instant impact with your anchor piece (1 day), complete harmony in 2-3 months. The magic unfolds gradually: instant satisfaction with the first artwork, followed by progressive wonder with each addition. Don't rush; the most beautiful collections are built with patience, and each step brings its unique pleasure.
Your elegant interior awaits you, it only takes one gesture
In 3 weeks, when you return home after a difficult day, your gaze will naturally fall on your first artwork which has transformed your living room. Your shoulders relax instantly, this feeling of "home" overwhelms you, and your guests won't be able to resist complimenting this atmosphere so soothing and refined without being able to explain why it touches them so much.
You will have gained more than just beautiful decoration: the confidence that comes from mastering the codes of elegance, the discreet pride of living in an interior that truly resembles you, and this transferable skill that will transform your view on all the spaces you arrange. Your loved ones will come to ask for your advice, and you will know exactly what to tell them.
The most difficult part - understanding the mechanisms - is behind you. All that remains is to choose this first anchor artwork that will set the tone for everything else. Take 2 minutes to observe your main wall, visualize your future artwork in place, and give yourself permission to create this elegant interior you have dreamed of for so long.
🌟 Your transformation starts now: Discreet elegance is not a privilege reserved for a few, it’s a skill that can be learned and cultivated. You now have all the keys in hand. The best part of it all? In 6 months, you will look back on these tips with a smile, as they will seem obvious to you.


