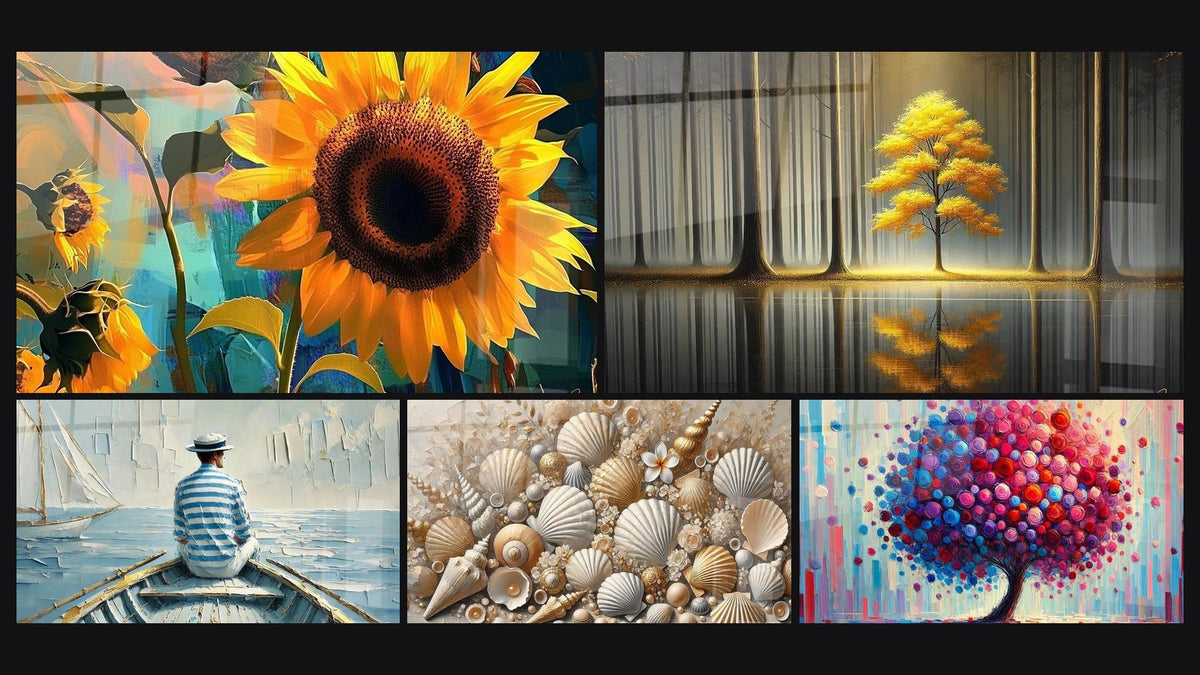
Mounted artworks for temporary exhibitions or pop-up displays
October 11, 2025 · 17 min read · by Walensky
Are you organizing a temporary exhibition or setting up a pop-up shop, and your finest paintings end up stored in the back room? Why? Because drilling into rented walls, installing hooks on fragile partitions, or risking damage to a valuable surface completely paralyzes you.
This hesitation is costing you dearly: visitors walk past bare walls, your creations remain invisible, and your event loses all its visual impact. The space seems unfinished, amateurish, and desperately lacking the artistic signature that makes all the difference.
You've probably already tried to improvise with easels or makeshift supports. Result: unstable works of art that risk falling over, an unprofessional presentation, and a constant anxiety that a painting will tip in front of your guests.
It’s perfectly normal to be stuck in this situation. The problem isn't your lack of organization, but the absence of a real autonomous presentation strategy adapted to temporary constraints.
By the end of this article, you will master all the techniques to create sophisticated wall displays without any fixings, transform any space into a professional temporary gallery, and impress your visitors from the moment they walk in.
Why leaning paintings are revolutionizing temporary exhibitions?
In modern event management, ease of installation often determines the success of a project. Imagine being able to transform an empty space into a refined gallery in less than two hours, without any tools or special permission. That's exactly the opportunity you're missing if you remain stuck on traditional hanging methods.
🎨 Testimonial from an event organizer: "At the last Salon du Design in Lyon, I had to set up 15 stands in a morning. Leaning paintings saved me: installation in 10 minutes per space, impeccable presentation, and no stress with the venue's regulations. My clients were delighted with the professional look."
Conversation with a decor expert
The golden rule of modern exhibitions: A well-placed artwork creates more impact than a poorly hung one. By freeing your creations from wall constraints, you triple your creative possibilities and installation speed.

What really happens when your artworks remain invisible?
Perhaps you recognize these situations: your finest pieces wait in your reserves "until the right moment," visitors pass through your space without stopping, or your events consistently lack that “something special” that makes an impression.
The real problem isn't your artistic sense or your creations. You are still suffering from the tyranny of walls: this limiting belief that a painting only exists if it is hung. This mentality deprives you of 80% of your presentation possibilities.
It's like a chef limiting themselves to a single burner when they have an entire kitchen at their disposal. Your paintings can live in the space, dialogue with each other, create endlessly adaptable atmospheres.
The first hidden cause: the obsession with "permanence"
Here's what’s really blocking you: you still plan your presentations as if they were meant to last for years. However, the ephemeral has its own rules - freer, more creative, more impactful.
It's like the difference between building a house and pitching a tent: the tools, methods, and results are completely different. Your approach must adapt to this specific temporality.
This revelation will transform your way of designing your spaces: instead of seeking perfect fixation, you will create living compositions that evolve according to your needs. No more frustration, just pure creativity.
🔍 Immediate test: Look around and count how many decorative objects are simply placed (vases, sculptures, books...). You realize? The most noticeable elements are often those that occupy space freely, without visible attachment.
The second hidden cause: the fear of instability
Many think that a painting placed = a painting that will fall. In reality, a properly placed painting is more stable than one poorly hung on a fragile wall.
Imagine a book on a shelf: it never falls, because its center of gravity is perfectly controlled. The same principle applies to your paintings: understanding balance guarantees safety.
This fear prevents you from spectacular presentations where your works could create real “magical moments” in the space. You stay in your comfort zone instead of exploring innovative staging.
The third hidden cause: ignorance of suitable supports
No one has ever explained to you that there is a whole universe of specialized supports for temporary presentations. You improvise with what you find, when professional solutions exist.
It's like trying to bake with gardening tools: technically possible, but the result will never live up to your ambitions.
Result: your installations look makeshift, and visitors immediately notice – you lose professional credibility.
The 3 signals that reveal you are experiencing these blockages:
- You regularly postpone your exhibition projects: You wait for the "right moment" or "the right solution," which means you haven't yet found your reliable method
- Your visitors quickly pass through your spaces: Without a strong visual anchor, the eye has nothing to stop and contemplate – a sign of a lack of impact in your presentations
- You stress before each installation: This anxiety reveals that you don’t yet have a proven and secure system for your temporary displays
The trigger element: mastering the art of space arrangement
What really makes the difference is understanding that your paintings are no longer objects to be "hung" but elements to compose in space. This three-dimensional approach multiplies your creative possibilities and visual impact. You will recognize this click when you start seeing your spaces as theater scenes where each painting plays a specific role.
The universal rule of successful presentations: A well-placed painting in space attracts more attention than a painting lost on a wall. Test it by comparing the visual impact of a work isolated on an easel versus drowned in a busy wall.
| ❌ Traditional approach | ✅ Modern method | 💡 Why it works | 🎯 Concrete benefit |
|---|---|---|---|
| Waiting to have permission to drill | Creating self-sufficient displays | Total installation freedom | Exhibition possible everywhere, immediately |
| Fixed and rigid installations | Compositions that can be easily modified | Real-time adaptation | Continuous optimization of impact |
| Stress about the perfect hanging | Confidence in stability | Proven and safe methods | Total serenity during the event |
| Static and cold presentation | Living and immersive staging | Dialogue between artworks and space | Captivated and marked visitors |

The 3-step method for spectacular presentations
Rest assured: mastering the art of the placed painting is not complex once you understand the logic. It's like learning to ride a bike: at first it seems impossible, then it becomes natural. We will build your expertise step by step, from the basics of stability to the most sophisticated compositions. In three weeks, you will impress your visitors on their very first visit.
📋 Overview of your progress: Step 1 - Mastering stability and safety (solid foundations). Step 2 - Creating harmonious compositions (professional aesthetics). Step 3 - Developing immersive staging (maximum impact). Each level transforms your approach and your confidence.
Step 1: Mastering the Fundamentals of Stability
Starting with safety ensures that all your future projects are built on solid foundations. Like an architect who cares for their foundation, this first step will give you that absolute confidence which then unlocks all your creativity. You'll immediately feel the relief of no longer fearing a painting tipping over.
Essential supports to get started
- Adjustable presentation easels: Metal or wood tripod structures with retaining clips. They support up to 5kg and adapt to formats from 30x40cm to 70x100cm. Prioritize models with non-slip feet over cheap plastic versions that lack stability.
- Standalone wall supports: Free-standing panels that create instant "false walls". The principle is a weighted base supporting a vertical panel where you place your works. Choose models of at least 180cm in height for a professional look and check the stability of the weighting.
- Corner wedges and stoppers: Small, discreet elements that prevent slippage. They are placed behind the frame to maintain the perfect inclination. These invisible details make all the difference between an amateur and a professional finish.
Secure installation: the gestures that count
Calculate your painting's balance: Place your hand flat under the center of the frame and find the point where the artwork remains horizontal without tilting. This is your perfect balance point - mark it discreetly on the back. All your supports must pass through this magic point.
⏱️ Time: 2 minutes per painting | ✅ Successful when: The painting remains stable without your hand | ⚠️ Attention: Never place the support too low (tilts forward) or too high (tilts backward)
Position the support according to the rule of the triangle: Your easel or support forms a triangle with the floor. The wider this base, the greater the stability. Always adjust the feet to their maximum secure extension and check that the whole thing doesn't move when you push the painting slightly.
⏱️ Time: 1 minute per support | ✅ Successful when: No movement even when pushing gently | ⚠️ Attention: On a slippery floor, add adhesive pads under the feet
Adjust the inclination for visual impact: A painting slightly tilted backward (5 to 10 degrees) catches the light better and avoids reflections. Use your corner wedges to maintain this optimal tilt. The artwork should seem to "look" slightly downwards.
⏱️ Time: 30 seconds per adjustment | ✅ Successful when: No annoying reflection and perfect readability | ⚠️ Attention: Too much inclination gives a "about to fall" appearance - stay subtle
✅ Your first installation validated: Your artwork must remain perfectly stable even if you pass by quickly. No movement, no noise, no worries. If something still moves, readjust the feet - it's normal at first. Congratulations, you have just completed the most important step!
— Our selection


OUR RECOMMENDED PRODUCTS
Step 2: Creating Harmonious Compositions
Now that your artworks are perfectly stable, you can focus on aesthetic impact. This step transforms your technical installations into true visual experiences. You will discover how to make your works dialogue with each other and create those "magical moments" that your visitors spontaneously photograph.
Professional Composition Tools
- Portable Accent Lighting: Battery-powered LED spotlights that highlight each work without electrical installation. Angle the light at 30 degrees to avoid direct reflections. These lights instantly transform the atmosphere and enhance your colors.
- Visual Connection Elements: Bases, plants or decorative objects that create bridges between your artworks. They unify the whole and naturally guide the visitor's gaze from one work to another according to a route you control.
- Discreet Space Delimiters: Elegant cords or floor markings that define the contemplation area. They protect your works while inviting observation under good conditions.
Composition: The Art of Making Your Works Dialogue
Apply the rule of varying heights: Systematically alternate tall and short artworks to create a captivating visual rhythm. This variation mimics the natural movement of the eye and maintains attention. Never place two artworks of the same height side by side - it's the golden rule of professional galleries.
⏱️ Time: 15 minutes for 5 artworks | ✅ Success when: The whole undulates harmoniously | ⚠️ Attention: Avoid excessive differences that break the fluidity of the gaze
Master breathing distances: Allow between 80cm and 120cm between each artwork placed. This distance allows each work to exist fully while maintaining the cohesion of the whole. Measure from the outer edges of the frames, not from the supports.
⏱️ Time: 10 minutes of adjustment | ✅ Success when: Each artwork "breathes" visually | ⚠️ Attention: Too tight = cluttered effect, too spaced out = loss of dialogue between artworks
Create anchor points of light: Position your lighting to draw a logical visual path. Start by illuminating the centerpiece (the one that should attract attention first), then create luminous relays towards the other pieces. The eye naturally follows these guides.
⏱️ Time: 20 minutes for the entire setup | ✅ Success when: The gaze naturally follows the path | ⚠️ Attention: Avoid direct lighting that creates unsightly shadows
🎨 Test your composition: Step back 3 meters and observe the whole. Your eye should be naturally drawn to the main artwork, then circulate harmoniously towards the others without effort. If your gaze "sticks" somewhere or gets lost, adjust the heights or lighting. You are on the right track when the whole seems to "flow" naturally!
You're now at expert level! This final step transforms your presentations into true immersive experiences that your visitors will remember for a long time. You will learn to create atmospheres that tell a story and emotionally mark your audience. This is the difference between a simple exhibition and a memorable event.
The expert set designer's arsenal
- Multi-level supports: Structures that allow you to present multiple works at different heights on the same focal point. These "visual staircases" create depth and densify impact without cluttering the space. Contextualization elements: Objects or textures that reinforce the universe of your artworks (fabrics, natural materials, historical references...). They create a narrative coherence and amplify artistic emotion. Sound and olfactory ambiance system: Discreet diffusers that engage senses other than sight. Soft music or a subtle fragrance transform the visit into a memorable multisensory experience.
Scenography: transforming space into an experience
Build a visual dramaturgy: Organize your artworks according to a logical emotional progression - from the welcoming introduction towards the artistic climax, then towards a soothing conclusion. Like in theater, each "act" of your exhibition should have its function in the overall experience.
⏱️ Time: 45 minutes of design | ✅ Success when: The journey tells a coherent story | ⚠️ Attention: Avoid abrupt tonal shifts that destabilize the visitor
Master depth effects: Play with multiple visual planes in the foreground, middle ground and background. Place artworks of different sizes at varying distances to create this impression of spatial richness that captivates the eye and invites exploration.
⏱️ Time: 30 minutes of adjustments | ✅ Successful when: The space feels larger and richer | ⚠️ Attention: Don't overload - depth comes from subtlety, not accumulation
Integrate sensory elements: Add a light olfactory dimension (soft incense, woody scent...) and a discreet soundscape that supports the artistic emotion. These unconscious elements amplify the memorability of your presentation.
⏱️ Time: 15 minutes of installation | ✅ Successful when: The atmosphere envelops without being noticed | ⚠️ Attention: Stay subtle - these elements should sublimate, not distract from your works
🌟 Validation of your expertise: Discreetly observe the reaction of your first visitors. They should naturally slow down when entering, stay longer than expected, and spontaneously comment on the atmosphere. If you hear "Wow, this place is magnificent!", you have reached expert level! Otherwise, adjust one element at a time until you achieve that magical reaction.
The expert progression rule: Don't move on to the next step until the current step feels natural and effortless. Mastering stability must become automatic before working on composition. Mastering composition must be fluid before addressing staging. This patience guarantees your final success.
You now master the three pillars of successful temporary presentations. Here are some professional secrets that will make a difference in your most ambitious installations and give you the edge your competitors don't yet have.
🎯 Pro tip - The reverse mirror effect: Place a discreet small mirror behind your most valuable works. It visually doubles the depth of the space and creates an "infinite gallery" effect that impresses visitors. This set designer trick transforms a small space into a prestigious showcase.
Frequent question from our readers
"Can I really create a professional impact with just leaned artworks? I'm afraid it will look amateur..."
I perfectly understand this concern - we all have had it! In reality, the most prestigious contemporary galleries massively use this technique because it creates a stronger visual impact than a traditional hanging. Look at the photos of the latest art biennials: 90% of the works are presented autonomously. It has become THE reference for modern professionalism. Your fear simply comes from the habit of old codes - but your visitors will immediately recognize the modernity of your approach.
💡 Reassuring test: Install a single artwork according to our method in your space and observe the reactions. You'll immediately notice that people stop more often and look more attentively at this "liberated" work than those classically hung.
— You may also like


Attention: the mistakes that can ruin your presentation
Now that you know the best practices, let's protect your work by avoiding classic pitfalls. These errors are perfectly normal when you start out, but they can spoil even the most beautiful installation.
- ⚠️ Neglecting natural lighting: It’s tempting to focus solely on your spotlights, but natural light changes constantly. Test your installation at different times of the day to avoid annoying reflections or unexpected shadows. Planning for adaptation solutions will save you disappointment. ⚠️ Underestimating the importance of the floor: An unstable or slippery floor compromises your entire installation, even if it’s perfectly adjusted. Always check the stability of your floor support and add pads if necessary. This 30-second check can prevent disasters. ⚠️ Overloading on the first installation: Enthusiasm often leads to wanting to present all your works at once. Start with 3-4 well-displayed pieces rather than 10 paintings competing with each other. You can always enrich it later. ⚠️ Forgetting visitor traffic: Your supports can create obstacles to circulation or dangerous blind spots. Walk around your space as a visitor discovering the place to identify friction points. A smooth path guarantees safety and enjoyment for visitors. ⚠️ Neglecting the weather for temporary installations: Wind, humidity, temperature variations affect your supports and artworks. Anticipate these external factors with appropriate protection, especially for outdoor events or in poorly insulated locations.
🛡️ Safety checklist before inauguration: All supports are stable without swaying • No annoying reflections on the artworks • Smooth circulation without obstacles • Weather protection in place if necessary • Resistance test performed (slight push) • Optimal lighting verified at different times. These checks take 10 minutes but guarantee your peace of mind.
— In the same vein


Frequently asked questions about mounted paintings
Expect to spend between €50 and €150 to equip your first installation of 3-5 artworks with professional-grade supports. You can start with a minimal budget of €30 by choosing simple easels, then gradually enrich your equipment. The investment pays for itself from the first use thanks to the time saved and the professional impact achieved.
Your transformation into an expert in temporary presentations
In a few weeks, you will look back and smile at your hesitations today. Your temporary exhibitions will have become expected events, your visitors will leave with stars in their eyes, and you will feel that intense pride of mastering a know-how that few professionals truly possess. Your loved ones will notice your new confidence when you talk about your exhibition projects.
This expertise goes far beyond simply placed artworks: you will have developed an eye for space, an intuitive understanding of visual impact, and that rare ability to transform any place into an artistic showcase. These scenographer skills will serve you in all your future creative and professional projects.
The most difficult part was understanding that another approach existed - now you know it! Your first step? Choose 2-3 of your finest artworks and test the stability method we just detailed. You only have to start, and you'll discover that your works were waiting for this freedom to reveal their full potential.
🚀 Your success starts now: Every great set designer started with their first artwork hung. You have all the keys in hand to create presentations that leave a lasting impression. The only difference between dream and reality is taking action today!
Also read: 📖 Read more articles on unfixed artwork
</div
More selected pieces
Dawn Over the Lighthouse - Sea Landscape Edition
233,90€
Discover this artwork →Explore our collections