

You've just decorated your baby’s room with love, but those white walls seem so... empty. You would like to create a stimulating environment for their development, but you don’t know where to start.
Every time you look at these bare walls, you feel that little pang of worry: "Am I doing enough to foster their awakening? Is my child's visual environment rich enough?"
You may have tried a few colorful mobiles or stickers, but nothing seems quite right. Too childish, not sophisticated enough, or simply... disappointing compared to your expectations.
Rest assured, this feeling is perfectly normal. The truth is that no one really explains to us how wall art can become a true partner in the visual development of our children, from their first few months of life.
By the end of this article, you will know exactly how to choose and place artworks that will naturally stimulate your child's visual development, while creating an aesthetic environment that you will be proud of for years to come.
Why the visual awakening of your baby can’t wait?
The first few months of life represent a unique window of opportunity for visual development. If you wait until your child grows up to enrich their visual environment, you are missing out on the most critical period of their brain development. It's like planting seeds in a garden: the ground is most fertile now.
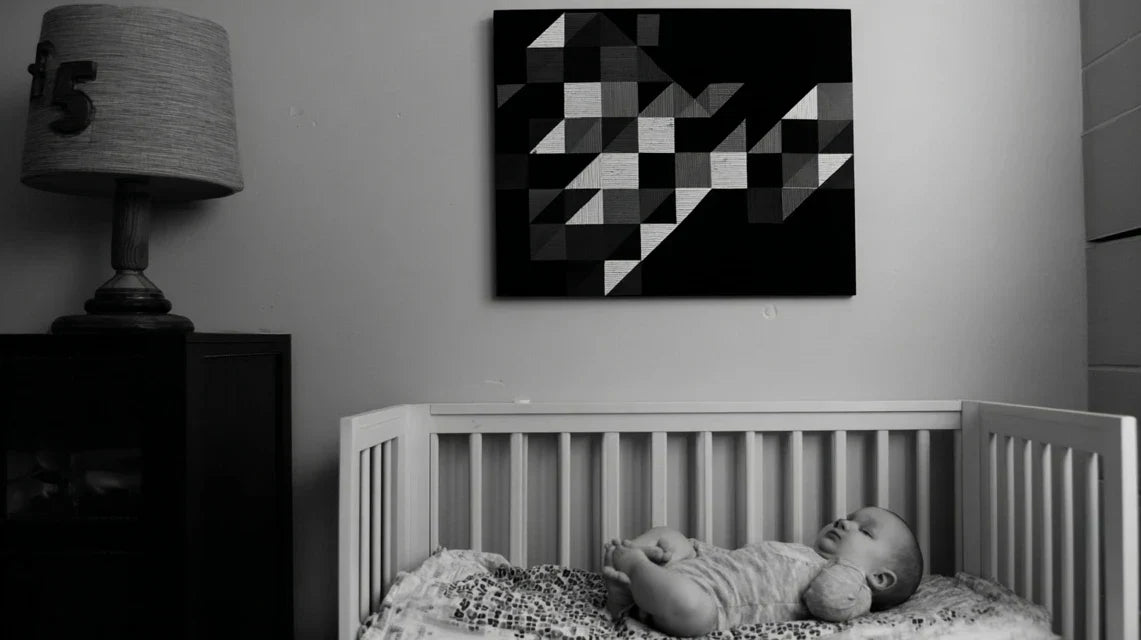
👶 Testimony from Sarah, Leo’s mom: "I installed an artwork with contrasting geometric shapes in Leo’s room at 2 months. Within weeks, I noticed that he fixed his gaze on the wall for much longer, his eyes followed the lines. Today, at 8 months old, he points to his favorite shapes when I carry him."
💬 Conversation with a decor expert
The rule of the first 1000 days: Your child’s brain creates 1 million neural connections per second during their first months. A visually rich environment multiplies these connections and you will see the first effects in just a few weeks.
What's really happening in your baby's eyes
Perhaps you’ve noticed that your baby stares at certain places on the ceiling for long minutes, seems fascinated by shadows that move, or always turns their head to the same side. These behaviors are not random.
What's really happening is an intensive training of the visual system. Your child’s brain analyzes, compares, memorizes every visual stimulus to build its understanding of the world. The problem isn't your baby; it's that their environment lacks "raw material" for this learning.
It’s like giving a little budding chef an equipped kitchen but no ingredients to cook. They have the abilities, but not the tools to develop them.
Blurry vision: an unsuspected asset to exploit
Contrary to what one might think, the fact that your baby sees blurry isn't a handicap, but a characteristic to be exploited intelligently. While everyone focuses on details, nature has planned for babies to first focus on global shapes and contrasts.
Imagine looking at a landscape with your eyes squinted: you distinguish the large masses, the lines of force, the light and dark areas. That's exactly what your child perceives, and it’s perfect for developing their overall vision.
This natural peculiarity explains why a painting with simple shapes and contrasts captivates your baby much more than a complex mobile. Their brain can process the information and draw concrete learnings from it.
🔍 Quick test: Stand 50 cm away from a decorated wall and squint strongly. What you still distinguish is exactly what your baby sees. You will instantly understand why certain elements attract them more than others.
The magnetic attraction of outlines: why your baby stares at corners
You’ve surely noticed that your baby often looks at the angles of furniture, the contours of doors, or the lines where walls and ceilings meet. This isn't distraction; it's pure neurological training.
The visual system first trains to detect outlines, like an apprentice drawer who would start by tracing lines before adding details. These natural "exercises" build the foundations of their future vision.
Understanding this changes everything in your decorative approach: instead of enduring this behavior, you can intelligently nourish it with works that offer exactly what their brain needs to progress.
The mystery of selective attention: why they ignore certain stimuli
If your baby seems to "ignore" certain colorful toys but remains mesmerized by a simple game of shadows, it's not just fussiness. Their brain naturally filters information based on its usefulness for their current development.
An environment that is too cluttered or unsuitable for their developmental stage becomes "visual noise" that their brain learns to ignore. This is a protective mechanism, but it can limit learning opportunities.
The key lies in targeted simplicity: offering the right stimulus at the right time, not too much, nor too little. Your wall art then becomes a development partner rather than just a decorative element.
🎯 3 signs that your visual environment is working:
- Prolonged fixation: Your baby looks at an item for more than 10 seconds in a row, indicating that their brain is actively processing the information
- Smooth eye movements: Their eyes follow lines and shapes continuously, proving that their eye-brain coordination is developing
- Recognition reaction: They smile or vocalize when they see a familiar item again, showing that their visual memory is being built
The magic trigger: the optimal distance of 40-60 cm
What really makes the difference is understanding that your baby has a very precise "zone of clarity" between 40 and 60 cm. It's within this zone that their brain can fully exploit visual stimuli, like a projector that only reveals the image when the focus is perfect. Place a visual element in this zone, and you will immediately see much more sustained attention and faster progress.
The rule of the awakening zone: Any decorative item located between 40 and 60 cm from your baby's eyes (lying or sitting position) becomes an active development tool. Test by moving a contrasting object into this zone - the effect is immediate.
| ❌ Common belief | ✅ Scientific reality | 💡 Explanation | 🎯 Practical benefit |
|---|---|---|---|
| Babies only see in black and white | They perceive contrasts from birth, colors around 3-4 months | The visual system develops gradually in stages | You can enrich the environment from the first days |
| It's necessary to avoid overstimulation | An environment that is too poor hinders development | The brain needs "raw material" to create connections | Appropriate stimuli accelerate learning |
| Wall decorations are just aesthetic | They become active awakening tools | Placement and choice directly influence development | Your decoration works for your child 24/7 |
| You have to wait for the child to grow up | The first 1000 days are the most decisive | Brain plasticity is maximal in the first months | Every day counts to optimize potential |
The progressive method for transforming your baby’s environment
Now that you understand the mechanisms at play, the good news is that you don't need to revolutionize the entire nursery all at once. The key to success lies in a progressive approach, like building a house: we start with the solid foundations, then add floor by floor. In 6 to 8 weeks, you will have created an environment that naturally stimulates your child’s visual development, while maintaining the aesthetic harmony you are looking for.
🎯 Overview of the transformation: We will proceed in 3 key steps: first install the essential elements (contrasts and simple shapes), then enrich with color and texture dimension, and finally personalize with evolving elements. Each step brings visible benefits and prepares the next.
Step 1: Create visual foundations (0-3 months)
This first step is crucial as it will lay the foundation for all of your child’s visual development. Just as an architect starts by digging solid foundations, we will first install the elements that your baby's brain can immediately process and use. The satisfaction of seeing your child react to the first stimuli will motivate you for the rest of the journey.
🛍️ Essential items to get started
- A black and white board with simple geometric shapes: Choose clean patterns (circles, triangles, lines) on a white background or vice versa. Maximum contrast allows the nascent visual system to exercise effectively. Avoid patterns that are too small or complex, which would become "visual noise" for your baby. Opt for a format of at least 30x40 cm for optimal visibility.
- Adjustable mounting support: Invest in a system that allows you to easily change the height and angle. Visual development evolves rapidly, and you will need to adapt the positioning. A rigid and secure support guarantees safety while offering the necessary flexibility for frequent adjustments.
- Soft indirect lighting: A light source that avoids reflections on the board while maintaining sufficient contrast. Direct lighting creates shadows that disrupt shape perception. Well-thought-out lighting reveals all the details of the board and optimizes your child’s visual experience.
Let's move on to practical installation:
🔧 Step-by-step installation
Initial positioning: Place the board 50 cm from the mattress, slightly offset on the side where your baby naturally turns their head. This distance corresponds to their optimal focus zone. The 15° downward angle compensates for their lying position and facilitates visual fixation. Rest assured, you don't need to be millimeter precise.
⏱️ Time: 15 minutes | ✅ Success when: Baby focuses on the board for more than 5 seconds | ⚠️ Attention: Too close (less than 40 cm) and the image becomes blurry even for them
Reaction test: Observe your baby during their calm awake times (neither hungry nor tired). Note what elements they naturally look at and how long they focus on them. These observations will guide you for future adjustments. Don't worry if the reaction isn't immediate, some babies need a few days to adapt.
⏱️ Time: 5 minutes of observation, 3 times per day | ✅ Success when: You identify their visual preferences | ⚠️ Attention: Avoid moments of fatigue where attention is reduced
Personalized adjustment: Adjust the position based on their reactions: if they look above, raise the artwork slightly. If their eyes "slide" without stopping, check the distance and lighting. Each baby has their own preferences, and you are best placed to decode them. This personalization makes all the difference for effectiveness.
⏱️ Time: 2-3 adjustments over 1 week | ✅ Success when: Prolonged and regular fixation | ⚠️ Attention: Too frequent changes prevent necessary habituation
✨ Verification of step 1 success: Your installation works when your baby naturally seeks the artwork with their gaze upon waking, maintains their attention on it for 10-15 seconds, and seems to "converse" with it by vocalizing or smiling. If any of these reactions are missing, first check the distance and lighting before changing the artwork.
RECOMMENDED PRODUCTS
Step 2: Enrich with color and depth (3-6 months)
Now that the visual foundations are laid, your baby is ready for the next level: the gradual introduction of color. Their visual system has matured and can begin to distinguish nuances. This is when you will see their curiosity flourish spectacularly, with more marked and joyful reactions. The snowball effect begins: each new stimulus enriches their visual library.
🎨 New elements to introduce
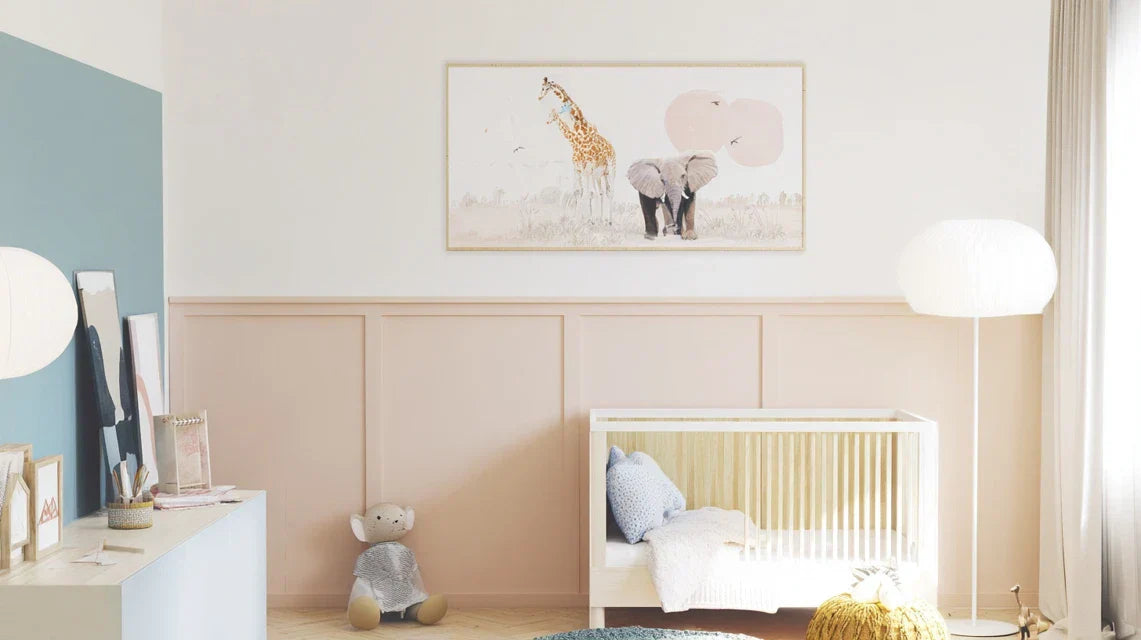
- Artwork with 2-3 contrasting primary colors: Red, blue and yellow on a neutral background create the first chromatic learnings. These "pure" colors are more easily identifiable by the developing visual system. Choose shapes that remain simple but slightly more varied than in step 1. The size can remain the same but the details can be a little finer. Element with visual texture: An artwork with light reliefs or material effects brings the notion of depth. The natural shadows created by these reliefs add an extra dimension of learning. Make sure that the reliefs remain soft and do not create too marked shadows that would disrupt the overall reading. Second focal point: A smaller element to be placed within their peripheral field of vision to exercise their ability to scan the space with their gaze. This element should complement the main artwork, not compete with it. It develops their ability to manage multiple sources of visual information simultaneously.
🎨 Implementing Enrichment
Gradual introduction of color: Replace the black and white artwork with the colored version, in the same location. Observe whether attention is maintained or intensified. Color should enhance interest, not disperse it. If your baby seems less attentive, temporarily revert to black and white and try again a few days later.
⏱️ Time: 2-3 days of adaptation | ✅ Successful when: Attention is maintained or increased | ⚠️ Caution: Overly saturated colors can overstimulate
Adding texture: Integrate the textured element in a second step, ideally one week after color. Place it near the main artwork to create a consistent "point of interest." Texture provides visual richness that prepares for future eye-hand coordination learning.
⏱️ Time: Immediate installation, adaptation over 1 week | ✅ Successful when: Baby alternates their gaze between the two elements | ⚠️ Caution: Avoid textures that create overly contrasting shadows
Developing visual scanning: Position the second focal point at a 90° angle from the first, within their field of vision when they slightly turn their head. This configuration encourages them to explore their environment visually and develops eye motor skills. Start with short sessions of 5-10 minutes.
⏱️ Time: Positioning in 10 minutes, development over 2-3 weeks | ✅ Successful when: Smooth eye movement between the elements | ⚠️ Caution: Too many elements create confusion rather than enrichment
Step 3: Personalize and Evolve (6 months and older)
Your child now reaches a level of visual sophistication that allows you to truly personalize their environment according to their emerging personality. You know their preferences, their reactions, their moments of greatest attention. This is the time to create a unique space that reflects both your aesthetic tastes and their developmental needs. The final result will be a space that you are proud of and that will continue to stimulate your child for years to come.
🌟 Advanced Personalization Elements
- Evolving artwork with modular elements: Choose a work whose some elements can be modified or repositioned according to their evolving abilities. This could be magnetic shapes, sliding elements, or interchangeable panels. This evolvability maintains interest and supports cognitive growth. Artwork of quality: Invest in a piece that pleases you aesthetically and remains relevant as your child grows. Noble materials and careful finishes create a quality environment that positively influences the development of taste. Choose something that integrates with your overall decor.
- Accent lighting: Specific lighting that highlights artworks while creating a warm atmosphere. This lighting can be adjustable to suit different times of day and activities. It transforms the space into a true personal gallery.
🎭 Creating a personalized environment
Installation of the main artwork: Choose the definitive location taking into account your child's development (transition to sitting position, then standing). The work must remain visible and interesting at all stages. Provide a height that will allow your child to appreciate it when they start moving.
⏱️ Time: 30 minutes of installation | ✅ Successful when: The artwork integrates harmoniously | ⚠️ Attention: Check the solidity of the fixing for years to come
Creating a visual path: Organize the different elements to create a "path" that the eye can naturally follow. This spatial organization develops visual planning skills and prepares for future reading and writing learning. The arrangement should seem natural and fluid.
⏱️ Time: 1 hour of setup and adjustments | ✅ Successful when: The gaze naturally follows the path | ⚠️ Attention: Avoid visual "dead ends" that break the movement of the gaze
Evolutivity tests: Experiment with different possible configurations of your modular installation. Note which variations provoke the most interest and at what times. This flexibility will allow you to adapt the environment to the development phases without having to start everything again.
⏱️ Time: 15 minutes of testing per week | ✅ Successful when: You master the different configurations | ⚠️ Attention: Change gradually so as not to destabilize acquired references
The rule of natural evolution: Move on to the next step when your child shows less interest in current stimuli AND shows signs of new abilities (better coordination, longer attention span, more complex reactions). Respect their pace rather than indicative ages.
Congratulations! You have just created much more than a simple decoration: a true personalized visual development laboratory. Now, let me share some secrets from professionals that will really make the difference in the effectiveness of your installation.
🎯 Neuropsychologist tip: Vary the natural lighting according to the time of day. In the morning, prioritize direct light that reveals contrasts. In the afternoon, softer light highlights colors and textures. This natural variation promotes visual adaptability and optimizes each period of alertness.
🤔 "But isn't this too sophisticated for such a little baby?"
"I feel like it will all go over his head..."
I perfectly understand this concern, it is normal to wonder if you are doing “too much”. In reality, you probably underestimate your baby's abilities. Imagine a little musician who only hears simple sounds: he would learn to recognize these sounds, but would never develop an ear for musical richness. For vision, it’s exactly the same thing: the richer and more adapted the environment is, the more capabilities develop. The important thing is progressive adaptation, not excessive simplicity.
💡 Reassuring test: Start with a single simple element and observe your baby's reactions for a week. You will be surprised to see how much he interacts with his visual environment, even as a newborn.
Mistakes to absolutely avoid in the visual arrangement
Even with the best intentions, some mistakes can compromise all your efforts or even hinder your child's development. These errors are so common that even professionals sometimes make them. I prefer to talk about them now to save you weeks of frustration.
- 🚫 Installation too high for safety: It's tempting to place decorative elements out of reach to prevent the baby from grabbing them later, but at 80 cm from the floor, they are totally useless for his visual development. The brain cannot process what is outside its optimal field of vision. Prefer secure fixings at the right height rather than a "safe" bad placement.
- 🚫 Constant change to “renew interest”: Many parents change elements as soon as they feel their baby is getting bored, but familiarization is part of learning. Like a book you reread to better understand it, your child needs time to “digest” each visual stimulus. Wait at least 2-3 weeks before changing anything.
- 🚫 Accumulation of elements "just in case": More isn't always better when it comes to visual stimulation. An overloaded environment forces the brain to filter instead of learning. It’s like trying to listen to 5 conversations at once: impossible to focus on one. Limit yourself to a maximum of 2-3 elements within direct field of vision.
- 🚫 Choice based solely on your adult tastes: A painting that seems “beautiful” to you is not necessarily suitable for your baby's visual development. Subtle nuances and fine details that you appreciate may be invisible to him. Find a compromise between adult aesthetics and developmental effectiveness. 🚫 Ignoring natural lighting: Installing a wall art piece in a poorly lit area or creating annoying reflections negates all its benefits. Light is an integral part of the visual experience. Observe your room at different times of the day before choosing the final location.
✅ Weekly check list: Your installation works if baby spontaneously looks towards the decorated area when waking up, maintains attention for at least 10 seconds straight, shows signs of pleasure (smiles, vocalizes) while looking, and doesn't consistently look away. If any of these signals are missing, first check lighting and distance before changing content.
🎁 Special offer for readers
Because you took the time to inform yourself, enjoy 10% discount on your first order:
⏰ Valid 72h after reading • Applicable to all our products
Frequently asked questions about visual development through wall art
An effective environment can be created with 50 to 150 euros depending on your choices. The important thing is not the price but the relevance of the chosen elements. A simple but well-placed artwork will have more impact than a poorly designed expensive installation. Start with a basic item at 30-50 euros and gradually enrich according to your child's reactions.
From the first weeks of life! The visual system begins to develop immediately after birth. The sooner you start, the more you benefit from the maximum brain plasticity of this period. Even a newborn baby of 15 days can benefit from an adapted visual environment, with observable effects in a few days.
Initial installation takes 30 minutes maximum and maintenance is limited to monthly cleaning and occasional position adjustments. It's less demanding than maintaining houseplants! Observing your baby will naturally guide you for the necessary adjustments.
Your baby will tell you! Prolonged fixation, smiles and vocalizations are signs of a successful choice. Start with strong contrasts (black/white) then gradually introduce primary pure colors. Simple geometric shapes work better than complex details in the first months.
Absolutely! The principles of visual awakening blend perfectly with a modern and streamlined aesthetic. Geometric shapes and controlled contrasts are even very trendy in contemporary decor. You can create a stimulating environment that reinforces your decorative style rather than compromising it.
Your child in their new environment: the transformation underway
In a few weeks, when you observe your child exploring their environment with curiosity and confidence, you will realize the extent of the transformation you have initiated. Their eyes will move more smoothly, their attention span will have developed, and you will see them actively anticipate and seek their favorite visual elements. Your friends will probably notice that your baby seems more "awake" and more interactive than other children of the same age.
But the most beautiful thing about this approach is that you will have acquired a deep understanding of visual development that will serve you throughout your child's childhood. You will know how to adapt the environment to the different phases, create spaces that promote concentration and creativity, and even pass on this knowledge to other parents. This expertise will give you lasting confidence in your educational choices.
The first step is often the easiest: carefully observe your baby's visual reactions for a few days, identify their natural preferences, and choose an initial element that is suitable. Each prolonged gaze of your child towards their new environment will be confirmation that you have made the right choice for their development.
🌟 Your mission begins today: You now have all the keys to transform your child's environment into a true partner in development. Every day that passes without acting is a missed opportunity during this critical period. Your baby deserves the best possible start in life.


