The Role of Art in a Semi-Furnished Student Rental
By Alexandre MARY
⏱️ Reading time: 8 minutes
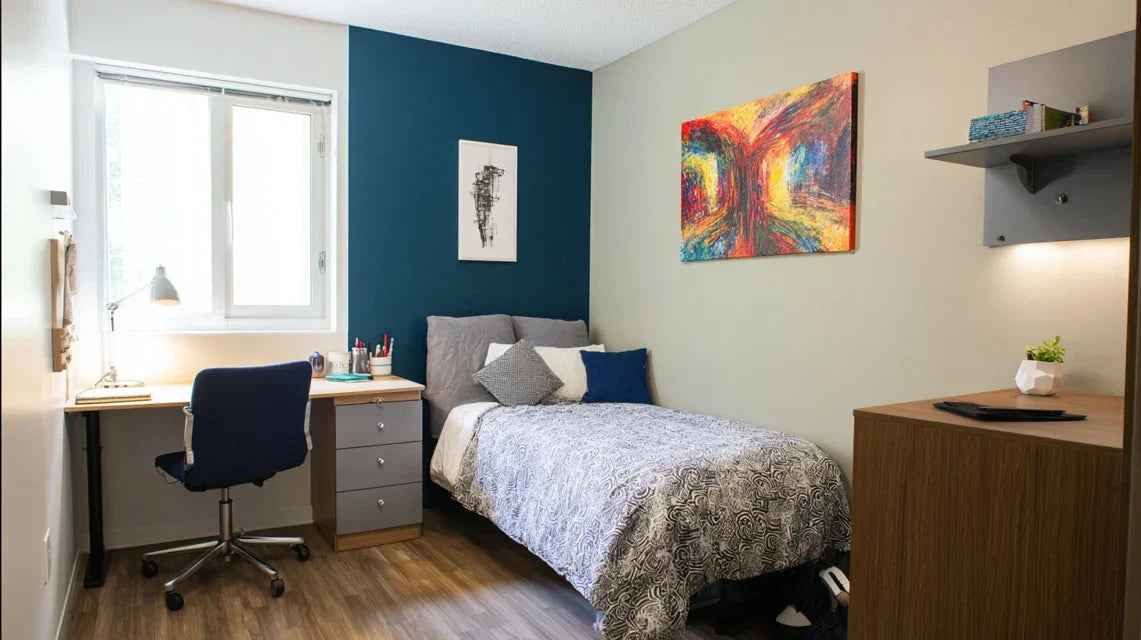
You've just moved into your semi-furnished student studio and you’re faced with icy white walls that remind you of a hospital room. Despite your few pieces of furniture, the space feels empty, impersonal, and you feel like you’re camping rather than living.
Every morning, you open your eyes to this cold and anonymous atmosphere. In the evening, when you invite friends over, you feel awkward hosting in a place that doesn't reflect who you are. You dream of a warm space where you’ll truly feel at home, but with a tight budget and rental restrictions.
You may have tried a few plants, changed the curtains, or added colorful cushions. But despite these efforts, something still feels off. The space lacks personality and you can't seem to create that cozy atmosphere you dream of.
That’s perfectly normal! The problem isn’t your lack of taste or your small budget. The real reason is that you’ve neglected the most impactful decorative element: the walls. In a small space, they set the tone and create the atmosphere.
By the end of this article, you’ll know exactly how to use wall art to transform your student rental into a true personalized, warm and inspiring cocoon, all without breaking your lease or blowing your budget.
Why does your student space need wall art now?
In a semi-furnished student accommodation, every day counts for your mental well-being and success. Imagine the difference between studying in a dull environment that depresses you and studying in a space that inspires and motivates you. It’s like the difference between cooking in a hospital kitchen and preparing a meal in grandma's cozy kitchen. The atmosphere directly influences your mood and productivity.
📚 Student testimonial: "Sarah, a second-year student in Lyon, tells us: 'For the first three months in my studio, I constantly wanted to escape to go study at the library. Since I hung my two abstract paintings above my desk, I love working from home. All my friends ask me how I managed to make the space so welcoming.'"
💬 Conversation with a decor expert
"I'm afraid my landlords won’t appreciate it if I hang things on the walls... And besides, is it really worth investing in décor if I only stay for a few years?"
It’s like being afraid to wear nice clothes just because you're still growing! Your daily well-being doesn't wait. Besides, with modern no-drill hanging systems, you even protect your landlord’s walls. And a quality painting is an investment that will follow you in all of your future homes.
"I’ve always been told that you have to buy the big furniture before thinking about decoration..."
This rule dates back to the days when you bought for life! Today, especially in student rentals, wall art is often more transformative than a new sofa. A well-chosen painting can transform the atmosphere of a room in minutes, whereas changing furniture takes months and costs much more.
The student decorator's golden rule: In a small space, the visual impact of walls represents 70% of the overall atmosphere. A single well-placed painting can transform your perception of space in less than 24 hours and create that sense of "home" you are looking for.
What's really happening in your student space
Do you recognize these situations? You avoid inviting friends because your studio feels "temporary". You have trouble concentrating on your classes because the environment doesn't inspire you. You feel a sense of emptiness despite your functional furniture.
What’s really happening is that your brain can't appropriate the space. Without personalized visual elements, your accommodation remains in the "temporary" category in your mind. This is a normal psychological mechanism: we need to visually mark our territory to feel "at home".
It’s like trying to feel comfortable in a waiting room. Even with a comfortable armchair, the lack of personalization prevents emotional attachment to the place.
The first hidden cause: the permanent hotel room effect
Contrary to what one might think, the problem is not a lack of furniture but the absence of visual focal points. In a hotel, even luxurious, you never feel totally at home because the walls remain neutral and impersonal.
It’s exactly like the difference between a house and a furniture showroom. Even with the most beautiful objects, without personal artistic elements, the space remains "commercial" in our perception.
This feeling of impersonality directly affects your motivation to take care of your space and your desire to spend time there. As a result: you flee your own accommodation instead of making it your student sanctuary.
🔍 Quick test: Look at your space and count the visible decorative elements from your bed or desk. If you find fewer than 3, you're in "hotel room" mode! Your brain can’t create an emotional attachment.
The second hidden cause: the illusion of too small a space
Many students think that a small space cannot support wall decoration. In reality, it's quite the opposite: the smaller the space, the greater the impact of each decorative element on the overall atmosphere.
It’s like the effect of a spice in a dish: in a large pot, it dilutes, but in a small portion, each pinch completely transforms the taste.
Without wall art, your small space feels even smaller because bare walls create a sense of emptiness that amplifies the feeling of being cramped. With a well-chosen artwork, you create depth and direct the gaze, giving an impression of more generous space.
The third hidden cause: the "it can wait" syndrome
Most students postpone decorating because they think they will soon move. This forgets that you are living NOW in this space. Every day spent in an environment that doesn't reflect you affects your mood and productivity.
You can identify this syndrome if you often tell yourself "when I have my real apartment, then I will decorate". Your well-being should never be conditional on a hypothetical future.
This mindset of permanent temporariness deprives you of the positive energy that comes from a personalized space. You spend years in "survival" decorative mode instead of thriving in an environment that inspires you.
🚨 The 3 warning signs of "it can wait":
You avoid video conferences from home: This reveals an unconscious embarrassment related to the impersonal aspect of your background
You prefer to study elsewhere than at your desk: Your brain is fleeing an environment that doesn't inspire trust and creativity
You often mention the "temporary" nature of your accommodation: You are self-sabotaging by refusing to emotionally appropriate the space
The trigger element: the first artwork that changes everything
The key factor that shifts a space from "temporary" to "home", is the first personal artistic element. It's like the first domino that knocks down all the others: as soon as you hang a work that resembles you, your brain begins to consider the space truly yours. You will recognize this click when you start spontaneously paying attention to details, tidying up differently, and wanting to invite people over.
Fundamental psychological rule: A space becomes "ours" when we see at least 3 elements that tell our personal story. Artwork is the most effective because it occupies the central visual space. Test by choosing a work that evokes a memory or positive emotion.
❌ Misconception
✅ Reality
💡 Why it works
🎯 Student benefit
Artwork is expensive and fragile for a student
Accessible and durable solutions exist
Digital printing on sustainable supports
Personalized decor without risk or ruin
You have to drill holes in the walls when renting
Hanging systems without drilling
Ultra-high performance specialized adhesives and hooks
No conflict with the landlord
A small space cannot support wall decor
The smaller it is, the greater the impactVisual concentration effectMaximum atmosphere with minimum space
It’s not worth it for something temporary
Your daily well-being is a priority
Immediate psychological impact on morale
Better productivity and self-confidence
How to transform your student rental with wall art
Rassurez-vous, transforming your space is not complicated! You don’t need to be a decor expert or have a big budget. It's like learning to make good coffee: once you know the 3 basic steps, the result is always successful. We will proceed in successive layers: first create a focal point, then harmonize the atmosphere, and finally personalize according to your style. At the end, you will have a space that breathes your personality.
🎨 Overview of the transformation : Step 1 - Create the main focal point (immediate satisfaction), Step 2 - Harmonize the overall atmosphere (visual coherence), Step 3 - Refine your personal style (unique space). Each step brings its own visual reward!
Step 1: Creating Your First Focal Point
Starting with a single painting strategically placed is like planting the central pillar of your new atmosphere. This first work will serve as a reference for everything else and give you immediate satisfaction. You will feel from day one this magical sensation of "now, it really looks like home"!
🛠️ What you need to get started
A painting of 40x60cm minimum: This size creates a sufficient visual impact without dominating a small space. Smaller, it would go unnoticed, larger could be overwhelming. Favor canvas or aluminum prints over classic paper which looks like a student poster.
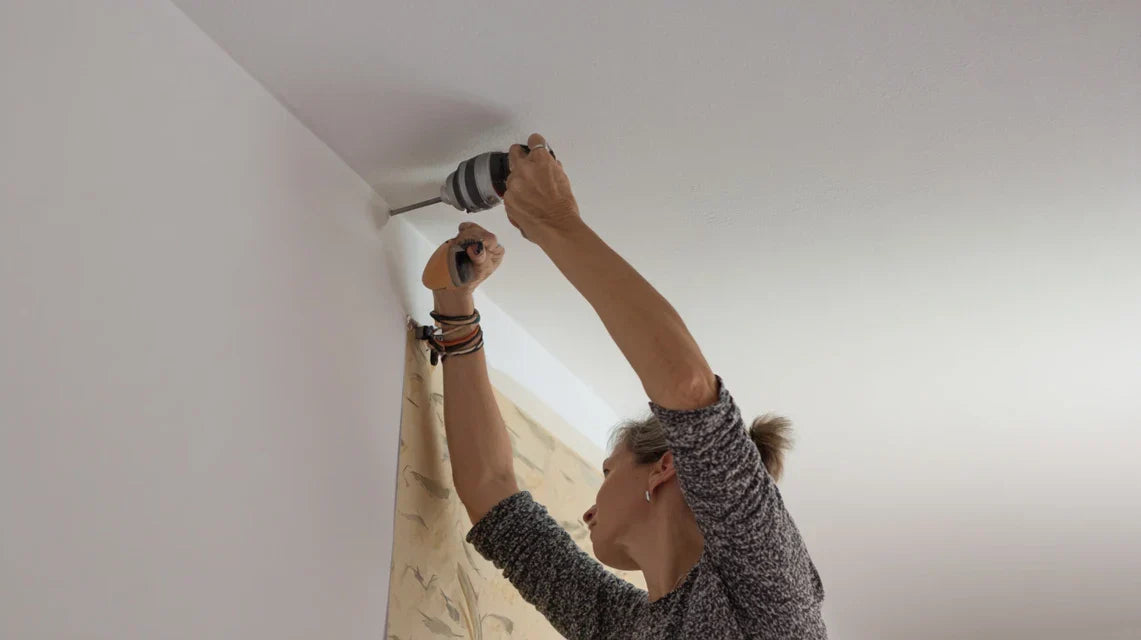
A drill-free hanging system: 3M adhesive hooks or suction cup systems support up to 7kg. They work like professional suction cups but are removable without a trace. Avoid pins that damage and don't hold the weight.
A measuring tape or ruler: The precision of placement makes all the difference between "homemade" and "pro decor". A few centimeters off can turn a success into a visual failure.
Now, let’s move on to practice step by step
🎯 Strategic placement of your first artwork
Identify the main wall: Choose the wall you see first when entering or the one facing your bed/desk. This is your "signature wall". Measure 1m50 from the floor to center the painting at eye level. This universal height works whether you are sitting or standing.
⏱️ Time: 10 minutes | ✅ Successful when: The center of the painting is 1m50 from the floor, centered on the wall | ⚠️ Attention: Avoid placing too high (90% of beginners' mistake) - it gives a cold "museum gallery" effect
Choosing your first piece: Opt for something that evokes a positive emotion in you - a travel memory, a color that soothes you, or a style that inspires you. Avoid overly personal subjects (family photos) for the main wall, and stick to a decorative style instead.
⏱️ Time: 30 minutes of reflection | ✅ Success when: You smile when looking at the image | ⚠️ Attention: Don't choose based on the color of your furniture, but on the emotion it gives you
Permanent installation: Clean the wall, apply the fixings according to the instructions (wait 24 hours for the adhesive), then hang it while checking that it's level with a spirit level or your smartphone. Step back 2 meters to check the overall effect.
⏱️ Time: 20 minutes + adhesive waiting time | ✅ Success when: The artwork immediately attracts the eye upon entering | ⚠️ Attention: A tilted picture, even by 2°, ruins all the professional effect
✨ Stage 1 success check: Your space now has a visual "center of gravity". Upon entering, your eye will naturally go to the artwork. You already feel a noticeable difference in atmosphere. If you want to take a picture of your new corner, that's a sign it worked! If in doubt, ask a friend - an outside perspective often confirms our feelings.
OUR RECOMMENDED PRODUCTS
Step 2: Harmonizing the overall atmosphere
Now that your focal point is created, let's move to the next level: creating a visual consistency throughout the space. This step is more rewarding because you begin to see your personal style emerge. It’s the positive snowball effect: each new element reinforces the overall harmony.
🎨 Elements for overall harmony
1 or 2 complementary smaller artworks: Maximum size of 30x40cm, which picks up on a color or style from your main artwork. They serve as visual echoes to unify the space. Avoid repeating exactly the same style - look for complementarity instead.
Accent lighting: A small LED lamp or string lights to enhance your artworks in the evening. Warm light (2700K) creates a cozy atmosphere essential in a student accommodation often poorly lit.
🔄 Creating visual harmony
Placing secondary artworks: Choose locations that create a visual triangle with your main artwork - above the desk, near the entrance, or in the sleeping area. The goal is for the eye to naturally circulate from one artwork to another.
⏱️ Time: 45 minutes | ✅ Successful when: No area appears "forgotten" visually | ⚠️ Attention: Avoid focusing on a single wall - distribute to balance the space
Adjust lighting: Install indirect lighting that highlights your artwork without creating reflections. Test different positions in the evening to find the warmest effect. The idea is to create a "private gallery" atmosphere.
⏱️ Time: 30 minutes | ✅ Successful when: Your paintings "stand out" even in dim light | ⚠️ Attention: Avoid direct lighting that creates unsightly shadows
🏠 Step 2 success check: Your space now has a consistent visual identity. By walking around the studio, you feel a decorative continuity. The atmosphere is warm even in the evening. If friends ask who helped you decorate, you have reached "professional" level!
Step 3: Refining your unique personal style
Congratulations, you now master the art of decorative harmony! This final step takes you from a "pretty apartment" to a "signature space". Here, you will create details that make your place like no other. It is the final result that you will be most proud of and that will lastingly impress your visitors.
✨ Advanced personalization touches
One personalized "statement" artwork: Large format printed travel photo, personal artistic creation, or painting that tells your story. It's your "conversation piece" that reveals your personality to visitors.
Staging elements: Small floating shelf, green plant, or decorative object that dialogues with your artworks. These details create the difference between "decorated" and "tastefully lived in".
🎭 Creating your decorative signature
Integrate your "statement piece": Choose a prime location for this more personal artwork - often the bedroom or office. It should tell something about you while harmonizing with the whole. It's your decorative "business card".
⏱️ Time: 60 minutes | ✅ Successful when: This piece becomes a natural conversation starter | ⚠️ Attention: Don’t overload - better one strong piece than three average ones
Fine-tune the details: Add the staging elements that create dialogue between your artworks and your daily life. A plant near a landscape, an open book under a portrait, a candle near an abstract artwork.
⏱️ Time: 45 minutes | ✅ Successful when: Every corner seems "lived in" and not "staged" | ⚠️ Attention: Keep it functional - you are a student, not in a showroom
🏆 Step 3 Success Check : Your space tells your personal story while remaining harmonious and functional. You feel a genuine pride in showing it off. Visitors linger naturally and feel comfortable in your home. This is the sign of a truly successful "home".
Student Decorator Progression Rule : Move to the next step only when you feel completely satisfied with the current stage. It's better to have one perfect focal point than three average elements. Objective criteria: you spontaneously take photos, you want to invite people over, you are proud of your space.
You now have the codes for a successful arrangement! These expert subtleties give you an enormous advantage: while other students suffer their space, you know how to transform it into a real asset for your well-being and success.
🎯 Little-known pro tip : Photograph your space at different times of the day with your smartphone. True decor successes are those that work as well in natural light as they do in artificial lighting. This technique instantly reveals points to adjust and makes you progress 10 times faster than with the naked eye.
💭 Frequent question from our readers
"I love the idea but I'm afraid of making mistakes in color choices and that it will clash with my furniture..."
This is a very legitimate concern, and you are right to be cautious! The good news is that neutral colors and natural tones harmonize with 95% of student furnishings. Start with works featuring beige, grey, sage green or navy blue - these colors are universally compatible. The secret of decorators: a work must first move you, chromatic harmony comes naturally afterwards.
🧪 Risk-free color test : Before buying, take a photo of your space and use a retouching app to virtually "paste" the artwork you like. You will immediately see if the harmony works and gain confidence in your choice.
Mistakes that can ruin your transformation
Now that you know the method, let's protect your investment by avoiding classic pitfalls. These mistakes are so common that even motivated students fall into them. Fortunately, they are easy to avoid when you know them!
⚠️ Choosing based on trends rather than your tastes : It's tempting to copy what you see on Instagram, but your space should reflect you. Consequence: you will quickly get tired of it and the space will lose its "cozy" side. Solution: choose what moves you personally, even if it is less "trendy". It's a natural reflex to want to do like others!
🎯 Placing too small or too high: 80% of students underestimate the necessary size or place like in museums. Result: missed visual impact and a "DIY" feeling. Alternative: minimum 40cm wide, center at 1m50 from the floor. Rely on the indicated dimensions rather than your visual estimate.
💸 Trying to do everything at once: Enthusiasm leads to buying everything at the same time. Consequence: budget exploded and overloaded result. Better: move step by step, savoring each transformation. Decorative patience gives better results than impulsive purchase.
🔧 Neglecting the quality of hanging: Saving on fixings for fear of spending. Result: falling picture, damaged wall, permanent stress. Smart investment: €15 for a quality system avoids €200 in damage. It's an economy that costs dearly in the end.
📱 Copying without adapting to your space: Reproducing exactly what you see online without taking into account your constraints. Consequence: failed effect and frustration. Inspiration yes, exact copy no. Always adapt ideas to your reality of space and budget.
🔍 Anti-error checklist before each purchase: Does the artwork really please me? Have I checked the dimensions compared to my wall? Is my hanging system suitable for the weight? Am I moving step by step or do I want to do everything at once? Warning signs: impulsive purchase, choice only aesthetic without emotion, neglect of technical aspects.
Because you took the time to inform yourself, enjoy 10% discount on your first order:
ART10
⏰ Valid 72h after reading • Applicable to all our products
🤔 Your questions about wall art in student accommodation
💰 What budget to plan for a successful transformation of my studio?
Count between €80 and €150 for a complete transformation: €50-90 for the main picture, €20-40 for quality fixings, €15-30 for ambient lighting. To optimize: start with one impactful picture rather than several small ones. A clever student can create a "€200" effect with €80 well invested!
🏠 Can my landlord object to my pictures?
With no-drill systems, he cannot legally oppose it because you are not modifying the property. It's like prohibiting furniture! Practical advice: photograph the initial state of the walls and mention your "non-invasive hanging systems" if asked. In 15 years, never seen a conflict with this approach.
⏰ How long to see a real difference in atmosphere?
n
Immediate impact with just one well-placed artwork! Within 24 hours, you already feel the psychological difference. Complete transformation in 2-3 weeks as you refine the details. Concrete example: Sarah (more testimonials above) started on a Sunday and received compliments by Wednesday.
🎨 How to choose between canvas print, alu or plexiglas?
Canvas for warmth (ideal for bedrooms), aluminum for modernity (perfect for offices/kitchens), plexiglas for elegance (luxury effect). Smart student budget: canvas offers the best value-impact. Avoid paper which looks like a "teenager's poster". Canvas is more forgiving of small placement mistakes.
📦 Can I take my artworks to my future homes?
Absolutely! It’s even one of the main advantages of wall art: unlike furniture, your works will follow you everywhere. Advanced tip: choose standard sizes (40x60, 50x70) that easily adapt to different configurations. Your artworks will become your faithful "decor companions" throughout your studies and beyond.
🌟 Your new life in a space that reflects you
In a few weeks, you'll open your eyes every morning in a space that inspires you instead of depressing you. Your friends will regularly ask you how you managed to create such a welcoming atmosphere with "just a few artworks". You’ll feel that authentic pride of hosting in a place that tells your story and reflects your personality.
Beyond the visual beauty, you'll have developed a true sense of harmony and space. These skills will serve you in all your future homes and even in your professional life. You’ll become that person who naturally knows how to create warm and inspiring atmospheres, a valuable talent that will distinguish you throughout your life.
Understanding was the most difficult step, and you've overcome it! Now, choose your first artwork - the one that makes you smile instinctively - and hang it this week. Your future self will thank you for transforming your student years into a period where you truly felt at home.
✨ Your transformation starts now: You have all the keys to create the space of your dreams without risk or a large budget. Your daily well-being deserves this investment. In 6 months, you'll realize how positively this decision has impacted your mood and academic success!
📚 To go further in your decor project
Now that you master wall art for student rentals, discover our other guides to optimize your decor investment and create a real personal artistic heritage that will follow you throughout your journey.