


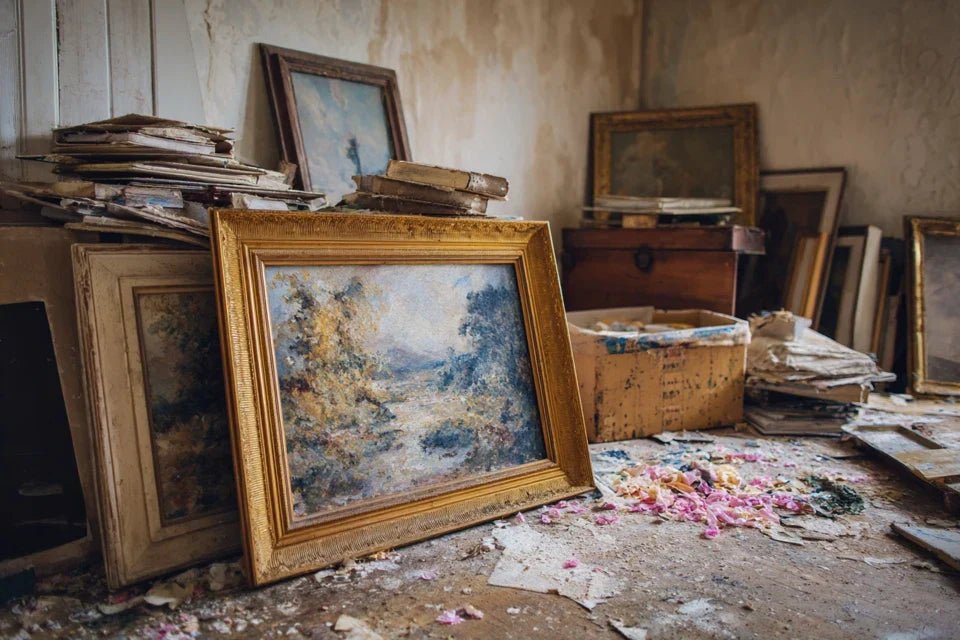
You can already imagine the scratches on the frame, the glass breaking at the first turn, or worse: your masterpiece slipping and crashing against the truck's metal walls. This anxiety knots your stomach when you should be savoring your purchase.
Perhaps you’ve tried to prop up your artwork with pillows or blankets, but deep down, you know that’s not enough. Advice found online talks about "securing it well," but no one really explains how to protect a work of art during truck transport.
Rest assured: this concern is perfectly legitimate. The problem isn't your lack of experience, but the absence of an approach adapted to transporting wall artworks. Traditional moving techniques simply don’t apply to works of art.
In a few minutes, you will know exactly how to transport your paintings in a rental truck without risk. You will master professional protection techniques and discover the mistakes that damage 99% of artworks. Your next move will be serene, and you can finally enjoy your new acquisition.
Why does transporting wall artworks by truck require a specific approach?
Transporting paintings by truck is not something to be taken lightly, and now is the time to worry about it. Every year, thousands of artworks are damaged during transport, and insurance companies often refuse to cover damage caused by improper packaging. It’s like entrusting a newborn to someone without explaining how to carry them: intentions are good, but the consequences can be dramatic.
📦 Customer testimonial: Marie, an interior designer, recently lost a lithograph worth €1200 during a move. "I had wrapped my painting in bubble wrap, but I hadn't thought about the truck’s vibrations. The frame cracked and the glass scratched the artwork. My home insurance didn't reimburse me because the transport wasn't 'professional'."
💬 Conversation with a decor expert
Golden rule of art transport: anticipation is better than repair: By applying the right protection techniques, you eliminate 95% of the risk of damage. Your artwork will arrive in exactly the same condition as when it left its original location, and this in less than 30 minutes of preparation.
Understanding what really puts your artworks at risk during transport
You feel that apprehension about seeing your painting slide into the truck, you already visualize the impacts against the walls with the slightest braking, and you wonder if your packaging will really hold up to the vibrations of the road.
This worry actually reveals a great intuition: your brain instinctively identifies the real dangers of transporting wall art. The problem isn't your stress, but the fact that no one has explained to you how to neutralize these risks methodically.
It's exactly like learning to drive: at first, you focus on a thousand details at once, but once you master the fundamentals, everything becomes fluid and natural.
Vibration: The silent enemy of your frames
Contrary to what many think, it is not the violent shocks that cause the most damage, but the constant micro-vibrations of the engine and the road. These invisible little shakes work on the fixings, detach the elements of the frame and can even crack the glass on long journeys.
Imagine a jackhammer working at slow speed for hours: even the most resistant materials eventually give way under this repeated pressure.
That's why so many owners discover invisible damage only once they reach their destination: vibrations have weakened the structure, and simply handling the artwork is enough to cause it to break.
🔍 Revealing test: Place your hand flat on a painting in a moving vehicle for 30 seconds. You will feel exactly the vibrations that your artwork will undergo throughout the journey. It's often much more intense than you imagine!
Movement of loading: when physics plays against you
Many believe that it is enough to "securely wedge" a painting to secure it, but in reality, the laws of physics turn every braking into a projection force. A 5 kg artwork can exert a pressure of 50 kg during sudden stop.
It's like holding a bucket of water in an elevator: as soon as the cabin slows down, the contents continue their movement and escape your hands.
Result: your improvised wedging systems yield under pressure, and your painting becomes a projectile that can damage other objects or suffer itself destructive impacts.
Leverage effect: why large formats are the most vulnerable
The larger a wall art piece is, the more it transforms small movements into large shifts. A slight wobble at the fixing point becomes a significant oscillation at the corners.
You can observe this by holding a broom handle from the bottom: the slightest movement of your wrist makes the top dance several centimeters.
This mechanical amplification explains why large-format artworks often have damaged corners or deformed frames, even when transport seemed to go smoothly.
🎯 3 alarm signals to watch out for:
- Cracking of the frame during loading: This means that the structure is already under stress and will not withstand vibrations
- Play in the fixings after transport: This is a sign that the assemblies have been stressed beyond their limits
- Friction marks on the edges: They reveal that the artwork has moved despite your precautions
The multiplier effect: when multiple risks combine
The real danger appears when vibrations + movements + leverage combine during transport. It's a domino effect: each factor amplifies the others, creating stresses that even professional frames may not be able to withstand. Recognizing this allows you to adapt your protection method based on the size of your artwork and the duration of the journey.
Progressive protection principle: The more valuable or fragile your artwork is, the more levels of protection you should multiply. A single security system, even a perfect one, can still fail.
| ❌ Common misconception | ✅ Reality of transport | 💡 Why it's different | 🎯 Adapted solution |
|---|---|---|---|
| Bubble wrap is enough to protect | You need rigid AND flexible protection | Bubble wrap absorbs shocks but not vibrations | Cardboard sandwich + foam + plastic film |
| The tighter it is, the better | Compression can deform the frame | Materials work differently under pressure | Firm hold but with breathing points |
| Standing against the wall, it's stable | Most dangerous position in case of braking | Maximum leverage + no damping | Flat transport with anti-slip system |
| A short journey doesn't require precautions | 80% of damage occurs within the first 15 km | Most abrupt starts and stops | Complete protection from the first kilometer |
The progressive method for safely transporting your wall art
Now that you understand the real stakes, take a deep breath: you are going to discover a structured approach that eliminates stress and guesswork. This method follows the logic of construction: first solid foundations, then methodical assembly, and finally the finishing touches that make the difference. At each step, you will see your confidence grow and your artwork become perfectly secured.
🎯 Overview of the method : We proceed in 3 steps like a professional: first the protective packaging which creates a cocoon around the artwork, then the fixing system that immobilizes it in the truck, and finally the checks that guarantee a serene transport. Each level brings its specific security.
Step 1 : Create the protective cocoon of your artwork
This first step is crucial because it isolates your painting from all micro-shocks and vibrations. It's like building a custom case: your artwork should never come into direct contact with external elements again. Once this protection is in place, you will immediately feel that peace of mind that comes from knowing you have done things right.
🛠️ Essential materials for packaging
- Double-thickness corrugated cardboard : Thicker than standard packaging cardboard, it resembles the cardboard used for large appliances. You will recognize it by its rigidity (impossible to bend by hand). Absolutely avoid single-layer cardboard which deforms under weight and does not protect against impacts.
- 5mm minimum polyethylene foam : This white foam comes in rolls or sheets. The quality test: when you press on it with your thumb, it should return to its shape in less than 3 seconds. This elasticity absorbs vibrations that the cardboard alone cannot handle.
- Professional stretch plastic film : More resistant than cling film, it is difficult to tear and really sticks. You will find it in moving supply stores. Its role: keep all elements cohesive without letting air infiltrate.
Let's move on to creating your protective packaging now
🔧 Sandwich packaging technique
Prepare the base protection : Cut a piece of cardboard that extends 10cm on each side of your painting. This margin allows to absorb lateral impacts without them reaching the artwork. Place a layer of foam over the entire surface. The thickness of the foam compensates for irregularities in the frame and distributes pressure evenly.
⏱️ Time : 10 minutes | ✅ Successful when : The painting placed on it only touches the foam, never the cardboard | ⚠️ Attention : If the foam is completely compressed under the weight, double the thickness
Position and wrap the artwork: Place your painting face down on the foam (the glass or canvas will thus be protected). Cover the back with a new layer of foam, then the closure cardboard. This sandwich technique distributes stress across the entire surface rather than on the fragile points of the frame.
⏱️ Time: 5 minutes | ✅ Success when: You no longer feel the reliefs of the frame through the packaging | ⚠️ Attention: Never squeeze directly on the corners of the frame
Finalize with plastic wrap: Wrap the film in a spiral, starting with the corners (the most vulnerable points). Pull firmly but not to the point of deforming the packaging. The film must make at least 3 complete turns. This step transforms your packaging into a homogeneous block that cannot come apart.
⏱️ Time: 8 minutes | ✅ Success when: The packaging sounds "full" when you tap it | ⚠️ Attention: Check that no air bubbles are trapped
✅ Packaging quality control: Your artwork is perfectly protected when you can lift it by a corner without feeling any deformation, when the packaging resists moderate hand pressure, and when no element protrudes. If you feel any concern, add a layer: better to overprotect than not enough!
OUR RECOMMENDED PRODUCTS
Step 2: Mastering the fixing system in the truck
Now that your artwork is in its protective cocoon, we move on to the fixing system which will immobilize it perfectly in the truck. This step is more rewarding because you immediately see the result: your painting literally becomes integrated with the vehicle, and the domino effect begins: the more you master this technique, the more confident you will become for your future transports.
🔗 Professional fixing equipment
- Ratchet straps with hooks: Prefer wide straps (minimum 35mm) with a resistance of 500kg. The hooks must fit the truck's lashing rings. The ratchet system allows precise tension adjustment without excessive effort.
- Industrial anti-slip mat: More effective than blankets, this corrugated rubber mat prevents any slippage. It comes in cuttable rolls. Recommended thickness: minimum 8mm for optimal adhesion.
- Telescopic loading bars: They fit between the truck walls and create additional support points. Essential for large-size artworks that require support at multiple points.
🎯 Secure fixing technique
Prepare the transport area: Spread the non-slip mat over the entire surface where the artwork will be placed. Ensure this area is in the front third of the truck (the most stable zone). This position reduces swaying and facilitates inspections.
⏱️ Time: 5 minutes | ✅ Success when: The mat adheres perfectly to the floor without creases | ⚠️ Attention: A poorly placed mat can create imbalance points
Position and strap the artwork: Place the wrapped painting flat on the mat. Pass the straps in a cross pattern over the top, distributing pressure on areas reinforced by cardboard. Tighten gradually alternating straps to maintain balance. The tension should immobilize without crushing.
⏱️ Time: 12 minutes | ✅ Success when: The artwork doesn't move a millimeter when you gently shake the truck | ⚠️ Attention: A strap that is too tight can deform the packaging
Install safety bars: Place the telescopic bars perpendicular to the artwork, creating a protective cage. Adjust the tension so they are well wedged but without applying direct pressure on the packaging. These bars constitute your last line of defense.
⏱️ Time: 8 minutes | ✅ Success when: The bars don't move even when pushing on them | ⚠️ Attention: Ensure they do not touch the artwork directly
🔒 Final safety test: Your fixing system is optimal when you can lean slightly on the artwork without it moving, when the straps remain tight after a few minutes, and when no element risks coming loose. Walk around the truck and shake it gently: nothing should move inside.
Step 3: Fine-tuning for expert transport
At this stage, you already master the essentials, but this last step will take you from a "secure transport" level to a "professional transport" level. These finishing touches make the difference between someone who applies a method and a true connoisseur who anticipates all scenarios. The final result: you will transport your works with the same serenity as a professional gallery owner.
🎨 Expert finishes
Create buffer zones: Install inflatable cushions or foam blocks between your artwork and other objects in the truck. These damping zones absorb parasitic energies and prevent vibrations from being transmitted from one object to another. Same principle as expansion joints in a building.
⏱️ Time: 10 minutes | ✅ Success when: Your artwork is isolated in its own "bubble" of space | ⚠️ Attention: Buffer zones should not hinder access for inspections
Install the monitoring system: Place your smartphone in the truck (airplane mode + vibration recording app) to measure the stresses experienced during transit. This data will allow you to adjust your technique for future transports.
⏱️ Time: 3 minutes | ✅ Success when: The phone is securely fixed near the artwork | ⚠️ Attention: Protect the device in a rigid case
Prepare the route plan: Plan your itinerary, avoiding work zones, damaged roads and rush hours. Identify rest areas for intermediate checks. This preparation reduces the stresses on your artwork by one third.
⏱️ Time: 15 minutes | ✅ Success when: You have a plan A and a plan B for your route | ⚠️ Attention: Allow a 30% margin on your travel time
Expert progression rule: You are ready to move up a level when your installation withstands the "truck starts" test - if nothing moves during the first few meters, your transport will be perfect. Combine patience in preparation and confidence in execution.
Congratulations! You now possess the techniques of professionals for transporting wall art. These methods give you a considerable advantage: where others stress and improvise, you proceed with method and assurance.
🎓 Gallery tip: True experts always do a "dry run" - they simulate the route with an object of similar weight and size before transporting the actual artwork. This technique reveals weaknesses in your installation and allows you to adjust the system without risk.
🤔 "What if I don't have time to do all of this?"
"I understand the method, but I only have 30 minutes before leaving to pick up my painting. Can I shorten some steps?"
I fully understand this urgency! In that case, focus on the 'sandwich packaging' (complete step 1) and a simple but effective fixing: flat position + 2 cross straps + anti-slip mat. This "express" version will take you exactly 25 minutes and cover 90% of the risks. You can always perfect your technique on the next transport, the important thing is to start safely.
⚡ Immediate action: Time yourself packaging your first painting: you'll be surprised to see that "doing it right" takes only a few minutes more than "doing it quickly", with incomparably safer results.
The mistakes that turn a serene transport into a nightmare
Before you start, I must warn you about the common pitfalls that have caused disasters even for well-intentioned people. These errors are so common that they seem logical at first glance, but they create exactly the conditions we seek to avoid.
- ⚠️ Don't trust "it will hold fine" : This phrase is the prelude to 90% of transport accidents. Your brain minimizes risks through natural optimism, but physics makes no compromises. Always test your installation by lightly shaking the truck. If something moves, the fixing is insufficient.
- 🚫 Transporting upright "to save space" : This position multiplies the stress on the frame tenfold. The artwork becomes a giant pendulum that transforms every vibration into a destructive oscillation. Even for a 5-minute journey, always prefer a flat position.
- ❌ Stacking multiple artworks "to optimize" : Each additional artwork adds its weight and vibrations to the one below. Frames are not designed to support loads, even light ones. One artwork = one dedicated space.
- 🔴 Neglecting the weather : Humidity and temperature variations cause the wood of the frames to work and can cause deformations during transport. Check the weather forecast and adjust your protection (reinforced plastic film if rain is expected).
- ⭕ Skipping the intermediate check : On a journey longer than 1 hour, stop halfway to check that nothing has moved. Vibrations can gradually loosen fixings, and 5 minutes of checking avoids hours of regret.
🛡️ 4-point control system : Before departure, check that the artwork does not move under slight pressure, that all straps are tightened evenly, that nothing is likely to come loose during the journey, and that your route avoids roads in poor condition. If you have any doubts about any of these points, redo the fixing.
🎁 Special readers offer
Because you took the time to inform yourself, enjoy 10% discount on your first order :
⏰ Valid for 72h after reading • Applicable to all our products
❓ Frequently asked questions about transporting wall art
For a standard artwork (50x70cm), count 25-30€ of protective material (reusable for 5-6 transports) and 45 minutes of preparation. A professional transport would cost you 150-300€. The initial investment is worth it after the 2nd transport, and you gain autonomy and flexibility for your future acquisitions.
This fear is healthy and shows that you are aware of the value of your work! Start by practicing with a similar but valueless object (old frame, used mirror). Once you master the gestures, your confidence will be total. Remember: galleries use exactly these techniques for decades.
For 1-3 medium-sized artworks, a 9m³ is more than sufficient and offers more stability than a large volume. Be sure to check the presence of lashing rings on the walls and floor, the cleanliness of the loading space (no nails or irregularities), and the condition of the tailgate or rear door. Ask for a demonstration of the opening system to avoid unpleasant surprises.


