The first time I night-dived in the Maldives, I thought I was witnessing pure magic. Every movement of my palm triggered an explosion of electric blue sparks in the marine darkness. This hypnotic spectacle of bioluminescence haunted me for months until I decided to take on the ultimate challenge: capturing this living light on canvas. Here's what the marine bioluminescence painting brings: an exploration of the limits of color and light, a deep connection with oceanic mysteries, and the satisfaction of mastering one of the most technical subjects in contemporary art. But how do you reproduce something that seems to defy the laws of physics? How do you paint a light that emanates from within the water itself, without an external source, in shades that our tubes of paint simply don't contain? Rest assured: for fifteen years I have been documenting and painting marine luminous phenomena, I have developed proven techniques that allow creating this magical illusion. I will reveal the secrets that ocean artists use to transform the invisible into the visible.
The luminous paradox that fascinates marine painters
Marine bioluminescence represents a conceptual challenge before even being technical. Unlike a sunset or moonlight reflections on water, we are talking here about light emitted by living organisms themselves. Dinoflagellates, these microorganisms responsible for the phenomenon, produce a cold, blue-green light that does not behave like a traditional light source. It doesn't illuminate its environment. It is the environment.
This distinction changes everything for the artist. In classical painting, we work with light that reflects off objects. With bioluminescence, we must paint objects that are themselves light. It's like trying to paint a star without its sky, a flame without fuel. Watercolorists quickly discover that their traditional whites appear dull and opaque. Oil painters find that layering luminous layers paradoxically creates darkness. The medium itself seems to conspire against our intention.
For a long time I sought to understand why my first attempts looked more like bar neon signs than the luminescent clouds I had observed. The answer came from a conversation with a marine biologist: bioluminescence is never uniform. It pulses, it varies in intensity according to the movement of water, it creates impossible gradients. Our eye perceives this complexity instantly, but our hand must learn to consciously recreate it.
The pigments and mediums that defy darkness
Let's be frank: no traditional pigment can reproduce natural luminescence. It is a difficult truth to accept for any artist starting in this field. But this limitation becomes a creative opportunity once you understand how to simulate light rather than reproduce it.
Phosphorescent pigments: allies or pitfalls?
Phosphorescent paints seem to be the obvious solution for painting bioluminescence. After all, they glow in the dark, exactly like our subject. Yet, I quickly learned their limitations. These pigments require prior light charging and emit a rather coarse greenish glow, far from the subtlety of dinoflagellates. Their use must be strategic and parsimonious.
I now reserve them for maximum intensity points: bioluminescent wave crests, the wake of a moving fish, concentrations of plankton. Mixed at only 10-15% with conventional pigments, they create a light depth without falling into the gadget effect. The trick is to apply them as the final layer, over a background already completed in traditional colors.
The palette of impossible blue
For ocean artists, building the right palette for bioluminescence resembles an alchemical quest. Prussian blue is too deep, cerulean blue too opaque, turquoise blue too warm. My personal solution? A complex blend of phthalo blue, titanium white, and a tiny touch of dioxazine violet, with variations depending on the desired transparency.
But the secret lies less in the blues than in the greens and yellows that accompany them. A pure lemon yellow, applied as an ultra-diluted glaze over a black-blue background, creates that characteristic electric quality. Touches of emerald green in the most intense areas amplify the effect of cold light. And paradoxically, deep violets in adjacent shadows literally make the luminous zones vibrate by simultaneous contrast.

The negative work technique: paint the darkness first
Here's the revelation that transformed my practice: you don't paint bioluminescence, you paint everything around it. This counter-intuitive approach comes from my training in printmaking, where light is born from what we remove rather than what we add. On canvas, the principle adapts brilliantly.
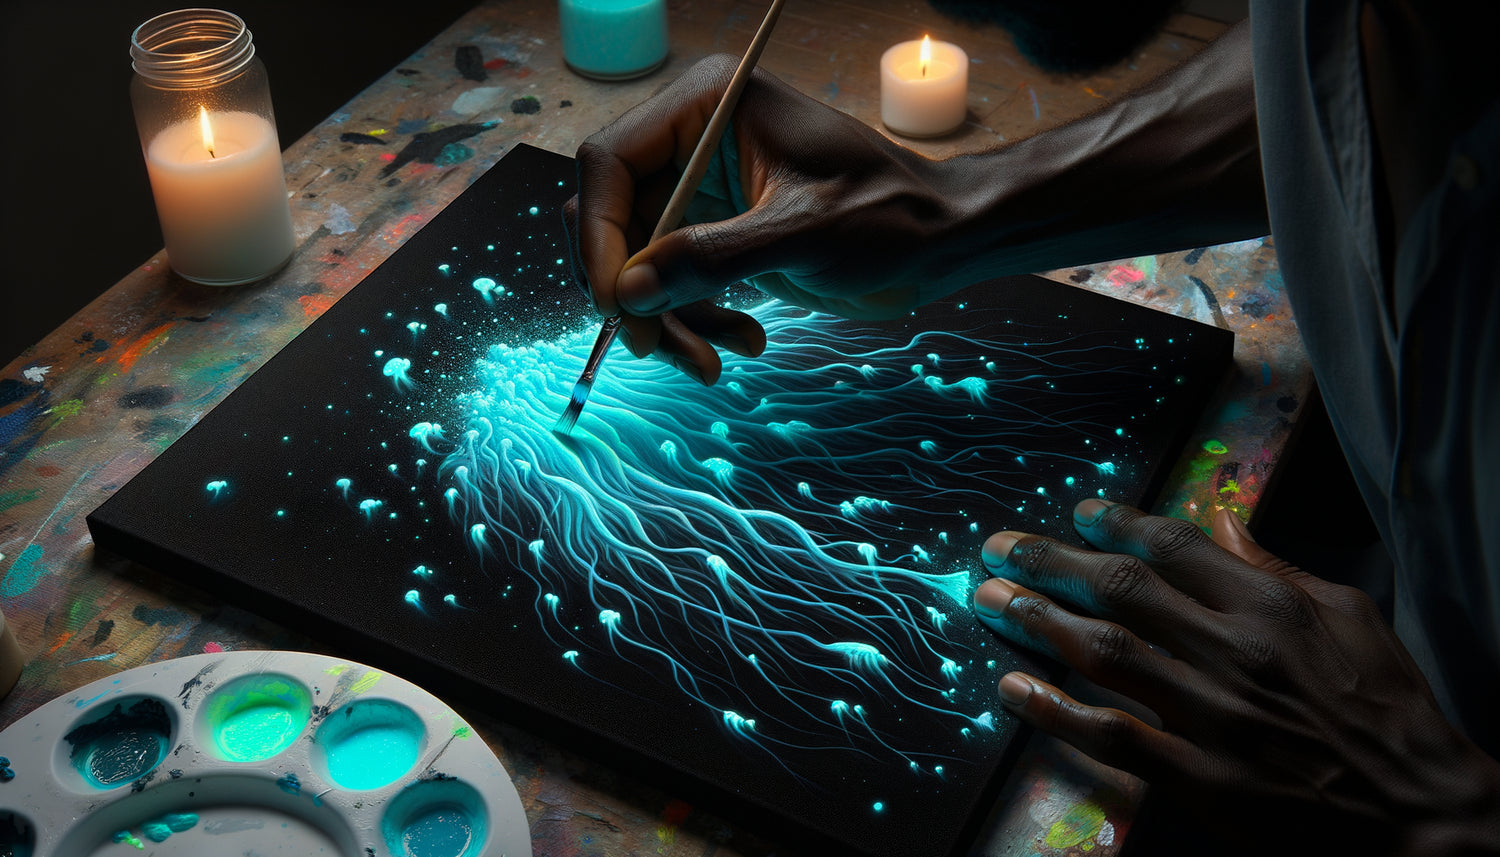
I always start with an intense black background, sometimes three or four layers to achieve abyssal depth. Not a standard black, but a blend of ultramarine blue, burnt umber, and ivory black that retains chromatic richness. On this base, I build the darkness gradients: the areas of unlit sea, the depths, the silhouettes of reefs or marine animals.
It's only then, when 80% of the canvas is in dark values, that I gradually introduce light. Translucent glazes first, so diluted they seem to barely alter the surface. Then slightly more opaque layers in areas of medium intensity. And finally, the pure bright accents, applied with a fine brush or even the tip of a knife, in areas of maximum plankton concentration.
This method naturally creates what photographers call the bloom effect: this quality of light that seems to overflow from its source, radiating into the surrounding darkness. In traditional painting, this effect is almost impossible to achieve by working from light to dark.
Liquid textures and invisible movement
Marine bioluminescence is never static. It follows currents, pulses with the movements of plankton, traces ephemeral paths in the water. Capturing this dynamism without falling into artistic blur is the second major technical challenge for ocean artists.
I use several techniques depending on the desired effect. For the bioluminescent trails left by fish or divers, I work with a fanned brush slightly damp, in rapid and fluid movement, applying a creamy consistency paint. The gesture must be unique, without repetition, to preserve this quality of liquid spontaneity.
For the plankton clouds, my favorite technique involves controlled projections. I heavily dilute my luminous paint, then I use a toothbrush or stiff brush that I tap above the canvas, creating a constellation of micro-points that perfectly imitate the dispersion of phytoplankton. The density varies depending on the strength of the tapping and the distance from the surface.
Bioluminescent waves, these crests of foam that seem traced in neon, require a mixed approach. I first build the shape of the wave in dark values, then apply the light following the direction of the water's movement. A final glaze with interference paint (these pigments that change color depending on the viewing angle) adds this characteristic shimmering quality.

The Fatal Mistake 90% of Beginners Make
After years of teaching the painting of marine phenomena, I have identified the mistake that consistently ruins beginner's works: excessive light. The temptation is understandable. Faced with a subject as spectacular as bioluminescence, you want it to shine, to pop, to impress. The result? Saturated paintings that look like advertising signs rather than natural phenomena.
True marine bioluminescence is subtly fragile. It almost disappears at the edge of vision. In my most successful compositions, truly luminous areas represent less than 15% of the total surface area. The rest is gradation, suggestion, anticipation. It is this extreme contrast that creates emotional impact.
I have developed a personal rule: for every touch of pure light, five touches of semi-darkness. These intermediate areas, painted with translucent pigments in mid-tones, create the credible transition between the black abyss and the bioluminescent glow. They are invisible individually but essential to the whole.
Another common mistake concerns color temperature. Beginners often use blues that are too warm or greens that are too yellow. Natural bioluminescence tends towards electric cyan, a very cold blue-green, almost glacial. Adding even a hint of red or orange immediately destroys the credibility of the phenomenon.
Inspirations and References to Nourish Your Practice
Painting bioluminescence without ever having observed it in nature would be like composing a symphony while being deaf. I strongly recommend aspiring ocean artists to experience this sensory experience at least once. Accessible destinations include the Maldives, Mosquito Bay in Puerto Rico, or even some Breton coasts during plankton bloom periods.
In the meantime, build a rigorous visual library. BBC documentaries about the deep ocean contain extraordinary sequences. Long exposure photographs by specialized photographers such as Phil Hart or Doug Perrine reveal details that the human eye cannot grasp. I have also found unexpected inspiration in traditional Japanese art, particularly the prints of Hokusai and Hiroshige who masterfully capture the movement of water.
Study the works of contemporary artists who have explored this theme as well. Reena Makwana's acrylic paintings create spectacular depth effects. Ran Ortner’s mixed-media, while not specifically focused on bioluminescence, masterfully captures underwater light. Even visual science fiction, particularly the environments created for the film Avatar, offers interesting technical avenues.
Let the oceanic magic transform your interior
Discover our exclusive collection of nature wall art that captures the mysterious essence of marine depths and brings this living light into your living space.
Transcending technical challenge to reach emotion
Beyond technical prowess, painting marine bioluminescence confronts us with a deeper question: what does it mean to capture the ephemeral? These luminous organisms only glow for a few seconds, in response to movement, then fade. Their light is a defense reaction, a chemical communication, a language we barely understand.
When I paint now, I no longer seek just visual precision. I want to convey that vertiginous sensation of being suspended in liquid darkness, surrounded by living constellations. I want the viewer to feel this mixture of fascination and slight dread at the radical strangeness of marine life. Technique then becomes a means, not an end.
That's why I encourage you to develop your own visual language for bioluminescence. My techniques are a starting point, not a doctrine. Some artists create spectacular effects with unconventional mediums: fluorescent ink, epoxy resins mixed with luminescent pigments, even integrated LEDs for installations. The important thing is to remain faithful to the essence of the phenomenon: this cold, fragile, almost supernatural light that reminds us that our oceans still hold countless mysteries.
Start modestly. A small study on black paper, a few chosen pigments, a single source of bioluminescence. Observe how colors interact, how glazes build depth, how the movement of your brush can suggest liquidity. With each work, you will refine your understanding of this unique challenge for ocean artists. And one day, you will create that canvas which truly seems to emit its own light, which transports the viewer beneath the waves, into a world where life itself glows in the dark.
Frequently asked questions about bioluminescence painting
What type of paint is best suited to represent marine bioluminescence?
The choice of medium is crucial and largely depends on the desired effect. Personally, I prefer acrylic for its versatility and quick drying time, which allows for rapid layering of translucent glazes essential to the luminescence effect. Acrylic accepts both phosphorescent pigments and interference mediums. Oil offers smoother transitions and superior chromatic richness, but its drying time complicates multi-layer work. For beginners, I recommend high-quality fluid acrylic, complemented by a glazing medium that increases transparency without excessively diluting the pigment. Avoid school paints whose excessive opacity prevents creating these delicate gradients that make all the difference. Some artists also explore gouache on black backgrounds or watercolor on tinted paper with excellent results, particularly for preparatory studies. The key is to choose a medium that allows you to gradually build light rather than applying it in one go.
Do you need to have seen bioluminescence in person to be able to paint it correctly?
Honestly, it helps enormously, but it is not strictly essential. Direct experience gives you an intuitive understanding of the behavior of light in water, its relative intensity, and its ephemeral quality. You viscerally understand that it is neither a lamp nor a reflection, but something unique. However, many talented ocean artists work exclusively from photographs and videos of high quality. The key is to build up an exhaustive visual documentation: look at dozens of different sources to understand the constants of the phenomenon. Study variations according to species (dinoflagellates, jellyfish, ctenophores), conditions (wave, calm water, wake). Also read about the underlying biology: understanding that bioluminescence is a chemical reaction (luciferin + luciferase) helps visualize its cold light quality. If you live near the coast, certain bloom periods create visible effects even in temperate Europe. Otherwise, start by painting fireflies or other terrestrial luminescent phenomena to develop your eye before tackling the specific marine challenge.
How to avoid my bioluminescence painting looking like an artificial neon effect?
This is trap number one and I experienced it myself for years. The solution lies in three principles. First principle: moderation. Natural bioluminescence is never saturated at 100%. Even your brightest areas must contain a part of darkness, transparency. I always dilute my luminous pigments by at least 30% to preserve this translucent quality. Second principle: variation. A neon is uniform, bioluminescence is not. Vary the intensity, density, color (from blue-green to electric turquoise). Create concentrations and dispersions, areas of intensity and transition zones. Third principle: context. What fundamentally differentiates a natural glow from an artificial effect is its integration into the environment. Your bioluminescence must reveal the underwater shapes (a fish swimming, a wave breaking), not exist in an abstract way. First work on your complete underwater composition in dark values, then add light as a revealer, not as an isolated subject. And above all, remember that darkness makes light: the deeper and richer your blacks are, the more magical and natural your luminous touches will appear.