No-drill mounting: effective solutions for glass or aluminium prints
By Alexandre MARY
⏱️ Reading time : 8 minutes
You just splurged on this magnificent glass artwork that will perfectly illuminate your living room, but here's the thing: the idea of drilling holes in your pristine walls completely paralyzes you.
You can already imagine the unsightly holes, the plaster dust spreading everywhere, and this nagging anxiety: "What if I get the height wrong? What if I have to move?" Your work of art therefore remains leaning against the wall, waiting for a hypothetical courage that never comes.
You may have tried basic adhesive hooks from the hardware store, but they came loose after a few weeks. Or maybe you tried those so-called "ultra-powerful magnets" that scratched your glass artwork.
Rest assured: this is not a lack of skill on your part. Mass-market solutions are simply not designed for high-end artworks like your glass or Dibond paintings, which deserve a fixing worthy of their beauty.
By the end of this article, you will master professional techniques to hang your artworks without any holes, safely, and you can finally transform your interior into a true personal art gallery.
Why drilling-free fixing is revolutionizing modern decor?
In a world where we move on average every 7 years, drilling becomes a major obstacle to artistic expression. It's like buying a magnificent car but refusing to drive it for fear of damaging it: you deprive your interior of that creative energy that makes all the difference between a house and a home.
🎨 Expert testimony : Sarah, a Parisian interior architect, recently confided in me: "I have a collector client who owns 47 works of art. Thanks to drilling-free fixing techniques, he can completely change the atmosphere of his loft in one afternoon, according to his moods and the seasons."
💬 Conversation with a decor expert
"I'm afraid my new artwork won't hold without screws..."
Relax! Modern professional adhesives can support up to 10kg per fixing point. It’s more solid than most classic wall plugs!
"But I've been told that you absolutely have to drill for safety..."
Who told you that? A well-fixed artwork with the right adhesive technique won’t budge a millimeter. It’s even more flexible in case of wall movement!
Drilling-free fixing is freedom from constraint : You can finally dare, experiment, move your artworks as you please, and create that unique atmosphere that truly resembles you.
Discover what really prevents your paintings from sticking to the wall
Have you already experienced this frustration: your painting coming off the wall in the middle of the night, that startling noise that wakes you up, that morning discovery of your artwork lying on the floor. Or perhaps that gradual tilt that annoys you but you put off until the day it all falls.
It's not a matter of bad luck or poor materials. It’s because 99% of people ignore the 3 physical laws that govern hanging without drilling. Once you know them, you will never look at your walls the same way again.
Imagine a tightrope walker: he doesn't just balance with his equilibrium, but because he understands the forces acting on him. It’s exactly the same for your paintings.
The first hidden cause: the invisible "orange peel" effect
Even the smoothest wall appears to have micro-reliefs invisible to the naked eye. Contrary to what everyone believes, it's not the strength of the adhesive that counts, but its ability to perfectly conform to these microscopic irregularities.
It’s like trying to glue two puzzle pieces together: even if the glue is ultra-strong, if the shapes don't fit perfectly, it won't hold for long.
This discovery changes everything: instead of looking for the strongest adhesive, you need to prepare the surface to create a perfect bond. The difference in holding power is spectacular.
🔍 Revealing test: Pass your hand flat on your wall, then slide it slowly. Do you feel these tiny roughnesses? That's what secretly sabotages your fixings!
The second unknown law: silent thermal expansion
Your wall is constantly "breathing" due to temperature variations, even indoors. This permanent dilation-contraction eventually fatigues the adhesive, just like an elastic band that is stretched continuously.
That’s why your fixings hold perfectly for the first few months, then suddenly come loose: the adhesive was not designed for these repeated micro-movements.
The solution? Choose "living" adhesives that accompany these movements rather than suffer them. Your paintings will then remain perfectly in place, season after season.
The humidity factor that no one suspects
Ambient humidity drastically influences adhesion, but not as you might think. A well-ventilated bathroom can be more favorable than a too dry living room where the adhesive becomes brittle.
Observe your old fixings: you will notice whitish or yellowish traces around the contact points. This is a sign that moisture has infiltrated the bond.
This knowledge transforms your approach: you adapt your technique according to the room and create optimal conditions for durable holding.
🎯 3 warning signs to watch out for:
Slight progressive tilt: The fixing is getting tired and will soon lose its adhesion
Corners that come off slightly: Moisture is seeping in and compromising the bond
Colored traces around the fixing: The adhesive degrades chemically
The trigger element: weight distribution
Here's what really makes the difference: how the weight is distributed across the fixing points. It’s the lever effect that multiplies or divides the force exerted on each point. A poorly balanced artwork can exert 3 times more pressure on a point than its actual weight.
The golden rule of invisible fixing: Always create at least 2 fixing points perfectly aligned, even for a small artwork. This guarantees optimal distribution.
❌ Common belief
✅ Professional reality
💡 Explanation
🎯 Concrete benefit
The stickier it is, the better it holds
Adaptation to the surface takes precedence
Invisible micro-reliefs create air pockets
5x longer hold
One fixing point is enough
Minimum 2 aligned points
Distribution of forces and lever effect
Perfect stability
Humidity always damages
Stable humidity helps adhesion
Sudden variations fatigue the adhesive
Durable fixing
All walls are the same
Each surface has its own specificities
Paint, texture, age change adhesion
Adapted technique
The progressive method to master invisible fixing
Now that you understand the real issues, let's discover together this methodical approach that will transform your walls into a professional gallery. Like a chef who masters their gestures, you will acquire this expertise that makes all the difference.
🚀 Overview of your progress: We will proceed in increasing steps: first perfect preparation (30% of success), then technical fixing (50%), and finally expert finishing (20%). At each level, your confidence grows and your results improve.
Step 1: Create the perfect conditions (The invisible foundations)
It all starts with this crucial phase that most people neglect out of impatience. Yet this is where 80% of success is played. Imagine building a house: even the best bricks will not hold on shaky foundations.
🛠️ Your professional preparation tools
70% isopropyl alcohol: Unlike household alcohol, this evaporates without leaving a residue and perfectly dissolves invisible oils. Find it in pharmacies. Avoid substitutes that leave a greasy film that is imperceptible but fatal.
Non-fluffy microfiber cloth: The fabric must be perfectly smooth to avoid creating micro-scratches. Test by running your finger over it: no roughness should be felt. The impact? A perfectly uniform surface that multiplies adhesion.
Minimum 60cm bubble level: The longer, the more accurate. What's the difference with a short level? You detect invisible wall defects that would skew your installation.
Let's move on to action, step by step:
🎯 Surface preparation (the foundation of everything)
Thorough degreasing: Generously soak your microfiber cloth with isopropyl alcohol and clean in circular motions 30cm in diameter. Even a "clean" wall hides traces of fingerprints, dust, and ambient oils that compromise adhesion.
⏱️ Time: 3 minutes per area | ✅ Successful when: The microfiber cloth remains spotless | ⚠️ Attention: Do not wipe dry before complete evaporation (30 seconds)
Levelness check: Place your level horizontally and vertically on the area. You are looking for deformations that would create uneven tension on your fixing. A wall that appears perfectly straight can have 2-3mm of defect.
⏱️ Time: 2 minutes | ✅ Successful when: You know the high and low points | ⚠️ Attention: A defect > 2mm requires compensation
Preliminary adhesion test: Stick a small piece of test adhesive for 24h, then remove it in one quick motion. Observe the surface: no residue should remain, and the adhesive should not have crumbled.
⏱️ Time: 1 minute + 24 hours waiting time | ✅ Successful when: Clean removal without trace | ⚠️ Attention: Some recent paints (< 30 days) are not compatible
✅ Validation of step 1: Your fixing area is now perfectly clean, level and tested. You should feel that satisfaction of a job well done. If something is wrong, start again: this base determines everything else.
OUR RECOMMENDED PRODUCTS
Step 2: Mastering technical fixing (The art of the invisible)
You are now moving to the next level: the fixing itself. Here, every gesture counts and precision becomes your best ally. This is when your methodical preparation will bear fruit spectacularly.
🔧 Professional fixing arsenal
Double-sided structural adhesives: Look for the "VHB" (Very High Bond) or equivalent mention. Thickness 0.8 to 1.5mm to compensate for micro-defects. Avoid thin adhesives that forgive no imperfections.
Neodymium magnetic systems:Minimum power 5kg per magnet with integrated scratch protection. Quality is recognized by the coating: bare magnets rust and stain.
Reinforced adhesive hooks:Minimum load capacity of 3kg per hook, with a wide distribution base (minimum 3cm²). The secret? A geometry that distributes stress.
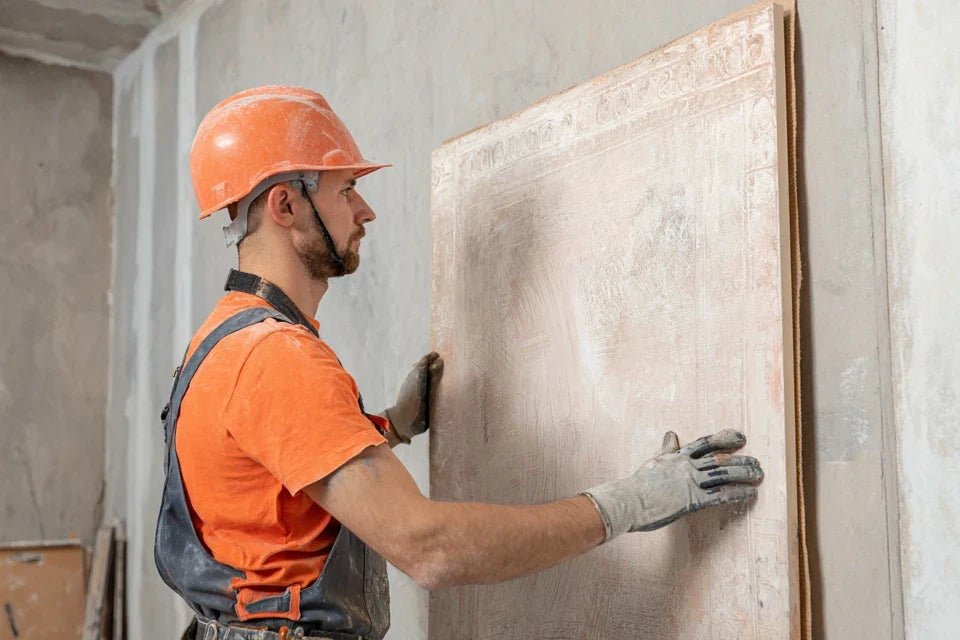
🎨 Installation of the fixing (technical and finesse)
Precise positioning: Mark with a pencil, checking measurements three times. Use the triangle rule: for a rectangular painting, the attachment points form an imaginary triangle with the center of gravity.
⏱️ Time: 5 minutes | ✅ Successful when: Measurements are consistent to the millimeter | ⚠️ Attention: A 2mm error is immediately visible to the eye
Progressive adhesive application: Remove only 1/3 of the protective film, position, then gradually unroll while chasing out air bubbles with a spatula. The pressure must be firm and even.
⏱️ Time: 3 minutes per point | ✅ Successful when: No visible bubbles | ⚠️ Attention: Impossible to reposition after full contact
Adhesive activation: Apply pressure of 10kg for 30 seconds on each point (use your body weight). This step activates molecular bonding and multiplies the hold by a factor of three.
⏱️ Time: 30 seconds per point | ✅ Successful when: Feeling of "grip" is firm | ⚠️ Attention: Insufficient pressure = guaranteed failure in the following weeks
🎯 Quality control step 2: Your fixings are now firmly anchored and perfectly aligned. Wait 24h before full load: this is the time needed to reach 100% adhesion. Patience rewarded!
Step 3: Perfecting the final installation (The expert level)
You are now reaching the level of mastery that makes the difference between an informed amateur and a true connoisseur. Your painting will not only hold: it will perfectly integrate into your decor as if it had always been there.
🏆 Installation and fine adjustments
Progressive painting placement:Start with a single contact point, check the alignment, then gradually engage the other points. Each fixing should "click" distinctly.
⏱️ Time: 2 minutes | ✅ Successful when: Firm and uniform contact | ⚠️ Attention: Forcing a misalignment damages the fixings
Micro-level adjustments: Use the clearance for sliding (1-2mm) to perfect the horizontal. A perfectly straight painting attracts the eye and enhances the artwork.
⏱️ Time: 3 minutes | ✅ Successful when: Perfect level across the entire width | ⚠️ Attention: Adjustments only within one hour of placement
Final resistance test: Apply slight lateral pressure then release. The artwork should return exactly to its initial position, indicating a perfectly balanced fixing.
⏱️ Time: 30 seconds | ✅ Successful when: Natural return to position | ⚠️ Attention: Residual movement = revision needed
Expert progression rule: Once you have mastered this method on a first artwork, you can install a complete piece in just 15 minutes, with the safety and finish of a professional gallery.
Congratulations! You now master the subtleties known by professionals of hanging. Here are the little secrets that make all the difference and give you that decisive advantage over 95% of amateurs.
🎨 Gallery secret: For glass artworks, stick a tiny piece of self-adhesive felt to the rear corners. This prevents micro-vibrations that prematurely fatigue fixings and create those annoying "clicking" noises.
🤔 Reader question: "Does it really work with heavy artworks?"
"I have a superb 60x80cm glass artwork that weighs easily 4-5kg. I can't believe a simple adhesive could support it..."
I perfectly understand this apprehension! It’s the same reflex we all have when facing innovation. Know that VHB adhesives support facade panels of skyscrapers - your 5kg artwork represents a negligible load compared to their actual capacity. Moreover, with the two-point fixing technique, each supports only 2.5kg, which is 5 times less than its limit.
💡 Reassuring test: Start by hanging a less valuable artwork of equivalent weight for a week. You will see for yourself the absolute solidity of this method.
The 5 pitfalls that compromise your installations
Now that you know the method, let's protect your investment by avoiding these insidious errors that even experienced DIYers make. These traps are treacherous because their effects only manifest several weeks after installation.
⚠️ Impatience trap: Wanting to load immediately after installation. It's tempting, but the adhesive reaches its maximum strength in 24-48h. Patience = durability guarantee. Mark the date on your calendar rather than playing with fire.
🌡️ Temperature trap: Installing in very cold (< 15°C) or very hot (> 30°C) weather. The adhesive cannot create its optimal bond under these conditions. Ideal temperature: 18-25°C. Wait for the right time or adjust the heating.
💧 Hidden moisture trap: Clean with water just before installation. Even "dry", the surface retains invisible micro-droplets. Always finish with isopropyl alcohol to chase away residual moisture.
📏 The "close enough" trap: Neglecting 1-2mm of misalignment thinking it won't be noticed. The human eye immediately detects even minimal alignment defects. Millimeter precision is non-negotiable.
🔄 The repositioning trap: Trying to "slightly" move an adhesive that has already been glued. You irrevocably break its internal structure. It's better to start over with a new adhesive than to tinker with a compromised fixing.
🛡️ Anti-failure verification system: Each week for the first month, visually check alignment and test with slight pressure. Monitor any changes in position, corner peeling or alteration of the fixing appearance. At the slightest doubt, anticipate rather than suffer.
Because you took the time to inform yourself, enjoy 10% discount on your first order:
ART10
⏰ Valid 72h after reading • Applicable to all our products
🙋 Your most frequently asked questions about drilling-free fixing
💰 How much does a professional drilling-free installation actually cost?
For a standard painting, count €15-25 in materials (adhesives + tools) against €150-300 for a traditional professional hanging. The savings are considerable, and you can reuse your tools for all your future paintings. Payback after the 2nd painting!
⏰ How long does it take to master this technique?
With our method, 2 hours are enough for your first perfect installation. After 3-4 paintings, you become autonomous and fast. It's comparable to learning how to make an omelette: intimidating at first, then natural for life.
🏠 Does it work on all types of walls?
The technique adapts to 95% of modern surfaces: paint, wallpaper, smooth tile, glass, metal. Only exceptions: very rough surfaces (thick plaster), old oil paints or damp walls. Preliminary testing immediately reveals compatibility.
🔄 Can a painting be removed and replaced without damage?
Absolutely! That's the advantage of this method. Clean removal guaranteed with the fishing line or gentle heat (hair dryer) technique. No trace on the wall, no damage to the painting. Total freedom of rearrangement.
🌟 What's the difference with "consumer" solutions?
Consumer adhesives are designed to last 6-12 months on light loads. Professional solutions guarantee 5-10 years even with heavy load. It’s the difference between tape and a structural adhesive: same principle, incomparable performance.
🎨 Your transformation into an invisible hanging expert
In a few weeks, when your guests admire your perfectly positioned artworks, they will secretly ask you: "How do you make it look so professional?" You'll smile knowing this little secret that makes all the difference. Your walls have become your field of expression, freed from the constraint of drilling.
This mastery goes beyond the technical aspect: you’ve gained creative confidence. You now dare to experiment, move, and renew your decoration according to your moods and seasons. This flexibility literally transforms your relationship with your interior.
The best part? You have acquired a rare and valuable skill that you will proudly pass on to your loved ones. Your first gesture? Choose that artwork that has been waiting for too long and finally give it the place it deserves.
✨ Your moment of truth: You now have all the keys in hand. The only thing separating you from your perfect personal gallery is this first step. Your wall awaits, so does your artwork. It's up to you!
📚 To go further in the art of hanging
Discover our other technical guides to master all aspects of wall fixing: specialized techniques according to materials, solutions for difficult walls, and installation secrets for large artworks.


