

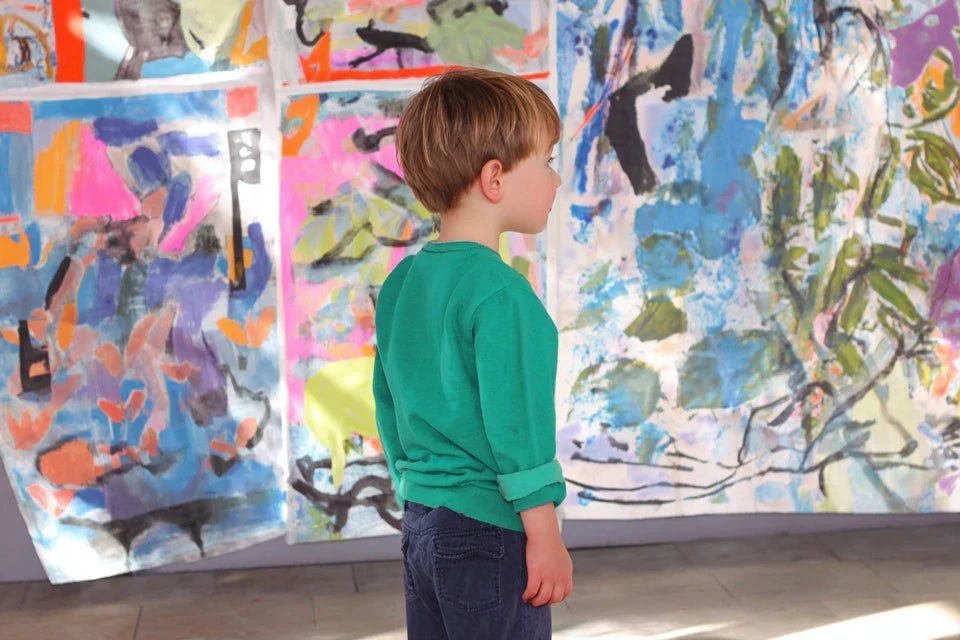
You've just fallen for this magnificent artwork that would transform your living room... but then your two-year-old’s gaze falls on them as they explore on all fours. Anxiety grips you: what if they pull it down? What if it falls during their nap?
You can already imagine the dull sound of the frame crashing, shards of glass, tears... This visceral fear paralyzes you and makes you give up on your decor crush, settling for bare walls "for safety".
You may have already tried repositionable stickers or small lightweight pictures hung high. But that's not what you want: you want real works of art, not makeshift solutions that give the impression of a child’s room throughout the house.
Rest assured, this frustration is perfectly normal. The problem isn't your desire for beauty, but simply that no one has explained to you the secure hanging techniques that allow families around the world to live peacefully with magnificent paintings.
By the end of this article, you will know exactly how to secure any artwork to create an interior that is both elegant and 100% safe for your children, without compromising on aesthetics.
Why is the safety of wall art so crucial today?
Every year in France, more than 2,000 domestic accidents involve decorative objects that come loose. With the evolution of our interiors towards greater openness and the trend for large-format decoratives, this issue has never been so relevant. It's like installing a swing set in your garden: beautiful when done right, dangerous if it’s botched.
🏠 Real testimonial: Sarah, mother of 18-month-old twins, confides to us: "I had hung a 60x80cm painting with simple nails. One morning, I found my son standing in his bed, the painting had fallen 20cm from his head during the night. I realized that I could no longer improvise."
💬 Conversation with a decor expert
The golden rule of secure family decor: A well-fixed picture can withstand 3 times its weight in traction. This simple rule will allow you to sleep soundly from the first night, while maintaining the elegance of your interior.
What really happens when you "keep it simple"
You might recognize yourself: you hammer a nail at random, you hang your picture hoping that "it will hold", then you jump at the slightest noise thinking it has fallen. Or else: you completely give up on medium and large format pictures that you wanted, limiting yourself to mini photo frames.
What really happens is that you underestimate the forces at play. A picture, even light, is subject to vibrations, temperature variations, humidity... The problem isn't your technique, but the fact that no one has explained the physics of hanging to you.
It’s like driving a car knowing only how to use the accelerator: you will move forward, but you won't go far safely.
The first hidden cause: the illusion of "light therefore safe"
Contrary to what one might imagine, it’s not the weight that is dangerous, but how this weight is distributed on the wall. A small 500g picture poorly fixed can fall, while a 3kg large format correctly secured will never move.
Imagine carrying a backpack: 10kg well distributed on your shoulders will seem lighter than 3kg in a handbag that pulls on one arm.
This realization changes everything in your approach: you can finally choose your pictures for their beauty, then adapt the fixing accordingly, rather than limiting yourself out of fear.
🔍 Quick test: Take a thick book and hang it with a thin string: it breaks. Same book with a wide strap: it holds. This is exactly the principle of weight distribution on your walls.
The second hidden cause: neglecting the lever effect
Many think that it’s enough to "hammer the nail well" for it to hold. In reality, a picture creates a lever effect which multiplies forces: the further it is from the wall, the greater the traction.
It's like opening a door: the harder you push near the hinges, the harder it is. The easier it is when you push near the handle.
Result: your hanging undergoes constraints much higher than the simple weight of the picture, explaining why fixings that seemed solid suddenly come loose.
The third hidden cause: ignoring the movements of the house
Your house "breathes" constantly: thermal expansion, passages that create vibrations, doors slamming... These micro-movements gradually wear out fixings, even the strongest ones initially.
You can easily check this: observe your paintings after a few months. Are they perfectly straight? Or slightly tilted? This slight movement reveals that your fixing "works".
This realization explains why some paintings fall after months for no apparent reason, and why you need to think about "durability" from the moment of installation.
🔍 3 alarm signals to watch out for:
- The painting gradually tilts: Your fixing is wearing out and will come loose. It's like a shoe that gets looser: the problem worsens.
- Plaster dust traces on the floor: Your wall anchor is working too hard in the wall. Imagine a tooth that wiggles: it ends up falling out.
- A slight noise during passages: Your painting vibrates, indicating that the fixing does not absorb movements. It's equivalent to furniture that creaks.
The trigger factor: the invisible danger zone
The real trigger factor is the hanging height in relation to the child. Between 50cm and 1m20 from the floor, you are in the "red zone": high enough for the child not to be able to grab it, but low enough for the fall to be dangerous. It's a domino effect: if it falls, the impact will be maximal. You can identify this by getting down on your hands and knees at your child’s height and looking where your gaze naturally falls.
The rule of safety zones: Below 50cm, use removable fixings. Between 50cm and 1m20, maximum securing is mandatory. Above 1m20, standard securing is sufficient. Test by gently pulling on the frame: it should not move a millimeter.
| ❌ Common belief | ✅ Reality | 💡 Explanation | 🎯 Practical benefit |
|---|---|---|---|
| The heavier it is, the more dangerous it is | It's the fixing that counts, not the weight | Force distribution is more important than total weight | You can choose beautiful large formats |
| You have to avoid paintings with children | You need to adapt the hanging technique | Safety comes from the method, not deprivation | Your decor remains your priority |
| Nails are enough if you're careful | Wall anchors and distribution are essential | A single fixing point concentrates all forces | Total peace of mind once installed |
| It’s complicated and expensive to secure | It’s simple with the right method | A few euros worth of hardware avoids thousands of euros in damage | Protection and savings guaranteed |
The progressive method to secure your paintings without stress
Now that you understand the real stakes, the good news : securing your artworks is simpler than you might think. It's like learning to ride a bike: it seems complex at first, then it becomes natural and quick. We will proceed step by step, starting with solid foundations, then refining the technique. Final result : beautifully displayed artworks and total peace of mind.
🎯 Method overview : Step 1 - Diagnosis and preparation (the foundations), Step 2 - Secure installation (the structure), Step 3 - Checks and finishing touches (durability). Progression logic : each step secures more, and you see the results immediately.
Step 1 : Diagnosis and preparation - Lay the right foundations
This first step is crucial as it determines everything else. It's like choosing the location of a house: done well, everything becomes easy. Once this step is complete, you will already feel a great sense of satisfaction because you finally master the situation.
🔧 Your diagnostic and preparation tools
- Stud detector : Small electronic device that "sees" through the wall. It identifies solid structures (beams, metal studs) where hanging will be 10 times more secure. Available in hardware stores for 15-25€. Quality criterion : must detect metal AND wood. Avoid simple magnetic detectors, which are too inaccurate.
- Spirit level of at least 60cm : Longer = more accurate to avoid the "tilted" effect that wears out the fixings. The principle: a stable reference surface so your artwork doesn't "work". Quality index : bubbles well centered and readable graduations. Impact: a straight artwork will last 3 times longer.
- Rigid measuring tape : Unlike a flexible measuring tape, it does not bend and gives accurate measurements for safety distances. Why not a classic measuring tape : it deforms and makes you make dangerous placement errors.
Now, let's move on to practice with your first diagnosis :
🎯 Performing a safety diagnosis
Analyze your wall : Pass the detector over the entire hanging area, tracing an imaginary grid. Objective : find at least one secure anchor point (stud/beam) in your area. Technical detail : studs are typically spaced 60cm apart, look in a zigzag if you don't find anything. Rest assured : even the most "difficult" walls always have a solution.
⏱️ Time : 5-10 minutes | ✅ Successful when : You have found at least one firm "beep" zone on your detector | ⚠️ Attention : Do not confuse a weak "beep" (pipe) and a clear "beep" (structure), test by tapping lightly
Measure the child’s area: Get down on your hands and knees and note everything that is within reach of your child standing up and climbing. Reason: to precisely define your "red zone" for securing it. Technical tip: add 20cm to the child's current height to anticipate their growth. It’s easy: 2 minutes and you have your risk map.
⏱️ Time: 3 minutes | ✅ Success when: You have outlined the 50cm-120cm zone from the floor with a pencil | ⚠️ Attention: Think about objects they can climb on (sofa, chair), that changes things
Evaluate weight and dimensions: Weigh your painting with a kitchen scale and measure its exact dimensions. Why: to choose the appropriate fixing based on precise calculations, not guesswork. Technique: also note the frame thickness as it influences the lever arm. Simple: 1 minute of measurements avoids hours of anxiety.
⏱️ Time: 2 minutes | ✅ Success when: You have noted weight, width, height, and thickness | ⚠️ Attention: Add 500g to the measured weight to account for variations (humidity, dust)
✅ Validation of step 1: You must have identified at least one solid anchor point, outlined your risk zone, and know the exact characteristics of your painting. Quick check: you can explain in 30 seconds where and how you are going to hang it. If it’s blurry: take measurements again, that's normal at first. For the next step: you now master all parameters, installation will be a piece of cake!
OUR RECOMMENDED PRODUCTS
Step 2: Secure Installation - Create an Unshakeable Fixing
You are now moving on to the heart of securing. Forget stress and improvisation: you have all the elements to create an installation worthy of a professional. This step is more rewarding because you see your painting taking its permanent place, and the snowball effect begins: each successful gesture reinforces your confidence for the next.
🔩 Your Secure Fixing Arsenal
- Heavy-duty expansion anchors: Metal cylinders that "deploy" into the wall to create a maximum grip. Look for the mention "minimum load capacity 25kg" on the packaging. Where to find them: fixing section, about €2 for 4. Quality criterion: thick metal, no plastic. Why not standard anchors: they break under repeated traction. Special wood screws for artwork: Wide head and special thread that "bites" into the dowel without turning it. Principle: The wide head distributes the weight over a larger surface. Quality recognition: Fine, regular threading, minimum 8mm flat head. Result impact: Your artwork will never move even a millimeter.
- X-shaped distribution hook: An X system that distributes the weight of the artwork over 2 points instead of one. Analogy: Like carrying a tray with two hands instead of one. Visible benefit: Even a child hanging from it can't knock it down.
🎯 Step-by-step installation
Drill at calculated points: Use a drill bit suitable for the diameter of your dowels and drill perpendicular to the wall. Reason: A slanted hole weakens the hold by 50%. Technique: Mark with pencil, drill in two passes (marking then complete drilling), vacuum up the dust. It's manageable: 30 seconds per hole with a little method.
⏱️ Time: 2-3 minutes | ✅ Successful when: Clean, perpendicular holes, dust vacuumed | ⚠️ Attention: If it crumbles a lot, you may be on a hollow partition - look for another point
Install safety dowels: Tap the dowels into the wall with a mallet until they are flush with the wall. Objective: They must be perfectly integrated to deploy properly. Pro tip: Give a few firm but not violent taps, you should feel resistance increase. Easy to check: They don't move when you pull on them by hand.
⏱️ Time: 1 minute per dowel | ✅ Successful when: Dowel is flush with the wall and resists manual traction | ⚠️ Attention: If it sinks in too easily, the wall may be too soft - use a larger dowel
Screw and test the load capacity: Screw your special screws leaving 5mm protruding for hooking. Why this measurement: Enough space for the hook, not enough for a child to grab onto. Mandatory test: Pull firmly downwards with both hands - it shouldn't move. Confidence: This simple test reassures you definitively.
⏱️ Time: 1 minute per screw | ✅ Successful when: Screw is stable, protruding 5mm, resists strong traction | ⚠️ Attention: If it spins freely, the dowel is not properly deployed - start over
✅ Validation step 2: Your fixing points are invisible but immovable. Final test: Hang a 5kg bag from each point - zero movement. If it moves slightly: tighten, it's just an adjustment. Ready for the next step: you now have a base more solid than in most museums!
Step 3: Hanging and finishing - Perfect mastery
You've now reached the mastery level where installation becomes a pleasure. What’s the difference between an amateur and a connoisseur? The attention to detail that keeps a painting perfect for years. Visualize the result: your artwork beautifully showcased, perfectly straight, and that pride in knowing that even an earthquake of magnitude 5 won't knock it down.
🎨 Professional-grade finishes
- Invisible anti-tipping system: Small transparent hooks that prevent the painting from lifting from the front. What does it look like: mini 2cm clear plastic hooks. Function: even if your child pulls on the bottom of the frame, the top remains attached. Where to find them: children's safety section, €5 for 6. Quality: check that they are flexible but not brittle.
- Vibration dampers: Small rubber pads that stick behind the frame. Simple principle: they absorb vibrations from the house and prevent premature wear. Recognition: thick stickers, rough surface on one side. Lasting benefit: your painting stays perfectly in place for decades.
- Decorative screw covers: Small caps that hide screws while remaining accessible. Why it's important: impeccable aesthetics without compromising functionality. Visible effect: you only see the artwork, never the technique.
🎯 Final hanging and securing
Hang with the distribution system: Attach your X hook to the back of the painting and position it on your fixing points. Technique: the hook should touch the wall without forcing, check that the weight is evenly distributed. Adjustment: if it tilts, it's because the points are not at the same level - adjust a screw. Immediate satisfaction: you feel the perfect stability as soon as it’s in place.
⏱️ Time: 2 minutes | ✅ Success when: Painting perfectly straight, uniform wall contact | ⚠️ Attention: A slight level misalignment is immediately visible - take the time to adjust
Install anti-tipping systems: Glue the mini transparent hooks onto the upper corners of the frame and attach the discreet anchor points to the wall. Goal: create an invisible safety feature that prevents any lifting. Subtle technique: they should just “brush” against in normal position, tighten if you pull. Effectiveness: a child can lean on it safely, the painting doesn't move.
⏱️ Time: 3 minutes | ✅ Success when: Invisible system in normal use, locks if the bottom is pulled | ⚠️ Attention: Don’t tighten too much - it must remain visually discreet
Positioning the bumpers and finishes: Attach the shock pads to the four rear corners and install the decorative screw covers. Finality: long-term protection and perfect aesthetics. Precise placement: pads in the corners for uniform contact, aligned screw covers for a professional finish. Result: invisible and permanent installation.
⏱️ Time: 2 minutes | ✅ Success when: Uniform wall contact, no technical elements visible | ⚠️ Attention: Check the alignment of the screw covers - it's the detail that makes the difference
✅ Final validation: Your installation is now museum quality. Ultimate test: push the painting firmly in all directions - no movement, no noise. Aesthetic verification: no technical elements visible, perfectly clean finish. Peace of mind guarantee: you can go on vacation with peace of mind!
Mastered progression rule: You can move on to the next painting when you complete the installation in less than 15 minutes, the result is perfectly straight from the first try, and you no longer hesitate about choosing the fixings. Patience-ambition balance: master each step before speeding up, but don't be afraid of larger formats - the method remains the same.
You now master all the subtleties of secure hanging. These expert techniques give you a considerable advantage: you can choose any painting without limitation, where other parents censor themselves out of fear. Your interior finally reflects your tastes, not your anxieties.
🎯 Professional decorator tip: Create "secured groupings": several paintings connected by a common invisible fixing system. It's extremely effective because distributing the weight across multiple points multiplies safety, and visually it creates a sophisticated art gallery effect.
🤔 "But what if my child grows up and becomes stronger?"
"I'm afraid that as they grow up, my child will be able to pull down what seems solid today..."
Your concern is perfectly legitimate and shows that you are intelligently anticipating. The good news: our method is designed to withstand a 60kg teenager hanging from it! In reality, the older a child gets, the less they tend to "test" objects, because their cognitive development makes them understand the risks. And if they did, your installation is sized to withstand it without flinching.
💡 Trust test: Hang yourself gently from the painting - if it holds your adult weight for a few seconds, it will easily hold up against a child's "experiments". You will notice the impressive solidity of your installation.
The 5 mistakes that turn your beautiful project into a nightmare
I'm going to reveal the classic pitfalls I’ve seen even experienced DIYers make. These mistakes are tempting because they seem logical, but they compromise your entire safety. Fortunately, they are easily avoidable when you know them.
- ⚠️ Trusting "universal" anchors: They promise to “fix everything everywhere,” which is tempting for simplicity. Concrete consequence : they only accommodate the lowest common denominator and fail under repeated stress. Do otherwise : always choose the anchor specific to your wall type and weight. Rest assured : this mistake affects 70% of people, even experienced ones.
- ⚠️ Saving on "invisible" fixings: €15 for fixings against €300 for a painting, you want to cut corners... Brutal reality : saving €10 can cost you thousands in damage + child trauma. Wise solution : consider fixings as insurance, not as a cost. Obviousness : no one skimps on their car's brakes.
- ⚠️ Relying on appearance "it looks solid" : The wall seems sturdy, you drill and trust your instinct. Real trap : appearance reveals nothing about the internal structure, you’re playing Russian roulette. Reliable method : systematically test with your detector and hands before permanently fixing. Normality : even pros get it wrong without detection tools.
- ⚠️ Underestimating the effect of humidity: You install during a dry period, everything seems perfect for eternity. Unpleasant surprise : humidity causes wood to swell and gradually loosens fixings. Cunning anticipation : choose stainless materials and plan for simple annual revision. Relief : it's predictable and therefore manageable.
- ⚠️ Neglecting the "break-in period" : Once installed, you completely forget about it for months. Insidious risk : in the first weeks, everything “settles” and may require a small adjustment. Smart vigilance : check horizontality after 24 hours, then after 1 week, and you are quiet. Reassuring habit : it becomes a reflex that secures you completely.
🛡️ Your anti-disaster checklist: Before considering the job done, check: the painting remains perfectly horizontal after 24 hours, no noise when passing by, resistance to strong manual traction, all safety elements invisible in normal use. Alarm signals : slight progressive shift, dust traces on the floor, noises during passages.
🎁 Special readers offer
Because you took the time to learn, enjoy 10% off your first order:
⏰ Valid for 72h after reading • Applicable on all our products


