


You admire your new artwork with satisfaction, but that fine layer of dust on the frame's glass ruins the effect. You grab a damp cloth, you gently rub... and there appear unsightly streaks that completely tarnish your work of art.
The natural light now reveals every flaw: whitish halos that cross the artwork, micro-scratches that catch the light, and this frustrating feeling that your painting has lost some of its original presence.
You've already tried classic window cleaner, grandma’s newspaper, even those special wipes... But it doesn't work: either it leaves streaks, or it attacks the surface, or the result only lasts a few days before the dust comes back stronger than ever.
Rest assured, this isn't a problem of your technique! The frame glass requires a completely different approach from classic windows, because it is specially treated and often more fragile than ordinary glass.
By the end of this article, you will know exactly which products to choose and how to use them to get a perfect and lasting shine on all your frame glasses, without risking damaging your precious paintings.
Why a dirty frame glass can ruin the impact of your decor?
An impeccable frame glass can completely transform the atmosphere of a room, while a dull or stained glass loses up to 40% of the visual impact of your painting. It's like wearing a luxury suit with dirty shoes: the detail ruins the whole thing and gives an impression of neglect. The opportunity you are missing? Every guest subconsciously notices these details and it influences their perception of your artistic taste.
🎨 Expert testimony: "I've seen collectors lose significant sales simply because their artworks were presented behind poorly maintained glasses. An art dealer confided in me that a €5000 painting looked 'cheap' due to fingerprints on the glass creating unsightly reflections."
💬 Conversation with a decor expert
The golden rule for framed glass: A preventative and adapted cleaning preserves your artworks much better than dust and humidity accumulation. Visible result in 5 minutes, lasting protection for 3 months.
Understand why your previous attempts failed
You surely recognize yourself in these situations: you clean and traces appear immediately, you use a "special glass" product but it leaves a greasy film, or your glass becomes electrostatic and attracts dust twice as fast.
What's really happening? You are treating a specialized glass like an ordinary window. The framed glass often has anti-reflective, UV protective or antistatic treatments that react poorly to classic products.
It’s like trying to wash a delicate fabric with regular detergent: the fibers degrade and the result worsens with each wash.
The first hidden cause: the pH of your products
Contrary to popular belief, most glass cleaners are too alkaline for art glass. The difference? A window glass can withstand a high pH, but a treated glass degrades and develops a micro-porosity that attracts dirt.
Imagine a waxed parquet floor: if you use bleach, you destroy the protection and the wood becomes porous and dull.
Impact on your daily life: you have to clean more often because damaged glass gets dirty faster, creating a vicious cycle of degradation.
🧪 Quick test: Spray a drop of your current product onto a glass and observe: if it "foams" or bubbles, the pH is too high for art glass.
The second cause: neglected static electricity
Many think that all you need to do is wipe well to avoid streaks. The real mechanism? Static electricity generated by friction instantly attracts suspended dust particles.
It’s like rubbing a balloon on a sweater: it then attracts all the small pieces of paper. Your freshly cleaned glass becomes a dirt magnet.
Frustrating consequence: your glass looks clean for 10 minutes, then mysteriously gets dirty again, giving you the impression of cleaning for nothing.
The third cause: reversed order of operations
Almost no one notices this crucial mistake: cleaning the glass before dusting the frame. Concrete example: you clean perfectly, then when dusting the frame, the particles redeposit on the clean glass.
How to spot it at home? If your glass seems dirty a few hours after cleaning, observe: do the dust particles concentrate near the edges of the frame?
Daily impact: you think your products don't work, when in reality it’s just a matter of organizing the cleaning.
The 3 warning signs to watch out for:
- Circular traces: Your product contains too-powerful surfactants that leave a residual film. "Grainy" feel to the touch: The glass develops a micro-roughness due to an overly aggressive cleaner. Rapid return of dust: Static electricity is not neutralized, your glass actively attracts dirt.The Trigger Factor: The Quality of the Water Used
- Soft brush vacuum cleaner: A small round nozzle with natural bristles that looks like a giant makeup brush. It is used to remove dust without scattering it. Find it in appliance stores. Quality criterion: the bristles should not be electrostatic (test by rubbing: if they attract hair, move on). Avoid hard plastic tips that scratch.
- Antistatic microfiber cloth: Recognizable by its slightly rough texture and often blue or green color. The principle? Microfibers capture particles instead of moving them. Quality tip: run your hand over it, it should "grip" your skin slightly. Impact: eliminates 99% of particles without chemicals.
- Thin cotton gloves: Those used by jewelers, as thin as paper but resistant. They prevent fingerprints and the natural oil from your skin from contaminating the glass during cleaning. Visible benefit: no retouching needed after the work.
The real difference lies in the water hardness. Hard water acts as a catalyst for white traces, even with the best product in the world. Concrete clues: if your faucets quickly get stains or your kettle limescale quickly, your water sabotages your glass cleaning efforts.
The Rule of Successful Cleaning: Demineralized water + suitable product + antistatic technique = perfect result. Test by cleaning a small corner with bottled water: the difference is immediate.
| ❌ Classic Method | ✅ Adapted Method | 💡 Why it Works | 🎯 Visible Benefit |
|---|---|---|---|
| Glass cleaner + tap water | Specialized cleaner + demineralized water | No calcareous residue or aggressive pH | Perfect transparency for 3 months |
| Wipe with newspaper | Antistatic microfiber in circular motion | Neutralizes static electricity | Zero dust attraction |
| Clean glass then frame | Dust frame FIRST, THEN clean glass | Avoids immediate re-contamination | Lasting cleanliness |
| Spray directly onto the glass | Spray onto the cloth first | Control of quantity and distribution | No risk of infiltration |
The Professional Method for Lasting Shine
Now that you understand the real issues, let's move on to practice with a method proven by professional framing experts. Think of this approach as building a house: solid foundations (preparation), structure (cleaning), and finishing touches (protection). The final result? A shine that lasts 3 times longer than with classic methods.
🎯 Method Overview: Three progressive steps that build on each other: secure preparation (risk elimination), targeted cleaning (adapted treatment), and lasting protection (prevention of re-soiling). Each step takes 2-3 minutes but saves hours of re-cleaning.
Starting with this step avoids 90% of accidents and failures. It's like preparing your ingredients before cooking: it seems tedious, but it guarantees a perfect result without stress. Once this preparation is complete, you will feel that satisfaction of well-organized work which announces a success.
Essentials for this step
Now let's get to action with a methodical approach
Safe execution of preparation
Secure the painting environment: Close doors and windows to avoid drafts that blow dust around. The reason? A particle that flies can settle again while you clean. Technical detail: wait 5 minutes after closing for the air to stabilize. It's simpler than it seems: just a matter of anticipation.
⏱️ Time: 2 minutes | ✅ Successful when: No perceptible airflow, relative silence | ⚠️ Attention: Do not close if it is too hot (condensation on the glass) - wait until evening.
Examine the painting under oblique lighting: Use a flashlight or your phone in torch mode, placed at 45° from the glass. This reveals invisible traces to the naked eye. Why this technique? The grazing light brings out micro-scratches and residues that will spoil the final result. Simple but revealing!
⏱️ Time: 1 minute | ✅ Successful when: You can precisely see all areas to be treated | ⚠️ Attention: Never look directly at the reflection of the lamp in the glass (dazzle).
Dust the frame first: Gently vacuum all corners of the frame with the brush nozzle. The goal? Eliminate the source of contamination before cleaning the glass. Technique: movements from the outside in to move dust away from the glass. Unfailing logic once you think about it!
⏱️ Time: 3 minutes | ✅ Successful when: No visible dust even when blowing gently | ⚠️ Attention: Some antique frames are fragile - test suction on a discreet corner.
✓ Final step check: Your space is calm, the frame impeccable, and you have precisely identified the areas to clean on the glass. If you still see dust floating, wait an additional 5 minutes. If you encounter difficulties, repeat the frame vacuuming: this is often where the problem lies. Bravo, you have laid solid foundations!
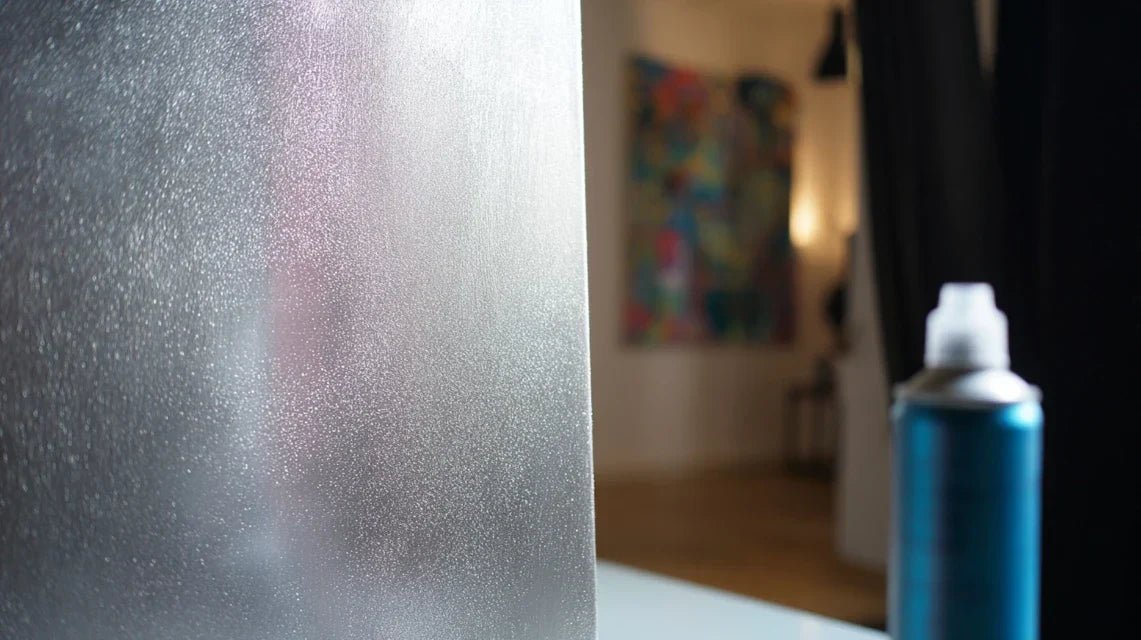
OUR RECOMMENDED PRODUCTS
Step 2: Targeted Cleaning (the heart of the technique)
You are now moving to the expert level: cleaning that really makes a difference. What changes? You no longer clean "blindly" but in a strategic and personalized way according to the traces identified. This step is particularly rewarding because the results are immediately visible and create a snowball effect of motivation.
Essential specialized products
- pH neutral art glass cleaner: Transparent liquid slightly viscous, often sold in a 250ml spray bottle. It works by gentle dissolution of residues without attacking the glass treatments. Where to find it? Art supply stores or professional framers. Quality criterion: must be labeled "pH neutral" and "ammonia-free". Why not window cleaner? It contains solvents that degrade anti-reflective coatings.
- Demineralized water spray: Totally pure water, recognizable by its characteristic "flat" taste. The technical principle? Zero minerals = no possible lime residue. Buy it in an auto store (windshield washer section) or pharmacy. Quality test: it should leave no trace when drying on a black surface. Immediate impact: perfect transparency without white haze.
- Special optical microfiber: Ultra-fine fabric used to clean high-end glasses, often delivered in a small plastic bag. Why special? Its weave captures microscopic particles without spreading them. Recognize good quality: it should glide on the glass without "catching" or making noise. Visible benefit: scratch-free finish.
Professional cleaning technique
Product application in test area: Spray the cleaner onto your cloth (never directly on the glass), then test on a discreet lower corner. Crucial technique: spiral movement from the outside to the inside to avoid streaks. Why start small? To verify compatibility and adjust your technique without risk.
⏱️ Time: 30 seconds | ✅ Successful when: Test area perfectly transparent without residue | ⚠️ Attention: If the product "backfires" or forms drops, your cloth is too wet.
Cleaning in 20cm sections: Mentally divide the glass into squares and treat them one by one. The logic? To avoid the product drying before being wiped off. Movement: wide spirals then finish with straight vertical lines. This method guarantees an even distribution and avoids product buildup.
⏱️ Time: 1 minute per section | ✅ Success when: Each section is perfectly transparent before moving on to the next | ⚠️ Caution: Never go back over a dry area (risk of streaks).
Rinsing with demineralized water: Lightly spray pure water onto a second clean cloth and wipe the entire glass surface. The goal? To remove any product residue and neutralize static electricity. Final technique: immediate drying with the optical microfiber in straight vertical movements. The secret of the professionals!
⏱️ Time: 2 minutes | ✅ Success when: The glass is perfectly dry and no longer "hisses" to the touch | ⚠️ Caution: Demineralized water should be used sparingly (too much = drying streaks).
🔍 Pro quality check: Observe the glass from three different angles with your oblique lighting: face, 45° left, 45° right. Expected result: total transparency, no parasitic reflections, no product traces. If you detect micro-traces, that's normal: an additional pass with a dry microfiber is sufficient. Congratulations, you have mastered the expert technique!
You are now reaching the ultimate level of mastery: not only cleaning perfectly, but also preventing re-soiling. The difference between an amateur and a connoisseur? The amateur cleans, the connoisseur protects and prevents. The final result you can visualize: glasses that retain their shine for 3 months instead of 3 weeks, and compliments from your guests on the stature of your collection.
Advanced protection products
- Antistatic optical spray: Colorless liquid that leaves a film only a few nanometers thick. Its function? Actively repel dust by neutralizing electrical charges. Available from opticians or pro photo stores. Selection criterion: must be specified "long-lasting antistatic". Observable effect: dust "slides" instead of sticking. Ultra-soft natural hair brush: Makeup brush or gilding brush, with badger or squirrel hair. It is used for weekly preventative maintenance: remove dust before it becomes embedded. Quality test: when passed over your cheek, it should be totally soft. Advantage: preserves the antistatic treatment by avoiding friction.
Application of durable protection
Targeted anti-static treatment: Spray the antistatic onto a clean cloth and apply in an ultra-thin layer over the entire glass. The technique? Cross movements (vertical then horizontal) for perfect distribution. Why is this crucial? This invisible film repels dust for months instead of attracting it.
⏱️ Time: 3 minutes | ✅ Successful when: The glass has a slightly "slippery" feel but remains perfectly transparent | ⚠️ Caution: Too much product will create a veil: better two thin layers than one thick.
Final protective polishing: With the optical microfiber perfectly dry, polish gently in very slow circular motions. The goal? To distribute the treatment evenly and eliminate any excess. This step creates the invisible "skin" that will make a difference over time.
⏱️ Time: 2 minutes | ✅ Successful when: The glass "glides" under the cloth and reflects light evenly | ⚠️ Caution: Too fast movements = static electricity = opposite effect sought.
Final validation test: Bring your hand 2cm away from the glass without touching it: a well-treated glass should not attract arm hairs due to static electricity. Then observe under raking light: the surface must be perfectly uniform. This verification guarantees the effectiveness of the treatment for the next 3 months.
⏱️ Time: 1 minute | ✅ Successful when: No electrostatic attraction, even reflections, zero visible trace | ⚠️ Caution: If the electrostatic test fails, an additional antistatic pass is necessary.


