When I supervised the layout of the Villeurbanne Montessori primary school three years ago, the director showed me a dozen paintings stacked in a closet. "We're afraid to hang them, the partitions are too fragile," he confided, discouraged. I have seen this scene in at least twenty establishments since. These light modular partitions that equip our modern schools – practical for reconfiguring spaces – often become bare walls, depriving children of a stimulating visual environment. Yet, hanging a painting on a light modular school partition is perfectly possible with the right fixings. Here's what an adapted approach brings: complete safety for children, preservation of the support without structural damage, and flexibility to regularly transform the teaching space. The fear of drilling or weakening these thin walls paralyzes many establishments. Rest assured: solutions exist, they are simple, and above all, they radically transform the atmosphere of a classroom. I will guide you through the techniques that I use daily to dress these delicate spaces.
Understanding the nature of your modular partitions: the essential diagnosis
Before talking about wall fixing, it is necessary to precisely identify your support. Light school modular partitions come in three main families: plaster panels on metal frames (type Placoplâtre®), insulating sandwich panels, and honeycomb acoustic systems. Each reacts differently under load. During a project at the Jean Moulin School in Lyon, we discovered that their "light" partitions could actually support 15 kg per square meter thanks to a reinforced frame – crucial information obtained from the municipal technical service.
To identify your partition type, tap gently on the surface: a hollow and resonant sound generally indicates plaster on spaced studs (spacing 60 cm), while a more muffled sound indicates a solid panel. Thickness varies between 5 and 10 cm for these structures. Always consult the architect's plans or the building maintenance manual – these documents specify the admissible load and reinforced areas, often present around doors or in corners. This preliminary step avoids 90% of fixing errors that I observe in the field. A painting for school generally weighs between 500 grams and 5 kg depending on its size, which remains well within the capabilities of these supports with the right technique.
Expansion anchors: your best ally for light paintings
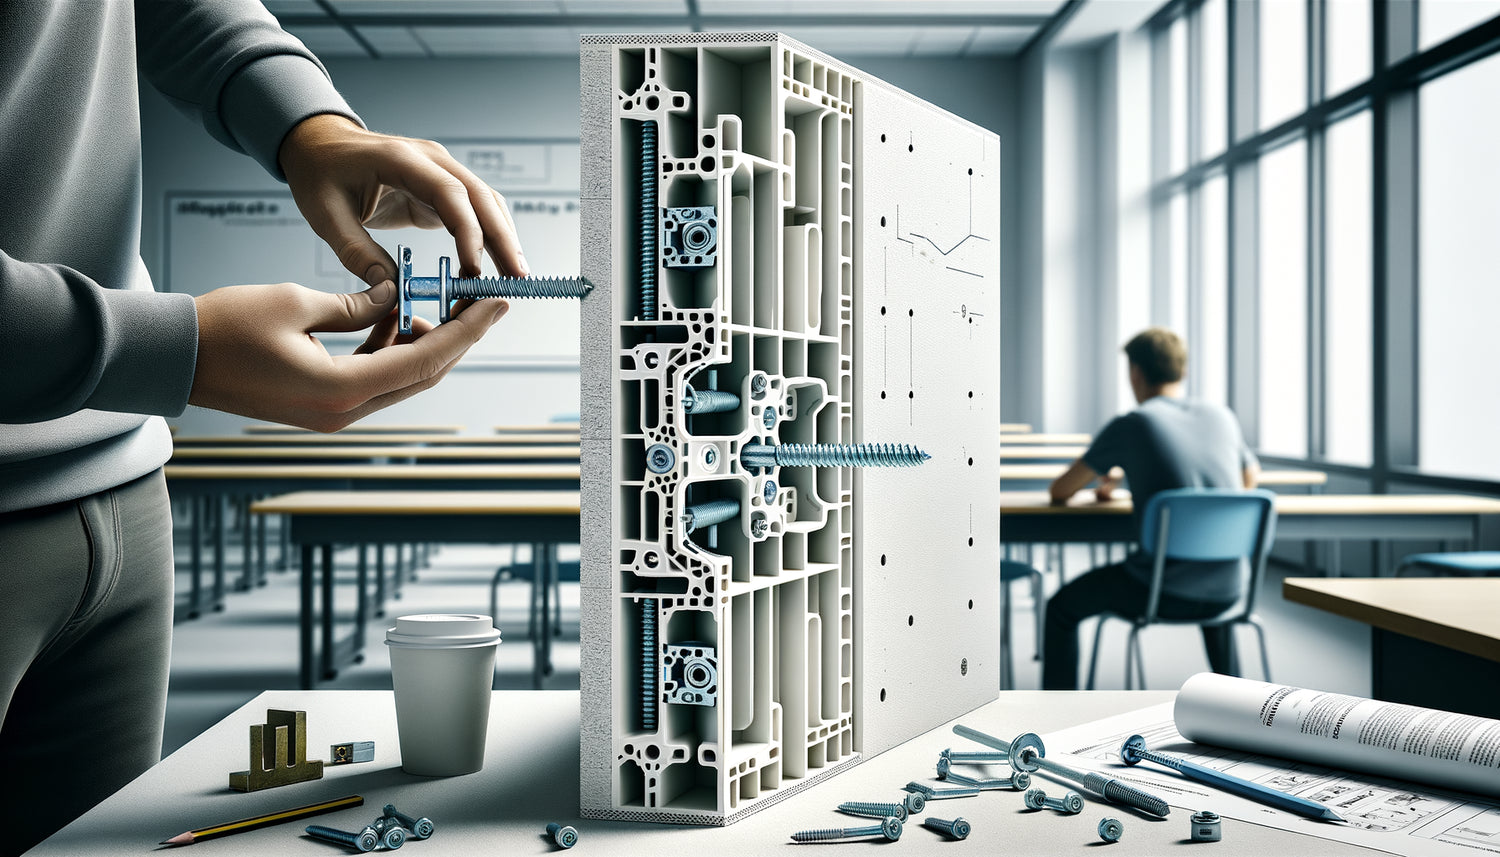
For a lightweight partition wall painting weighing less than 2 kg – typically a framed A3 format – plasterboard expansion plugs are my preferred solution. These little plastic or metal wonders expand behind the wall, creating a firm grip without exerting excessive pressure. I particularly use "Molly" or "umbrella" models which offer excellent load distribution. The technique is simple: drill an 8 to 10 mm hole with a percussion drill deactivated (rotation only), insert the plug, then screw in the screw that opens the mechanism at the back.
The tip I share with all establishment managers: always position your wall fixing on the axis of a vertical metal stud if possible. Use a stud finder (€15 in a hardware store) to locate them – it's an investment that changes everything. In this configuration, the expansion plug is fixed directly into the steel rail and can support up to 10 kg. I equipped the entire Lumière college educational wing with 47 paintings without any incidents in five years. For lightweight paintings, you can even opt for self-drilling plugs that do not require pre-drilling – a considerable time saving during multiple installations. Remember: always drill perfectly horizontally, verified with a spirit level, to avoid lateral stresses which weaken the fixing.
The professional step-by-step installation method
After marking the location with a pencil, protect the floor with a tarpaulin – plaster dust is fine and sticky. Drill slowly, keeping the drill perpendicular to the partition. Immediately vacuum up the residue from the hole to ensure a good grip of the plug. Insert the plug until its collar is flush with the surface, then screw in gradually checking stability regularly. Once the screw is removed, you can hang your picture fixing system – hook, attachment or wire according to your configuration.

No-drill systems: when reversibility is paramount
In modular schools that reorganize their spaces every quarter, the constraint of reversibility becomes a priority. This is where drill-free fixings reveal their potential. I equipped the Waldorf school in Grenoble with magnetic hanging systems: high-adhesion self-adhesive strips attached to the back of the artwork respond to metal plates glued to the wall. Load capacity: up to 3 kg per 10 cm strip. The advantage? Moving artworks in seconds to follow pedagogical themes.
Extra-strong double-sided adhesive tapes (such as Command™ or Tesa Powerstrips®) work remarkably well on smooth, painted plaster. However, they require a perfectly clean surface, degreased with 70% alcohol, and a temperature above 15°C during installation. For a 1 kg artwork on partition, use 4 strips of 2 kg each arranged in a rectangle – this redundancy guarantees safety even if a strip comes off. I systematically apply the “triple security” rule in schools: the theoretical load multiplied by three. These systems leave sticky traces when removed, but a little vegetable oil on a cloth removes them without damaging the paint. In a kindergarten in Chambéry, we created a modular gallery of 30 artworks that teachers reorganize according to projects, transforming corridors into real living exhibition spaces.
Rails and hanging systems: the professional solution for multiple artworks
When an institution wants to regularly hang different artworks for schools, I strongly recommend installing hanging rails. This system, widely used in museums, consists of fixing a metal rod or aluminum rail at the top of the partition – ideally on the upper load-bearing structure or ceiling – from which adjustable cables with hooks descend. The major advantage: only one solid drilling intervention at the top, and then total freedom to move, add or remove artworks without touching the light partition.
At Villefranche technical high school, we installed 45 meters of rails for artworks in the corridors. The braided steel cables (each with a load capacity of 15 kg) descend to the desired height and are fixed to the frames via discreet hooks. The system allows adjustment of the height to the millimeter – crucial for adapting to different age groups. CAP carpentry students even made their own frames that they exhibit and change every month. This artwork fixing is certainly more expensive to install (€120 per linear meter installed), but it amortizes its investment from the second reconfiguration. For modular partitions whose position may change, prioritize self-supporting rails on castors – a solution I deployed in three Montessori schools where spatial flexibility is fundamental. These mobile structures support up to 20 kg and create instant mock picture frames without any wall drilling.
Practical tips for installing a hanging rail
First, locate the beam or load-bearing frame in the ceiling with your detector. Mark the location of the rail ensuring perfect horizontality. Fix the supports every 80 cm maximum with fasteners suitable for the ceiling (often concrete). Clip the rail into its supports, then adjust your cables according to the weight of the wall art. For a professional result, use transparent nylon cables for lightweight works – they become practically invisible from 2 meters away, creating a levitating effect particularly appreciated by children.

Securing large artworks: the multiple anchor points technique
Heavier wall art – over 5 kg – requires a different approach on light partition. The golden rule: distribute the load across multiple anchor points. For a 90×60 cm canvas weighing 7 kg that we had to install in the hall of a primary school, I used four metal Molly fasteners arranged in a rectangle, each capable of supporting individually 8 kg. The fixing system included a horizontal metal plate screwed to the back of the frame, itself hung from the four points via a Y cable.
An elegant alternative is to create an invisible support frame: four thin wooden battens (2×3 cm) fixed to the partition according to a perimeter slightly larger than the painting, on which the work simply rests and is discreetly screwed on the sides. This technique distributes the weight over a large surface area and is perfectly suited for modular partitions whose punctual capacity is limited but whose surface resistance is correct. In an applied arts school, we thus hung a collaborative mural of 2×1.5 meters weighing 12 kg without worry. The support frame remains hidden behind the work and can be repainted to match the color of the wall. For establishments, I recommend having these installations validated by the departmental technical service – a simple visit that legally secures the intervention and reassures all parties.
Transform your learning spaces into inspiring galleries
Discover our exclusive collection of wall art for schools that combines beauty with educational value and formats adapted to secure fixings on all types of modular partitions.
The fatal mistakes to absolutely avoid
In fifteen years of school facility design, I have noticed the same recurring errors. The first: using universal wall plugs designed for concrete on cellular plasterboard. They don't grip, spin in the void, and create an unusable hole. Result: three failed attempts and a partition riddled with perforations. Invest in wall plugs specifically designed for lightweight partitions – the €2 extra cost avoids €200 repairs.
Second classic mistake: neglecting the actual weight of the artwork to be hung. Always weigh your artwork with its frame before choosing your wall fixing. A kitchen scale will do. I mentally add 30% safety margin – a professional reflex that has saved me many inconveniences. Third blunder: fixing a heavy picture only by its top attachment. On modular partition, the vibration caused by repeated passages (students running in the corridors) creates a seesaw effect that gradually tears off the fixing. Always add two small anti-tip wedges at the bottom of the frame – 5 mm transparent adhesive pads are enough to stabilize the whole.
Finally, the mistake I see in 40% of establishments: hanging wall art for schools without considering fire safety standards. Some frame materials (expanded polystyrene in particular) are prohibited in public buildings. Check the M1 classification (non-flammable) of your frames, especially in corridors which constitute evacuation routes. An administrative detail that avoids having to take everything down during a visit from the safety commission – experienced with a school principal devastated two days before back to school.
Creating an evolving gallery: long-term vision
Beyond simply fixing a picture, think of the whole as an evolving educational project. In the Freinet school where I regularly work, we have created a “wall of creations” with 24 interchangeable clip frames fixed on rails. Each week, new student creations take place, transforming the corridor into a permanent and renewed exhibition. The fixing for lightweight partition used combines high rails (load distributed on the supporting structure) and descending cables with universal clips. Changing artwork: 30 seconds per picture.
This approach transforms wall mounting into a dynamic educational tool. Children develop a living relationship with art and their own creations. Technically, this requires a more elaborate initial installation, but daily use becomes child's play. For institutions with tight budgets, an economical version consists of installing simple rails – thin 5 cm deep wall shelves – on which the tableaux pour école come to rest, held in place by their own inclination. Fixed to uprights with metal brackets, these rails support 15 kg per meter and allow rotation of works without any tools. I equipped 12 classrooms at the school of Saint-Priest for less than €800, creating exceptional flexibility appreciated as much by teachers as by technical services who no longer intervene for each change.
Hanging a tableau sur une cloison légère d'école modulaire is no longer a technical headache but an opportunity to transform the school environment. Imagine corridors where children's eyes linger on inspiring works rather than bare, cold walls. Imagine spaces that celebrate their creations, value their work, and stimulate their curiosity. This transformation begins with a simple adapted wall plug, a cleverly placed rail, or a discreet magnetic system. Solutions exist for every configuration, every budget, every level of technical skill. Start small: a single picture, well fixed, in a passageway. Observe the impact on the atmosphere, the looks that stop, the conversations that arise. Then gradually extend this approach. You are not simply decorating a wall – you are creating an environment where learning is nourished by beauty and daily inspiration.
Frequently asked questions about fixing pictures in schools
Can I hang a picture on a modular partition without the agreement of the technical service?
From a regulatory point of view, any intervention on the structure of an educational establishment is the responsibility of the manager – often the municipality for primary schools or the department for colleges. I strongly recommend systematically informing the technical service, even for light fixings. In my practice, a simple email notification with a photo of the wall fixing intended and the weight of the artwork is usually sufficient. This approach protects you in case of an incident and often allows you to obtain valuable advice on the specifics of your modular partitions. Many technical services appreciate this transparency and may even lend you the appropriate tools or intervene directly. For private establishments, consult your multi-risk insurance – some require prior validation for modifications, even minor ones. This five-minute administrative precaution can avoid considerable complications in case of subsequent damage to the partition or, worst case scenario, a fall of the artwork. Experience has taught me that an informed technical service becomes a valuable ally, sometimes even a source of proposals to optimize your large-scale hanging projects.
How to repair a light partition damaged by improper fixing?
Damage to light partitions is usually repairable with a little patience. For a simple missed wall plug hole, use patching compound powder (type Enduit Colle) mixed to the consistency of yogurt. Generously fill the hole, tamping well with a soft spatula, let dry for 2 hours, then sand gently with grain 120 sandpaper. A second thin layer perfectly evens out the surface. Repaint with the original color – always keep a pot of touch-up paint for the wall color, advice I give to all establishments. For a larger hole or tear in the gypsum board, cut out the damaged area cleanly with a cutter in the shape of a rectangle, insert a piece of gypsum board of the same thickness held by wide adhesive on the back, then plaster the joint with joint compound. This technique requires a little practice but remains accessible. In cases of structural damage – partition pierced from one side to the other or metal upright damaged –, the intervention of a professional becomes essential to guarantee solidity and sound insulation. The best repair is obviously prevention: choosing from the start the fixing for light partitions adapted to the weight of your artwork avoids 95% of these disappointments.
Are there alternatives to wall mounting for very large artworks?
Absolutely, and some are even more relevant for large wall art in school settings. Professional exhibition easels are my favorite solution for artworks weighing over 10 kg or 1.20 meters in height. These free-standing metal or wood supports position freely against the modular partition without any fixing. They offer the considerable advantage of total mobility – moving the artwork for an event, cleaning or reconfiguration becomes a breeze. I equipped the hall of Lycée Édouard Herriot with six high-end easels supporting 25 kg each, creating a modular exhibition according to educational projects. Cost: €80 to €200 per easel depending on quality, but minimum durability of 15 years. Another elegant alternative: floor standing display panels with integrated hanging systems. These mobile structures with casters support multiple lightweight wall art simultaneously via metal rails or grids. For temporary use, cable tensioning systems stretched between the floor and ceiling (type Stas Cliprail) create picture rails without touching the side walls – perfect for modular schools where each element can be disassembled and repositioned. These alternative solutions certainly cost more initially than simple wall plugs, but their flexibility and total preservation of partitions justify the investment in many educational contexts where change is the only constant.