

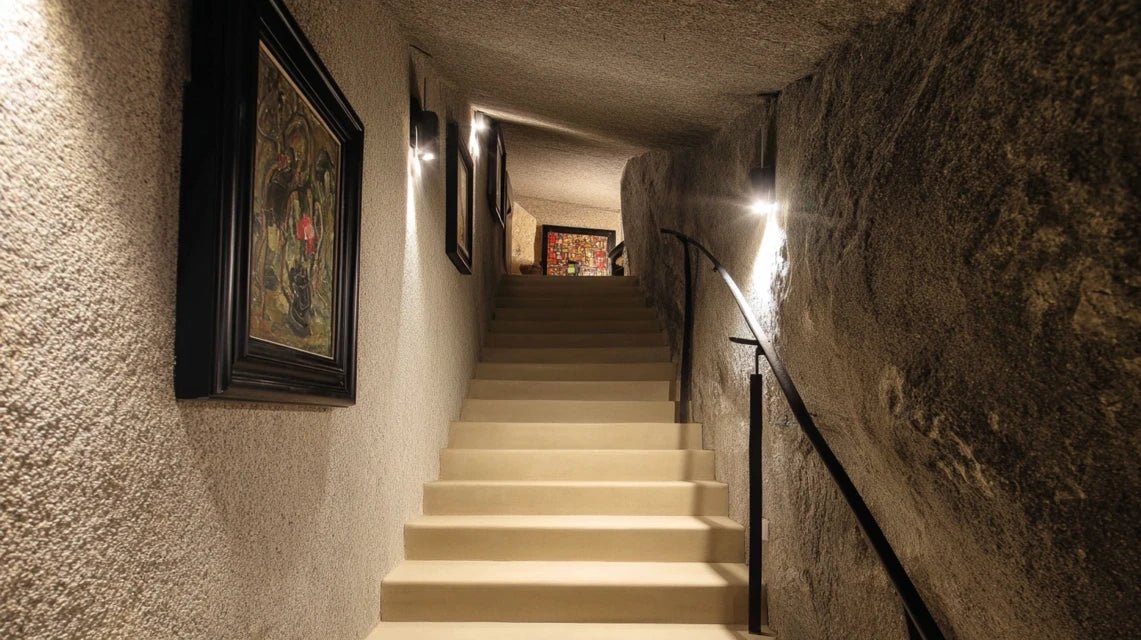
You pass by this stairwell leading to the basement several times a day, and each time, the same feeling overwhelms you: this bare, cold wall that taunts you. This obligatory passage area in your home remains desperately empty, as if it didn't exist in your decor project.
You can imagine hanging something there, but this unconventional configuration discourages you. The dim lighting, the particular angle, the feeling that nothing will really enhance this space... You end up giving up and accepting this "black hole" in your interior.
You may have tried a few solutions: a basic wall lamp, a small frame lost on this large wall, or simply ignored this area completely. Result? Your staircase still looks like a utilitarian passage without soul, far from the warm atmosphere you want for your home.
It's perfectly normal to feel helpless in the face of this configuration! Most decor advice focuses on the main rooms, neglecting these transition spaces which nevertheless have enormous decorative potential. The problem is not your lack of inspiration, but the absence of a method adapted to these particular areas.
By the end of this article, you will know exactly how to transform your stairwell leading to the basement into a real artistic focal point, creating a harmonious decorative continuity throughout your home.
Why decorating your stairwell leading to the basement can revolutionize your interior?
Neglecting the decoration of your stairwell leading to the basement now is missing a unique opportunity to create a personal decorative signature. Imagine the surprised and admiring look of your guests discovering an unexpected work of art in this passage area. It's like ignoring an extra room in your house: you lose square meters of artistic expression!
🏠 Customer testimonial : Marie, owner of a townhouse in Lyon, recently told us: "Since I installed a large abstract painting in my stairwell leading to the basement, my friends systematically ask me who my decorator is. This area was invisible, it has become the starting point for all conversations about my decor!"
💬 Conversation with a decor expert
What's Really Behind Your Hesitation to Decorate This Space
Do you recognize yourself in these situations? You avoid looking at the staircase as you receive guests. You feel a little awkward every time you go down to the cellar. You have the impression that your decor "abruptly stops" at this place in the house.
What's really happening is that your brain perceives this visual break as a lack of harmony in your living space. It’s not an aesthetic whim, it's a real need for spatial coherence! Your discomfort comes from the feeling that your home isn't "finished."
It's exactly like wearing an elegant outfit with mismatched shoes: technically everything works, but something feels off in the overall look. Your undecorated staircase creates this same dissonance in your interior.
The Real Technical Reason: You’re Afraid of Lighting
Contrary to what one might imagine, the problem isn't the space or configuration, but the apprehension of subdued lighting. You think a painting won't be highlighted, when in reality, this softer ambiance reveals certain works better than direct lighting!
Think about contemporary art galleries: they often prefer indirect and subdued lighting to create an intimate atmosphere. Your staircase naturally reproduces these privileged exhibition conditions.
This discovery will completely change the way you see this space: instead of being a handicap, the natural lighting of your staircase becomes an asset for creating a private gallery ambiance in your home.
🧪 Immediate test: Go down your staircase in the late afternoon and observe the natural light that filters through. You will notice this quality of soft, enveloping lighting, perfect for sublimating a wall art piece.
The Proportion Trap: You Overestimate the Complexity
You think it takes complex calculations to choose the right size painting, when in fact there's a simple two-thirds rule: your artwork should cover about two-thirds of the available width on the wall.
It’s like cooking: you don't need to know all the principles of food chemistry to succeed in a delicious dish. A few basic proportions are enough to create a harmonious and professional result.
This simplicity will free you from paralyzing analysis and allow you to trust your decorative instinct, which is often more accurate than all calculations.
The psychological obstacle: the fear of others' opinions
You subconsciously dread that they might find your choice "strange" or "pretentious," especially in an unusual space like a staircase leading to the basement. This intimate area of the house seems too personal to be exposed.
In reality, it’s exactly the opposite: guests are always impressed by this attention to detail in "hidden" spaces. It reveals a refined personality that cares even for places no one is obliged to decorate.
This realization will transform your apprehension into pride: your decorated staircase becomes proof of your authentic aesthetic sense, not any need to appear.
3 signs that prove you're ready to take the plunge:
- You naturally slow down on this staircase: Your instinct already tells you that this space deserves attention, you feel its decorative potential You can already imagine possibilities: Images of paintings spontaneously come to mind when you pass here, your creativity is awakened You look for excuses to go down to the basement: Unconsciously, you would like this journey to become more pleasant, it's a sign of a real need for beautification
What really makes the difference is the ability to create an unexpected "wow" effect in an ordinary passageway. It's like discovering a secret garden behind a mundane door: the emotional impact is amplified by the element of surprise. You identify this potential when you feel that little excitement at the idea of transforming this neglected space into a decorative jewel.
The rule of the valued passage: The more frequently a space is traversed, the greater its potential for daily impact. Check it by counting how many times you use this staircase in a day - you'll be surprised!
| ❌ Limiting belief | ✅ Decorative reality | 💡 Explanation | 🎯 Practical benefit |
|---|---|---|---|
| No one really looks at staircases | Staircases are natural contemplation zones | The slower pace of going up/down favors observation | Guaranteed daily visual impact |
| It takes a lot of light for a painting | Dim lighting creates an intimate gallery atmosphere | Some works reveal their nuances better in soft light | Cozy and sophisticated ambiance |
| It's complicated to choose the right size | The 2/3 of width rule works perfectlyNaturally harmonious proportion for the human eye | Safe and balanced choice immediately | |
| It might look pretentious | It’s a mark of an authentic and refined taste | Taking care of details reveals a thoughtful personality | Recognition of your aesthetic sense |
The simple 3-step method to successfully install your artwork
Rassurez-vous, transformer votre montée d'escalier en galerie personnelle n'a rien de compliqué ! Nous allons procéder comme un jardinier expérimenté : d'abord préparer le terrain (analyse de l'espace), puis planter (choisir et positionner), enfin entretenir (optimiser l'éclairage). À chaque étape, vous verrez votre vision prendre forme et votre confiance grandir.
🎯 Overview of your transformation : Step 1 - Analysis of your unique space (you understand its strengths), Step 2 - Selection and optimal positioning (your painting finds its ideal place), Step 3 - Optimization of highlighting (the final effect impresses you). Logical progression that leads you from hesitation to pride in a few weeks.
Step 1: Analyze and tame your unique space
Starting with this step avoids costly mistakes and saves you valuable time! It's like making a plan of a plot of land before building: you lay solid foundations for a lasting result. Once this analysis is complete, you will feel the satisfaction of perfectly mastering your project.
The simple tools you need
- A measuring tape: The one you have in your toolbox is quite sufficient. It allows you to precisely measure the available wall surface and avoid dangerous approximations. Make sure it is graduated in centimeters for greater accuracy. Laser measures are practical but not essential for this project.
- Your smartphone with camera: The indispensable modern tool for capturing lighting at different times of the day. Photos reveal details that your accustomed eye no longer notices, such as shadows or reflections. Activate HDR mode to obtain a faithful rendering of contrasts.
- A notebook and pencil: To note your observations and quick sketches. Paper remains more practical than digital for jotting down spontaneous ideas and making proportion calculations. Choose a notebook that you can keep within reach throughout the project.
Now, let's move on to concrete action
How to analyze your space like a professional
Measure your available wall surface: Take the exact dimensions of the free wall, avoiding walkways (minimum 80cm from the railing). This measurement determines the maximum size of your future painting and avoids proportion errors. Note height and width, then calculate 2/3 of the width to obtain your optimal dimension.
⏱️ Time: 10 minutes | ✅ Successful when: You have noted 3 measurements: total height, total width, and optimal width (2/3) | ⚠️ Attention: Don't forget the height of the railing in your calculations - many make mistakes measuring from the floor
Photograph the lighting at 3 key moments: Take photos at 9am (morning light), 3pm (afternoon) and 7pm (artificial lighting). These three moments reveal how your future artwork will be perceived under different lighting conditions. Always position yourself in the same spot to objectively compare.
⏱️ Time: 5 minutes x 3 shots | ✅ Success when: You clearly visualize the bright and shaded areas at each moment | ⚠️ Attention: The camera flash distorts reality - disable it absolutely
Identify your "privileged viewpoint": Find the place from which your artwork will be most often admired (usually when climbing the stairs). Mark this location on the floor with a small, discreet piece of tape. This position determines the optimal viewing angle for hanging and the ideal height.
⏱️ Time: 5 minutes | ✅ Success when: You know exactly from what angle your artwork will be admired | ⚠️ Attention: Many forget that perspective changes whether you are going up or down - test both directions
✅ Validation of step 1: You now have a clear vision of your space, with precise measurements and an understanding of its natural lighting. If something seems unclear, retaking the measurements with a fresh perspective will clarify your ideas. This solid foundation will greatly simplify choosing your artwork!
OUR RECOMMENDED PRODUCTS
Step 2: Choosing and positioning your artwork
Now that you master your space, the artistic choice becomes much more obvious! This step is the most rewarding because you see your vision take shape concretely. The snowball effect begins: once your painting is chosen, you will naturally want to harmonize the rest of your decor.
Criteria for selecting your wall art
- Format and proportions adapted: Favor a horizontal or square format to harmonize with the architecture of the staircase. Vertical formats that are too narrow get visually lost in this space. The optimal dimension remains 2/3 of the previously calculated width. Avoid panoramic formats that create imbalance. Consistent color palette: Choose tones that dialogue with your existing interior without necessarily blending completely into it. A painting can introduce an accent color that reveals shades present elsewhere in the house. Test virtually by bringing a photo of the painting closer to your staircase. Style and emotions sought: Abstract art works particularly well in staircases because it stimulates the imagination during movement. Landscapes bring a feeling of escape, geometric works a reassuring structure. Choose what resonates with the atmosphere you want to create.
Professional Positioning Techniques
Calculate the optimal hanging height: Position the center of the artwork at 5ft 3in (1.60m) from the floor, which is the standard human eye level. In a staircase, adjust slightly downwards (5ft 1in/1.55m) as you often look upwards. This height guarantees optimal visual comfort from your preferred viewpoint identified in step 1.
⏱️ Time: 15 minutes | ✅ Success when: The artwork seems to "float" naturally at the right level, without effort to view it | ⚠️ Attention: Measure from the center of the artwork, not from the top - a very common mistake
Test with a cardboard template: Cut out a rectangle matching the dimensions of your future artwork and temporarily attach it to the wall with masking tape. Live with it for 48 hours to validate size and position. This architect's technique avoids 90% of buyer's remorse and gives a precise idea of the final result.
⏱️ Time: 20 minutes preparation + 48h observation | ✅ Success when: The template seems "obvious" and natural after 2 days | ⚠️ Attention: Resist the urge to constantly reposition - let your eye get used to it
This final step reveals all the magic of your project! You are now reaching a level of sophistication that distinguishes true art lovers. The final result will give you that profound satisfaction of mastering all aspects of artistic enhancement, a rare and appreciated skill.
Lighting Techniques to Enhance Your Artwork
Install discreet accent lighting: Add a small LED wall sconce that is adjustable 12in (30cm) above the artwork, directed downwards. This soft light reveals the details of the work without creating annoying reflections. Choose a warm color temperature (2700K) to preserve the cozy atmosphere of the staircase.
⏱️ Time: 45 minutes installation | ✅ Success when: The artwork is enhanced without the lighting being conspicuous | ⚠️ Attention: Avoid direct frontal lighting that creates harsh shadows and reflections
Secure the hanging with a professional system: Use anchors suitable for your wall material (drywall, concrete, brick) and robust metal hooks. The weight of the artwork + 50% safety margin determines the necessary strength. Always double the attachment points for medium and large formats.
⏱️ Time: 30 minutes | ✅ Success when: The artwork is perfectly stable, even when touching the frame lightly | ⚠️ Attention: Check the resistance by pulling gently downwards - the system should not move
The rule of artistic progression: Start with a work that you really like, even if it seems "too" much at first. Your eye gets used to it in a week, and you will always regret choosing something too small or too understated. Measured boldness always pays off in decor!
Congratulations! You now master the subtleties of stair decoration, a skill that few homeowners possess. This expertise gives you a definite advantage in creating interiors that leave a lasting impression and reveal your refined personality.
🎨 Pro Decorator Tip: Create an "ensemble effect" by choosing 2-3 paintings of the same style but different sizes for other staircases in the house. This visual consistency transforms your home into a private gallery and reveals a sophisticated aesthetic.
💭 Frequent question from our readers
"Can I install a heavy painting in my staircase without risking it falling?"
This concern is perfectly legitimate and shows that you think about safety, which is essential! The good news is that modern mounting systems allow for the secure fixing of works up to 15kg on any standard wall. The secret lies in choosing fixings adapted to your support: expanding metal dowels for concrete/brick, expansion dowels for plasterboard with backing. Double the fixing points and you can sleep soundly.
🔧 Reassuring action: Before making a final purchase, test your mounting system with an object of equivalent weight (water pack, books...) for 24 hours. You will see the solidity of the assembly and eliminate any apprehension.
The 5 mistakes that can ruin your artistic project
Attention, these mistakes are tempting because they seem logical at first glance! I prefer to talk about them now so you avoid these classic traps into which even experienced amateur decorators fall.
- 🚫 Choosing a format that is too small for fear: Instinct pushes us to "play it safe" with a small format that blends into the decor. Result: your painting becomes invisible and the desired decorative effect falls flat. On the contrary, embrace a generous format that asserts its presence - your staircase deserves to be noticed! This is a mistake that 70% of our customers now avoid thanks to the 2/3 rule. 🚫 Hanging too high "so everyone can see it": This logic seems sensible but creates a painting disconnected from the living space, perched like a ceiling decoration. The standard height of 1.60m works everywhere, including in staircases. Resist the urge to "raise" it under the pretext of the specificity of the place. 🚫 Avoiding lighting for economy: An unlit painting, even beautiful, loses 50% of its visual impact and remains invisible in the evening. The investment in a small LED light is minimal compared to the cost of the artwork and completely transforms the rendering. It's like buying a beautiful car and refusing to put gas in it! 🚫 Choosing a piece that "goes with everything": This cautious approach produces bland and impersonal interiors. Your staircase deserves a work of art that reflects you, even if it's a little outside the box. It's precisely this unique character that will create the desired "signature" effect.
- 🚫 Putting off the final installation: Letting the project drag on "until you have more time" kills creative momentum and motivation. Once your artwork is chosen, install it within the following week. Concrete action keeps enthusiasm high and quickly reveals the result of your efforts.
🛡️ Anti-error verification system: Before finalizing, check these 4 points: Does your artwork cover about 2/3 of the wall width? Is its center at 1.55-1.60m from the floor? Have you tested the strength of the hanging? Does the lighting reveal the details without creating reflections? Warning signs: persistent hesitation after 3 days, repeated negative comments from your entourage, a feeling that "something is wrong" without being able to identify what.
🎁 Special offer for readers
Because you took the time to inform yourself, enjoy 10% discount on your first order:
⏰ Valid 72h after reading • Applicable to all our products
❓ Your most frequently asked questions about staircase artwork
Allow between €80 and €300 for a professional result: €60-€200 for the artwork depending on the format, €15-€30 for LED lighting, €5-€20 for a secure hanging system. Optimize by first choosing your favorite piece, then adapt the accessories. A successful project increases the value of your property by 2 to 3 times the initial investment.
With an organized schedule: 1 weekend for analysis and measurements, 1 week to choose your artwork, 1 weekend for complete installation. That's 3 weeks from start to finish! The longest part is often the artistic selection because you want to be sure of your choice. Speed up by pre-selecting a maximum of 3 options from the start.
Absolutely not! 90% of our customers successfully install their own artwork. The necessary tools (drill, level, measuring tape) are found in most homes. Only exception: old stone walls or complex electrical installations that require specialized expertise. For all other cases, our guide is quite sufficient.
Use the "color bridge" technique: identify a color present elsewhere in your home (cushion, rug, object) and choose a work that picks up this shade. Even present in small quantities, this color connection creates a natural harmony. Alternative: opt for enhanced neutrals (beiges, grays, off-whites) that go with everything while adding sophistication.
Three infallible indicators after 1 week of installation: you feel a little pride each time you pass in the stairwell, your loved ones spontaneously make positive comments, you want to take care of other decorative details in the house. If these 3 signals are present, your choice is perfectly adapted! Otherwise, revisit the position or lighting before changing the artwork.
🏡 Your stairwell transformed: the daily pride that awaits you
In a few weeks, you will descend to your cellar with a knowing smile, admiring this artwork perfectly integrated which reveals your refined aesthetic sense. Your guests will not fail to notice this particular attention to detail, a sign of a personality that cares for its environment down to its most intimate corners. This discreet but remarkable transformation will become a source of daily satisfaction.
Beyond the decorative aspect, you will have acquired a valuable skill in arranging atypical spaces which will serve you for all your future projects. This ability to see artistic potential in neglected areas distinguishes you and reveals a natural decorator's eye. The confidence gained will give you the audacity to take on other creative projects in your home.
The hardest part is now behind you: understanding the mechanisms and overcoming apprehensions. Your first concrete step? Take out your measuring tape and take the dimensions of your wall today. These simple measurements concretize your project and release your creativity to imagine the perfect artwork that will sublimate this unique space.
🚀 Your moment has come: Your stairwell is waiting for this artistic transformation which will reveal its hidden beauty - you now have all the keys to succeed in this project that will permanently mark your interior!
Read next


