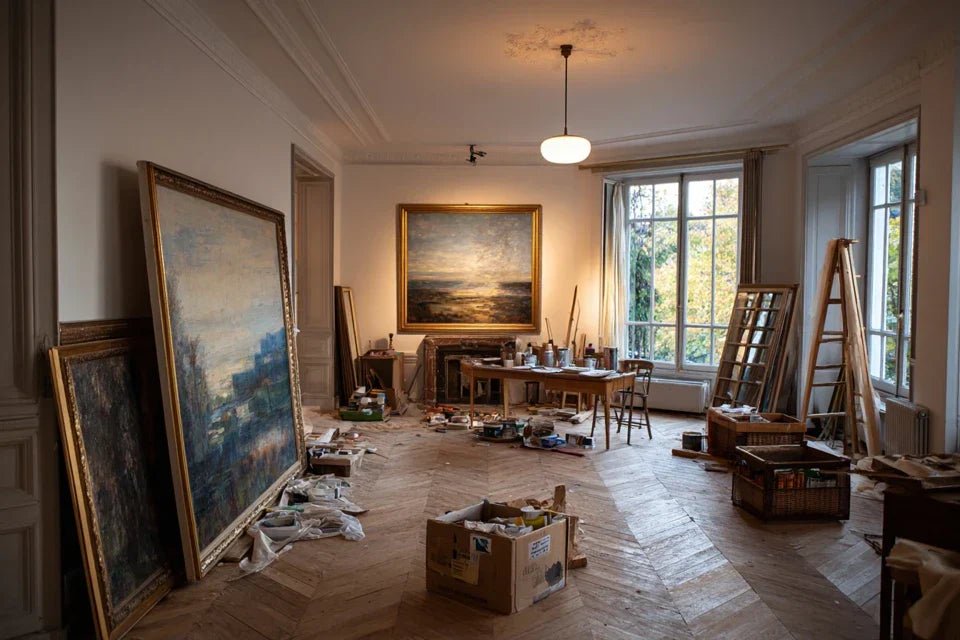
Vous venez de craquer sur ce tableau magnifique qui transformera votre salon, mais voilà que vos travaux de rénovation commencent la semaine prochaine. Vous regardez votre mur nu en vous demandant où installer les spots pour tableaux, si l'électricien saura où passer les câbles, et surtout... si vous n'êtes pas en train de tout faire dans le mauvais ordre.
Cette sensation de panique vous envahit : et si l'emplacement que vous aviez prévu ne fonctionnait pas avec le nouvel éclairage tableau rénovation ? Et si vous deviez percer de nouveaux trous après avoir repeint ? Cette incertitude vous fait hésiter sur chaque décision.
Vous avez probablement essayé de chercher des conseils sur internet, demandé à votre électricien qui vous a répondu "on verra bien", ou tenté de visualiser le résultat... mais rien ne vous rassure vraiment sur le choix de l'éclairage intégré pour tableaux.
Rassurez-vous, c'est parfaitement normal ! La plupart des gens pensent à l'éclairage des œuvres d'art après les travaux, alors que c'est justement LE moment idéal pour tout prévoir intelligemment, sans complications ni surcoûts.
À la fin de cet article, vous saurez exactement comment intégrer l'éclairage optimal pour vos futurs tableaux pendant vos travaux, et vous visualiserez votre intérieur transformé avec une mise en valeur digne d'une galerie d'art.
Pourquoi l'éclairage de vos tableaux peut-il transformer votre rénovation en chef-d'œuvre ?
Imaginez : vous finissez vos travaux, accrochez enfin votre tableau tant attendu... et là, déception. Dans cette lumière, il paraît terne, ses couleurs semblent éteintes. C'est comme acheter une voiture de sport pour rouler dans un tunnel : le potentiel est là, mais impossible de le révéler ! Vous venez de rater l'opportunité de créer cette ambiance galerie d'art dont vous rêviez.
💡 Témoignage client : "Nous avions investi dans une œuvre d'art contemporain à 2 500€. Une fois accrochée dans notre salon rénové, elle disparaissait complètement. Nous avons dû refaire passer l'électricien pour installer des spots dédiés - 800€ de plus et des retouches peinture. Si seulement nous avions su..."
💬 Conversation avec un expert déco
La règle d'or de l'éclairage artistique : Un tableau bien éclairé devient le point focal naturel de votre pièce, comme un feu de cheminée attire tous les regards. En intégrant cet éclairage pendant vos travaux, vous obtenez un résultat professionnel en 3 semaines au lieu de subir des années de frustration.
Ce qui se passe vraiment quand votre éclairage tableau échoue
Vous vous reconnaissez peut-être dans ces situations : vous allumez le plafonnier et votre tableau perd toute sa profondeur, vous tentez une lampe d'appoint mais elle crée des reflets gênants sur la toile, ou encore vous regardez votre œuvre le soir et elle semble complètement différente de la journée.
En réalité, ce n'est pas votre tableau qui pose problème, ni votre goût artistique. C'est que 95% des éclairages résidentiels sont conçus pour les activités quotidiennes, pas pour révéler les nuances subtiles d'une œuvre d'art.
C'est comme essayer de lire un livre avec une lampe de poche : techniquement possible, mais vous passez à côté de toute la richesse du contenu.
La première cause cachée : l'angle d'éclairage inadapté
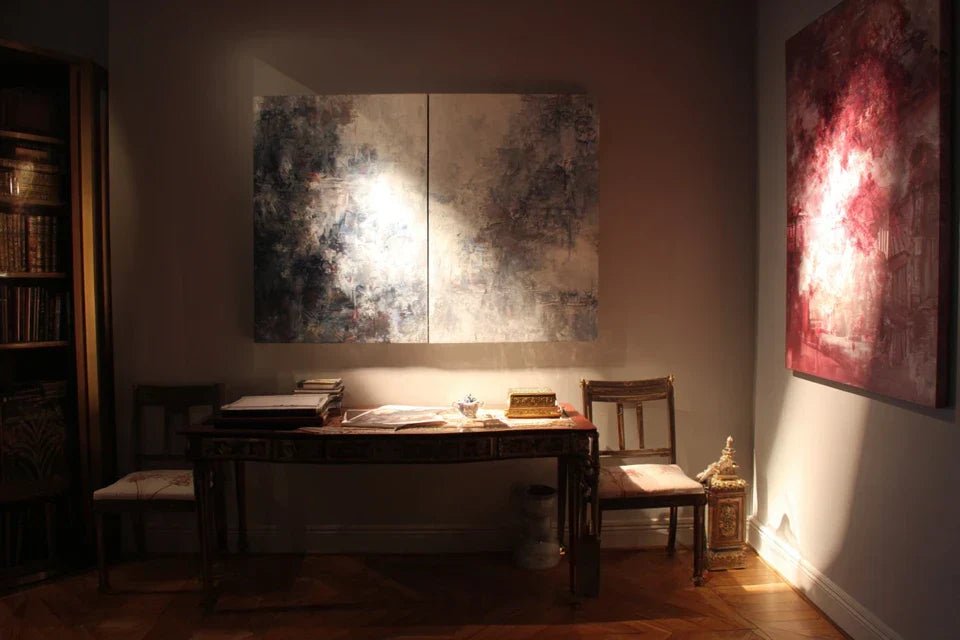
Contrairement à ce que beaucoup pensent, éclairer un tableau frontalement est la pire chose à faire. Cela crée des reflets et aplatit complètement les reliefs de la peinture. La réalité ? Il faut un éclairage oblique à 30 degrés, comme le soleil du matin qui révèle la texture d'un paysage.
Imaginez que vous photographiez quelqu'un : vous ne pointez jamais le flash directement sur son visage, vous créez une lumière douce et orientée qui sculpte les traits. C'est exactement le même principe pour vos tableaux.
Cette mauvaise inclinaison vous fait perdre 60% de l'impact visuel de votre œuvre. Vous regardez votre investissement artistique sans jamais voir sa vraie beauté. En corrigeant simplement cet angle pendant vos travaux, vous révélez instantanément toute la magie cachée de vos tableaux.
🔍 Test immédiat : Prenez une lampe de bureau et éclairez un tableau sous différents angles. Vous verrez immédiatement la différence spectaculaire entre un éclairage direct (terne) et oblique (vivant). 30 secondes pour comprendre pourquoi vos tableaux ne vous enchantent pas !
L'erreur fatale de température de couleur
Beaucoup installent des ampoules LED blanches froides partout, pensant que "plus c'est blanc, mieux c'est". Grave erreur ! Cette lumière froide dénature complètement les couleurs chaudes d'un tableau, comme regarder un coucher de soleil à travers des lunettes bleues.
Les galeries d'art professionnelles utilisent exclusivement des lumières chaudes (2700K-3000K) qui respectent les intentions de l'artiste. C'est la différence entre voir une photo sur un écran mal calibré et la découvrir imprimée par un professionnel.
Avec la mauvaise température, vous vivez avec une version déformée de votre tableau au quotidien. Vos invités ne voient jamais ce qui vous a fait craquer lors de l'achat. En choisissant les bonnes ampoules dès la rénovation, vous garantissez que chaque nuance soit respectée.
Le piège de l'intensité lumineuse mal dosée
Voici ce que personne ne vous dit : un tableau a besoin de 3 fois plus de lumière que le reste de la pièce pour être mis en valeur, mais cette lumière doit être douce et uniforme. Beaucoup pensent qu'un spot puissant suffit, créant un effet "projecteur de prison" peu flatteur.
Observez votre tableau à différents moments : si certaines zones disparaissent dans l'ombre tandis que d'autres sont éblouissantes, c'est le signe d'un dosage raté. Vous devriez voir chaque détail clairement, sans aucune zone de contraste violent.
Cet éclairage mal dosé vous fait passer des soirées frustrantes où vous ne profitez jamais pleinement de vos œuvres. C'est comme avoir une chaîne hi-fi haut de gamme avec le volume toujours trop fort ou trop faible.
🎯 Les 3 signaux d'un éclairage tableau raté :
- Votre regard évite naturellement le tableau le soir : Votre cerveau rejette inconsciemment ce qui n'est pas agréable à regarder, comme quand on évite un miroir mal éclairé
- Les couleurs semblent "sales" ou ternes : Signe d'une température de couleur inadaptée qui dénature l'œuvre originale
- Vous devez plisser les yeux pour voir les détails : Preuve que l'intensité est mal calibrée, trop faible ou mal répartie
Le facteur déclencheur : l'intégration architecturale
Ce qui fait vraiment la différence, c'est de penser éclairage ET architecture ensemble pendant les travaux. Comme un architecte qui intègre les escaliers dans sa conception plutôt que de les ajouter après coup, l'éclairage de vos tableaux doit faire partie intégrante de votre rénovation. Cela vous permet de dissimuler les câbles, d'optimiser les emplacements et de créer cette harmonie visuelle parfaite que vous ressentez dans les lieux d'exception.
La règle des 3 couches lumineuses : Éclairage général + éclairage fonctionnel + éclairage d'accentuation pour tableaux. Comme un plat gastronomique a sa base, ses ingrédients principaux et sa touche finale, cette hiérarchie crée une ambiance sophistiquée. Vérifiez-le en observant n'importe quel restaurant étoilé !
| ❌ Approche classique | ✅ Approche professionnelle | 💡 Pourquoi ça marche | 🎯 Bénéfice immédiat |
|---|---|---|---|
| Ajouter des spots après travaux | Intégrer l'éclairage pendant rénovation | Câblage invisible et emplacements optimaux | Résultat galerie d'art sans trace de bricolage |
| Éclairer frontalement le tableau | Incliner à 30° pour éviter les reflets | Révèle la texture sans éblouir | Chaque détail visible sous son meilleur jour |
| LED blanc froid partout | Température chaude dédiée (2700K-3000K) | Respecte les couleurs originales de l'œuvre | Impact émotionnel maximum preserved |
| Un seul spot puissant | Éclairage doux et uniforme calibré | Confort visuel et mise en valeur subtile | Plaisir de contempler sans fatigue oculaire |
La méthode en 3 étapes pour intégrer parfaitement l'éclairage de vos tableaux
Respirez, vous y êtes presque ! Cette méthode suit la logique naturelle de rénovation : d'abord l'infrastructure (comme planter les racines), puis l'installation (faire pousser l'arbre), enfin l'optimisation (récolter les fruits). En suivant cet ordre, vous obtenez un résultat harmonieux et durable sans stress ni mauvaises surprises.
🎯 Vue d'ensemble de la progression : Planification électrique (infrastructure invisible) → Installation technique (éclairage fonctionnel) → Calibrage artistique (révélation de vos œuvres). Chaque étape prépare la suivante, comme construire une maison : fondations solides, structure stable, décoration finale parfaite.
Étape 1 : Planifier l'infrastructure électrique (pendant gros œuvre)
Commencer par cette étape, c'est comme planter les bonnes graines au bon endroit : tout le reste en découle naturellement. Une fois vos murs refermés, il sera trop tard pour optimiser les emplacements sans casser votre belle rénovation. Cette phase vous donnera la satisfaction de savoir que tout est prêt sous vos nouveaux revêtements.
🔌 Ce dont vous avez besoin côté électricité
- Points lumineux dédiés sur circuits séparés : Pas de rallonges ni multiprises visibles, comme dans les installations muséales professionnelles. Demandez à votre électricien des sorties discrètes à 2,20m du sol. Évitez les raccordements "au plus simple" qui limiteront vos options plus tard.
- Variateurs compatibles LED de qualité : Pour ajuster l'intensité selon l'ambiance souhaitée, comme un dimmer de théâtre. Vérifiez la compatibilité avec vos futures ampoules LED spécialisées. Les variateurs d'entrée de gamme créent des scintillements fatiguants.
- Prévisions pour rails électrifiés (optionnel) : Si vous changez souvent vos tableaux de place, ces systèmes modulaires vous offrent une flexibilité totale. C'est l'assurance de pouvoir réorganiser votre galerie personnelle selon vos envies.
Maintenant, passons à la mise en œuvre concrète
⚡ Comment réussir cette planification électrique
Définir les emplacements avec votre électricien : Marquez au sol l'emplacement précis de vos futurs tableaux avec du scotch coloré. Mesurez 30cm de chaque côté pour les spots latéraux. Cette visualisation évite 90% des erreurs de positionnement qui vous hanteraient pendant des années.
⏱️ Temps : 30 minutes | ✅ Réussi quand : Vous visualisez parfaitement le rendu final | ⚠️ Attention : Beaucoup oublient la hauteur d'accrochage variable selon la taille des œuvres
Prévoir les alimentations et commandes : Installez un interrupteur dédié près de l'entrée principale pour l'éclairage artistique. Comme une console de DJ, vous contrôlerez l'ambiance de votre intérieur d'un geste. Évitez de mélanger avec l'éclairage fonctionnel qui créerait des allumages/extinctions frustrantes.
⏱️ Temps : 15 minutes de planification | ✅ Réussi quand : Logique d'utilisation fluide et intuitive | ⚠️ Attention : L'interrupteur mal placé transforme votre éclairage d'art en contrainte quotidienne
Valider les puissances et compatibilités : Calculez 20 watts par mètre carré de tableau pour un éclairage optimal. Vérifiez que votre installation supporte cette charge supplémentaire. C'est comme s'assurer que votre cuisine peut alimenter tous vos électroménagers avant de les acheter.
⏱️ Temps : 10 minutes de calculs | ✅ Réussi quand : Marge de sécurité électrique confirmée | ⚠️ Attention : Sous-estimer la puissance vous obligera à des compromis sur l'intensité lumineuse
✅ Validation de l'étape 1 : Vos points électriques sont positionnés idéalement, vos commandes sont logiques et accessibles, vos circuits supportent la charge prévue. Si vous ressentez cette satisfaction du travail bien préparé, vous pouvez attaquer sereinement la suite. En cas de doute, mieux vaut reprendre 2 jours que regretter 10 ans !
NOS PRODUITS RECOMMANDÉS
Étape 2 : Installer le système d'éclairage (pendant finitions)
Cette étape marque le passage de l'invisible au visible : vos prévisions deviennent réalité. C'est plus gratifiant car vous voyez enfin le potentiel se dessiner. L'effet boule de neige commence : chaque spot installé vous donne envie de voir le résultat final avec vos tableaux.
💡 Votre matériel d'éclairage professionnel
- Spots LED orientables 2700K-3000K : Choisissez des modèles avec angle de faisceau réglable (15° à 40°), comme des projecteurs de théâtre miniatures. Privilégiez les marques spécialisées en éclairage muséal plutôt que les spots de grande surface qui dénaturent les couleurs.
- Transformateurs et drivers de qualité : Ces cerveaux électroniques garantissent une lumière stable sans scintillement. Comme le moteur d'une voiture, leur qualité détermine la longévité et les performances. Investissez dans du matériel professionnel pour éviter les pannes prématurées.
- Fixations discrètes ajustables : Privilégiez les systèmes qui s'effacent visuellement tout en offrant une flexibilité maximale. L'objectif : voir la lumière, jamais la source. C'est la signature d'un éclairage réussi.
🔧 Installation technique réussie
Positionner et fixer les spots : Respectez la règle des 30 degrés d'inclinaison et la distance de 1,5 fois la largeur du tableau. C'est de la géométrie pure : trop proche crée des ombres, trop loin disperse inutilement la lumière. Testez avec une lampe de poche avant fixation définitive.
⏱️ Temps : 45 minutes par spot | ✅ Réussi quand : Éclairage uniforme sans zone d'ombre | ⚠️ Attention : La fixation définitive sans test préalable mène souvent à des repositionnements coûteux
Raccorder et tester les circuits : Vérifiez chaque point individuellement puis l'ensemble du système. Comme un chef d'orchestre teste chaque instrument avant le concert final. Validez la compatibilité avec vos variateurs et l'absence de bourdonnements parasites.
⏱️ Temps : 20 minutes par circuit | ✅ Réussi quand : Fonctionnement silencieux et fluide | ⚠️ Attention : Les incompatibilités électroniques se révèlent souvent après quelques semaines d'usage
Étape 3 : Calibrer et optimiser (après pose des tableaux)
Vous atteignez maintenant le niveau d'excellence qui distingue votre intérieur de celui de vos amis. Cette étape finale révèle la différence entre "ça éclaire" et "ça sublime". Visualisez-vous dans votre salon, regardant vos tableaux révélés dans toute leur splendeur, avec cette fierté du travail accompli parfaitement.
🎨 Le calibrage artistique de votre éclairage
Ajuster l'intensité selon chaque œuvre : Chaque tableau a sa personnalité lumineuse optimale. Les œuvres sombres réclament plus d'intensité, les couleurs vives supportent un éclairage plus doux. C'est comme régler le volume de musique selon le style : du jazz feutré ou du rock puissant.
⏱️ Temps : 15 minutes par tableau | ✅ Réussi quand : Chaque couleur s'exprime parfaitement | ⚠️ Attention : L'éclairage parfait le jour peut être trop intense le soir avec l'éclairage ambiant
Créer des ambiances modulables : Programmez 3 niveaux d'intensité : jour (100%), soirée (70%), intimiste (40%). Comme les modes d'un appareil photo, chaque réglage révèle une facette différente de vos œuvres selon le moment et votre humeur.
⏱️ Temps : 30 minutes de réglages | ✅ Réussi quand : Transition naturelle entre ambiances | ⚠️ Attention : Trop de niveaux complique l'usage quotidien au lieu de le simplifier
La règle de progression maîtrisée : Vous passez à l'étape suivante quand l'étape actuelle vous semble naturelle et que vous visualisez clairement le résultat final. Patience dans l'exécution, ambition dans la vision : c'est l'équilibre des grands projets réussis.
Félicitations, vous maîtrisez maintenant les subtilités que connaissent seulement les professionnels de l'art ! Ces détails font la différence entre un amateur qui éclaire et un connaisseur qui révèle. Vos invités remarqueront immédiatement cette signature d'excellence sans forcément comprendre pourquoi votre intérieur les impressionne autant.
🏆 Astuce de galeriste professionnel : Installez un interrupteur temporisé sur votre éclairage artistique. Comme dans les musées, vos tableaux s'illuminent à votre arrivée puis s'éteignent automatiquement, préservant les œuvres tout en créant un effet "révélation" saisissant à chaque retour chez vous.
🤔 Question fréquente de nos lecteurs
"Dois-je vraiment prévoir l'éclairage si je ne sais pas encore quels tableaux j'achèterai ?"
C'est une excellente question qui montre que vous réfléchissez intelligemment ! Rassurez-vous : prévoir l'infrastructure est justement ce qui vous donne toute liberté pour vos futurs coups de cœur artistiques. C'est comme installer une cuisine équipée avant de savoir quels plats vous cuisinerez : l'important est d'avoir les bonnes bases. Avec un système bien conçu, vous pourrez adapter l'éclairage à n'importe quelle œuvre en quelques minutes de réglages, au lieu de subir des mois de travaux plus tard.
💡 Conseil pratique immédiat : Créez un tableau de bord visuel avec des photos d'œuvres qui vous plaisent (même si vous ne les achèterez pas). Cela aide votre électricien à comprendre votre style et adapter l'installation. Vous aurez immédiatement une vision plus claire de vos besoins !
Les pièges coûteux à éviter absolument dans votre projet
Attention, nous arrivons aux erreurs qui transforment un beau projet en cauchemar. Ces pièges sont classiques mais totalement évitables quand on les connaît. Je vous les révèle pour vous protéger des regrets et des surcoûts qui gâchent le plaisir de votre rénovation réussie.
- ⚠️ Installer l'éclairage après la peinture : C'est tentant de "voir le rendu final" avant de décider, mais vous vous retrouverez avec des perçages dans vos murs fraîchement peints, des retouches visibles et 300€ de main d'œuvre supplémentaire. La bonne méthode : prévoir pendant les travaux, ajuster après installation des tableaux.
- ⚠️ Copier l'éclairage de votre salon sur toutes les pièces : Chaque espace a ses contraintes : la salle à manger nécessite moins d'intensité (ambiance conviviale), la chambre demande plus de douceur (repos), l'entrée plus de punch (première impression). Adaptez chaque installation à sa fonction spécifique.
- ⚠️ Négliger la hauteur sous plafond : Un plafond bas avec spots puissants crée un effet "projecteur d'interrogatoire" désagréable. Avec moins de 2,50m, privilégiez l'éclairage indirect ou les appliques murales orientables. Mesurez avant de choisir vos équipements.
- ⚠️ Choisir des variateurs incompatibles avec les LED : Beaucoup achètent des variateurs classiques qui font scintiller les ampoules LED, créant une fatigue oculaire et abîmant les équipements. Vérifiez systématiquement la compatibilité ou investissez dans des variateurs spécialisés LED.
- ⚠️ Oublier l'évolutivité de vos goûts artistiques : Prévoir un éclairage figé pour un seul style de tableau vous limitera dans vos futurs achats d'art. Intégrez des systèmes modulables qui s'adaptent à vos découvertes artistiques futures. Votre passion pour l'art va grandir avec votre maison !
🛡️ Votre check-list de sécurité avant validation : Testez chaque spot individuellement, vérifiez l'absence de scintillement à tous les niveaux d'intensité, contrôlez que les commandes sont intuitives pour toute la famille, confirmez l'harmonie avec l'éclairage général. Signaux d'alarme : bourdonnements électriques, zones d'ombre inattendues, reflets gênants sur écrans ou miroirs.
🎁 Offre spéciale lecteurs
Parce que vous avez pris le temps de vous informer, profitez de 10% de réduction sur votre première commande :
⏰ Valable 72h après lecture • Applicable sur tous nos produits
🔧 Vos questions techniques sur l'éclairage de tableaux pendant rénovation
Comptez 150-300€ par point lumineux (matériel + pose), soit environ 500-800€ pour éclairer 3-4 tableaux dans un salon. C'est 40% moins cher qu'une installation après travaux ! Optimisez en groupant les commandes matériel et en planifiant pendant les gros œuvre. Exemple concret : éclairage complet d'un salon de 35m² avec 4 œuvres = 1200€ au lieu de 2000€ en rattrapage.
Un professionnel expérimenté maîtrise les bases en 30 minutes d'explication avec vos références visuelles. Préparez 3-4 photos de l'ambiance souhaitée, mesurez vos futurs emplacements et il adaptera ses propositions techniques. Rassurez-vous : la plupart des électriciens adorent ces projets plus créatifs que les installations standard !
Absolument ! Un bon système d'éclairage modulable s'adapte à 90% des styles artistiques. Seules les ampoules et l'intensité changent (20€ de matériel vs 500€ de nouveaux travaux). De l'art contemporain aux toiles classiques, de la photo noir et blanc aux œuvres colorées : votre infrastructure évoluera avec vos goûts. C'est l'investissement le plus rentable de votre rénovation artistique !
Montrez-lui des photos d'installations réussies et expliquez que c'est un projet valorisant pour son portfolio. Proposez-lui de découvrir les fournisseurs spécialisés en éclairage muséal : beaucoup d'électriciens découvrent ce marché avec plaisir. Si résistance persistante, changez de professionnel : un projet artistique mérite un artisan qui partage votre vision !
Encore mieux ! Les appartements anciens ont souvent plus de cachet pour mettre en valeur l'art. Utilisez les moulures existantes pour dissimuler les câbles, exploitez la hauteur sous plafond pour l'éclairage indirect, intégrez les spots dans les éléments décoratifs d'époque. Contrainte technique = opportunité créative dans 80% des cas !
🌟 Votre transformation en collectionneur d'art éclairé
Dans quelques semaines, vous entrerez chez vous et vos tableaux vous accueilleront dans une lumière parfaite, révélant chaque nuance comme dans une galerie d'art privée. Vos invités s'arrêteront naturellement devant vos œuvres, attirés par cette mise en valeur professionnelle. Vous ressentirez cette fierté discrète du travail parfaitement accompli, sachant que vous avez créé un écrin digne de vos futurs coups de cœur artistiques.
Cette maîtrise de l'éclairage artistique va bien au-delà de vos tableaux : vous avez développé un œil pour la lumière et l'ambiance qui transformera votre rapport à tous vos espaces de vie. Cette confiance nouvellement acquise vous ouvrira naturellement vers de nouveaux horizons artistiques et décoratifs.
Le plus dur était de comprendre les enjeux et la méthode - c'est fait ! Maintenant, prenez votre mètre et commencez à marquer vos emplacements dès aujourd'hui. Votre future galerie personnelle n'attend que cette première action concrète pour prendre vie.
🚀 Votre premier geste de collectionneur éclairé : Vous avez tous les outils en main pour créer cette ambiance d'exception que vous méritez. Chaque jour d'attente vous prive d'un plaisir quotidien immense. Votre intérieur transformé en galerie d'art personnelle, c'est le cadeau le plus durable que vous puissiez vous offrir !