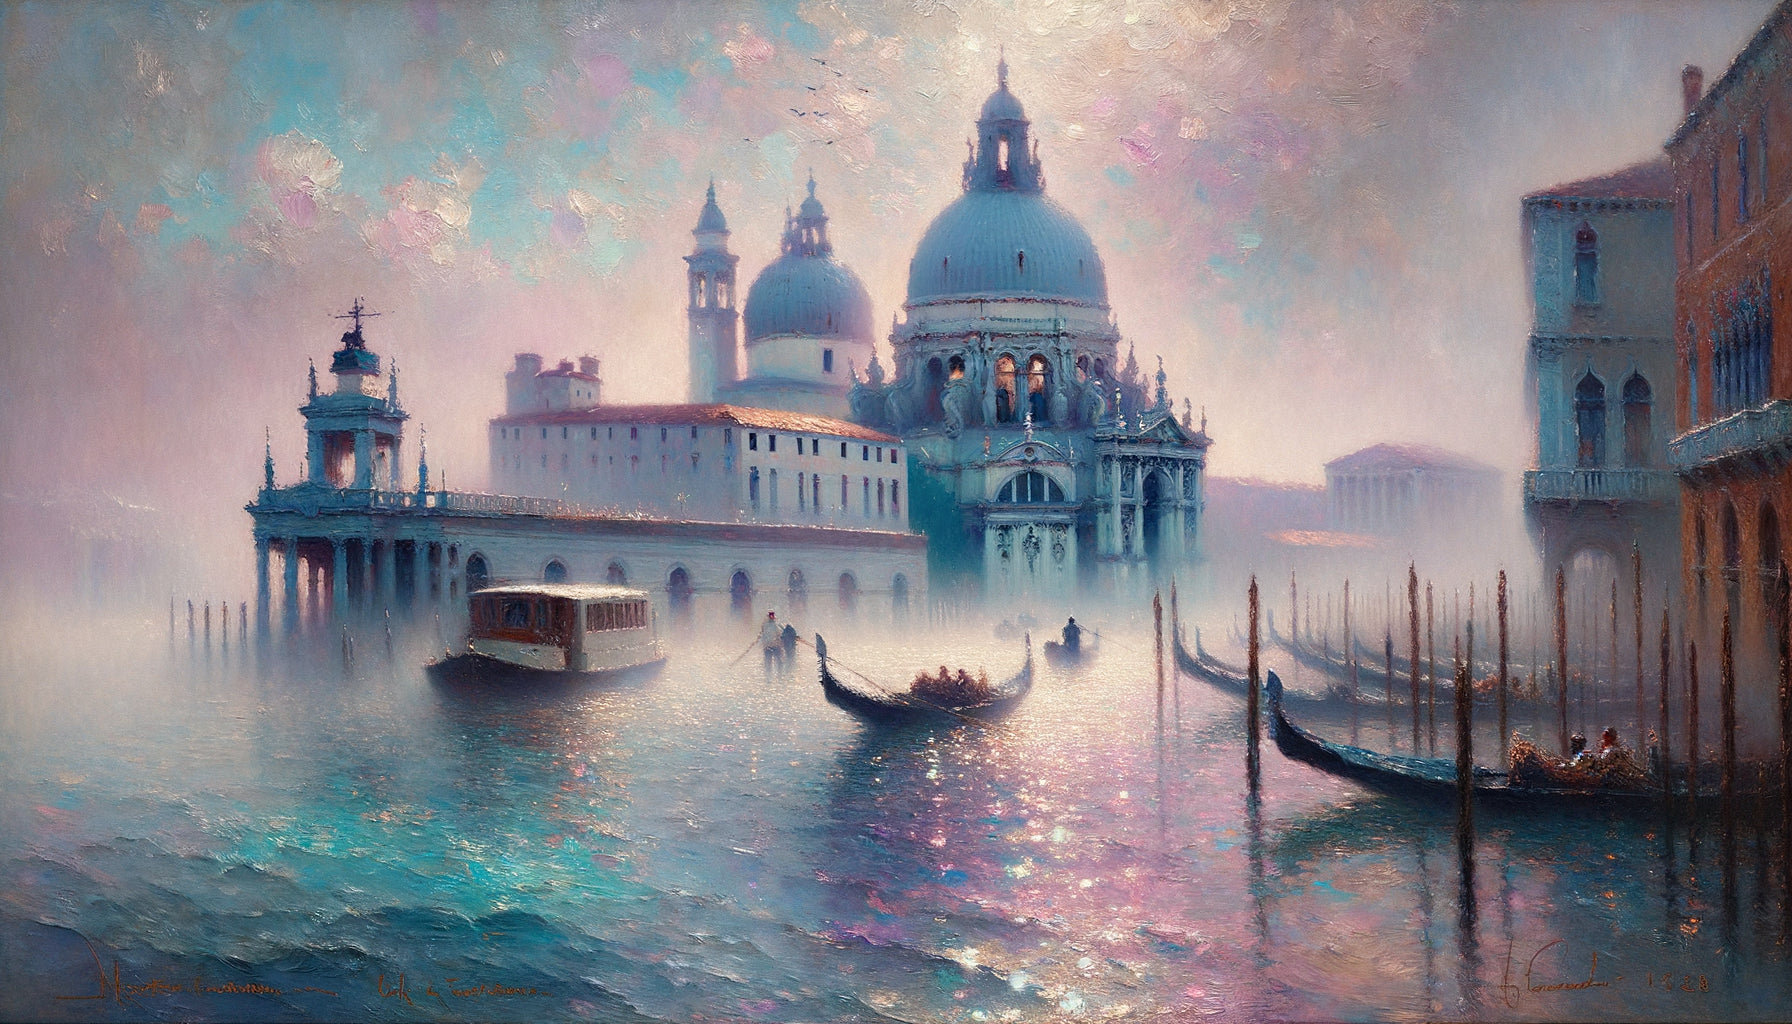
I spent fifteen years by Lake Geneva, my brush trembling before the water that dances. Each wave transforms light into a thousand fleeting flashes, each ripple recomposes the landscape into a liquid kaleidoscope. Painting reflections on a choppy surface is about capturing the elusive, translating movement into color, transforming chaos into harmony.
Here's what mastering aquatic reflections brings: an ability to create emotional depth in your paintings, an intimate understanding of how light behaves, and that masterful touch that distinguishes a mundane work from a hypnotic composition. The Impressionists understood this: water is never just a mirror; it’s a living surface that breathes.
The problem? When faced with moving water, most painters freeze their gaze. They try to copy what they see, to fix every detail, and end up with a confused mass of disordered brushstrokes. The water becomes muddy, the reflections lose their magic, and the canvas exudes frustration rather than fluidity.
Rest assured, this difficulty is universal. I've seen experienced watercolorists surrender before a simple stream, accomplished portrait artists drown in their attempts to render a river. Yet, there are proven methods, passed down from Turner to contemporary landscape painters, that transform this apparent complexity into a manageable process.
I’m going to reveal the technique that I’ve taught in my studio for ten years, the one that has enabled my students to move from creative paralysis to absolute confidence when facing water surfaces. An approach built on intelligent observation, strategic simplification, and the boldness of spontaneous gesture.
The golden rule: observe the rhythm before the form
Even before touching your palette, learn to see water as a musical score. Each wave has a tempo, each eddy follows a dominant direction. During my residency in Etretat, I spent hours simply watching the sea surge against the cliffs, without painting. This time was not wasted: I was decoding the visual grammar of moving water.
Reflections on a choppy surface are never anarchic. They obey three fundamental principles: vertical stretching (reflections lengthen in the direction of undulations), rhythmic fragmentation (waves break images into predictable segments), and tonal inversion (clear areas of the sky are reflected slightly darker, shadows slightly brighter).
Settle down facing your subject and time the cycle of the waves. On a windy lake, this cycle lasts about 3 to 5 seconds. On a river, look for areas where the current creates repetitive patterns. This initial observation will transform your approach: you won't paint isolated details, but a coherent pattern that repeats.
The visual memory exercise
Here is an exercise that I still practice today: look at the water for exactly ten seconds, then close your eyes and try to visualize what you just saw. What shapes dominated? Which colors stood out the most? This mental gymnastics trains your brain to synthesize rather than copy, a key skill for painting complex reflections.
The three-layer technique: structure, movement, accidents
My method relies on progressive construction in three distinct steps. Too many painters try to solve everything simultaneously, creating visual confusion. Layering allows you to manage complexity without losing spontaneity.
First layer - The invisible architecture: On your prepared canvas, establish the large tonal masses with a diluted wash. Identify where the darkest areas are located (usually reflections of trees or rocks) and the lightest areas (reflections of the sky). Work with wide flat brushes, following the horizontal direction of the water. This foundation should be readable even from afar, with only three or four distinct values.
I often use a mixture of Prussian blue and burnt sienna for this step, creating a neutral base that does not interfere with the final colors. Let it dry completely or work on another part of the canvas. Patience at this stage guarantees later clarity.
Second layer - The choreography of ripples: This is where the magic happens. With paint of a creamy consistency, apply horizontal brushstrokes that follow the lines of energy of the water. Do not try to render each wave: capture the overall movement. Your strokes should be decisive, applied in one gesture without retouching.
Vary the pressure and length of your strokes. Areas close to the shore require shorter, fragmented touches, while the water in the distance is translated into longer, finer lines. I alternate between flat brushes and spatulas to create this natural variation. The key: let the underlying layer breathe. The gaps between your brushstrokes create the optical vibration that evokes movement.
The secret of transitions
Reflections never end abruptly. Where a reflected form meets a wave, soften the transition slightly with a dry brush dragged horizontally. This technique, which I learned while studying Sorolla, creates the illusion of surfaces that constantly merge and separate.
Third layer - Light accents: With almost pure paint, add the bright highlights that bring agitated water to life. These touches should represent less than 10% of your total surface area. Too many artists oversaturate their reflections with white dots, killing subtlety.
Focus these accents on the crests of the waves, where light strikes directly, and on areas where the angle of reflection is optimal. Vary the color temperature: a white slightly tinted with cadmium yellow for sunlit reflections, a bluish white for shaded areas. This chromatic nuance transforms a correct technique into a poetic interpretation.

When water refuses to cooperate: adapting your method to the context
Each body of water has its own personality. The stormy ocean requires a radically different approach than the peaceful lake troubled by a breeze. After painting hundreds of water surfaces, I have developed specific protocols for each situation.
For very choppy water (wild sea, mountain torrent), abandon all hope of precise definition. Work with palette knives and stiff brushes, layering gestural masses. Reflections become almost abstract, suggested by stripes of pure color. Monet understood this in his Étretat paintings: the less you show, the more the viewer feels the fury of the water.
For moderately choppy water (windy lake, fast river), this is the ideal terrain for the three-layer method. You can still discern reflected shapes while maintaining the dynamism of movement. Alternate between definition and suggestion, creating a balance that keeps the eye moving across the canvas.
For slightly troubled water (gentle undulations), incorporate more detail into the reflections. Shapes remain recognizable but stretched, as seen in a distorting mirror. This is the time to use subtle glazes to create transparency, layering semi-opaque layers that hint at what lies beneath.
The trap of photography
Many artists work from photos. This is a fatal mistake for aquatic reflections. The camera freezes an instant impossible to perceive with the naked eye, creating configurations that seem artificial once painted. If you must use a photographic reference, take a series of shots and synthesize the overall impression rather than copying a single image.
The pigments that make light dance
Not all paints are created equal when it comes to aquatic reflections. Some pigments have a natural translucency that mimics the quality of water, while others have an opacity that creates the necessary contrasts.
My palette for aquatic surfaces always includes: cerulean blue (for soft sky reflections), ultramarine blue (for dark depths), emerald green or Hooker’s green (for vegetation reflections), and titanium white mixed with a touch of Naples yellow for warm, bright highlights.
The secret lies in partial mixes. Never fully mix your colors on the palette. Leave marbling, veins of distinct pigments. When you apply this semi-mixed paint to the canvas, it automatically creates the subtle chromatic variations that characterize real water. This is a technique I observed by analyzing Sisley’s paintings under a microscope: what appears homogeneous from afar reveals an incredible richness up close.
For dark and troubled water, I add bladder green or Van Dyck brown, creating these mysterious depths where the eye gets lost. For sunny scenes, a touch of Indian yellow warms the greens and creates that golden luminosity of summer afternoons.

The fatal mistake that kills your reflections (and how to avoid it)
After fifteen years of teaching, I have identified the recurring error that sabotages 80% of attempts: painting reflections with the same precision as the reflected objects. It's counterintuitive, but reflections should be treated with less definition than their sources.
When you paint a tree at the edge of the water, you can render each branch meticulously. Its reflection, even on relatively calm water, must be suggested with looser brushstrokes, softer outlines. Blur is not a weakness, it's the signature of water. The more agitated the surface, the more this difference in treatment should be marked.
I teach my students the test of distance: step back three meters from your canvas. If your reflections look like a mirror image of what’s above, they are too defined. They must evoke, suggest, vibrate, never duplicate.
Another subtle mistake: using exactly the same colors for the object and its reflection. Water always adds its own tint, whether it's the blue of the sky that it reflects simultaneously, the algae that tint its depth, or the sediments that modify its transparency. Slightly cool warm colors in reflections, slightly warm cold colors. This chromatic modulation instantly creates credibility.
The dry brush technique for the final ripples
Here's a trick that transforms acceptable water into a convincing surface: once your paint is almost dry (slightly sticky to the touch), take a fanned dry brush and drag it horizontally over the reflection areas. This action creates micro-striations that perfectly mimic the small surface ripples. Use this technique sparingly, on only 20 to 30% of your water surface, where grazing light accentuates the texture of the water.
Let the water dance on your walls
Discover our exclusive collection of nature paintings that capture the poetry of aquatic reflections and transform each room into a window on living landscapes.
From the studio to your practice: start today
Theory is only worth it through practice. Here's how I recommend approaching your first complex water reflection canvas.
Start small. Maximum 30x40 cm format. Large surfaces amplify errors and discourage. On a modest format, you can experiment without the anxiety of investment.
Choose an accessible subject. Forget the ocean storm for your first attempt. Opt for a pond with a few gentle ripples, where you can still distinguish the reflected shapes. Once this step is mastered, you will naturally progress to more turbulent surfaces.
Limit your palette. Three blues, two greens, one brown, and white. That's quite enough. An excess of colors creates chromatic confusion that kills the consistency of water. Impressionist masters worked with surprisingly restricted palettes.
Paint in two sessions. First session: the first two layers. Let dry completely, ideally 24 hours. Second session: final accents with a fresh eye. This break allows you to see your mistakes and avoid overworking the surface.
And above all, accept initial imperfection. My first attempt at painting reflections on Lake Geneva looked like a greenish soup. The twentieth began to capture something right. The fiftieth gave me my first real pride. It's a progressive learning that rewards perseverance.
Keep all your studies, even failed ones. When you compare them six months later, you will measure your progress tangibly. This visual documentation of your evolution is the best antidote to discouragement.
When technique meets emotion
Painting the reflections on a choppy water surface is never a simple technical exercise. It's a meditation on impermanence, a celebration of perpetual movement, an attempt to freeze what naturally refuses to be frozen.
The afternoons I spent by the water, brush in hand, taught me as much about myself as they did about painting. There’s something both humbling and exhilarating in this confrontation with a subject that doesn't wait for you, that changes constantly, that forces you to let go of absolute control.
Your reflections will never be photographically accurate. And it is precisely their strength. They will carry your interpretation, your sensitivity, your unique way of seeing the light dance. A painted reflection is always a disguised self-portrait, a revelation of how you perceive movement and transformation.
So next time you settle down facing a river, a lake, an ocean, don't seek to copy. Seek to dialogue. Let the water teach you its rhythm, then translate that rhythm into your own pictorial language. It is there that the method becomes art, and that technique fades behind emotion.
Frequently Asked Questions
Should I paint reflections before or after the rest of the landscape?
This is a question that all my beginner students ask, and the answer depends on your support and technique. Personally, I always work from back to front : sky, horizon line, then water with its reflections. This approach allows you to naturally harmonize colors between what is reflected and its reflection. If you paint trees or buildings by the water's edge first, you will already have the right shades on your palette for their reflections. However, for watercolor, the reverse order may be preferable because the light areas of the water must be preserved from the start. Experiment with both approaches on small studies to discover what corresponds to your natural process. There is no absolute rule, only what works for you and maintains the freshness of your gesture.
Can I paint convincing reflections working only from photos?
Yes, but with important precautions. Photography freezes a moment that the human eye never perceives in isolation. When we look at water, our brain synthesizes a succession of images into a global impression. A single photo often captures unusual wave configurations that will seem artificial once painted. My recommendation: take a series of 10 to 15 photos of the same subject at intervals of a few seconds, then use them collectively as reference. Observe the constants between these images: the dominant direction of undulations, the areas that consistently remain lighter or darker. It is these recurring elements that you must paint, not the accidents of a single moment. Ideally, supplement your photos with quick sketches made on site, even approximate ones. These visual notes capture the vivid impression that photography cannot seize. If you live far from water, work from photos but also study canvases by masters to understand how they simplify and stylize reflections. Over time, you will develop an intuition that compensates for the limitations of photographic reference.
How do I know when my reflections are finished and avoid overworking the surface?
This is probably the most difficult skill to acquire: knowing when to stop. I have ruined countless promising canvases by adding that famous extra brushstroke. Here's my protocol to avoid burnout: establish in advance a maximum number of passes on each area (usually three are enough). Once these passes have been made, put down your brushes and physically leave your studio for at least an hour. Upon returning, look at the canvas from across the room. If the reflections read correctly at a distance, they are finished, regardless of the imperfections you perceive up close. Water is inherently imprecise, blurry, elusive. This quality must be reflected in your painting. A reflection that is too polished, too worked, loses its aquatic character and becomes static. Remember this golden rule: an effective reflection always suggests more than it shows. If you can count each brushstroke individually on your water surface, you probably haven't overworked it. It’s when the touches become confused, when the colors muddy, that you have gone too far. Photograph your canvas at different stages to compare and learn to recognize that optimal moment when everything is said without being overloaded. With practice, you will develop an instinct that will whisper to you: now, stop.