

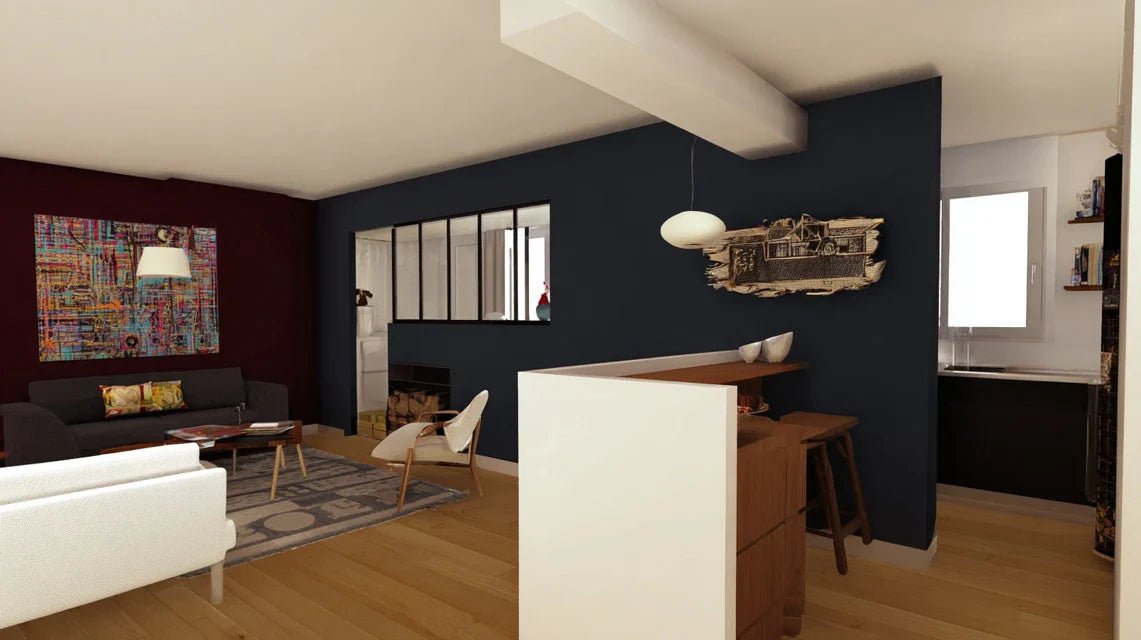
Looking at that bare wall between your kitchen and living room, sighing, since it could completely transform the atmosphere of your home, but you don't dare to take the plunge.
Every day, you pass in front of this empty space that separates your two main living areas, feeling that sense of incompleteness which frustrates you. This wall, yet strategic, remains desperately white and impersonal.
You may have already tried hanging something on it: a family photo too small to be noticed, a basic mirror that says nothing to anyone, or worse, nothing at all for fear of messing up.
This hesitation is perfectly normal - this transition wall is one of the most difficult to decorate since it must create a harmonious link between two different decorative universes. The problem isn't your lack of taste, it's the absence of method.
By the end of this article, you will know exactly how to choose and position the perfect artwork to transform this wall into a true decorative link, creating visual harmony between your kitchen and living room that you'll be proud of every day.
Why this transition wall deserves your immediate attention?
This wall between the kitchen and living room represents much more than a simple partition - it's the nerve center of your home, the one everyone sees first when entering. Neglecting this space is missing the opportunity to create decorative consistency that will unify your living spaces and impress your guests.
🏠 Customer testimonial: "Marie had a beautiful modern living room and a sleek kitchen, but the passage between them created an unpleasant visual break. By installing an abstract painting with warm tones on the dividing wall, she created a harmonious dialogue between her two spaces. Today, her guests consistently compliment the fluidity of her decor."
💬 Conversation with a decorating expert
The golden rule of the transition wall: It should tell a common story between your two spaces, as if it were a chapter linking two parts of the same book. The result? A fluid circulation and an immediate sense of harmony you will feel from the first week.
Finally understand why your wall remains problematic
You probably feel one of these three frustrations: a feeling that your spaces lack personality, the sensation of an unpleasant visual break between the kitchen and living room, or this constant hesitation when guests visit your home.
What is really happening is that your wall is experiencing a decorative identity conflict. It tries to satisfy two different atmospheres without a clear method, creating this unfinished impression that frustrates you daily.
Imagine a conversation between two people speaking different languages: without a translator, the message doesn't get across. Your wall needs this "translator" element to create harmonious dialogue.
The real reason: you are looking for harmony in the wrong place
Contrary to what we think, harmony does not come from similarity but from intelligent complementarity. You think you need to perfectly match your two spaces, instead of creating a visual bridge that enriches them mutually.
It's like conducting an orchestra: instruments play different notes, but follow the same score to create a unified melody. Your wall artwork must play this role of conductor.
This revelation will change your approach: instead of looking for something neutral that blends in, you will choose something characterized that unites. The impact on the atmosphere of your home will be immediate and striking.
🔍 Revelatory test: Look at your wall from your sofa, then from your worktop. If you feel two completely different atmospheres, it's proof that your wall needs a unifying element.
The error of poorly mastered proportions
Many think that a small painting is enough to dress a wall, but the reality is different: a transition wall requires presence to affirm its role as a link between two important spaces.
It's like choosing a bridge to connect two shores: a fragile walkway will never give the same confidence as a solid and well-proportioned structure. The artwork must have the stature of its mission.
As a result, your guests will finally notice the coherence of your decor and you will feel the satisfaction of living in an interior truly thought out.
The trap of excessive neutrality
You may have opted for beige or white tones, thinking that neutrality was safer. But a neutral transition wall becomes invisible, missing its goal of creating connection.
Imagine yourself in your living room in three months: every time you go to the kitchen, your gaze naturally falls on this artwork that makes you smile and reminds you why you love your home.
3 signs your wall needs attention:
- The eye automatically avoids it: Your guests avoid looking at this area, sign that the space lacks visual appeal and creates an uncomfortable void. Constant feeling of disconnect: You feel a break between the kitchen ambiance and living room, like two different houses. Hesitation about decor: You keep postponing decisions, evidence that you lack confidence in your overall vision.
The trigger: the effect of visual continuity
What really makes the difference is the effect of continuity created by the right artwork. Like a thread in a novel, it naturally guides the eye from one space to another, creating that magical feeling of instant harmony. You'll recognize it by that immediate impression that "everything finally fits" in your interior.
3-Second Rule: If when looking at your wall, you don’t immediately feel a positive emotion or a sense of harmony, it means the right element is missing. Test it now by positioning yourself in the center of your room.
| ❌ Classic approach | ✅ Modern approach | 💡 Why it works | 🎯 Immediate benefit |
|---|---|---|---|
| Seeking absolute neutrality | Creating a characterized visual bridge | Character unites better than blandness | Affirmed personality |
| Perfectly matching colors | Harmonizing ambiances | Harmony transcends exactitude | Natural fluidity |
| Minimizing for fear of overloading | Affirming with the right proportions | Well-dosed presence structures space | Controlled visual impact |
| Choosing by elimination | Choosing by attraction | Positive emotion guides better | Daily satisfaction |
The 3-Step Method to Successfully Decorate Your Transition Wall
Rest assured, transforming this wall is not complicated once you follow the right method. It's like building a house: solid foundations, clear structure, careful finishes. Each step prepares the next for a harmonious and lasting result that will provide you with immediate and lasting satisfaction.
🎯 Overview of your transformation: First analyze your two spaces to identify their common points, then choose the artwork that unites them with style, and finally master the hanging for a professional result. Result at each step: increasing clarity, strengthened confidence, final harmony.
Starting with this analysis is essential because it reveals the connecting threads you no longer see on a daily basis. It's like discovering the common melody in two different pieces - once identified, harmony becomes obvious and will naturally guide you to the perfect choice.
🔍 Elements to observe in each space
- Dominant color palette: Note the 3 main shades of each room, y including natural materials like wood or stone. Look for a color merchant or use a mobile app. Check that you capture warm or cool nuances, as this will determine the emotional impact of your future artwork.
- Material style: Observe whether your spaces tend towards smooth modern, textured natural, or raw industrial. This material consistency guides the choice of support for your work. Recognize quality through careful finishes and overall harmony, as it will directly influence the perception of your decor.
- Overall light intensity: Assess whether your rooms are bathed in soft or contrasting light, natural or artificial. This is crucial because it determines which type of artwork will stand out best and create the desired visual effect.
Let's move on to analyzing your situation concretely
📋 Decorative audit in 4 steps
Photograph your two spaces: Take a photo of your kitchen from the living room, and vice versa, to capture the real transition. Photos reveal invisible imbalances and will allow you to maintain an objective vision throughout the process.
⏱️ Time: 15 minutes | ✅ Success when: You clearly see the break or continuity between your spaces | ⚠️ Attention: Avoid misleading angles - shoot from your usual living positions
List 5 common elements: Identify what already echoes between your rooms: a wood tone, a metal, a geometric shape. These common points are your allies in naturally creating continuity as without forcing harmony.
⏱️ Time: 10 minutes | ✅ Success when: You have found at least 3 true similarities | ⚠️ Attention: Don't force resemblances - better 3 true than 5 artificial
Define the desired atmosphere: Choose 3 adjectives that describe the atmosphere you want to create: cozy, modern, soothing, dynamic... This emotional compass will guide all your subsequent choices towards felt coherence.
⏱️ Time: 5 minutes | ✅ Success when: Your 3 words sound right with your personality | ⚠️ Attention: Avoid vague terms like "pretty" - be specific
✅ Validation of step 1: You must have a clear vision of your dominant colors, recurrent materials and target atmosphere. If one element still escapes you, resume observation - a solid foundation guarantees the success of the following steps.
OUR RECOMMENDED PRODUCTS
Step 2: Select the artwork that creates the perfect dialogue
Now that you know the DNA of your spaces, you can confidently choose the artwork that will enhance them. This is the most rewarding moment because your vision takes shape, and each criterion met reinforces the final impact of your decor.
🎨 Selection criteria for a transition artwork
- Proportional size: For a wall of 3-4m², aim for a minimum width of 60-80cm. The artwork should have enough presence to be seen from both spaces without dominating or disappearing. Measure your wall and apply the rule of 2/3 of available width, as this creates the optimal visual balance.
- Transition palette: Choose an artwork that picks up 2-3 colors from each space, creating a natural visual bridge. Check that the shades harmonize in natural and artificial light, as this is how you will live with your choice.
- Unifying style: Opt for an aesthetic that dialogues with your two ambiances without exactly copying them. The artwork should have its own personality while respecting the general spirit of your existing decor.
🛍️ Mastering the selection process
Pre-select a maximum of 3 artworks: Base your decision on your previously defined criteria to avoid choice paralysis. Each pre-selected artwork must respond to your three ambiance adjectives and pick up at least 2 colors from your common palette.
⏱️ Time: 45 minutes | ✅ Success when: Each artwork immediately makes you think of your two spaces | ⚠️ Attention: Resist isolated crushes - harmony is more important than raw emotion
Test virtually: Use your analysis photos to visualize each artwork in your real context. Print them in approximate format or use an augmented reality app to anticipate the final effect and avoid unpleasant surprises.
⏱️ Time: 30 minutes | ✅ Success when: One artwork stands out by its natural integration | ⚠️ Attention: Screens distort colors - validate in natural light
🎯 Validation of step 2: Your chosen artwork should make you want to see it every day and integrate naturally into your test photos. If you are still hesitating, it means that the analysis of step 1 deserves to be refined to clarify your selection criteria.
Step 3: Master hanging for a professional result
Hanging determines 80% of the final impact of your artwork. A perfect artwork poorly positioned loses all its effect, while expert placement reveals and amplifies beauty of your decorative choice. This final step crowns your approach with a result you will be proud of.
📐 Optimal hanging in 3 steps
Find the perfect height: Position the center of your artwork at 5.25ft (1.60m) from the floor, a standard height that suits perspectives from the kitchen and living room. This universal rule ensures optimal visual comfort from all positions in your living space.
⏱️ Time: 10 minutes | ✅ Success when: The artwork naturally falls within your field of vision from both spaces | ⚠️ Attention: Adjust according to your height and that of your family - comfort takes precedence over the rule
Center in relation to circulation: Align your artwork with the main axis of passage between your two rooms, not necessarily at the geometric center of the wall. This position naturally guides the eye and creates the desired fluidity in your daily movements.
⏱️ Time: 15 minutes | ✅ Success when: The artwork naturally accompanies your kitchen-living room journeys | ⚠️ Attention: Test from several angles before drilling - perfect symmetry is not always the solution
Secure with the right system: Use fixings adapted to the weight and wall: molly plugs for drywall, chemical anchors for concrete. A solid mounting preserves your investment and gives you peace of mind to enjoy it fully.
⏱️ Time: 20 minutes | ✅ Success when: The artwork doesn't move a millimeter when you test the stability | ⚠️ Attention: Oversize rather than undersize - safety has no price
Intelligent progression rule: Advance step by step without rushing - a week of observation between analysis and purchase, then a weekend for careful mounting. Patience in this approach guarantees a result that you will cherish for years.
Congratulations! You now master the subtleties of an expert that transform a simple wall into a sophisticated decorative element. This methodical approach gives you a decisive advantage over those who decorate randomly and live with disappointing results.
🎯 Professional decorator tip: Create dedicated lighting for your artwork with a directional wall sconce or a track spotlight. This professional lighting reveals nuances and textures, transforming your wall into a private gallery that will impress all your guests.
💭 "What if my choice doesn't please my spouse?"
"I'm afraid what I like won't match my partner's tastes..."
This concern is very understandable and shows that you care about family harmony. The beauty of the method you have just learned, is that it is based on the objective analysis of your existing decor, created together. The work chosen according to your common criteria has every chance of being appealing because it naturally extends your shared decorative choices. Furthermore, involve your partner in the pre-selection stage - two perspectives are better than one to validate the final harmony.
💡 Reassuring action: Organize a "validation session" where you present your 3 pre-selected works with your decorative harmony arguments. You will probably discover that you naturally agree on the choice that respects your common decorative DNA.
⚠️ The 5 mistakes that sabotage your decor project
After supporting hundreds of decoration projects, I have identified recurring pitfalls that ruin the most beautiful creative impulses. These errors are tempting because they seem logical, but avoiding these pitfalls will save you time, money and frustration.
- ⏰ Rushing into the first crush: Immediate emotion leads to impulsive purchases, but your work must live with you for years. A failed acquisition creates daily frustration and is expensive to correct. Always take 48 hours to reflect - the truly good choice stands the test of time, and it's a healthy reflex that differentiates the amateur from the connoisseur. 📏 Underestimating the importance of proportions: "Smaller is safer" seems reasonable, but a work that is too small disappears and fails its mission of transition. Result: persistent feeling of incompleteness and wasted investment. Respect the rule of 2/3 of available width - your space deserves a work to match. 💡 Neglecting existing lighting: Choosing without taking into account natural and artificial light transforms colors and can ruin the desired effect. A beautiful work in store may appear dull at home. Always observe your colors in your actual lighting conditions, as this is the environment you will live with your choice. 🔨 Improvising the fixing: "I'll see on site" often leads to unstable solutions that endanger your investment and spoil the aesthetics. A professional hanging secures and enhances your work. Prepare your fixing system in advance - this anticipation makes the difference between amateur and expert. 🎨 Copying a decor seen elsewhere: Being inspired is good, plagiarizing is risky as your context is unique. A "catalog" decor lacks soul and doesn't reflect you. Adapt ideas to your reality rather than reproducing them identically - your personality should shine through in the final result.
🛡️ Error prevention checkpoints: Before any purchase, check that the artwork respects your 3 ambiance adjectives, sits well in your test photos, and that you have the appropriate hanging hardware. Warning signs: persistent hesitation, a need to convince those around you, or the impression that "it will be fine anyway".
🎁 Special offer for readers
Because you took the time to inform yourself, enjoy 10% discount on your first order:
⏰ Valid 72h after reading • Applicable on all our products
❓ Frequently asked questions about the transition wall arrangement
Allow 2-3 weeks in total: one week of observation and analysis, a few days to select the perfect artwork, then a weekend for careful hanging. To optimize: prepare your list of criteria before searching, and order your fixings at the same time as the artwork. Our client Sophie transformed her wall in just 10 days by following this methodical planning.
For a transition wall, allow 200-600€ depending on the size: 150-500€ for the artwork and 50-100€ for professional hanging. Investing in quality is worthwhile as a beautiful work of art lasts decades. Budget tip: stretched canvas or high-end plexi artworks offer excellent value for money and a very contemporary look.
For an artwork of less than 5kg on a standard wall, you can do it yourself with the right fixings. Beyond that, or on concrete/stone walls, a professional guarantees safety and perfect finish for 80-120€. Simple test: if you are unsure about the type of wall or fixing, call an expert - your peace of mind is worth it.
Absolutely! In a small space, the unifying effect is even more important as it avoids the feeling of suffocation between zones. Adapt the proportions: aim for a minimum width of 50-60cm and favor light shades that visually enlarge the space. The impact will be even more spectacular because every element counts more.
Yes, but sparingly: maximum 3 harmonious pieces to avoid visual overload. Key principle: keep the same color family and space regularly. A composition of 2 medium-sized artworks or 3 small ones can create a more dynamic ensemble than a single large piece, especially in a modern gallery style.
🌟 Your new daily life with a harmonious transition wall
In a few weeks, when you return home, your gaze will naturally settle on this artwork that perfectly unites your living spaces. Your guests will spontaneously compliment the consistency of your decor, and you will feel that deep satisfaction of having created a truly personalized interior.
Beyond aesthetics, you will have developed a sure decorating eye that will serve you for all your future layout projects. This newly acquired confidence will transform your relationship with decoration: no more paralyzing hesitations, place for assumed choices that reflect your unique personality.
The methodical analysis that you now master is your best asset to succeed in all your decor projects. Your first step? Observe your wall with your new criteria, then go for it - you have all the keys in hand to create the harmony you dreamed of.
🚀 Your transformation starts now: Each day spent with a successful transition wall brings you satisfaction and pride. Your interior deserves this attention, and you deserve this success. The perfect harmony between your spaces awaits your action!


